Table of Contents
Advertisement
1-888-340-0482
Monday-Friday
8:30-5:30 Central Time
Keys Fitness Products, L.P.
P.O. Box 551239
Dallas, Texas 75355-1239
Keys Fitness Products, L.P.
4009 Distribution Dr.
Suite 250
Garland, Texas 75041
OWNER'S MANUAL
315-00029
06/05 Rev B
QUESTIONS?
Call Our Toll Free
Keys Fitness Helpline
1-888-340-0482
CAUTION!
Please read the precautions and
instructions in this manual before
using this equipment. Please save
this manual for future reference.
Advertisement
Table of Contents

Subscribe to Our Youtube Channel
Related Manuals for Keys Fitness 6.0r


Summary of Contents for Keys Fitness 6.0r
- Page 1 1-888-340-0482 Monday-Friday 8:30-5:30 Central Time Keys Fitness Products, L.P. P.O. Box 551239 Dallas, Texas 75355-1239 Keys Fitness Products, L.P. 4009 Distribution Dr. Suite 250 Garland, Texas 75041 OWNER’S MANUAL Please read the precautions and 315-00029 instructions in this manual before 06/05 Rev B using this equipment.
-
Page 2: Important Safety Information
This is especially important for persons over the age of 35 and/or persons with pre-existing health problems. Keys Fitness Products LP assumes no responsibility for personal injury or property damage sustained by or through the use of this product. -
Page 3: Safety Precautions And Tips
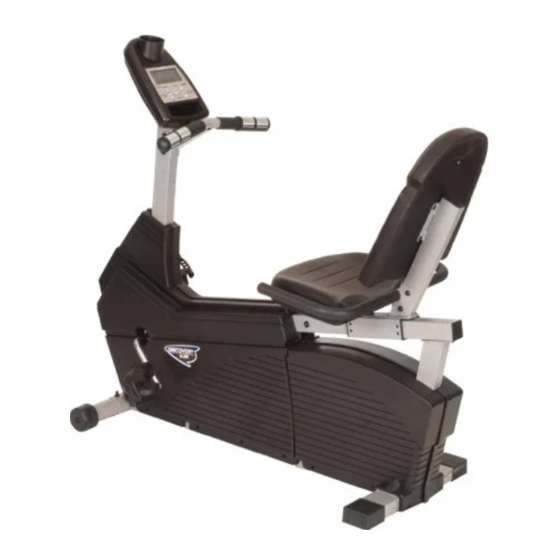
Safety Precautions and Tips It is the owner's responsibility to ensure that all users of this exercise bike have read the Owner's Manual and are familiar with warnings and safety precautions. • This exercise bike has a maximum user capacity of 300 pounds. - Page 4 Assembly of the Triumph 6.0r Recumbent Bike REMOVE ALL SECURITY TAPE AND WRAPPING BEFORE BEGINNING 2. Attach the SEAT and BACK CUSHIONS to the SUPPORT BRACKETS with the ALLEN HEAD SCREWS. 1. Attach FRONT FOOT TUBE to the FRAME by using the...
-
Page 5: Locking Knob
3. Attach the SEAT HANDLEBAR to the SEAT SUPPORT BRACKET with the BUTTON HEAD SCREWS, FLAT WASHERS and LOCK NUTS. LOCKING KNOB 4. Connect SEAT CARRIAGE to FRAME with BUTTON HEAD SCREWS and FLAT WASHERS. Slide SEAT SUP- PORT BRACKET onto SEAT CARRIAGE. Screw LOCK- ING KNOB into SEAT SUPPORT BRACKET and lock into SEAT CARRIAGE. -
Page 6: Rear Support Tube
PEDAL 5. Attach PEDALS. Axles of pedals are branded “L” and “R.” The pedal marked “R” goes on the right hand side of the bike and the one marked “L” on the left hand side. Tighten the left pedal by turning counter-clockwise and the right pedal by turning clockwise. -
Page 7: Console Instructions
HAND PULSE WIRES CONSOLE TUBE PLATE M5x20 BUTTON HEAD SCREWS HANDLEBAR M8 LOCK NUTS M8 FLAT WASHERS FRAME 7. Attach the HANDLEBAR to the CONSOLE TUBE with BUTTON HEAD SCREWS, FLAT WASHERS and LOCK NUTS. Connect PICK UP WIRE and EXTENSION WIRE from FRAME to those in the CONSOLE TUBE. - Page 8 CONSOLE INSTRUCTIONS TRAINING MODE INSTRUCTION (To start your training) As soon as you press START/STOP button without any presets (functions and programs), the computer starts working under Manual mode. Training without preset Time: If you do not preset TIME, each column of the workout profile bar graph represents 0.1 km or ml.
- Page 9 CONSOLE INSTRUCTIONS To reset program: You may press RESET button to reset the PROGRAM and select the training mode and/or tension load under STOP mode. If you hold on pressing the RESET button for 2 seconds, all data (including personal data) will be reset.
-
Page 10: Monitoring Your Heart Rate
CONSOLE INSTRUCTIONS 5. If the monitor display is improper, please remove the batteries, wait 2 minutes, then replace the batteries. 6. The monitor can be powered on with 4 “C” size batteries or by using the AC adapter input. Monitoring Your Heart Rate To obtain the greatest cardiovascular benefits from your exer- cise workout, it is important to work within your target heart rate zone. -
Page 11: Target Heart Rate Zone
Check your pulse recovery rate – If your pulse is over 100 bpm five minutes after you stop exercising, or if it’s higher than normal the morning after exercising, your exertion may have been too strenuous for your current fitness level. Rest and reduce the intensity next time. - Page 12 331-00006 BEARING CM535/550/560/750 DCV6.0R U/R 330-00005 CRANK, TRI6.0R DCV6.0R 311-00020 FLYWHEEL, (CRANK PULLEY) U/R CM535/550/56 302-00479 M6 X 1 X 10MM MACHINE SCREW TRI-6.0R#13 304-00006 BELT, 1222J6 302-00468 M10 X 1MM CAP NUT TRI-6.0R#15 302-01106 10MM IDX22MM OD WASHER TRI-6.0R...
-
Page 13: Limited Warranty
Please contact a Keys Fitness customer service representative for specifics on wear items. This Limited Warranty becomes VALID ONLY if the product is purchased through a Keys Fitness authorized dealer unless otherwise authorized by Keys Fitness in writing.
Need help?
Do you have a question about the 6.0r and is the answer not in the manual?
Questions and answers