Avery Dennison Pathfinder 6057 System Administrator Manual
Hide thumbs
Also See for Pathfinder 6057:
- System administrator manual (60 pages) ,
- Operator's handbook manual (36 pages) ,
- Price management (2 pages)
Table of Contents
Advertisement
Quick Links
Advertisement
Table of Contents

Related Manuals for Avery Dennison Pathfinder 6057


Summary of Contents for Avery Dennison Pathfinder 6057
- Page 2 Each product and program carries a respective written warranty, the only warranty on which the customer can rely. Avery Dennison reserves the right to make changes in the product, the programs, and their availability at any time and without notice. Although Avery Dennison has made every effort to provide complete and accurate information in this manual, Avery Dennison shall not be liable for any omissions or inaccuracies.
-
Page 3: Table Of Contents
T A B L E O F C O N T E N T S TABLE OF CONTENTS ........................I INTRODUCTION ...........................1-1 Using This Manual ........................1-1 Audience ..........................1-1 Using the Display ........................1-1 Reading the Task Bar ......................1-2 Using the Input Panel ............ - Page 4 CONFIGURING THE SCANNER .....................5-1 Setting Scanner Options ......................5-1 Setting a Tone for Good or Bad Scans ...................5-3 Enabling Specific Bar Codes ....................5-4 Configuring UPC/EAN Bar Codes ...................5-5 Configuring Code 39 Bar Codes.....................5-6 Configuring Code 128 Bar Codes ...................5-7 Configuring I 2of5 Bar Codes .........
-
Page 5: Introduction
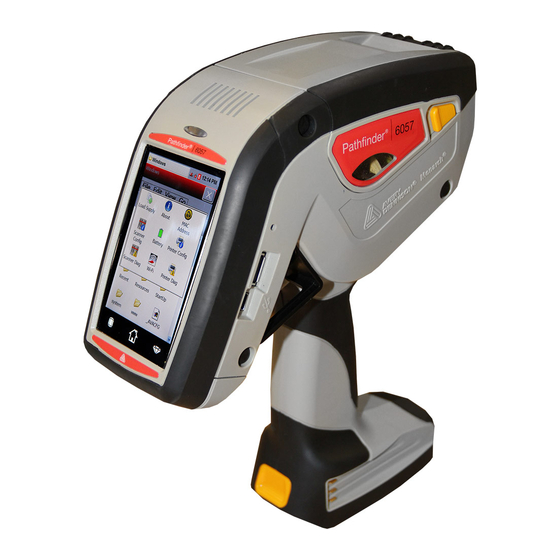
I N T R O D U C T I O N The Pathfinder® 6057 printer prints, scans bar codes, collects data, and communicates with other devices. The printer operates on a Microsoft® Windows-based CE platform. Before you begin, review the safety information in the Regulatory Compliance document Note: included with your printer. -
Page 6: Reading The Task Bar
To Access the Start Menu, touch the Emerald key. Reading the Task Bar The Task Bar has the following indicators: Icon Description Wired/Wireless Connection Task Bar Wireless Signal Strength Battery Status Emerald Key U s i n g t h e I n p u t P a n e l To access the printer’s input panel, touch the Diamond key. -
Page 7: Entering Data Using The Input Panel
Key(s) Description Accepts data or menu selection. Closes any open windows. Displays upper-case or lower-case alphabetic input panel. Displays numeric input panel. Displays special character and symbol input panel. Entering Data Using the Input Panel When prompted to enter data: 1. - Page 8 1-4 System Administrator’s Guide...
-
Page 9: Administrative Tools
A D M I N I S T R A T I V E T O O L S Use these tools to identify and track your printers change the Power and Input Panel properties lock the system to restrict user access ... -
Page 10: Importing/Exporting Asset Tracking Files
Importing/Exporting Asset Tracking Files Use Import to retrieve an asset tracking backup file (.XML extension) from your PC or server. Use Export to create a backup file (.XML extension) of the asset tracking information. Export saves the .XML file on the root of the printer. Touch the Device icon on the desktop and look for AssetTracking.XML. - Page 11 press the power button. This is the only way to “wake up” the printer when the printer is in Suspend mode. 1. Touch the Emerald key to access the Start Menu, select Settings, Control Panel, and Power. Three tabs appear: Battery, Schemes, and Device Status. The Battery tab displays the current power levels for the main battery and backup battery.
-
Page 12: Changing The Input Panel Options
C h a n g i n g t h e I n p u t P a n e l O p t i o n s 1. Touch the Emerald key to access the Start Menu, select Settings, Control Panel, and Input Panel. -
Page 13: Using The System Lockdown Option
5. Check if you want to use gestures for Space, Backspace, Shift and Enter when using the Keyboard input panel. 6. Touch OK to return to the Input Panel Properties window. 7. Check to allow applications to change the input panel state. 8. -
Page 14: Unlocking The System
Unlocking the System To unlock the system: 1. Touch the Emerald key. This opens a prompt for the administrator password. Touch the Diamond key to show the input panel if it does not automatically appear. 2. Enter the administrator password. 3. -
Page 15: Changing The Pc Connection
3. You can lockdown the USB Host Port and the USB Device Port by checking the boxes. If Lockdown USB Device Port is already selected, you may have disabled “Enable direct Note: connections to the desktop computer” from the PC Connection Properties window. See “Changing the PC Connection”... -
Page 16: Adding Notification Events
A d d i n g N o t i f i c a t i o n E v e n t s Review how to enter data using the input panel before continuing. See “Entering Data Using the Input Panel”... - Page 17 7. Touch the Priority and Sound tab and set the Priority and select the Audio File, if necessary. 8. Touch Done. 9. Select the new Notification (shown as DATA WAIT in the screen below) and touch Test. 10. Touch Start/Stop. The LED and sound settings play for the selected notification. 11.
-
Page 18: Testing The Speaker
T e s t i n g t h e S p e a k e r 1. Touch the Emerald key to access the Start Menu, select Settings, Control Panel, and Speaker Test. 2. Touch Run Test. While the test is performed, you hear a tone sounded at each frequency (200 Hz –... - Page 19 2. Touch the Device Name tab to change the device’s name. 3. Touch the Device name box. Touch the diamond key to display the input panel if it does not automatically appear. Enter the Device name. Use Bsp on the input panel to clear any previously entered information.
- Page 20 2-12 System Administrator’s Guide...
-
Page 21: Configuring Wireless Settings
C O N F I G U R I N G W I R E L E S S S E T T I N G S Use this chapter to configure the 802.11b/g wireless (radio) card settings. A b o u t t h e S u m m i t 8 0 2 . 1 1 g W i r e l e s s C a r d The Summit SDC-CF10G1 802.11g wireless card operates at speeds of up to 11Mbps in 802.11b mode and 54Mbps in 802.11g mode on any wireless-compatible network. -
Page 22: Finding A Network
Finding a Network Review how to enter data using the input panel before continuing. See “Entering Data Using the Input Panel” for more information. The printer searches for available networks and lists the SSIDs, signal strength, and encryption. You can connect to an existing network profile if you have the required network security information. -
Page 23: Creating A Profile
Touch Scan. A list of available networks appears. 6. Select the network you need, then touch Configure. 7. Touch Yes. SCU creates a profile for the selected network. Creating a Profile The default profile does not have an SSID or security settings. It can only connect to an access point that broadcasts its SSID and is not secured. -
Page 24: Setting A Password
3. Touch New and then touch the Profile box. Touch the diamond key to display the input panel if it does not automatically appear. Enter the profile name. Touch the diamond key to hide the input panel. Touch OK. 4. Specify the Radio settings including SSID, TX power, Radio mode, authentication and encryption, along with any necessary credentials. - Page 25 3. Touch the Global tab. 4. Scroll down the Property menu until you see Admin Password. 5. Select Admin Password. Touch the Value box. Enter the new password. 6. Touch Commit to save your changes. Make a note of the password if you change it. The Admin password restricts all access Note: to wireless settings.
- Page 26 3-6 System Administrator’s Guide...
-
Page 27: Using Printer Diagnostics
U S I N G P R I N T E R D I A G N O S T I C S Use printer diagnostics to check machine totals print diagnostic labels perform sensor tests perform a printhead dot resistance test ... -
Page 28: Accessing Printer Diagnostics
A c c e s s i n g P r i n t e r D i a g n o s t i c s 1. Touch the Home key and then select Printer Diag. 2. Decide which of the following tests to perform: ... -
Page 29: Printing Diagnostic Labels
2. Touch Back to return to the Printer Diagnostics window. Touch Done to return to the desktop. Printing Diagnostic Labels 1. Select Diagnostic Labels (test labels) from the Printer Diagnostics window. 2. Before you run these tests, load the supply in Non-Peel mode. Refer to the Operator’s Handbook for more information about loading supply. - Page 30 Gray Scale Label The gray scale test checks the uniformity of the printing. The printed sample should be uniformly gray across the supply. If you see voids, especially on the edges, keep the sample and call Service. Label w ith vo ids Serial Quality Label A label prints bar codes for you to scan to check the quality of serial bar codes.
-
Page 31: Checking The Stock Registration
Checking the Stock Registration If you Calibrate Stock, there is no need to calibrate the sensor. 1. Load the supply for non-peel mode as shown below. 2. Select Stock Registration from the Printer Diagnostics window. 3. Select the sensor to calibrate (either Black Mark or On-Demand). The black mark sensor is used with black mark supplies (supplies with rectangular marks on the back side of the liner or on the supply). - Page 32 6. For on-demand supplies, make sure you calibrate over paper – lay the supply across the paper path as shown. 7. Close the supply cover, then touch Calibrate Sensor to calibrate the On-Demand sensor. The printer feeds one or two labels to calibrate the on-demand sensor. When the calibration is successful, a message appears: “On Demand stock sensor calibration successful.”...
-
Page 33: Testing The Sensors
Testing the Sensors 1. Select Sensor Tests from the Printer Diagnostics window. 2. You see the values for battery voltage, black mark voltage, on-demand voltage, and printhead temperature. The battery voltage range is between 7.0 and 8.4 volts. The printer does not print if the voltage is below 7.0. 3. -
Page 34: Testing The Printhead
4. The value listed for PH Temperature is the current temperature of the printhead. The valid range is between 5 and 60 Celsius. The temperature of the printhead depends upon the number of labels printed and the operating environment. If the temperature is greater than 60, the printer does not print. -
Page 35: Configuring The Scanner
C O N F I G U R I N G T H E S C A N N E R Use scanner configuration to set the scanner operating mode, trigger mode, and scanner timeout select the .wav file for successful and unsuccessful scans ... - Page 36 4. Touch General. 5. Set the Scanner Operating Mode: Momentary, Continuous, or Compatible. The default is compatible. Momentary The scanner is on when the trigger is pressed and goes off when the trigger is released. Continuous The scanner is always on. A good scan causes the scanner to reset and continue scanning.
-
Page 37: Setting A Tone For Good Or Bad Scans
Setting a Tone for Good or Bad Scans 1. Touch the Emerald key to access the Start Menu, select Settings, Control Panel, and User Notification. 2. Select the Events to add sound. 3. Touch Edit. 4. Change the LED settings (Color, Mode, ON/OFF Time and Cycles), if necessary. Configuring the Scanner 5-3... -
Page 38: Enabling Specific Bar Codes
5. Touch the Priority and Sound tab. 6. Set the Priority if multiple events try to control the LED at the same time. A higher or equal number interrupts a lower number. Use 0 for most applications, unless you need to override the system events (error, low battery, etc.). -
Page 39: Configuring Upc/Ean Bar Codes
Configuring UPC/EAN Bar Codes 1. To configure UPC/EAN settings, select UPC/EAN from the Scanner Configuration window. 2. Enable each bar code you need to scan. Allows the scanner to scan UPCA, UPCA+2, and UPCA UPCA+5 bar codes. Allows the scanner to scan UPCE bar codes. UPCE Allows the scanner to scan UPCE1 bar codes. -
Page 40: Configuring Code 39 Bar Codes
8. Set the Supplemental Redundancy, which sets the number of times a symbol without supplemental information is decoded. The range is 2 – 20. The default is 7. 9. Set the Security, which is how many times to scan the same bar code to determine a successful read. -
Page 41: Configuring Code 128 Bar Codes
Configuring Code 128 Bar Codes 1. To configure Code 128 settings, select Code 128 from the Scanner Configuration window. 2. Enable each bar code you need to scan. Allows the scanner to scan Code 128 bar codes. Code 128 Allows the scanner to scan UCC/EAN-128 bar codes. UCC/ EAN-128 Allows the scanner to scan ISBT 128 bar codes. -
Page 42: Configuring Msi Bar Codes
Configuring MSI Bar Codes 1. To configure MSI settings, select MSI from the Scanner Configuration window. 2. Enable each bar code you need to scan. Allows the scanner to scan MSI bar codes. Tells the scanner to return the check digit with the data Transmit when an MSI bar code is scanned. -
Page 43: Configuring Code 93 Bar Codes
Configuring Code 93 Bar Codes 1. To configure Code 93 settings, select Code 93 from the Scanner Configuration window. 2. Enable each bar code you need to scan. Allows the scanner to scan Code 93 bar codes. Code 93 Variable, specifies that Code 93 bar codes can be any Lengths Sets the length. -
Page 44: Scannable Bar Codes Vs. Printable Bar Codes
S c a n n a b l e B a r C o d e s v s . P r i n t a b l e B a r C o d e s Use the following table to see which bar codes the printer can scan and print: Bar Code Scan Print... - Page 45 5-12 System Administrator’s Guide...
Need help?
Do you have a question about the Pathfinder 6057 and is the answer not in the manual?
Questions and answers