Canon EOS 5D Mark II Instruction Manual
Hide thumbs
Also See for EOS 5D Mark II:
- User manual ,
- Instruction manual (260 pages) ,
- Firmware update procedures (7 pages)
Table of Contents
Advertisement
Quick Links
Advertisement
Table of Contents

Related Manuals for Canon EOS 5D Mark II


Summary of Contents for Canon EOS 5D Mark II
- Page 1 INSTRUCTION MANUAL Downloaded From camera-usermanual.com Canon Manuals...
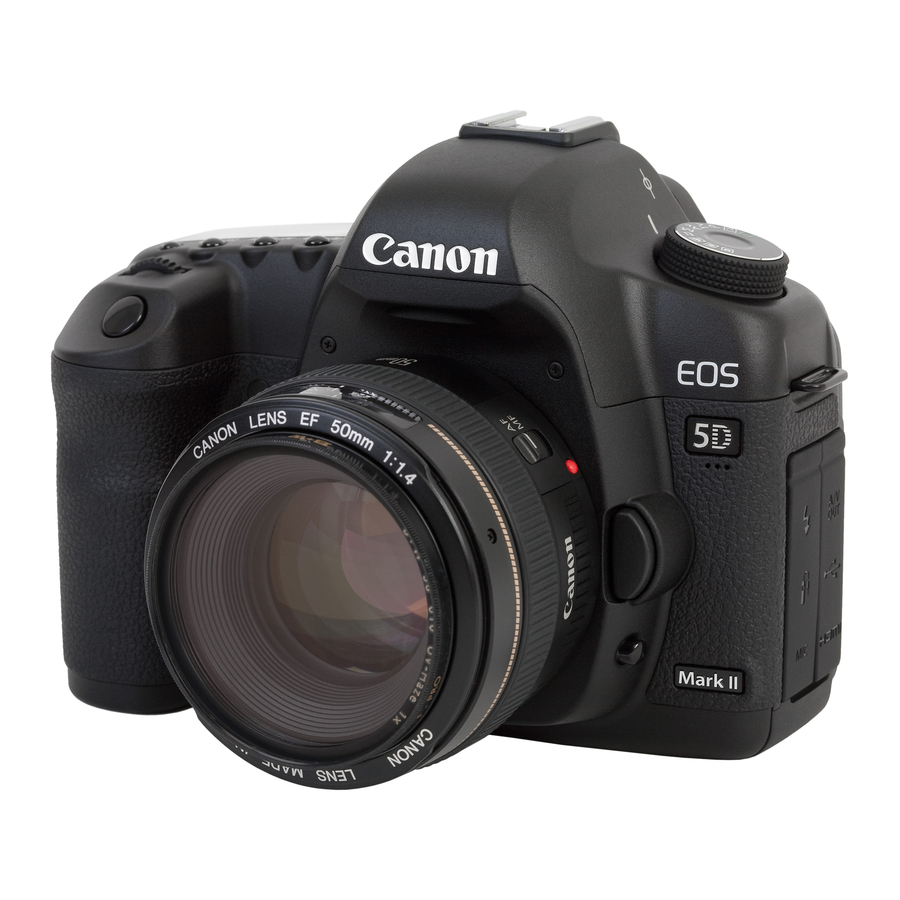
- Page 2 Thank you for purchasing a Canon product. The EOS 5D Mark II is a high-performance, digital SLR camera with a full-frame (approx. 36mm x 24mm) CMOS sensor with 21.10 effective megapixels. Other features include DIGIC 4, high-precision and high- speed, 9-point AF (plus six Assist AF points); approx. 3.9 fps continuous shooting;...
-
Page 3: Item Check List
If you purchased a Lens Kit, check that the lens is included. Depending on the Lens Kit type, the lens instruction manual might also be included. Be careful not to lose any of the above items Downloaded From camera-usermanual.com Canon Manuals... -
Page 4: Conventions Used In This Manual
It is assumed that all the menu settings and Custom Functions are set to the default. For explanatory purposes, the instructions show the camera attached with an EF50mm f/1.4 USM lens (or EF24-105mm f/4L IS USM). Downloaded From camera-usermanual.com Canon Manuals... -
Page 5: Table Of Contents
Advanced Operations Shooting features for specific types of subjects. Live View Shooting and Movies Shoot while viewing the LCD monitor. Image Playback Sensor Cleaning Printing Images and Transferring Images to a Computer Customizing the Camera Reference Downloaded From camera-usermanual.com Canon Manuals... - Page 6 Set the Power-off Time/Auto Power Off ............44 Reverting the Camera to the Default Settings..........45 About Copyright Information................. 46 Basic Shooting 1 Fully Automatic Shooting ................48 1 Full Auto Techniques ................50 C Creative Auto Shooting ................51 Downloaded From camera-usermanual.com Canon Manuals...
- Page 7 Aperture-Priority AE .................92 Depth of Field Preview ..................93 a: Manual Exposure..................94 q Selecting the Metering Mode ..............95 Setting Exposure Compensation..............96 h Auto Exposure Bracketing (AEB) ..............97 A AE Lock ......................98 F: Bulb Exposures ..................99 Mirror Lockup ....................101 Downloaded From camera-usermanual.com Canon Manuals...
- Page 8 Adjusting the LCD Monitor Brightness ............144 Setting the Image Review Time ..............145 Auto Rotate of Vertical Images..............146 Sensor Cleaning f Automatic Sensor Cleaning ..............148 Appending Dust Delete Data ................. 149 Manual Sensor Cleaning ................151 Downloaded From camera-usermanual.com Canon Manuals...
- Page 9 B Checking Camera Settings ..............190 Checking the Battery Information..............192 Using a Household Power Outlet ..............196 Replacing the Date/Time Battery ..............197 Function Availability Table ................198 Menu Settings ....................200 Troubleshooting Guide...................203 Error Codes....................209 System Map ....................210 Specifications ....................212 Index ......................223 Downloaded From camera-usermanual.com Canon Manuals...
-
Page 10: Index To Features
Recording Images Metering Format p.43 Metering mode p.95 Create/select a folder p.72 File No. p.74 Drive Image Quality Drive modes p.85 Maximum burst p.56 Image-recording quality p.54 ISO speed p.57 Picture Style p.59 Color space p.76 Downloaded From camera-usermanual.com Canon Manuals... - Page 11 Add Dust Delete Data p.149 - Live face detection mode p.116 Viewfinder • Manual focusing p.119 Dioptric adjustment p.34 • Exposure simulation p.109 Changing the focusing • Grid p.111 screen p.184 • Silent shooting p.120 Downloaded From camera-usermanual.com Canon Manuals...
-
Page 12: Handling Precautions
The camera is not waterproof and cannot be used underwater. If you accidentally drop the camera into water, promptly consult your nearest Canon Service Center. Wipe off any water droplets with a dry cloth. If the camera has been exposed to salty air, wipe it with a well-wrung wet cloth. - Page 13 When you shoot continuously for a prolonged period or use Live View shooting for a long period, the camera may become hot. Although this is not a malfunction, holding the hot camera for a long period can cause slight skin burns. Downloaded From camera-usermanual.com Canon Manuals...
-
Page 14: Quick Start Guide
<AF>. (p.31) Open the slot cover and insert a card. (p.29) Face the label side toward you and insert the end with the small holes into the camera. Set the power switch to <1>. (p.27) Downloaded From camera-usermanual.com Canon Manuals... - Page 15 2 sec. on the LCD monitor. To display the image again, press the <x> button (p.128). To view the images captured so far, see “Image Playback” (p.128). To delete an image, see “Erasing Images” (p.142). Downloaded From camera-usermanual.com Canon Manuals...
-
Page 16: Nomenclature
Lens release button (p.32) Lens mount Lens lock pin Audio/video OUT terminal (p.139) PC terminal (p.104) Digital terminal (p.154,167) Remote control terminal (N3 type) (p.100) HDMI mini OUT terminal (p.140) External microphone IN terminal (p.125) Body cap (p.31) Downloaded From camera-usermanual.com Canon Manuals... - Page 17 LCD monitor (p.40, 144) cover (p.26) Light sensor (p.144) Access lamp (p.30) Tripod socket <5> Quick Control Dial (p.37) Power/Quick Control Dial switch (p.27) <0> Setting/Movie shooting button (p.40/122) Card slot (p.29) Card ejection button (p.30) Downloaded From camera-usermanual.com Canon Manuals...
-
Page 18: Lcd Panel
Evaluative metering <0> Monochrome shooting (p.60) w Partial metering <g> ISO speed (p.57) r Spot metering e Center-weighted average metering <A> Highlight tone priority (p.177) The display will show only the settings currently applied. Downloaded From camera-usermanual.com Canon Manuals... -
Page 19: Viewfinder Information
AEB range compensation Shutter speed Card full warning (FuLL CF) FE lock (FEL) Card error warning (Err CF) Busy (buSY) No card warning (no CF) Aperture The display will show only the settings currently applied. Downloaded From camera-usermanual.com Canon Manuals... - Page 20 Aperture-priority AE (p.92) s : Shutter-priority AE (p.90) d : Program AE (p.88) Fully-Automatic Modes All you do is press the shutter button. Fully-automatic shooting suitable for the subject. 1: Full Auto (p.48) C: Creative Auto (p.51) Downloaded From camera-usermanual.com Canon Manuals...
- Page 21 Use of genuine Canon accessories is recommended This product is designed to achieve excellent performance when used with genuine Canon accessories. Canon shall not be liable for any damage to this product and/or accidents such as fire, etc., caused by the malfunction of non- genuine Canon accessories (e.g., a leakage and/or explosion of a battery...
- Page 22 For connection to a supply not in the U.S.A., use an attachment plug adapter of the proper configuration for the power outlet. Battery Charger LC-E6E Charger for Battery Pack LP-E6 (p.24). Power cord Charge lamp Battery pack slot Power cord socket Downloaded From camera-usermanual.com Canon Manuals...
-
Page 23: Getting Started
Pull the strap to take up any slack and make sure the strap will not loosen from the buckle. The eyepiece cover is also attached to the strap (p.100). Eyepiece cover Downloaded From camera-usermanual.com Canon Manuals... -
Page 24: Charging The Battery
23°C / 73°F. The time required to recharge the battery depends on the ambient temperature and battery’s charge level. For safety reasons, recharging in low temperatures (5°C - 10°C / 41°F - 50°F) will take a longer time (up to 4 hours). Downloaded From camera-usermanual.com Canon Manuals... - Page 25 Purchase a new battery. The charger cannot charge any battery other than Battery Pack LP-E6. Battery Pack LP-E6 is dedicated to Canon products only. Using it with an incompatible battery charger or product may result in malfunction or accidents for which Canon cannot be held liable.
-
Page 26: Installing And Removing The Battery
To prevent short circuiting, be sure to attach the protective cover to the battery. After opening the battery compartment cover, be careful not to swing it back further. Otherwise, the hinge might break. Downloaded From camera-usermanual.com Canon Manuals... -
Page 27: Turning On The Power
If you set the power switch to <2> while an image is being recorded to the card, [Recording ...] will be displayed and the power will turn off after the card finishes recording the image. Downloaded From camera-usermanual.com Canon Manuals... -
Page 28: Checking The Battery Level
For battery life with Live View shooting, see page 111. See the [7 Battery info.] menu to further check the battery’s condition (p.192). If size-AA/LR6 batteries are used in Battery Grip BG-E6, a four-level indicator will be displayed. ([ ] will not be displayed.) Downloaded From camera-usermanual.com Canon Manuals... -
Page 29: Installing And Removing The Cf Card
The number of shots remaining depends on the remaining capacity of the card, image-recording quality, ISO speed, etc. Setting the [1 Shoot w/o card] menu option to [Off] will prevent you from forgetting to install a card (p.200). Downloaded From camera-usermanual.com Canon Manuals... -
Page 30: Removing The Card
If you use such a card, be careful not to subject the camera to vibration or physical shock especially while recording or displaying images. Downloaded From camera-usermanual.com Canon Manuals... -
Page 31: Attaching And Detaching A Lens
When changing lenses, do it in a place with minimal dust. When storing the camera without a lens attached, be sure to attach the body cap to the camera. Remove dust on the body cap before attaching it. Downloaded From camera-usermanual.com Canon Manuals... -
Page 32: Detaching The Lens
When attaching or detaching the hood, grasp the hood toward the bottom to turn it. If you hold the front edge of the hood, it might get bent out of shape and become unable to turn. Downloaded From camera-usermanual.com Canon Manuals... -
Page 33: About The Lens Image Stabilizer
<AF> or <MF>. If the camera is mounted on a tripod, you can save battery power by switching the IS switch to <2>. The Image Stabilizer is effective even when the camera is mounted on a monopod. Downloaded From camera-usermanual.com Canon Manuals... -
Page 34: Basic Operation
4. Press your arms and elbows lightly against the front of your body. 5. Press the camera against your face and look through the viewfinder. 6. To maintain a stable stance, place one foot in front of the other. Downloaded From camera-usermanual.com Canon Manuals... -
Page 35: Shutter Button
Even during the menu display, image playback, and image recording, you can instantly go back to shooting-ready by pressing the shutter button halfway. Downloaded From camera-usermanual.com Canon Manuals... - Page 36 Live View shooting, scroll the playback image during magnified view, operate the Quick Control screen, etc. You can also use it to select or set menu options (except [3 Erase images] and [5 Format]). Downloaded From camera-usermanual.com Canon Manuals...
- Page 37 > dial to set the desired setting. Use this dial to set the exposure compensation amount, the aperture setting for manual exposures, etc. You can also do step (1) when the power switch is set to <1>. Downloaded From camera-usermanual.com Canon Manuals...
-
Page 38: Using The Quick Control Screen
If [8C.Fn III -3: AF point selection method] is set to [1: Multi-controller direct], the Quick Control screen cannot be displayed (p.179). Regarding the <C> (Creative Auto) mode, see page 51. Downloaded From camera-usermanual.com Canon Manuals... - Page 39 Turn the < > or <6> dial to change the setting. <0> Press <0> to return to the Quick Control screen. Highlight tone priority <A> cannot be set with the Quick Control screen. Downloaded From camera-usermanual.com Canon Manuals...
-
Page 40: Menu Operations
*The [2/8/9] tabs are not displayed in the fully-automatic modes. When a fully-automatic mode is set, there are menu items which are not displayed. d/s/f/a/F Menu Screen Set-up Custom Functions Playback Shooting My Menu Menu settings Menu items Downloaded From camera-usermanual.com Canon Manuals... - Page 41 The explanation of menu functions hereinafter assumes that you have pressed the <M> button to display the menu screen. You can also use <9> to set menu settings. (Except for [3 Erase images] and [5 Format].) Downloaded From camera-usermanual.com Canon Manuals...
-
Page 42: Before You Start
Turn the <5> dial to select [OK], then press <0>. The date/time will be set and the menu will reappear. It is important to set the correct date/time because it will be recorded together with each captured image. Downloaded From camera-usermanual.com Canon Manuals... -
Page 43: Formatting The Card
When discarding the card, destroy the card physically to prevent personal data from being leaked. The card capacity displayed on the card format screen might be smaller than the capacity indicated on the card. Downloaded From camera-usermanual.com Canon Manuals... -
Page 44: Set The Power-Off Time/Auto Power Off
Turn the <5> dial to select the setting, then press <0>. Even if [Off] has been set, the LCD monitor will turn off automatically after 30 min. to save power. (The camera’s power does not turn off.) Downloaded From camera-usermanual.com Canon Manuals... -
Page 45: Reverting The Camera To The Default Settings
0 (Zero) compensation WB-BKT Canceled Canceled Peripheral Enable/ illumination Correction Flash exposure 0 (Zero) correction data retained compensation File numbering Continuous Live View Disable shooting Auto cleaning Enable Custom Functions No changes Dust Delete Data Erased Downloaded From camera-usermanual.com Canon Manuals... -
Page 46: About Copyright Information
<B> button to display the copyright information. Press the <M> button to return to the [Clear settings] screen. To delete the copyright information, select [Delete copyright information] on the [Clear settings] screen. Downloaded From camera-usermanual.com Canon Manuals... -
Page 47: Basic Shooting
About the Auto Lighting Optimizer In the fully-automatic modes (1/C), the Auto Lighting Optimizer will adjust the image automatically to obtain the optimum brightness and contrast. In the d/s/f modes, the Auto Lighting Optimizer is enabled by default (p.177). Downloaded From camera-usermanual.com Canon Manuals... -
Page 48: Fully Automatic Shooting
<o> in the viewfinder will light. Focus confirmation light Take the picture. Press the shutter button completely to take the picture. The captured image will be displayed for about 2 sec. on the LCD monitor. Downloaded From camera-usermanual.com Canon Manuals... - Page 49 Although I used an external Speedlite, the bottom part of the photo came out dark. If the lens hood is attached, it will obstruct the flash. If the subject is near to the camera, detach the hood before shooting with flash. Downloaded From camera-usermanual.com Canon Manuals...
-
Page 50: Full Auto Techniques
As long as you keep aiming the AF point on the subject while pressing the shutter button halfway, the focusing will be continuous. When you want to take the picture, press the shutter button completely. Downloaded From camera-usermanual.com Canon Manuals... -
Page 51: C Creative Auto Shooting
If you change the shooting mode or turn off the power switch, the Creative Auto settings will revert to the default. However, the image-recording quality, self-timer and remote control settings will be retained. Downloaded From camera-usermanual.com Canon Manuals... - Page 52 To set the image-recording quality, see “Setting the Image-recording Quality” on page 54. After adjusting all the desired settings, press <0> to return to the screen in step 2 on the previous page. When using an external flash, (1) cannot be set. Downloaded From camera-usermanual.com Canon Manuals...
-
Page 53: Image Settings
Folders can also be created and selected. The M icon on the right of the page title indicates that the function can be used when the Mode Dial is set to <d/s/ f/a/F>. Downloaded From camera-usermanual.com Canon Manuals... -
Page 54: Setting The Image-Recording Quality
(displayed up to 999). Press <0> to set the selected quality. Image-recording Quality Setting Examples 73 only 1 only 1+73 * If [–] is set for both RAW and JPEG, 73 will be set. Downloaded From camera-usermanual.com Canon Manuals... - Page 55 A2 or larger Figures for the file size, possible shots, and maximum burst during continuous shooting are based on Canon’s testing standards (ISO 100 and Standard Picture Style) using a 2GB card. These figures will vary depending on the subject, card brand, ISO speed, Picture Style, Custom Functions, etc.
- Page 56 2GB card. The number is displayed in the viewfinder on the bottom right. If the maximum burst is 99 or higher, “99” will be displayed. Downloaded From camera-usermanual.com Canon Manuals...
-
Page 57: I: Setting The Iso Speed
Set the ISO speed. While looking at the LCD panel or viewfinder, turn the <6> dial. It can be set within ISO 100-6400 in 1/3-stop increments. With “A” selected, the ISO speed will be set automatically (p.58). Downloaded From camera-usermanual.com Canon Manuals... - Page 58 Shooting Mode ISO Speed Setting ISO 100 - 3200 1/C/d/s/f Fixed at ISO 400 With flash Fixed at ISO 400* * If fill flash results in overexposure, ISO 100 or a higher ISO will be set. Downloaded From camera-usermanual.com Canon Manuals...
-
Page 59: A Selecting A Picture Style
By changing the [Color tone] (p.61), you can adjust the skin tone. R Landscape (C: Vivid blues and greens) For vivid blues and greens, and very sharp and crisp images. Effective for impressive landscapes. Downloaded From camera-usermanual.com Canon Manuals... -
Page 60: About The Symbols
The symbols on the top of the Picture Style selection screen refer to parameters such as [Sharpness] and [Contrast]. The numerals indicate the parameter settings, such as [Sharpness] and [Contrast], for each Picture Style. Symbols Sharpness Contrast Saturation Color tone Filter effect (Monochrome) Toning effect (Monochrome) Downloaded From camera-usermanual.com Canon Manuals... -
Page 61: A Customizing A Picture Style
Sharpness 0: Less sharp outline +7: Sharp outline h Contrast -4: Low contrast +4: High contrast i Saturation -4: Low saturation +4: High saturation j Color tone -4: Reddish skin tone +4: Yellowish skin tone Downloaded From camera-usermanual.com Canon Manuals... - Page 62 Increasing the [Contrast] will make the filter effect more pronounced. lToning Effect By applying a toning effect, you can create a monochrome image in that color. It can make the image look more impressive. The following can be selected: [N:None] [S:Sepia] [B:Blue] [P:Purple] [G:Green]. Downloaded From camera-usermanual.com Canon Manuals...
-
Page 63: A Registering A Picture Style
To adjust the parameters of a Picture Style which has been registered to the camera with the provided software, select the Picture Style here. Select a parameter. Select a parameter such as [Sharpness], then press <0>. Downloaded From camera-usermanual.com Canon Manuals... - Page 64 Picture Style in step 4 will nullify the parameter settings of the registered Picture Style. To shoot with the registered Picture Style, follow step 2 on the preceding page to select [User Def. *] and then shoot. Downloaded From camera-usermanual.com Canon Manuals...
-
Page 65: B: Setting The White Balance
This adjustment serves as the basis for the color correction. The result is natural-looking colors in the pictures. You can also use the [2 White balance] menu to set the white balance. Downloaded From camera-usermanual.com Canon Manuals... -
Page 66: O Custom White Balance
[OK] and the data will be imported. Press the <n> button. After exiting the menu, press the <n> button. Select the custom white balance. Look at the LCD panel and turn the <5> dial to select < >. Downloaded From camera-usermanual.com Canon Manuals... -
Page 67: P Setting The Color Temperature
If you want to set <P> to the reading taken with a commercially- available color temperature meter, take test shots and adjust the setting to compensate for the difference between the color temperature meter’s reading and the camera’s color temperature reading. Downloaded From camera-usermanual.com Canon Manuals... -
Page 68: White Balance Correction
LCD panel. One level of the blue/amber correction is equivalent to 5 mireds of a color temperature conversion filter. (Mired: Measuring unit indicating the density of a color temperature conversion filter.) Downloaded From camera-usermanual.com Canon Manuals... -
Page 69: White Balance Auto Bracketing
If you set AEB in combination with white balance bracketing, a total of nine images will be recorded for a single shot. Since three images are recorded for one shot, the card will take longer to record the shot. “BKT” stands for Bracketing. Downloaded From camera-usermanual.com Canon Manuals... -
Page 70: Lens Peripheral Illumination Correction
“About the Lens Correction Data” on the next page. Turn the <5> dial to select [Enable], then press <0>. Take the picture. The image will be recorded with the corrected peripheral illumination. Correction enabled Correction disabled Downloaded From camera-usermanual.com Canon Manuals... - Page 71 Digital Photo Professional (provided software). If the lens does not have distance information, the correction amount will be lower. The higher the ISO speed, the lower the correction amount will be. Downloaded From camera-usermanual.com Canon Manuals...
-
Page 72: Creating And Selecting A Folder
Turn the <5> dial to select [Create folder], then press <0>. Create a new folder. Turn the <5> dial to select [OK], then press <0>. A new folder with a higher one-up folder number is created. Downloaded From camera-usermanual.com Canon Manuals... -
Page 73: Selecting A Folder
A to Z, numerals, and an underscore “_”. There can be no space in the folder name. Also, folder names cannot have the same three-digit number such as “100ABC_D” and “100W_XYZ” even if the letters are different. Downloaded From camera-usermanual.com Canon Manuals... -
Page 74: File Numbering Methods
If you want to use continuous file numbering, you should use a newly-formatted card each time. File numbering after File numbering after replacing the card creating a folder Card-1 Card-1 Card-2 XXX-0051 XXX-0052 XXX-0051 XXX-0052 Next sequential file Downloaded From camera-usermanual.com Canon Manuals... -
Page 75: Auto Reset
For both JPEG and RAW images, the file name will start with “IMG_”. Movie file names will start with “MVI_”. The extension will be “.JPG” for JPEG images, “.CR2” for RAW images, and “.MOV” for movies. Downloaded From camera-usermanual.com Canon Manuals... -
Page 76: Setting The Color Space
If the image is captured with the color space set to Adobe RGB, the file name will start with “_MG_” (first character is an underscore). The ICC profile is not appended. The ICC profile is explained in the Software Instruction Manual in the CD-ROM. Downloaded From camera-usermanual.com Canon Manuals... -
Page 77: Setting The Af And Drive Modes
Mode Dial is set to <d/s/ f/a/F>. In the fully-automatic modes (1/C), the AF mode, AF point selection, and drive mode are set automatically. <AF> stands for auto focus. <MF> stands for manual focus. Downloaded From camera-usermanual.com Canon Manuals... -
Page 78: F: Selecting The Af Mode
On the lens, set the focus mode switch to <AF>. Press the <o> button. Select the AF mode. While looking at the LCD panel, turn the <6> dial. X: One-Shot AF 9: AI Focus AF Z: AI Servo AF Downloaded From camera-usermanual.com Canon Manuals... -
Page 79: Ai Servo Af For Moving Subjects
The exposure is set at the moment the picture is taken. In the d/s/f/a/F shooting modes, AF is also possible by pressing the <p> button. Downloaded From camera-usermanual.com Canon Manuals... - Page 80 AI Servo AF. When focus is achieved in the AI Focus AF mode with the Servo mode active, the beeper will sound softly. However, the focus confirmation light <o> in the viewfinder will not light. Downloaded From camera-usermanual.com Canon Manuals...
-
Page 81: S Selecting The Af Point
AF point will be selected. If you keep tilting it in the same direction, it will toggle between manual and automatic AF point selection. When all AF points light up, automatic AF point selection will be set. Downloaded From camera-usermanual.com Canon Manuals... - Page 82 When looking at the LCD panel to select the AF point, note the following: Automatic selection , center right , top If focus cannot be achieved with the external, EOS-dedicated Speedlite’s AF-assist beam, select the center AF point. Downloaded From camera-usermanual.com Canon Manuals...
- Page 83 AF points. They function as follows: : Vertical-line sensitive with f/2.8 and f/5.6 lenses, as with the center AF point. : Horizontal-line sensitive with f/5.6 lenses. Downloaded From camera-usermanual.com Canon Manuals...
-
Page 84: When Autofocus Fails
If you press the shutter button halfway during manual focusing, the active AF point and the focus confirmation light <o> in the viewfinder will light when focus is achieved. Downloaded From camera-usermanual.com Canon Manuals... -
Page 85: Selecting The Drive Mode
When the battery level is low, the continuous shooting speed will be slightly slower. In the AI Servo AF mode, the continuous shooting speed may become slightly slower depending on the subject and the lens used. Downloaded From camera-usermanual.com Canon Manuals... -
Page 86: Self-Timer Operation
When using the self-timer to shoot only yourself, use focus lock (p.50) for an object at about the same distance as where you will be. To cancel the self-timer after it starts, press the <o > button. Downloaded From camera-usermanual.com Canon Manuals... -
Page 87: Advanced Operations
LCD panel and viewfinder information will remain displayed for about 4 sec. (0). Functions which can be set in the d/s/f/a/F shooting modes are listed in “Function Availability Table” (p.198) First set the power switch to <J>. Downloaded From camera-usermanual.com Canon Manuals... -
Page 88: D: Program Ae
Check the shutter speed and aperture display. A correct exposure will be obtained as long as the shutter speed and aperture display do not blink. Take the picture. Compose the shot and press the shutter button completely. Downloaded From camera-usermanual.com Canon Manuals... - Page 89 To do this, press the shutter button down halfway, then turn the <6> dial until the desired shutter speed or aperture value is displayed. Program shift is canceled automatically after the picture is taken. Program shift cannot be used with flash. Downloaded From camera-usermanual.com Canon Manuals...
-
Page 90: S: Shutter-Priority Ae
<6> dial. Focus the subject. Press the shutter button halfway. The aperture is set automatically. Check the viewfinder display and shoot. As long as the aperture is not blinking, the exposure will be correct. Downloaded From camera-usermanual.com Canon Manuals... - Page 91 ISO speed. Shutter Speed Display The shutter speeds from “8000” to “4” indicate the denominator of the fractional shutter speed. For example, “125” indicates 1/125 sec. Also, “0"5” indicates 0.5 sec. and “15"” is 15 sec. Downloaded From camera-usermanual.com Canon Manuals...
-
Page 92: F: Aperture-Priority Ae
<6> dial. Focus the subject. Press the shutter button halfway. The shutter speed is set automatically. Check the viewfinder display and shoot. As long as the shutter speed is not blinking, the exposure will be correct. Downloaded From camera-usermanual.com Canon Manuals... -
Page 93: Depth Of Field Preview
However, the viewfinder will look darker. If the depth of field is difficult to discern, hold down the depth-of-field preview button while turning the <6> dial. The exposure will be locked (AE lock) while the depth-of-field preview button is pressed. Downloaded From camera-usermanual.com Canon Manuals... -
Page 94: A: Manual Exposure
The exposure level mark <s> lets you see how far you are from the standard exposure level. Set the exposure. Check the exposure level and set the desired shutter speed and aperture. Take the picture. Downloaded From camera-usermanual.com Canon Manuals... -
Page 95: Selecting The Metering Mode
This is for metering a specific part of the subject or scene. The metering is weighted at the center covering about 3.5% of the viewfinder area. Center-weighted average metering The metering is weighted at the center and then averaged for the entire scene. Downloaded From camera-usermanual.com Canon Manuals... -
Page 96: Setting Exposure Compensation
Take care not to turn the <5> dial and change the exposure compensation inadvertently. To prevent this, set the power switch to <1>. The exposure compensation can also be set with [ Expo. comp./ AEB] menu (p.97). Downloaded From camera-usermanual.com Canon Manuals... -
Page 97: Auto Exposure Bracketing (Aeb)
When <Q> or <k> is set, the three bracketed shots will be taken after a 10-sec. or 2-sec. delay. Neither flash nor bulb exposures can be used with AEB. Downloaded From camera-usermanual.com Canon Manuals... -
Page 98: A Ae Lock
AF point. AE lock is applied at the center AF point. * When the lens’ focus mode switch is set to <MF>, AE lock is applied at the center AF point. Downloaded From camera-usermanual.com Canon Manuals... -
Page 99: F: Bulb Exposures
LCD Panel Illumination Each time you press the <U> button, the LCD panel illumination will turn on or off (9). During a bulb exposure, pressing the shutter button completely will turn off the LCD panel illumination. Downloaded From camera-usermanual.com Canon Manuals... -
Page 100: Using The Eyepiece Cover
To operate the accessory, refer to its instruction manual. Open the terminal cover. Connect the plug to the remote control terminal. Connect the plug as shown in the illustration. To disconnect the plug, grasp the plug’s silver part and pull out. Downloaded From camera-usermanual.com Canon Manuals... -
Page 101: Mirror Lockup
Remote Controller TC-80N3 (both sold separately) is recommended. You can also lockup the mirror and shoot with the remote controller (sold separately, p.102). With Remote Controller RC-1, setting it to a 2-sec. delay is recommended for shooting. Downloaded From camera-usermanual.com Canon Manuals... -
Page 102: R Remote Control Shooting
The self-timer lamp lights and the Remote picture is taken. control sensor Camera misoperation may occur near certain types of fluorescent lights. During wireless remote control, try to keep the camera away from fluorescent light. Downloaded From camera-usermanual.com Canon Manuals... -
Page 103: D Flash Photography
Set the camera’s shooting mode to <a> (manual exposure) or <f> (aperture-priority AE) and adjust the aperture setting before shooting. When using a Speedlite which has manual flash mode, shoot in the manual flash mode. Downloaded From camera-usermanual.com Canon Manuals... - Page 104 Cautions for Live View shooting When using a non-Canon flash unit for Live View shooting, set the [6 Live View/Movie func. set.] menu’s [Silent shoot.] to [Disable] (p.120). The flash will not fire if it is set to [Mode 1] or [Mode 2].
-
Page 105: Setting The Flash
If you press the <B> button in step 3, you can revert the setting to the default. With an EX-series Speedlite not settable with the camera, only [Flash exp. comp], [E-TTL II], and [Flash firing] are settable for [Flash function settings]. (For some EX-series Speedlites, [Shutter sync.] is also settable.) Downloaded From camera-usermanual.com Canon Manuals... - Page 106 Custom Function settings (except [C.Fn-0: Distance indicator display]). If you use an EX-series Speedlite and the Speedlite Custom Function’s [Flash metering mode] is set to [TTL (autoflash)], the flash will always be fired at full output. Downloaded From camera-usermanual.com Canon Manuals...
-
Page 107: Live View Shooting And Movies
With EOS Utility (provided software) installed in your personal computer, you can connect the camera to the personal computer and shoot remotely while viewing the computer screen. For details, see the Software Instruction Manual in the CD-ROM. Downloaded From camera-usermanual.com Canon Manuals... -
Page 108: A Preparing For Live View Shooting
For details on [Stills+movie], see page 121. Select the [Screen settings] type. Turn the <5> dial to select [Stills display], then press <0>. The screen for step 3 will reappear. For details about this function, see the next page. Downloaded From camera-usermanual.com Canon Manuals... -
Page 109: Exposure Simulation
During Live View shooting, do not point the lens toward the sun. The sun’s heat can damage the camera’s internal components. Cautions for using Live View shooting are on pages 125-126. Still and movie shooting are possible even in the fully-automatic modes (1/C) (p.121). Downloaded From camera-usermanual.com Canon Manuals... -
Page 110: Shooting
To check the depth of field for still photos, press the depth-of-field preview button. The image brightness displayed will be close to the actual brightness of the resulting image. During continuous shooting, the exposure set for the first shot will also be applied to subsequent shots. Downloaded From camera-usermanual.com Canon Manuals... -
Page 111: Grid
With the stereo video cable (provided) or HDMI cable (sold separately), you can display the Live View image on a TV (p.139-140). You can also use a remote controller (sold separately, p.102) for Live View shooting. Downloaded From camera-usermanual.com Canon Manuals... -
Page 112: Exposure Level
If flash is used or bulb is set, the <g> icon and histogram will be grayed out (for your reference). The histogram might not be properly displayed in low light or bright light conditions. Downloaded From camera-usermanual.com Canon Manuals... -
Page 113: Using Af To Focus
AF point Press the <A> button. The Live View image will appear on the LCD monitor. The small box in the screen is the AF point, and the larger box is the magnifying frame. Magnifying frame Downloaded From camera-usermanual.com Canon Manuals... -
Page 114: Take The Picture
You cannot take a picture during autofocusing. Take the picture only while the Live View image is displayed. Autofocus will not work with the release button on Remote Switch RS-80N3 and Timer Remote Controller TC-80N3 (both sold separately). Downloaded From camera-usermanual.com Canon Manuals... -
Page 115: Live Mode
If focus is not achieved, the AF point will turn red. Take the picture. Check the focus and exposure, then press the shutter button to take the picture (p.110). Downloaded From camera-usermanual.com Canon Manuals... -
Page 116: Detection Mode
If a face cannot be detected, the < > AF point will be displayed and the center AF point will be used for focusing. Take the picture. Check the focus and exposure, then press the shutter button to take the picture (p.110). Downloaded From camera-usermanual.com Canon Manuals... -
Page 117: Manual Focusing
If you autofocus in the Live mode’s normal view and then magnify the image, the focus might be off. In the Liveu mode, pressing the <u> button will not magnify the image. Downloaded From camera-usermanual.com Canon Manuals... - Page 118 AF point over the subject to focus, then take the picture. The external Speedlite will not emit the AF-assist beam. Autofocus will not work with the release button on Remote Switch RS- 80N3 and Timer Remote Controller TC-80N3 (both sold separately). Downloaded From camera-usermanual.com Canon Manuals...
-
Page 119: Focusing Manually
After achieving focus, press the <u> AE lock button to return to the normal view. Magnified area position Take the picture. Magnification Check the focus and exposure, then press the shutter button to take the picture (p.110). Downloaded From camera-usermanual.com Canon Manuals... -
Page 120: Silent Shooting
If you use flash, the [Disable] operation will take effect even if you had set it to [Mode 1] or [Mode 2]. When using a non-Canon flash unit, set it to [Disable]. The flash will not fire if it is set to [Mode 1] or [Mode 2]. -
Page 121: Shooting Movies
Select [LV func. setting]. Select [Stills+movie], then select [Movie display]. Set the movie recording size. Select [Movie rec. size] and set the size. • [1920x1080] Full HD (Full High-Definition) quality • [640x480] 4:3 standard quality Downloaded From camera-usermanual.com Canon Manuals... - Page 122 Movie Shooting Time With a 4GB card, you can shoot a movie in [1920x1080] for about 12 min. At [640x480], about 24 min. (Based on Canon’s testing standards.) You can shoot movies up to about 90 min. total at 23°C/73°F. Or up to about 80 min.
- Page 123 Operation External flash cannot fire for still photos taken during movie shooting. If [Screen settings] has been set to [Movie display], the depth-of-field preview button will not work. Downloaded From camera-usermanual.com Canon Manuals...
- Page 124 Center-weighted average metering will be used for movie shooting. If the AF mode is set to [Liveu (Face detection) mode], the exposure control will be evaluative metering linked to the detected face. Downloaded From camera-usermanual.com Canon Manuals...
- Page 125 LCD monitor. In still photos, such bright areas will be recorded properly as a bright area. In movies, the bright areas will be recorded in almost the same way you see it on the LCD monitor. Downloaded From camera-usermanual.com Canon Manuals...
- Page 126 Notes about lenses and flash The focus preset feature on super telephoto lenses cannot be used. With an external Speedlite, FE lock, modeling flash, and test flash cannot be used. Downloaded From camera-usermanual.com Canon Manuals...
-
Page 127: Image Playback
About images taken with another camera: The camera might not be able to properly display images captured with a different camera or edited with a personal computer or whose file name was changed. Downloaded From camera-usermanual.com Canon Manuals... -
Page 128: Image Playback
Single image display Single image display + Image-recording quality Shooting information display Histogram display Exit the image playback. Press the <x> button to exit the image playback and return the camera to shooting ready. Downloaded From camera-usermanual.com Canon Manuals... -
Page 129: B Shooting Information Display
When the [4 AF point disp.] menu is set to [Enable], the AF point which achieved focus will be displayed in red. If automatic AF point selection was used, multiple AF points might be displayed in red. Downloaded From camera-usermanual.com Canon Manuals... -
Page 130: Exposure Level
And if there are too many pixels on the right, the color will be too saturated with no detail. By checking the image’s RGB histogram, you can see the color’s saturation and gradation condition and white balance inclination. Downloaded From camera-usermanual.com Canon Manuals... -
Page 131: H I Searching For Images Quickly
[4 Image jump w/6] (p.132). Turn the <5> dial to move the blue frame to select the image. Press the <u> button to display the selected image in the normal view. (9 images → 4 images → 1 image) Downloaded From camera-usermanual.com Canon Manuals... - Page 132 Press the <x> button to playback the image. Turn the <6> dial. The jump display will proceed according to the selected jump method. On the bottom right, the jump method and current image location are indicated. Jump method Image location Downloaded From camera-usermanual.com Canon Manuals...
-
Page 133: U/Y Magnified View
(the display jumps according to the selected jump method). Magnified view is not possible during the image review immediately after the image is taken. The movie image cannot be magnified. Downloaded From camera-usermanual.com Canon Manuals... -
Page 134: Rotating The Image
If the rotated image is not displayed in the rotated orientation during image playback, set the [5 Auto rotate] menu to [OnzD]. A movie cannot be rotated. Downloaded From camera-usermanual.com Canon Manuals... -
Page 135: Auto Playback (Slide Show)
Still photos and movies taken on the selected shooting date will Date be played back. Movies Only the movies in the card will be played back. Stills Only the still photos in the card will be played back. Downloaded From camera-usermanual.com Canon Manuals... -
Page 136: Start The Slide Show
During pause, you can turn the <5> or <6> dial to view another image. During the slide show, auto power off will not work. The display time may vary depending on the image. To view the slide show on a TV set, see page 139-140. Downloaded From camera-usermanual.com Canon Manuals... -
Page 137: Playing Movies
You can pause the movie playback by pressing <0>. During movie playback, you can Speaker adjust the sound volume by turning the <6> dial. For more details on the playback procedure, see the next page. Downloaded From camera-usermanual.com Canon Manuals... - Page 138 TV set. (Turning the <6> dial will not adjust the sound volume.) Movies cannot be edited with the camera. With ZoomBrowser EX/ ImageBrowser (provided software), you can edit out the unnecessary beginning or ending parts of the movie. Downloaded From camera-usermanual.com Canon Manuals...
-
Page 139: Viewing The Images On Tv
Set the proper video system format with [6 Video system]. Do not use any stereo video cable other than the one provided. Images might not be displayed if you use a different video cable. Downloaded From camera-usermanual.com Canon Manuals... - Page 140 Some TVs might not be able to display the captured images. In such a case, use the provided stereo video cable to connect to the TV. The camera’s <q> terminal and <D> terminal cannot be used at the same time. Downloaded From camera-usermanual.com Canon Manuals...
-
Page 141: K Protecting Images
To erase a protected image, you must first cancel the protection. If you erase all the images (p.143), only the protected images will remain. This is convenient when you want to erase unnecessary images all at once. Downloaded From camera-usermanual.com Canon Manuals... -
Page 142: L Erasing Images
3 Checkmarking <X> Images to be Erased in a Batch By checkmarking the images to be erased, you can erase multiple images at one time. Select [Erase images]. Under the [3] tab, select [Erase images], then press <0>. Downloaded From camera-usermanual.com Canon Manuals... - Page 143 You can erase all the images in a folder or card at one time. When the [3 Erase images] menu is set to [All images in folder] or [All images on card], all the images in the folder or card will be erased. Downloaded From camera-usermanual.com Canon Manuals...
-
Page 144: Changing Image Playback Settings
While [Auto] is set, be careful not to obstruct the round, external light sensor (left of the power switch) with your finger, etc. To check the image’s exposure, you should look at the histogram (p.130). Downloaded From camera-usermanual.com Canon Manuals... -
Page 145: Setting The Image Review Time
<0>. Set the desired time. Turn the <5> dial to select the setting, then press <0>. If [Hold] is set, the image will be displayed until the auto power off time elapses. Downloaded From camera-usermanual.com Canon Manuals... -
Page 146: Auto Rotate Of Vertical Images
If the vertical image is not automatically rotated on the personal computer screen, it means the software you are using is unable to rotate the image. Using the provided software is recommended. Downloaded From camera-usermanual.com Canon Manuals... -
Page 147: Sensor Cleaning
Remove dust on the body cap before attaching it. Even while the Self Cleaning Sensor Unit is operating, you can press the shutter button halfway to interrupt the cleaning and start shooting immediately. Downloaded From camera-usermanual.com Canon Manuals... -
Page 148: Automatic Sensor Cleaning
Disabling Automatic Sensor Cleaning In step 2, select [Auto cleaningf] and set it to [Disable]. The sensor cleaning will no longer be executed when you set the power switch to <1/J> or <2>. Downloaded From camera-usermanual.com Canon Manuals... -
Page 149: Appending Dust Delete Data
Delete Data], then press <0>. Select [OK]. Turn the <5> dial to select [OK], then press <0>. After the automatic sensor cleaning ends, a message will appear. Although there will be a shutter sound, a picture is not taken. Downloaded From camera-usermanual.com Canon Manuals... -
Page 150: Photograph A Solid-White Object
Be sure to use a solid-white object such as a new sheet of white paper. If the paper has any pattern or design, it may be recognized as dust data and affect the accuracy of the dust deletion with the software. Downloaded From camera-usermanual.com Canon Manuals... -
Page 151: Manual Sensor Cleaning
The surface of the image sensor is extremely delicate. If the sensor needs to be cleaned directly, having it done by a Canon Service Center is recommended. Before cleaning the sensor, detach the lens from the camera. - Page 152 Never use canned air or gas to clean the sensor. The blowing force can damage the sensor or the spray gas can freeze on the sensor. Downloaded From camera-usermanual.com Canon Manuals...
-
Page 153: Printing Images And Transferring Images To A Computer
You can print multiple images in one batch or give the print order to a photofinisher. Transferring Images to a Personal Computer (p.167) By connecting the camera to a personal computer, you can transfer images from the camera’s card by operating the camera. Downloaded From camera-usermanual.com Canon Manuals... -
Page 154: Preparing To Print
<D> icon must face the front side of the camera. To connect to the printer, refer to the printer’s instruction manual. Turn on the printer. Set the camera’s power switch to <1>. Some printers may make a beeping sound. Downloaded From camera-usermanual.com Canon Manuals... - Page 155 Before disconnecting the cable, turn off the camera and printer first. Hold the plug (not the cord) to pull out the cable. For direct printing, using the AC Adapter Kit ACK-E6 (sold separately) to power the camera is recommended. Downloaded From camera-usermanual.com Canon Manuals...
-
Page 156: Wprinting
* Depending on the printer, settings such as the date and file number imprinting and trimming might not be available. Select [Paper settings]. Select [Paper settings], then press <0>. The paper settings screen will appear. Downloaded From camera-usermanual.com Canon Manuals... - Page 157 The paper type screen will appear. YSetting the Paper Type Select the type of the paper loaded in the printer, then press <0>. When using a Canon printer and Canon paper, read the printer’s instruction manual to check what paper types can be used.
-
Page 158: Set The Printing Effects
* When you change the printing effects, it is reflected in the image displayed on the upper left. Note that the printed image might look slightly different from the displayed image which is only an approximation. This also applies to [Brightness] and [Adjust levels] on page 160. Downloaded From camera-usermanual.com Canon Manuals... -
Page 159: Start Printing
[Print]. If image tilt correction (p.161) has been applied, it will take longer to print the image. To stop the printing, press < > while [Stop] is displayed, then select [OK]. Downloaded From camera-usermanual.com Canon Manuals... - Page 160 >. B is for blue, A is amber, M is magenta, and G is green. The color in the respective direction will be corrected. If you select [Clear all], all the printing effect settings will be reverted to the default. Downloaded From camera-usermanual.com Canon Manuals...
-
Page 161: Trimming The Image
<O> icon on the screen will turn blue. Press <0> to exit the trimming. The print setting screen will reappear. You can check the trimmed image area on the upper left of the print setting screen. Downloaded From camera-usermanual.com Canon Manuals... -
Page 162: Error Messages
Check for any printer problems other than paper and ink problems. File Error The selected image cannot be printed via PictBridge. Images taken with a different camera or images edited with a computer might not be printable. Downloaded From camera-usermanual.com Canon Manuals... -
Page 163: W Digital Print Order Format (Dpof)
Select [Set up], then press <0>. Set the option as desired. Set the [Print type], [Date], and [File No.]. Select the option, then press <0>. Select the desired setting, then press <0>. Print type Date File No. Downloaded From camera-usermanual.com Canon Manuals... - Page 164 Also, depending on the image type, the print order may not be possible. Print ordering does not work with RAW images and movies. With [Index] prints, both the [Date] and [File No.] cannot be set to [On] at the same time. Downloaded From camera-usermanual.com Canon Manuals...
-
Page 165: Print Ordering
“Byn” or “All image.” When using a PictBridge printer, print no more than 400 images for one print order. If you specify more than this, all the images might not be printed. Downloaded From camera-usermanual.com Canon Manuals... -
Page 166: Direct Printing With Dpof
• When you set the index, you changed the paper setting before resuming the printing. • When you paused the printing, the card’s remaining capacity was low. If a problem occurs during printing, see page 162. Downloaded From camera-usermanual.com Canon Manuals... -
Page 167: Transferring Images To A Personal Computer
When the program selection screen appears on the personal computer, select [EOS Utility]. The [EOS Utility] screen will appear on the computer, and the direct image transfer screen will appear on the camera’s LCD monitor. Downloaded From camera-usermanual.com Canon Manuals... -
Page 168: Transferring Images To A Personal Computer
Since movie files are larger than still photo files, they will take longer to transfer. During the file transfer, do not disconnect the cable. Shooting will be disabled while the direct transfer screen is displayed. Downloaded From camera-usermanual.com Canon Manuals... - Page 169 To exit, press the <M> button. If you press < > instead of the <l> button, a confirmation dialog will appear. Select [OK], then press < > to start the transfer. RAW images and movies cannot be transferred as wallpaper. Downloaded From camera-usermanual.com Canon Manuals...
-
Page 170: Selecting The Images To Be Transferred
During the direct image transfer, both the RAW and JPEG images will be transferred to the personal computer. If you want to transfer more than 999 images in one batch, select [All images] on the direct transfer screen (p.168). Downloaded From camera-usermanual.com Canon Manuals... -
Page 171: Customizing The Camera
Mode Dial’s <w>, <x>, and <y> positions. The features explained in this chapter can be set and used in the following shooting modes: d, s, f, a, Downloaded From camera-usermanual.com Canon Manuals... -
Page 172: Setting Custom Functions
In step 2, select [Clear all Custom Func. (C.Fn)] to clear all the Custom Function settings. Even after all the Custom Functions are cleared, the setting for [8C.Fn IV - 5: Focusing Screen] will remain unchanged. Downloaded From camera-usermanual.com Canon Manuals... -
Page 173: Custom Functions
Dial direction during Tv/Av Focusing screen p.184 Add original decision data p.185 * Disabled in movie mode Shaded Custom Functions do not function during Live View (LV) still photo and/or movie shooting. (Settings are disabled.) Downloaded From camera-usermanual.com Canon Manuals... -
Page 174: Custom Function Settings
The AEB and WB-BKT settings will be retained even when the power switch is set to <2>. (When the flash is ready, AEB will be canceled. However, the AEB amount will be retained in memory.) Downloaded From camera-usermanual.com Canon Manuals... - Page 175 2: 1/200 sec. (fixed) The flash-sync speed is fixed to 1/200 sec. This better prevents subject blur and camera shake than with setting 1. However, the background will come out darker than with setting 1. Downloaded From camera-usermanual.com Canon Manuals...
-
Page 176: C.fn Ii: Image
ISO speeds, the noise in the shadow areas is further reduced. Change the setting to suit the noise level. 0: Standard 1: Low 2: Strong 3: Disable With setting 2, the maximum burst for continuous shooting will greatly decrease. Downloaded From camera-usermanual.com Canon Manuals... - Page 177 2: Strong 3: Disable Depending on the shooting conditions, noise might increase. This function will not work if manual exposure or bulb exposure has been set. In fully-automatic modes (1/C), [Standard] will be set automatically. Downloaded From camera-usermanual.com Canon Manuals...
-
Page 178: C.fn Iii: Autofocus/Drive
5: IS start With the lens’ IS switch already <ON>, the Image Stabilizer operates when you press the button. With setting 5, the Image Stabilizer will not operate when you press the shutter button halfway. Downloaded From camera-usermanual.com Canon Manuals... - Page 179 The AF-assist beam is not emitted. If the external, EOS-dedicated Speedlite’s [AF-assist beam firing] Custom Function is set to [Disabled], the Speedlite will not emit the AF-assist beam even if the camera’s C.Fn III -5-0 is set. Downloaded From camera-usermanual.com Canon Manuals...
- Page 180 When you select AI Servo AF and the center AF point, the six Assist AF points (p.80) will also function. Seven AF points will track the subject. This is effective for subjects that move erratically, making it difficult for only the center AF point to track it. Downloaded From camera-usermanual.com Canon Manuals...
- Page 181 With setting 2, if an Extender is used, the adjustment will be registered for the lens and Extender combination. The registered AF microadjustments will be retained even if you use the Custom Function to clear all settings (p.172). However, the setting itself will be [0: Disable]. Downloaded From camera-usermanual.com Canon Manuals...
-
Page 182: C.fn Iv: Operation/Others
1: Enable The functions of the <p> and <A/y> buttons will be switched with each other’s function. When set to 1, press the <p> button to display the image index or to reduce the image display. Downloaded From camera-usermanual.com Canon Manuals... - Page 183 In the manual exposure mode, the direction of the <6> and <5> dials will be reversed. In other shooting modes, the <6> dial will be reversed. The direction of the <5> dial will be the same in the manual exposure mode and for setting exposure compensation. Downloaded From camera-usermanual.com Canon Manuals...
- Page 184 IV -5-0 is already factory set. To change the focusing screen, refer to the instructions that come with the focusing screen. The C.Fn IV -5 setting is not included in the registered camera user settings (p.187). Downloaded From camera-usermanual.com Canon Manuals...
- Page 185 To verify whether the image is original, the Original Data Security Kit OSK-E3 (sold separately) is required. The images are not compatible with the image encryption/decryption features of Original Data Security Kit OSK-E3. Downloaded From camera-usermanual.com Canon Manuals...
-
Page 186: Registering My Menu
Deletes the registered menu items. [Delete] deletes one menu item at a time, and [Delete all items] deletes all menu items. Display from My Menu When [Enable] is set, the [9] tab will be displayed first when you display the menu screen. Downloaded From camera-usermanual.com Canon Manuals... -
Page 187: Register Camera User Settings
About Camera user setting’s [Clear settings] In step 2, if you select [Clear settings], the respective Mode Dial position will revert to the default setting effective before you registered the camera settings. The procedure is the same as step 3. Downloaded From camera-usermanual.com Canon Manuals... -
Page 188: Shooting Functions
If you want to register those changes, follow the procedure on the preceding page. By pressing the <B> button, you can check which shooting mode is registered under the <w>, <x>, and <y> positions (p.190). Downloaded From camera-usermanual.com Canon Manuals... -
Page 189: Reference
Reference This chapter provides reference information for camera features, system accessories, etc. The back of this chapter also has an index to make it easier to look up needed information. Downloaded From camera-usermanual.com Canon Manuals... -
Page 190: B Checking Camera Settings
Auto rotate display (p.146) Transfer of some images failed* (p.29, 55) Date/Time (p.42) Auto power off (p.44) * This icon is displayed only when the transfer of some images failed while using the Wireless File Transmitter WFT-E4/E4A. Downloaded From camera-usermanual.com Canon Manuals... - Page 191 To avoid this, press the <B> button to turn off the display on the LCD monitor, then turn off the power switch. Downloaded From camera-usermanual.com Canon Manuals...
-
Page 192: Checking The Battery Information
If for some reason, communication with the battery is not successful, the battery check display will show < > on the LCD panel and in the viewfinder. [Cannot communicate with battery] will be displayed. Just select [OK] and you can continue shooting. Downloaded From camera-usermanual.com Canon Manuals... -
Page 193: Registration
Battery registration is not possible if size-AA/LR6 batteries are in the Battery Grip BG-E6 or if you use the AC Adapter Kit ACK-E6. If six battery packs have already been registered, [Register] cannot be selected. To delete unnecessary battery information, refer to page 195. Downloaded From camera-usermanual.com Canon Manuals... - Page 194 Do not affix the label on any part other than as shown in the illustration in step 2. Otherwise, the misplaced label might make it difficult to insert the battery or impossible to turn on the camera. Downloaded From camera-usermanual.com Canon Manuals...
- Page 195 Press the <L> button. The confirmation dialog will appear. Select [OK]. Turn the <5> dial to select [OK], then press <0>. The battery pack information will be deleted, and the screen in step 1 will reappear. Downloaded From camera-usermanual.com Canon Manuals...
-
Page 196: Using A Household Power Outlet
DC coupler cord hole notch. Close the cover. Do not connect or disconnect the power cord while the camera’s power switch is set to <1> or < >. Downloaded From camera-usermanual.com Canon Manuals... -
Page 197: Replacing The Date/Time Battery
Replace the battery in the battery holder. Make sure the battery is in the proper + – orientation. Tighten the battery holder screw. For the date/time battery, be sure to use a CR1616 lithium battery. Downloaded From camera-usermanual.com Canon Manuals... -
Page 198: Function Availability Table
Preset WB Custom WB White balance Color temperature setting WB correction WB bracketing sRGB Color space Adobe RGB Auto Lighting Optimizer Peripheral illumination correction Long exposure noise reduction High ISO speed noise reduction Highlight tone priority Downloaded From camera-usermanual.com Canon Manuals... -
Page 199: Flash Control
Exposure AE lock Depth-of-field preview Single shooting Continuous shooting 10 sec. self-timer/ Drive Remote control 2 sec. self-timer/ Remote control FE lock External Flash exposure Speedlite compensation Flash control Stills only Live View shooting Stills+movie Downloaded From camera-usermanual.com Canon Manuals... -
Page 200: Menu Settings
Select images to be transferred to a personal Transfer order computer Displayed when external media is used via External media backup – WFT-E4/E4A (sold separately) The shaded menu items are not displayed in the fully-automatic modes (1/ Downloaded From camera-usermanual.com Canon Manuals... - Page 201 LV func. setting* / Silent shooting / Metering timer Live View/Movie Grid display / AF mode / Movie recording size / function settings Sound recording * In the <1/C> modes, the option will change to [Movie recording]. Downloaded From camera-usermanual.com Canon Manuals...
-
Page 202: Custom Function (C.fn)
Customize the camera as desired Drive C.Fn IV : Operation/ Others Clear all Custom Clears all Custom Function settings Functions (C.Fn) 9 My Menu (Green) Register frequently-used menu items and My Menu settings Custom Functions Downloaded From camera-usermanual.com Canon Manuals... -
Page 203: Troubleshooting Guide
Canon Service Center. Power-Related Problems The battery cannot be recharged with the battery charger provided. Do not recharge any battery pack other than genuine Canon Battery Pack LP-E6. The charger’s lamp blinks at high speed. If there is a problem with the battery charger or battery pack or if... - Page 204 If you try to focus in One-Shot AF mode while the focus confirmation light <o> in the viewfinder blinks, a picture cannot be taken. Press the shutter button halfway again to focus, or focus manually (p.35, 84). Downloaded From camera-usermanual.com Canon Manuals...
- Page 205 (slow-sync shooting) so that both the subject and background are properly exposed. If you do not want a slow shutter speed to be set, set [8C.Fn I -7: Flash sync. speed in Av mode] to 1 or 2 (p.175). Downloaded From camera-usermanual.com Canon Manuals...
-
Page 206: Flash Custom Functions
The flash does not fire. Make sure the flash (or PC sync cord) is securely attached to the camera. If you use a non-Canon flash with Live View shooting, set [Silent shoot.] to [Disable] (p.104). The flash always fires at full output. - Page 207 Part of the image blinks in black. The [4 Highlight alert] option is set to [Enable] (p.129). A red box is displayed on the image. The [4 AF point disp.] option is set to [Enable] (p.129). Downloaded From camera-usermanual.com Canon Manuals...
- Page 208 Use the stereo video cable that came with the camera (p.139). Printing-Related Problems There are fewer printing effects than listed in the instruction manual. The printing effects displayed may differ depending on the printer. The instruction manual lists all the printing effects available (p.158). Downloaded From camera-usermanual.com Canon Manuals...
-
Page 209: Error Codes
Communications between the camera and lens is faulty. Clean the lens contacts. Clean the electrical contacts on the camera and lens, use a Canon lens, or have the camera or lens checked or repaired. (p.13,16) There is a problem with the card. Replace the card. -
Page 210: System Map
CR1616 lithium battery Battery Charger LP-E6 LC-E6 or LC-E6E Focusing Screen Eg-D Eg-S Battery Grip BG-E6 Car Battery AC Adapter DC Coupler Cable AC-E6 DR-E6 CB-570 AC Adapter Kit Car Battery Charger Battery Magazine ACK-E6 CBC-E6 BGM-E6 Downloaded From camera-usermanual.com Canon Manuals... - Page 211 IFC-200U Ethernet port Interface Cable IFC-500U Personal computer USB port Windows Vista Windows XP Original Data Mac OS X Security Kit Card reader PC card slot OSK-E3 PictBridge-compatible printer CF card PCMCIA adapter Downloaded From camera-usermanual.com Canon Manuals...
-
Page 212: Specifications
Type I or II CF card, UDMA-compatible Image sensor size: Approx. 36 x 24 mm Compatible lenses: Canon EF lenses (except EF-S lenses) (The effective lens focal length is the same as indicated on the lens) Lens mount: Canon EF mount •... - Page 213 Exposure compensation: Manual and AEB (Settable in combination with manual exposure compensation) Settable amount: ±2 stops in 1/3- or 1/2-stop increments AE lock: Auto: Applied in One-Shot AF mode with evaluative metering when focus is achieved Manual: By AE lock button Downloaded From camera-usermanual.com Canon Manuals...
- Page 214 MOV (Video: H.264, Audio: Linear PCM) Recording size: 1920x1080 (Full HD), 640x480 (SD) Continuous movie shooting time: Full HD approx. 12 min. SD approx. 24 min. * Based on Canon's testing standards using a 4GB card. Downloaded From camera-usermanual.com Canon Manuals...
- Page 215 External microphone input terminal: 3.5mm dia. stereo mini jack Remote control terminal: Compatible with remote control via N3 Type Wireless remote control: With Remote Controller RC-1/RC-5 Extension system terminal: For connection to Wireless File Transmitter WFT-E4/E4A Downloaded From camera-usermanual.com Canon Manuals...
-
Page 216: Operation Environment
Working temperature range: 5°C - 40°C / 41°F - 104°F Working humidity: 85% or less Dimensions (W x H x D): 69 x 33 x 93 mm / 2.7 x 1.3 x 3.7 in. (Plug collapsed) Weight: Approx. 130 g / 4.6 oz. Downloaded From camera-usermanual.com Canon Manuals... - Page 217 All specifications above are based on Canon’s testing standards. The camera’s specifications and exterior are subject to change without notice. If a problem occurs with a non-Canon lens attached to the camera, consult the respective lens maker. About Full HD 1080 Full HD 1080 indicates compatibility with High-Definition with 1080 vertical pixels (scanning lines).
- Page 218 (1) for a personal and non-commercial purpose or (2) by a video provider licensed under the AT&T patents to provide MPEG-4 compliant video. No license is granted or implied for any other use for MPEG-4 standard.” * Notice displayed in English as required. Downloaded From camera-usermanual.com Canon Manuals...
- Page 219 • Before storing the camera or accessory when not in use, remove the battery pack and disconnect the power plug. This is to prevent electrical shock, heat generation, and fire. • Do not use the equipment where there is flammable gas. This is to prevent an explosion or fire. Downloaded From camera-usermanual.com Canon Manuals...
- Page 220 • Do not use paint thinner, benzene, or other organic solvents to clean the equipment. Doing so may cause fire or a health hazard. If the product does not work properly or requires repair, contact your dealer or your nearest Canon Service Center. Downloaded From camera-usermanual.com Canon Manuals...
- Page 221 If such changes or modifications should be made, you could be required to stop operation of the equipment. Canon U.S.A. Inc. One Canon Plaza, Lake Success, NY 11042, U.S.A. Tel No. (516)328-5600 This Class B digital apparatus complies with Canadian ICES-003.
- Page 222 4. Do not expose the charger to rain or snow. 5. Use of an attachment not recommended or sold by Canon may result in fire, electric shock, or personal injury. 6. To reduce risk of damage to electric plug and cord, pull by plug rather than by cord when disconnecting charger.
-
Page 223: Index
Cord........3, 139, 140 Battery check ........28 Creative Auto........51 Battery Grip........192 M icon ..........4 Beeper ......48, 79, 200 Cross-type focusing......83 Black-and-white (printing) .....158 Custom Functions ......172 Black-and-white image....60, 62 Clearing all ....... 172 Downloaded From camera-usermanual.com Canon Manuals... - Page 224 Grid display ........111 File name ........74 Grid matte ........184 File number........74 File size......55, 123, 129 Filter effect (Monochrome)....62 HDMI ..........140 Fine (Image-recording quality)..55 High-Definition...... 121, 140 Firmware Ver.........202 High ISO speed noise reduction .. 176 Downloaded From camera-usermanual.com Canon Manuals...
- Page 225 Manual exposure......94 Automatic setting ......58 Manual focusing ..... 84, 119 ISO expansion ......174 Manual reset........75 Maximum burst......55, 56 JPEG..........54 Medium (Image-recording quality) ... 55 Jump display .........132 Memory card Card Landscape ........59 Downloaded From camera-usermanual.com Canon Manuals...
- Page 226 Program shift ......89 (image verification) data ....185 Protect (image erase-protection) ... 141 P (Program AE) ......88 Quick Control Dial ......37 PAL ..........201 Quick Control screen...... 38 Paper settings (printing)....156 Quick mode ........113 Partial metering.......95 Downloaded From camera-usermanual.com Canon Manuals...
- Page 227 Bracketing ........69 Correction ........68 Silent shooting ......120 Custom........66 Single image display .....128 Personal........67 Single shooting .......85 Wireless remote control....102 Slide show........135 Small (Image-recording quality) ..54 Small RAW........54, 56 Spot metering........95 Downloaded From camera-usermanual.com Canon Manuals...
- Page 228 CANON INC. 30-2, Shimomaruko 3-chome, Ohta-ku, Tokyo 146-8501, Japan CANON U.S.A. INC. U.S.A. One Canon Plaza, Lake Success, NY 11042-1198, U.S.A. For all inquires concerning this product, call toll free in the U.S. 1-800-OK-CANON CANON CANADA INC. HEADQUARTERS CANADA 6390 Dixie Road, Mississauga, Ontario L5T 1P7, Canada CANON CANADA INC.
Need help?
Do you have a question about the EOS 5D Mark II and is the answer not in the manual?
Questions and answers