Table of Contents
Advertisement
Advertisement
Table of Contents

Related Manuals for Tait TM8110


Summary of Contents for Tait TM8110
-
Page 3: Directive 1999/5/Ec Declaration Of Conformity
Suomi Tait Electronics Limited vakuuttaa täten että TMAB1A & TMAH5A tyyppinen laite on direktiivin 1999/5/EY oleellisten vaatimusten ja sitä koskevien direktiivin muiden ehtojen mukainen. Katso: http://eudocs.taitworld.com/ MMA-00006-02 Issue 2 © Tait Electronics Limited March 2008. All rights reserved. -
Page 4: Updates Of Manual And Equipment
Intellectual property rights This product may be protected by one or more patents of Tait Electronics Limited together with their international equivalents, pending patent applications and registered trade marks: NZ508806,... -
Page 5: About This Guide
Please be environmentally responsible and dispose through the original supplier, or contact Tait Electronics Limited. Tait Electronics Limited also complies with the Restriction of the Use of Certain Hazardous Substances in Electrical and Electronic Equipment (RoHS) Directive in both the European Union and China. -
Page 6: For Your Safety
For your safety Before using your radio, please read the following important safety and compliance information. Safety warnings used in this guide Within this guide, the following conventions are used to alert you to important safety information: Warning: There is a potential risk of death or serious injury. Caution: There is the risk of minor or moderate injury to people. -
Page 7: Controlling Your Exposure To Rf Energy
0.9m (35 inches) between people and the antenna. This is the minimum safe distance. ■ Use the radio only with Tait-approved antennas and attachments, and make only authorized modifications to the antenna otherwise you could damage the radio and violate FCC regulations. -
Page 8: Compliance With Rf Energy Exposure Standards
The radio is designed to satisfy the applicable compliance regulations. Do not make modifications or changes to the radio that are not expressly approved by Tait Electronics Limited. Failure to do so could invalidate compliance requirements and void the user’s authority to operate the radio. -
Page 9: Health, Safety And Electromagnetic Compatibility In Europe
Brief Declarations of Conformity appear on page Website: To download the formal declaration of conformity, go to http://eudocs.taitworld.com. A signed and dated paper copy of the declaration of conformity can be obtained from Tait Europe Limited. For your safety 9... -
Page 10: Electromagnetic Compatibility In European Vehicles
Electromagnetic compatibility in European vehicles In the European Community, radio equipment fitted to automotive vehicles is regulated by Directive 72/245/EEC, as amended by 95/54/EC. The requirements of this directive cover the electromagnetic compatibility of electrical or electronic equipment fitted to automotive vehicles. Note: To meet the requirements of Directive 72/245/EEC (as amended by 95/54/EC) installation of this product in a vehicle must be performed according to the instructions... -
Page 11: Interference With Electronic Devices
Interference with electronic devices Some electronic devices may be prone to malfunction due to the lack of protection from RF energy that is present when your radio is transmitting. ■ Examples of electronic devices that may be affected by RF energy are: ■... -
Page 12: High Radio Surface Temperatures
(e.g. when jump-starting the vehicle). GPS operation Tait Electronics Limited is not responsible for the operation or failure of operation of GPS satellites or the availability of GPS satellite signals. Acknowledgement: The radio uses an implementation of UTM conversion sourced (with permission) from Geoscience Australia (GA). -
Page 13: Your Radio's Settings
Your radio’s settings Use the following table to list your radio’s programmed settings. Function key settings Frequently used channels and groups ID/Number Description ID/Number Description... -
Page 14: Radio Controls
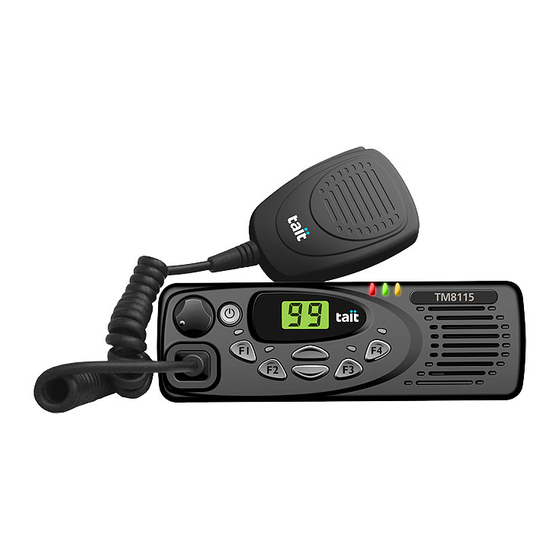
Radio controls press-to-talk (PTT) key radio status LEDs microphone green amber display speaker on/off key volume control microphone socket channel selection keys function keys 1 & 2 function keys 3 & 4... -
Page 15: Table Of Contents
Contents Directive 1999/5/EC Declaration of Conformity ....3 Updates of manual and equipment .......... 4 About this guide ..............5 For your safety ..............6 Safety warnings used in this guide ........... 6 Radio frequency exposure information ........6 Controlling your exposure to RF energy ........7 Compliance with RF energy exposure standards ....... - Page 16 Activating the repeater before a call ........24 Making a call ................. 25 Making a preset call .............. 26 Transmitting at low power ............. 26 Making an emergency call ............. 27 Ending all active calls ............. 28 Communicating directly with other radios ......29 Hearing faint and noisy signals ..........
-
Page 17: Getting Started
Getting started This section provides a brief description of your radio’s controls and indicators. The following topics are covered in this section: ■ about the radio controls ■ understanding the radio indicators ■ status LED indicators ■ audible tones About the radio controls The radio controls are the PTT key, volume control, on/off key, scroll keys, channel selection keys and function keys. - Page 18 press-to-talk (PTT) key radio status LEDs microphone green amber display speaker on/off key volume control microphone socket channel selection keys function keys 1 & 2 function keys 3 & 4 Symbol Name Function PTT key Press and hold to transmit and release to listen Volume control Rotate to change the speaker...
-
Page 19: Understanding The Radio Indicators
Understanding the radio indicators The status LED indicators and the radio’s audible tones all combine to give you information about the state of your radio. The most common way the indicators work is described in the following sections. Note: The way these indicators behave may be affected by the way your radio is programmed. - Page 20 Audible tones Note: If quiet or silent mode has been turned on, you will not hear any audible tones. For a description of other tones you may hear, see “Describing the radio’s audible tones” on page Tone type Meaning one short Radio locked: you need to enter a personal beep after identification number (PIN) before you can...
-
Page 21: Basic Operation
Basic operation This section describes the basic operation of your radio. The following topics are covered in this section: ■ turning the radio on and off ■ unlocking your radio ■ adjusting the speaker volume ■ selecting a channel or group ■... -
Page 22: Turning The Radio On And Off
Turning the radio on and off Give a long press of the on/off key to turn the radio either on or off. When the radio is first turned on, the red, green and amber LEDs flash briefly and the radio gives two short beeps. Unlocking your radio You may need to enter a personal identification number (PIN) before you can use your radio. -
Page 23: Checking That A Channel Is Clear
Checking that a channel is clear You or your user group may be segregated from other user groups by special signalling. If an incoming call carries the special signalling tones specific to you or your user group, your radio’s signalling mute opens and you can hear the call. These tones may not be audible. -
Page 24: Activating The Repeater Before A Call
Activating the repeater before a call A repeater-access tone is sent to activate the repeater before a call is made, so that the start of the call is not lost. To send a repeater-access tone, you may be able to either: ■... -
Page 25: Making A Call
Making a call Select the required channel or scan group using the channel selection keys Check that the channel is clear. If the green LED is glowing, the channel is busy and you may not be able to transmit. Once the channel is clear (the green LED is off), lift the microphone off the microphone clip. -
Page 26: Making A Preset Call
Making a preset call You may be able to make preset calls to other radios by using a programmed function key. There are two types of preset calls that may be available: ■ channel preset calls, or ■ network preset calls. Making a channel preset call Select the required channel using the channel selection keys... -
Page 27: Making An Emergency Call
Making an emergency call You may be able to activate emergency mode by using a programmed function key or a hidden emergency switch. Press the function key programmed for Emergency Mode or the hidden emergency switch. An emergency call is sent to your dispatcher, or some other predetermined location. -
Page 28: Ending All Active Calls
Ending all active calls You may have a function key programmed to either end the current call, or end the current call and all other active calls in your group. This can be done either by: ■ using the function key programmed for reset monitor to end your current call, ■... -
Page 29: Communicating Directly With Other Radios
Communicating directly with other radios You can bypass the radio repeater and communicate directly with another radio. This feature is known as repeater talkaround. You can do this, for example, when you are out of range of the repeater, or if the repeater is busy or stops working. While repeater talkaround is active, all transmissions are made on the receive frequency of the channel you are on. -
Page 30: Hearing Faint And Noisy Signals
Hearing faint and noisy signals Your radio’s squelch allows the radio to unmute only when the strength of the incoming signal is above a predetermined threshold. This means that only signals of reasonable intelligibility are made audible. To make faint and noisy signals audible, use the squelch override function to unmute the radio. -
Page 31: Using The Radio In Different Repeater Areas
Using the radio in different repeater areas Your radio may have a group of channels programmed as a voting group. The channels in the voting group all carry the same traffic, but from different repeaters. As your radio moves in and out of different repeater coverage areas, the best communication channel is automatically selected for you to use, until a better communications channel is selected. -
Page 32: Scanning A Group Of Channels
Scanning a group of channels The scan function is used to monitor a programmed group of channels, looking for activity. While the radio is scanning for activity, the amber LED glows. When activity is detected on a channel in the scan group, the radio stops on that channel. The amber LED begins flashing, the radio unmutes and you can hear the call. - Page 33 Making a call while scanning If you wish to make a call while your radio is scanning: Lift the microphone off the microphone clip. Press the PTT key to transmit. If the amber LED is flashing, your radio will now call the currently selected channel. If standard scan is active and there has been no recent activity on the channel (the amber LED is glowing rather than flashing), then the channel that is called depends on...
-
Page 34: Receiving A Call
Receiving a call When there is valid activity on your radio’s currently selected channel or group, the radio then unmutes and you can hear the call. If the incoming call contains special signalling that matches the signalling programmed for your radio, the green LED flashes and your radio may give a ringing tone. -
Page 35: Customizing Radio Settings
Customizing radio settings This section describes the ways in which you can customize your radio. The following settings are described in this section: ■ changing the external alert option ■ changing the volume of all audible tones ■ changing the volume of keypress tones ■... -
Page 36: Changing To Quiet Operation
You may be able to use a function key to change the volume of your keypress tones in the following ways: ■ Press the assigned function key to change the volume of your radio’s keypress tones between high and low. ■... -
Page 37: Troubleshooting
Troubleshooting The following topics are covered in this section: ■ when your radio won’t turn on ■ removing the microphone ■ reinstalling the microphone ■ removing the radio from the vehicle ■ describing the radio’s audible tones When your radio won’t turn on If the red, green and amber LEDs on the control head do not light up when the radio is turned on, it is likely that no power is reaching the radio. -
Page 38: Reinstalling The Microphone
Reinstalling the microphone Caution: The microphone grommet must be installed whenever the microphone is plugged into the microphone socket. Plug the microphone into the microphone socket. Slide the microphone grommet along the microphone cord and push two adjacent corners of the grommet into the microphone socket cavity. -
Page 39: Describing The Radio's Audible Tones
Describing the radio’s audible tones The following table summarizes the radio’s audible tones. Action and tone Meaning two short Radio turned on: the radio is powered on beeps and ready to use one short beep Radio locked: you need to enter your after the power- personal identity number (PIN) before you up beeps... - Page 40 Action and tone Meaning two high- Radio's temperature is very high: the pitched beeps radio's temperature is in the very high temperature range and all transmissions will now be at low power; if the radio's temperature rises outside this range, trans- missions will be inhibited, or antenna problem: your radio’s antenna may be damaged or not connected;...
-
Page 41: Licence Agreement
THIS LICENCE WILL BE PROVIDED YOU MAY ONLY TERMINATED AUTOMATICALLY AND WITHOUT NOTICE FROM TAIT IN THE EVENT THAT THE LICENSEE FAILS TO COMPLY WITH COPY THE SOFTWARE OR FIRMWARE INTO ANY MACHINE ANY TERM OR CONDITION OF THIS AGREEMENT... - Page 42 S SOLE AND TOTAL LIABIL ITY FOR ANY SUCH CLAIM SHALL BE LIMITED AT THE OPTION OF TAIT TO THE REPAIR OR REPLACEMENT OF THE SOFTWARE OR FIRMWARE OR THE REFUND OF THE PURCHASE PRICE OF THE SOFTWARE OR FIRMWARE...
Need help?
Do you have a question about the TM8110 and is the answer not in the manual?
Questions and answers