Table of Contents

Related Manuals for Miele DG 4050


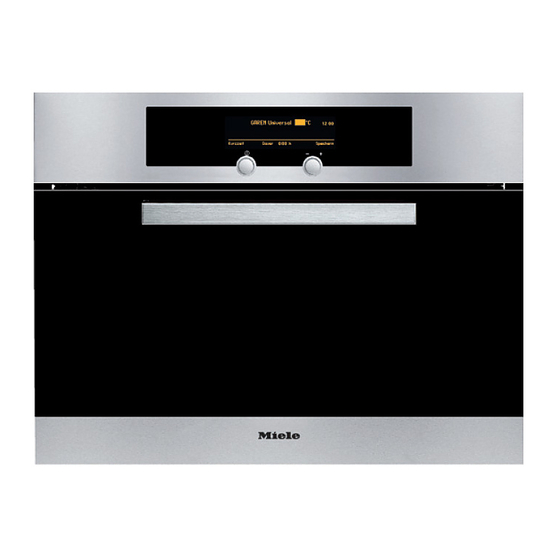
Summary of Contents for Miele DG 4050
-
Page 1: Operating And Installation Instructions
Operating and Installation instructions Steam oven DG 4050 DG 4060 GHirZ To avoid the risk of accidents or damage to the appliance it is essential to read these instructions before it is installed and used for the first time. M.-Nr. 06 159 580... -
Page 2: Table Of Contents
Contents Guide to the appliance ..........5 Front view. - Page 3 Contents Safety features ........... 40 Lock (LOCK $) .
- Page 4 Contents Appliance front and control panel ........63 Removing the steam oven door .
-
Page 5: Guide To The Appliance
Guide to the appliance Front view a On/Off switch (retractable) l Steam inlet b Multi-function selector with turn and m Drip channel in the oven press mechanism (retractable) n Floor heater c Display o Temperature sensor d Automatic door release for reducing p Outlet for air from oven interior steam e Ventilation outlet... -
Page 6: Accessories Supplied
For steaming Gastronorm size GN 1/2 325x265x40 mm (WxDxH) Silicone grease For lubricating the coupling seal Please read the relevant instructions in "Cleaning and care". Miele steam oven cookbook A selection of the best recipes from the Miele test kitchen. -
Page 7: Optional Accessories
Guide to the appliance Optional accessories Stainless steel containers Description Gross / Height Width x usable in mm Depth capacity in in mm litres DGG 2 For dishes in sauces and for solid cooking dried foods like pasta 2.5 / 2.0 325 x 175 (GN 1/3)* and rice in liquid... - Page 8 Guide to the appliance Other accessories Description Miele descaling For descaling Miele steam ovens and tablets coffee machines (6 tablets) Stainless steel Helps prevent re-soiling, water marks and conditioning agent finger prints on stainless steel surfaces 250 ml Miele ceramic hob...
-
Page 9: Warning And Safety Instructions
Warning and Safety instructions This appliance may be connected To avoid the risk of accidents and via a fused plug and switched damage to the appliance, please socket. If you wish to connect it to an read these instructions carefully isolator switch, or if the appliance is before using it for the first time. -
Page 10: Correct Use
Warning and Safety instructions Correct use For reasons of hygiene and to prevent the build-up of moisture in For safety reasons, the appliance the appliance, the water container must only be used after it has been should be emptied after each use. built in. - Page 11 Warning and Safety instructions Safety with children Do not allow children to lean against the open oven door, nor to To safeguard against burning, sit on it or swing on it. keep children away from the appliance at all times. This is Packaging, e.g.
- Page 12 Warning and Safety instructions Protecting the appliance from Do not use a steam cleaner to clean this appliance. The steam damage could reach electrical components and Do not use the appliance to heat cause a short circuit. Pressurised up food in sealed jars and tins. steam could also cause permanent Pressure will build up inside them and damage to the surface and to other...
- Page 13 When putting cooking containers switch off at the socket and withdraw or the condensate tray into the the plug. Contact the Miele Service oven or taking them out, take care not Department. to spill the contents. Avoid contact with...
- Page 14 Warning and Safety instructions Futher safety notes In countries where there are areas which may be subject to infestation When using an electric socket near by cockroaches or other vermin, pay the appliance, care should be particular attention to keeping the taken that the cable of the appliance appliance and its surroundings in a cannot get trapped by the appliance...
-
Page 15: Caring For The Environment
Caring for the environment Disposal of the packing Disposal of your old appliance material Electrical and electronic appliances often contain materials which, if The transport and protective packing handled or disposed of incorrectly, has been selected from materials which could be potentially hazardous to are environmentally friendly for disposal human health and to the environment. -
Page 16: Using For The First Time
Using for the first time The steam oven is supplied with the controls pushed in. They have to be released before the steam oven can be used. When the steam oven is first connected to the mains supply it will switch on automatically and a welcome message will appear in the display. - Page 17 60 seconds if you press the On/Off switch or the multi-function selector gently. If you select "On" it will remain in the display all the time. Because this oven is pre-equipped for the Miele|home system the following message will appear briefly in the display:...
-
Page 18: Setting The Water Hardness
Using for the first time Setting the water hardness The steam oven is set at the factory to water hardness setting IV (Very hard 4). If your water hardness level differs from this you will need to re-programme the appliance. You can use the test strip supplied to check the water hardness level, or your local water supplier will be able to advise you on the water hardness of your area. - Page 19 Using for the first time ^ Switch the appliance on by pressing in the On/Off switch gently. ^ Turn the multi-function selector anti-clockwise to "Settings". COOK UNIVERSAL ALL FUNCTIONS... COOK FISH AUTOMATIC... COOK VEGETABLES USER PROGRAMMES... COOK MEAT SETTINGS F... ^ Confirm your selection by gently pressing the multi-function selector.
-
Page 20: Cleaning And Heating Up For The First Time
Using for the first time Cleaning and heating up for the first time Take the water container out of the appliance and remove the insert (see "Cleaning and care"). Rinse the water container and the insert thoroughly by hand using hot water. Do not use any washing-up liquid or detergent. -
Page 21: Operation
Operation Controls Night dimming Between the hours of 22:00 and 6:00 The steam oven is supplied with the the lighting in the display is dimmed controls pushed in. They have to be automatically. released before the steam oven can If you have chosen for the time of day be used. -
Page 22: Operating Sequence
Operation Operating sequence ^ Press and release the controls. ^ Switch the appliance on by pressing in the On/Off switch gently. The Main menu will appear in the display. COOK UNIVERSAL ALL FUNCTIONS... COOK FISH AUTOMATIC... COOK VEGETABLES USER PROGRAMMES... COOK MEAT SETTINGS F... - Page 23 Operation When a menu is selected, e.g. Settings, further sub-menus appear which can be called up and changed. SETTINGS F Back A LANGUAGE F. . . CLOCK. . . MAIN MENU . . . The triangle symbols at the top and bottom of the display indicate that you can scroll to further options by turning the multi-function selector.
-
Page 24: Changing The Time Of Day
Operation Changing the time of day In the following example the time of day is changed from 10:15 to 12:17. The steam oven is switched off. ^ Turn the multi-function selector clockwise until "Clock" is highlighted in the display. 10 : 15 Time Clock ^ Press the multi-function selector gently to confirm your... -
Page 25: Minute Minder
Operation The current time of day will reappear even after a power cut. The steam oven stores this information for approx. 200 hours. After that "12:00" will flash in the display as it did when first switched on. You will have to re-set the time if this happens. Minute minder The minute minder can be used to time any activity in the kitchen, e.g. - Page 26 Operation 12 : 17 Time 0:00 Clock ^ Turn the multi-function selector until the minute minder time you want appears and confirm your selection. You will then see the minute minder time counting down in the display. At the end of the set time you will hear a buzzer. You can turn it off by pressing the multi-function selector.
-
Page 27: Recommended Temperature
Operation Recommended temperature The following recommended temperatures are set at the factory: Function Recommended Temperature range temperature in which can be set °C / °F in °C / °F COOK UNIVERSAL 100 / 210 40 - 100 / 105 - 210 COOK FISH 85* / 185* 75 - 100 / 165 - 210... -
Page 28: Before Each Use
Operation Before each use ^ Always use both hands when carrying the water container, and ^ When using a perforated cooking push it into the appliance until it container, push the condensate tray connects. Take care not to let any onto the lowest shelf runner to catch water spill out. -
Page 29: Selecting A Steam Oven Function
Operation Selecting a steam oven function ^ Press and release the controls. ^ Switch the appliance on by pressing in the On/Off switch gently. The main menu will appear. COOK UNIVERSAL ALL FUNCTIONS... COOK FISH AUTOMATIC... COOK VEGETABLES USER PROGRAMMES... COOK MEAT SETTINGS F... -
Page 30: Setting A Cooking Duration
Operation Setting a cooking duration After you have confirmed the (recommended) temperature, the display will change to show the screen for setting the cooking duration (Duration). COOK VEGETABLES 100°C 12:15 Durati 0:00 ^ Use the multi-function selector to set the duration, e.g. 10 minutes (0:10 h). -
Page 31: Starting A Programme
Operation Starting a programme The appliance is set up at the factory so that it starts automatically as soon as you have confirmed the cooking duration. If you prefer to always start the programme manually, you will have to alter the standard setting for Start to "manual" (see "Changing settings - Start"). -
Page 32: Saving Settings
Operation Saving settings Interrupting a programme You can save the settings for a cooking You can interrupt a programme at any programme while it is in progress, so time by opening the door. that you can call it up again from the The heating will be switched off and the User Programmes menu at a later date. -
Page 33: Changing The Settings During Operation
Operation Changing the settings during operation Changing the function ^ Turn the multi-function selector until the function you are using is highlighted and then press the selector gently. The display will change. ^ Select the function you want and proceed as before. Changing the temperature ^ Turn the multi-function selector until the temperature you have already... -
Page 34: At The End Of The Cooking Duration
Operation At the end of the cooking duration The last minute of the cooking duration is shown in minutes rather than hours. The display will change from hours (0:02 h) to minutes (1:00 min). Shortly before the end of the set cooking duration, the steam will be reduced and the door will open slightly. -
Page 35: After Use
Operation COOK VEGETABLES 100 °C 12:37 Keeping warm Time Duration Save If you do not want to use this function, you will need to change the factory default setting (see "Changing settings - Keeping warm"). When putting cooking containers or the condensate tray into the steam oven or taking them out, take care not to spill the contents. -
Page 36: Automatic
Operation Automatic You can choose from an extensive range of automatic programmes: Cook Vegetables, Cook Fish, Cook Shellfish, Cook Mussels, Cook Meat, Cook Pulses, Cook Side dishes, Cook Grain, Cook Fruit, Cook Eggs, Reheat, Defrost and Bottling. Cooking temperature and duration are pre-set, so you only need to select the category and confirm your selection. -
Page 37: User Programmes
Operation User programmes You can give programmes you use frequently their own individual names and then save them in the User Programmes menu. You can save up to 30 different user programmes. COOK UNIVERSAL ALL FUNCTIONS... COOK FISH AUTOMATIC... COOK VEGETABLES USER PROGRAMMES... - Page 38 Save USER Back A PROGRAMMES COOK FISH Save Start ^ Select and confirm "Save". Miele 12:21 Save as: ....ABCDEFGHIJKLMNOPQRSTUVWXYZ_ 0123456789 Back A ^ Select and confirm the individual letters or numbers. The symbol after the Z is for a space.
-
Page 39: Delay Start
Operation Delay start You can delay the start of a cooking programme. The steam oven will then switch on and off automatically. It is only possible to delay the start within 90 seconds after making an entry. ^ Select the function, temperature and duration in the normal way. -
Page 40: Safety Features
Safety features Lock (LOCK $) The lock prevents the steam oven being switched on unintentionally, by children for example. The appliance is delivered with the lock switched off (factory default setting). Before this feature can be activated, you will need to alter the factory default setting (this only needs to be done once). -
Page 41: System Lock (System Lock $)
Safety features System lock (SYSTEM LOCK $) The system lock prevents the settings being altered when the appliance is operating. The appliance is delivered with the system lock switched off (factory default setting). Before this feature can be activated, you will need to alter the factory default setting (this only needs to be done once). -
Page 42: Solo Programme
Safety features To deactivate the system lock ^ Select and confirm the $ symbol. ^ Select and confirm "Off". The system lock will remain activated at the end of a locked cooking programme or if a locked programme is cancelled. You will need to deactivate the system lock before you can start another programme. - Page 43 Safety features SETTINGS F Back A SAFETY Function SOLO PROGRAMME User programmes ^ Select and confirm "Function". ^ Specify the function, temperature and duration and confirm with OK. You can also choose one of your user programmes as the Solo Programme. Now that the setting has been altered, the ) will appear in the display when the appliance is switched off.
-
Page 44: Changing Settings
Changing settings Some of the standard steam oven settings (factory default settings) have an alternative which you can select if required. You can alter several settings one after the other. Proceed as follows: ^ Switch on the steam oven. ^ Select and confirm the Settings menu. SETTINGS F Back A LANGUAGE F. -
Page 45: Clock
Changing settings Clock You can select either a 24 hour or 12 hour clock. Select and confirm the one you want. Main menu The four cooking functions listed in the left-hand side of the display can be changed to show ones that you use frequently or to show your user defined programmes. -
Page 46: Keeping Warm
Changing settings Keeping warm The steam oven is set at the factory so that if it is not switched off at the end of a cooking programme, it will maintain a temperature of 70 °C for a maximum of 15 minutes to keep food warm. -
Page 47: Display
Changing settings Display Depending on setting, the display will be on all the time or will only be visible for a short time. If the "On for 60 seconds" option is selected, the display will go dark after 60 seconds. The time of day continues to run unseen in the background. -
Page 48: Demo Mode
Changing settings Demo mode Demo mode for showrooms only Demo mode is for dealers who want to demonstrate the appliance without the heater elements working. Do not activate this setting for domestic use! After a short while the message will go out and the Demo mode can be switched on or off. -
Page 49: Practical Tips
Practical tips Suitable containers You will find various tips on how to use the steam oven in the following sections Some stainless steel cooking or in the cook book. containers are supplied with the appliance. Other containers, in a variety Heat-resistant glass, ceramic, of sizes, both perforated and solid, are porcelain, stainless steel and enamel... -
Page 50: Steaming
Practical tips Steaming Food Function Temperature Duration in °C in minutes al dente well done Vegetables Asparagus, green COOK VEG Baby Carrots (whole) " Beans (french) " Beans (runner, sliced) " Beetroot (whole) " 20-30 Broccoli Brussels sprouts " 8-10 Cabbage (shredded) "... - Page 51 Practical tips Food Function Temperature Duration in °C in minutes Meat Beef goulash COOK MEAT 40-50 Chicken breast " 8-10 Chicken, whole " 50-60 Knuckle of pork " 90-95 Lamb ragout " 12-16 Turkey escalope " Turkey roulade " 12-15 Veal escalope "...
- Page 52 Practical tips Food Function Temperature Duration in °C in minutes Dried beans and pulses Red kidney beans COOK UNIVERSAL 60-65 (pre-soaked) Chick peas " 50-60 Millet " 9-10 Pearl Barley " 60-80 Buckwheat " 20-24 Red split lentils (un-soaked) " 10-15 Yellow split lentils (pre-soaked) "...
- Page 53 Practical tips Tips on steaming – Frozen fish should be partially defrosted before cooking. We – In general, the cooking durations for recommend using the "Defrost" cooking with steam are the same as function (see "Defrosting" for more for cooking food in a saucepan. information).
- Page 54 Practical tips – Grease perforated containers – The weight entry in the Automatic beforehand if using them to cook programmes refers to the weight per fish, and solid containers if using to piece. The setting and therefore the cook dishes containing eggs. cooking duration is the same whether cooking only one 250 g piece of –...
-
Page 55: Reheating
Practical tips Reheating Your steam oven is very effective at reheating dishes which have been REHEAT function prepared previously. Food to be reheated Duration in minutes Proceed as follows: Vegetables ^ Place the food on a flat plate and Cauliflower, runner beans, cover it with a deeper plate or some heat-resistant foil. -
Page 56: Defrosting
Practical tips Defrosting DEFROST function Food to be defrosted Weight in g Temp. Defrosting time Standing time in °C in minutes in minutes Meat Stew 30-40 10-15 Minced meat 15-20 10-15 Cutlets, chops, sausages 25-35 15-20 Poultry Chicken 1000 15-20 Chicken drumsticks 20-25 10-15... - Page 57 Practical tips Frozen food can be defrosted in this – Fish does not need to be fully appliance in much less time than when defrosted before cooking. Defrost so defrosting at room temperature. that the surface is sufficiently thawed to take herbs and seasoning. Proceed as follows: Depending on the thickness of the fish, 2 - 5 minutes at 60 °C should be...
-
Page 58: Bottling
Practical tips Bottling Proceed as follows: ^ Place the condensate tray on the first Select Cook Universal for bottling. runner level, and place the rack COOK UNIVERSAL function above it. Produce Temp. Duration ^ Place a maximum of 6 prepared jars in °C (all the same size) on the rack, minutes**... -
Page 59: Cooking Whole Meals
Practical tips Cooking whole meals ^ First place the dish with the longest cooking duration (the rice), in the It is very economical and practical to oven and set a duration of cook a whole meal at the same time in 20 minutes. -
Page 60: Blanching
Practical tips Blanching Preparing yoghurt You can use your steam oven to blanch Proceed as follows: vegetables and fruit to prepare them for ^ Mix 100 g yoghurt (with live culture) freezing. with 1 litre of fresh milk. The yoghurt Proceed as follows: and milk should have the same percentage fat content. -
Page 61: Disinfecting Baby Bottles
Practical tips Disinfecting baby bottles Proceed as follows: ^ Place the condensate tray on the The steam oven can be used to disinfect baby bottles and other lowest shelf level and place the rack containers. Check beforehand that all above it. parts, teats etc., are declared by the ^ Dismantle, clean and thoroughly manufacturer to be heat-resistant to... -
Page 62: Cleaning And Care
Cleaning and care General notes Do not use a steam cleaner to clean Disconnect the appliance from the this appliance. The steam could electricity supply and allow it to cool reach electrical components and down to a safe temperature before cause a short circuit. -
Page 63: Appliance Front And Control Panel
The appliance front and controls should and acids. It is therefore essential to be cleaned using a Miele E-Cloth or a clean it with care, as described above. mild solution of hot water with a little... -
Page 64: Removing The Steam Oven Door
Cleaning and care Removing the steam oven door ^ Holding the door evenly with both hands, lift the door up and off the It is much easier to clean the steam hinges. oven interior if you remove the door first. Proceed as follows: ^ Open the door fully. -
Page 65: Oven Interior
Miele ceramic Proceed as follows: hob cleaner (see "Optional ^ Pull on the fixing knob to release it. -
Page 66: Water Container
Cleaning and care Water container ^ After cleaning, dry both parts of the insert thoroughly before replacing it Remove, empty and dry the water in the water container. When container after each use. Also remove replacing the insert (see illustration), the insert from the water container. -
Page 67: Coupling Seal
Coupling seals can be ordered from the Miele Spare Parts Department. See back page for contact details. Only use the silicone grease supplied. On no account must... -
Page 68: Descaling
Cleaning and care Descaling Use the descaling tablets supplied supplied with the appliance (see "Optional accessories" for reordering details) or a proprietary citric acid based descaling agent to descale the appliance. Follow the manufacturer's instructions. With aluminium appliances (see data plate) ensure that the descaling agent does not come into contact with the aluminium surfaces as this could cause marks. - Page 69 Cleaning and care DESCALE 14:00 Duration 0:22 h START Time ^ Confirm "Start". It is only possible to cancel the descaling process during the first few minutes (before the $ lights up). After that the process cannot be cancelled. Do not switch the appliance off during the descaling process.
-
Page 70: Problem Solving Guide
Reconnect to the mains supply and switch the appliance on. If it still will not If the water hardness level was in fact start, contact a qualified electrician or set correctly or the problem occurs the Miele Service Department. again, contact the Service Department. - Page 71 If the appliance still will not start, Check whether switch it off and contact the Miele Service Department. – the door is closed properly. – Other fault messages: – the door seal is fitted correctly. If necessary, press it in all the way Call the Service department.
-
Page 72: After Sales Service, Data Plate
In the event of any faults which you cannot remedy yourself, please contact: – your Miele dealer, or – the Miele Service Department (see address on back cover). When contacting your Dealer or the Service Department, please quote the model and serial number of your appliance. -
Page 73: Installation
Installation Safety instructions for All dimensions are given in mm. installation Before connecting the appliance to the mains supply make sure that the voltage and frequency correspond to the rating on the data plate. This data must correspond in order to avoid the risk of damage to the appliance. -
Page 74: Appliance And Building-In Dimensions
Installation Appliance and building-in dimensions Installation in a tall unit a Steam oven b Building-in recess c Inlet for mains connection cable to the appliance d Recommended position for electrical socket. Important: Do not position behind the appliance! e Mains connection cable... - Page 75 Installation Installation in a base unit a Steam oven b Building-in recess c Inlet for mains connection cable to the appliance d Recommended position for electrical socket. Important: Do not position behind the appliance! e Mains connection cable N.B. Undercounter installation is not recommended if there are young children in the home.
- Page 76 Installation Installation in a tall unit in combination with an oven a Steam oven b Building-in recess c Inlet for mains connection cable to the appliance d Recommended position for electrical socket. Important: Do not position behind the appliance! e Mains connection cable f Oven...
-
Page 77: Installing The Appliance
Installation Installing the appliance ^ Push the appliance into the recess. After aligning the appliance it must be secured against slippage. Do this by screwing the two 3.5 x 25 mm wood screws i (supplied) into the vertical strips on either side of the appliance (see illustration). -
Page 78: Electrical Connection
Installation Electrical connection Connection should be made via a suitable isolator or a double pole fused All electrical work should be carried spur connection unit or fused plug and out by a suitably qualified and switched socket which complies with competent person, in strict national and local safety regulations accordance with current local and... - Page 79 Installation Non-rewireable plugs BS 1363 Important The fuse cover must be refitted when The electrical safety of this appliance changing the fuse, and if the fuse cover can only be guaranteed when is lost, the plug must not be used until a continuity is complete between the suitable replacement is obtained.
- Page 80 Alteration rights reserved / 0407 M.-Nr. 06 159 580 / 04 en - –...
Need help?
Do you have a question about the DG 4050 and is the answer not in the manual?
Questions and answers