Table of Contents

Related Manuals for Konka KL32IS10


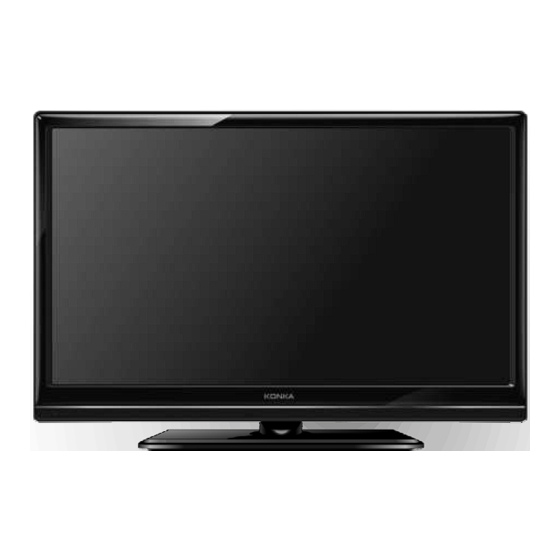
Summary of Contents for Konka KL32IS10
- Page 1 Please read this manual carefully before TV operation. Retain it for future reference. Record model number and serial number of the set. See the label attached on the back cover and quote this information to your dealer when you require service.
- Page 3 Important Safety Instructions and Maintenance Important Safety Instructions CAUTION Risk of electronic shock, do not open. Do not attempt to service this product yourself as opening or removing covers may expose you to dangerous voltage or other hazards. High Voltage Refer all servicing to qualified service personnel.
- Page 4 Important Safety Instructions and Maintenance Important Safety Instructions An outside antenna system should not be located in the vicinity of overhead power lines or other electric light or power circuits, or where it can fall into such power lines or circuits. When installing an outside antenna system, extreme care shold be taken to keep from touching such power lines or circuits as contact with them might be fatal.
- Page 5 Important Safety Instructions and Maintenance Installation Do not place the set on an unstable cart, stand, table or shelf. The set may fall, causing serious personal injury as well as damage to the product. Use only with the cart, stand, tripod, bracket, or table specified by the manufacturer, or sold with the apparatus.
-
Page 6: Table Of Contents
Welcome you to purchase KONKA LCD TV Welcome you to high quality image world KONKA colour LCD TV brings you. We sincerely hope KONKA TV brings you the brand new visual and audio enjoyment. This operating instructions can help you operate this TV set easily. -
Page 7: Accessories
The illustrations and on-screen displays in this user's manual are for explanation purposes and may vary slightly from actual operations. The example used throughtout this manual are based on the KL32IS10. Accessories Please make sure the following items are included with your LCD TV. If any items are missing, contact your dealer. -
Page 8: Introduction
Introduction Features l TV adopts 32" / 42" TFT LCD display screen Zero X radiation complies to green environment protection requirement Connect to computer directly to realize TV/monitor combo. 16:9 wide screen Auto tuning and fine tuning HDMI input Component Compatible (480i; 480P; 576i; 576P; 720P; 1080i; 1080P) PC VGA mode: VGA, SVGA, XGA, WXGA, SXGA Teletext NICAM/A2... -
Page 9: Specifications
Introduction Specifications Description KL32IS10 KL42IS10 Display screen type Color active matrix LCD display Display size 32" Diagonal max.) 42" Diagonal max.) LCD panel resolution 1366 x 768 1920 x 1080 Image control Fine digital control Power supply AC ~110-240V 50/60 Hz... -
Page 10: Stand And Wall-Mounted(Optional)
-Before performing work, spread cushioning over the base area to lay the LCD TV on. This will prevent it from being damaged. 1. Assembling instruction(Only for KL32IS10 model): 1) Fix the stand and the Transition Board together with screws. (Figure 1) 2) Fix the stand and the Cabinet together with screws. - Page 11 2. Fasten 2 brachets with screws on the wall as figure 5 shown; (Refer to figure 5) 3. Carefully check for the strength before releasing the LCD TV. Wall-mounted illustrations please see following. 1) For KL32IS10 model 400mm 400 200mm...
-
Page 12: General Description
General Description Overview of front and side panel The buttons on the lower-right panel control your TV’ s basic features, including the on-screen menu. To use the more advanced features, you must use the remote control. PR OG PR OG Power Switch MENU Press this button to turn TV on or off. -
Page 13: Overview Of Back Panel
General Description Overview of back panel VIDEO S-VIDEO HDMI 1/2 S-Video Connect to the HDMI jack of a device Connect an S-VIDEO signal from a camcorder or VCR. with an HDMI output. VGA/PC IN AV OUT Connect to the video output jack on AV output sockets for connecting an your PC. -
Page 14: Overview Of Remote Control
General Description Overview of remote control LED: Press any button, the led will light. POWER: Turn your TV on and off. YPbPr: Switch to YPbPr mode directly. Switch to PC mode directly. Switch to TV mode directly. YPbPr HDM I HDMI: Switch to HDMI1, HDMI2(twice) directly. - Page 15 General Description Overview of remote control NICAM: The button is used to set NICAM sound system. FREEZE: Freeze the current picture.Press again to resume. : Press this button to shut off sound of the TV temporarily, press again to restore TV sound. YPbPr HDM I Press these buttons to adjust TV volume.
-
Page 16: Teletext Model
General Description Teletext Mode Teletext is an information system broadcast by certain channels which be consulted like a newspaper. It also offers to subtitles for viewers with hearing problems or who are not familiar with the transmission language. YPbPr HDM I You can press these buttons to operate the teletext: INPU T SO UND... - Page 17 General Description Teletext Mode Reveal: Some pages contain hidden information. The hidden text is displayed if the REVEAL button is pressed. The hidden text will be cancelled when another page is requested if a different subpage is YPbPr HDM I broadcasting or if the REVEAL button is pressed.
-
Page 18: Installing Batteries In The Remote Control
General Description Installing Batteries in the Remote Control Open the battery compartment cover on the back side. Insert two 1.5V AAA size batteries in correct polarity. Don´ t mix old or used Point the remote towards the remote batteries with new ones. control sensor of the wireless TV and use it within 8 meters. -
Page 19: Connecting Vcr
External Connection Connecting VCR These instructions assume that you have already connected your TV to an antenna or a cable TV system. Skip step 1 if you have not yet connected to an antenna or a cable system. TV Rear Panel VIDEO S-VIDEO VCR Rear Panel... -
Page 20: Connecting S-Vhs Vcr
External Connection Connecting S-VHS VCR Your TV can be connected to an S-Video signal from an S-VHS VCR. (This connection delivers a better picture as compared to a standard VHS VCR.) TV Rear Panel VIDEO S-VIDEO VCR Rear Panel Audio Cable (Not supplied) S-Video Cable (Not supplied) RF Cable (Not supplied) An S-Video cable is usually included with an S-VHS VCR. -
Page 21: Connecting Dvd Player/Set-Top Box Via Component
External Connection Connecting DVD Player/Set-Top Box via Component The rear panel jacks on your TV make it easy to connect a DVD to your TV. TV Rear Panel VIDEO S-V IDEO DVD Player/Set-Top Box Audio Cable (Not supplied) Component Cable (Not supplied) Component video separates the video into Y (Luminance (brightness)), Pb (Blue) and Pr (Red) for enhanced video quality. -
Page 22: Connecting A Camcorder Via Av
External Connection Connecting a Camcorder via AV The side panel jacks on your TV make it easy to connect a camcorder to your TV. They allow you to view the camcorder tapes without using a VCR. TV Side Panel VI DEO AUDIO AV2 IN Video Cable (Not supplied) -
Page 23: Connecting Dvd Player/Set-Top Box Via Dvi
External Connection Connecting DVD Player/Set-Top Box via DVI This connection can only be made if there is a DVI Output connector on the external device. TV Rear Panel DVD Player/Set-Top Box VID EO S-VIDEO Audio Cable (Not supplied) DVI to HDMI Cable (Not supplied) Each DVD player/STB has a different back panel configuration. -
Page 24: Connecting Dvd Player/Set-Top Box Via Hdmi
External Connection Connecting DVD Player/Set-Top Box via HDMI This connection can only be made if there is a HDMI Output connector on the external device. TV Rear Panel DVD Player/Set-Top Box VIDEO S-VIDEO HDMI Cable (Not supplied) What is HDMI? HDMI, or high-definition multimedia interface, is a next-generation interface that enables the transmission of digital audio and video signals using a single cable without compression. -
Page 25: Connecting Pc
External Connection Connecting PC TV Rear Panel VIDEO S-VIDEO PC Audio Cable (Not supplied) D-Sub Cable (Not supplied) Each PC has a different back panel configuration. The HDMI jacks do not support PC connection. We recommend the use of cables with a Ferrite Core. 1. -
Page 26: Basic Operation
Basic Operation Turning the TV On and Off How to turn the TV on or off 1. Insert the power cord plug into a AC outlet. Press Power Switch button on the right side of TV to turn power on. 2. -
Page 27: Input Setup
Basic Operation Menu operation Input Setup Source Press INPUT key on the remote control to enter "INPUT SOURCE" menu. There are ten options for you to select: "TV", "AV1", "AV2", "S-Video", "PC", "YPBPR1", "YPBPR2", S-Video "USB” ,"HDMI 1", "HDMI 2". ▲... -
Page 28: Menu System Instruction
Menu system instruction Picture 1. Press MENU key to display the main menu on the screen. 2. Press key to select "Picture" option. 3. Press key to enter "Picture" submenu. 4. You can also press the PICTURE key on the Setting Channel Picture... -
Page 29: Sound
Menu system instruction Picture Adjusting the Backlight You can change the brightness of the entire screen according to your preference. 1. Press key to select "Backlight" option. 2. Press / key to decrease or increase the value of a particular item. Backlight: Adjusts the brightness of the whole screen. - Page 30 Menu system instruction Sound 1. Press key to select "Sound Mode" option. 2. Press key to select one sound mode. è Standard: Selects the normal sound mode. è News: Emphasizes voices over other sound è Music: Emphasizes music over voices. è...
-
Page 31: Function
Menu system instruction Function 1. Press MENU key to display the main menu on the screen. 2. Press key to select "Function" option. Setting Channel Picture Sound Function 3. Press key to enter "Function" submenu. Sleep Timer Freeze 3D NR Mi d Sleep Timer Source Switch... - Page 32 Menu system instruction Function 5) SOUND SOURCE 1. Press key to select "SOUND SOURCE" option. 2. Press key to swap the speakers' sound between main picture and sub-picture. 6) BORDER COLOR 1. Press key to select "BORDER COLOR" option. 2. Press key to set colour of the sub-picture's border.
-
Page 33: Setting
Menu system instruction Function Image Capture 1. Press to select "Image Capture". This function is available except USB, S-VIDEO and PC mode. 2. Press to capture picture and enter Do you want to save captured image? “ image save”menu. 3. Press to select “... -
Page 34: Channel
Menu system instruction Channel 1. Press MENU key to display the main menu on the screen. 2. Press key to select "Channel" option. 3. Press key to enter "Channel" submenu. Setting Channel Picture Sound Function Current Channel Color System Auto Current Channel Sound System Auto... -
Page 35: Manual Search
Menu system instruction Channel Manual Search 1. Press key to select "Manual Search" option. 2. Press key to tune from higher frequency to lower frequency or from lower frequency to higher frequency. Edit Program Edit Program 1. Press key to select "Edit Program" option. Current Channel 2. -
Page 36: Pc Display
Menu system instruction PC Display You should set your PC before connecting your PC to TV to aviod abnormal display. Setting Up your PC software (Based on Windows XP) The Windows display-settings for a typical computer are shown below. The actual screens on your PC may be different depending upon your particular version of Windows and your particular video card. -
Page 37: Digital Media Player
Digital Media Player Introduction This TV is embedded with one standard USB port digital media player. It can find the devices support USB1.1/2.0, including flash disk, USB hard disk. Note: Please do not remove the cable during the data transfer. It may cause problems of the system, it supports functions as : JPEG CARD READ... -
Page 38: Playing Music Files
Digital Media Player Playing Music Files 1. Select the [MP3] function and select a music folder to enter into. Press button to select a music file and press or “ OK”button to play.( as figure 3) 2. During the play, the information of this music can be seen on the right of the window. 3. -
Page 39: Troubleshooting
Troubleshooting MUTE CLASSIC... -
Page 40: Picture Defects And The Reason
Picture defects and the reason... - Page 41 39032534...
Need help?
Do you have a question about the KL32IS10 and is the answer not in the manual?
Questions and answers