
Related Manuals for Miele M 8151-2


Summary of Contents for Miele M 8151-2
-
Page 1: Operating Instructions
Operating instructions Microwave oven M 8151-2 M 8161-2 en - GB To avoid the risk of accidents or damage to the appliance it is essential to read these instructions before it is installed or used for the first time. M.-Nr. 07 289 660... -
Page 2: Table Of Contents
Contents Guide to the appliance ..........4 Oven interior and accessories . - Page 3 Contents Interrupting or re-starting a programme ....... . 24 Altering the settings ..........24 To cancel a programme .
-
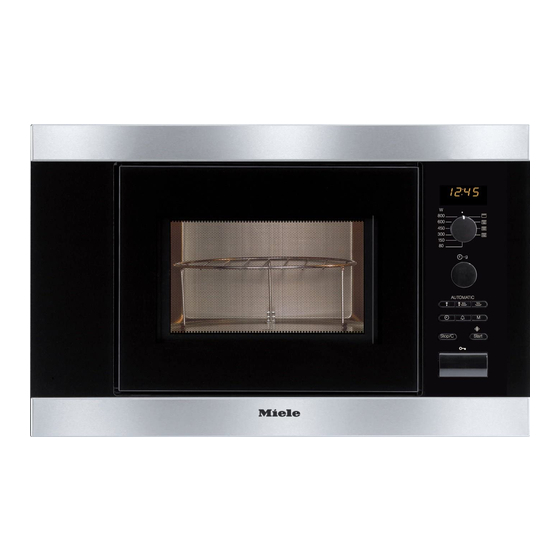
Page 4: Guide To The Appliance
Guide to the appliance Oven interior and accessories a Oven door f Grilling rack b Door locking mechanism g Glass tray c Quartz grill h Gourmet plate d Control panel i Cover e Turntable j Boiling rod... -
Page 5: Control Panel
Guide to the appliance Control panel k Electronic timer and clock display l Rotary selector for microwave power, grill and combination programmes m Rotary selector to enter time and weight n Automatic programme buttons o Time of day button m p Minute minder button l q Memory button (to save a 1-3 stage programme sequence) -
Page 6: Accessories Supplied
Guide to the appliance Accessories supplied Cover The cover supplied must only be used Grilling rack in the Microwave Solo mode. The grilling rack can be used for all It prevents the food from drying out and functions with and without the oven from becoming dirty, and it microwave power, except for accelerates the heating process. -
Page 7: Caring For The Environment
Caring for the environment Disposal of the packing Disposal of your old appliance material Electrical and electronic appliances often contain materials which, if The transport and protective packaging handled or disposed of incorrectly has been selected from materials which could be potentially hazardous to are environmentally friendly for disposal human health and to the environment. -
Page 8: Warning And Safety Instructions
Danger of injury. are supervised whilst using it, or have If the connection cable is damaged, been shown how to use it correctly by a it must be replaced by a Miele person responsible for their safety. approved service technician. - Page 9 (e.g. danger of overheating). Faulty components must only be replaced by genuine Miele original The electrical safety of this spare parts. The manufacturer can only appliance can only be guaranteed...
- Page 10 Warning and Safety instructions This appliance may only be used in added to the duration needed for mobile installations such as ships, cooking, reheating or defrosting. caravans, aircraft etc. if a risk Always remember that times for assessment of the installation has been cooking, reheating and defrosting in a carried out by a suitably qualified microwave oven are usually...
- Page 11 Warning and Safety instructions Never cook or reheat food or liquids When heating liquids, milk, sauces etc. in sealed containers, jars or bottles. in the microwave without the boiling With baby bottles, the screw top and rod, the boiling point of the liquid may teat must be loosened.
- Page 12 Warning and Safety instructions Try to avoid the interior walls being Similarly, hard-boiled eggs should not splashed with food or liquids containing be reheated in the microwave oven as salt. If it does happen, wipe these away this may lead to the eggs bursting, thoroughly to avoid corrosion on the even after they have been taken out of stainless steel surface.
- Page 13 Warning and Safety instructions Wear oven gloves when taking Do not use a steam-cleaning dishes in and out of the oven, or when appliance to clean this appliance. handling dishes or food in the oven if Steam could reach the electrical the grill is on or has just been in components and cause a short circuit.
-
Page 14: How The Microwave Oven Works
How the microwave oven works In a microwave oven there is a As heat is produced directly in the high-frequency tube called a food, magnetron. This converts electrical – food can generally be cooked energy into microwaves. These without adding much liquid or microwaves are distributed evenly cooking oil. -
Page 15: Modes Of Operation
Modes of operation What can a microwave oven In what ways can a microwave oven be used? In the microwave oven, food can be Microwave Solo mode cooked, reheated or defrosted quickly. Suitable for defrosting, reheating and You can use the microwave in the cooking. -
Page 16: Suitable Containers For Microwave Ovens
Suitable containers for microwave ovens Microwaves Containers and lids with hollow handles or knobs in which moisture can collect are unsuitable, unless the hollowed handles are adequately vented. Without vent holes pressure can build up, causing the container to crack or shatter with the danger of injury. - Page 17 Suitable containers for microwave ovens Earthenware Do not place aluminium foil dishes Decorated earthenware is only suitable on the rack in case the dish sparks if the decoration is beneath an all-over or arcs. If sparks occur, transfer glaze. food to a microwave-safe container. Earthenware can get very hot and –...
-
Page 18: Testing Dishes For Their Suitability
Suitable containers for microwave ovens Testing dishes for their Disposable containers, such as trays made from polystyrene, can only be suitability used for very short, timed warming and If in doubt as to whether glass, reheating of food. earthenware or porcelain plates or dishes are suitable for use in a Plastic boiling bags can be used for microwave oven, a simple test can be... -
Page 19: The Cover
Suitable containers for microwave ovens The cover Do not use a lid or cover if – prevents too much steam escaping, – food coated with breadcrumbs is especially when cooking foods which being cooked. need longer to cook such as –... -
Page 20: Before Using For The First Time
Before using for the first time ^ Check the appliance for any Important: damage. After unpacking, let the appliance stand for approx. 2 hours at room Do not use the microwave if temperature after transporting it to – the door is warped. –... -
Page 21: Time Of Day Display
Time of day display ^ Press the m button to confirm, or wait Setting the time of day a few seconds. ^ Connect the appliance to the mains The m symbol will flash, and the electricity supply. current minutes will light up for a few 12:00 and the m symbol will flash in seconds. -
Page 22: Operation
Operation To open the door To close the door ^ Press the a button to open the ^ Push the door firmly shut. door. Press the Start button again to resume If the microwave oven is being used, an interrupted cooking programme. opening the door will interrupt the The appliance will not start again if cooking programme. -
Page 23: Door" Message
Operation When heating up food which cannot be – the frequency of stirring or turning stirred or turned during cooking, as with the food. a plated meal, it is best to use a lower Frequent stirring or turning heats the microwave power level. -
Page 24: Interrupting Or Re-Starting A Programme
Operation Interrupting or re-starting a To cancel a programme programme ^ Press the Stop/C button twice. At any time you can . . At the end of a programme . . . interrupt a programme: An audible tone will sound when the ^ Press the Stop/C button or open the cooking programme is complete. -
Page 25: Quick Start (Programmable)
Operation Quick start (programmable) System lock Pressing the Start button c is sufficient The system lock prevents the appliance to set the appliance operating on being used by children, for example. maximum power. Three set durations are stored in the To activate the system lock memory: ^ Press and hold the Stop/C button in... -
Page 26: Minute Minder
Operation Minute minder Minute minder + cooking function The minute minder can be used to time The minute minder can be used at the any activity in the kitchen, e.g. boiling same time as a cooking function, and eggs. The time set counts down in one counts down in the background. -
Page 27: Operation - Grilling
Operation - Grilling The grill can be used on 4 settings: by itself, and in combination with the Microwave function at one of three different power levels. If the total grilling time required is less than 15 minutes, the grill should be pre-heated for approx. - Page 28 Operation - Grilling Combination mode - To change a cooking duration Microwave + Grill The cooking duration entered can be changed during operation if required. This function is very good for baking Interrupt the process by pressing the and browning. The microwave cooks Stop/C button, and change the the food, and the grill browns it.
-
Page 29: Gourmet Plate
Gourmet plate ^ Place the gourmet plate directly on the turntable. The gourmet plate gets extremely hot when in use. Always use oven Do not place it on the rack. Make gloves when handling it to avoid sure there is a gap of approx. 2 cm burns. -
Page 30: Some Suggested Uses
Gourmet plate Some suggested uses Recipes Pre-heat the gourmet plate directly on Croque monsieur (Serves 3) the turntable for up to 5 minutes at 450 W + Grill L. 6 slices of bread 30 g soft butter Fish fingers (frozen), 75 g grated Emmental cheese 150 g + 2 tbsp oil 3 slices of cooked ham... - Page 31 Gourmet plate Vegetable medley (Serves 3) Home-made potato rösti (Serves 2) 2 onions 2 tbsp oil 400 g peeled potatoes 100 g mushrooms, cleaned 2 small onions 150 g baby carrots or carrot slices 50 g grated Emmental cheese 100 g broccoli florets Salt, pepper 1 red pepper 20 g butter...
- Page 32 Gourmet plate Pork fillets (Serves 2) Curried chicken (Serves 3) 1 piece pork fillet (approx. 400 g) 4 rashers streaky bacon 600 g chicken or turkey breasts Salt, pepper 2 tbsp oil 10 g butter 2 tbsp white wine 200 g sliced mushrooms 2 tbsp apple juice 200 ml double cream 1 tbsp lemon juice...
- Page 33 Gourmet plate Fisherman's salmon (Serves 2) 2 pieces of salmon fillet (each 150 g) 1 tbsp lemon juice Salt, white pepper Drizzle the salmon with the lemon juice, and leave to stand for approx. 10 minutes. Place the gourmet plate on the turntable, and pre-heat for approx.
- Page 34 Gourmet plate Pineapple cake Quick almond tart For the cake: For the base: 2 eggs 100 g plain flour 80 g sugar level tsp baking powder ripe bananas 75 g butter or margarine 30 g chocolate chips 30 g sugar 100 g plain flour Filling: tsp.
-
Page 35: Operation - Automatic Programmes
Operation - Automatic programmes Automatic cooking All of the Automatic programmes are weight dependent. There are four programmes for frozen After selecting a programme, enter the food and eight programmes for fresh weight of the food. The microwave oven food. The standing time for each automatically calculates the duration programme is approx. - Page 36 Operation - Automatic programmes The programmed duration can, if necessary, be extended by a few minutes during operation by pressing the Start button repeatedly until the duration required shows in the display. On all programmes it is only possible to extend the duration by a few minutes.
-
Page 37: Recipes For Automatic Programmes
Recipes for Automatic programmes ° Below are some recipe suggestions for Carrots in a chervil cream sauce the Automatic programmes using the (serves 2) "Cooking fresh food" function°. 350 g carrots, washed and peeled These can be adapted to suit your 5 g butter requirements. - Page 38 Recipes for Automatic programmes ° AC 2 E Potatoes AC 3 _ Fish Fish curry This programme can be used to cook (serves 4) new potatoes and boiled potatoes. Enter the weight for the potatoes and 300 g pineapple pieces the cooking liquid.
- Page 39 Recipes for Automatic programmes ° AC 4 3 Kebabs Chicken kebabs (makes 8 kebabs) Pork kebabs 4 chicken breasts, each approx. 120 g (makes 8 kebabs) 4 pineapple slices (tinned) 1 piece of pork fillet, approx. 300 g 16 apricot halves (tinned) 1 red pepper For the marinade: 2 onions...
- Page 40 Recipes for Automatic programmes ° AC 5 ; Chicken AC 7 5 Fish pie Cut the chicken in half. Brush with Crispy fish pie (Serves 2) melted butter or oil, and season. Arrange the two halves with the cut side 400 g rosefish fillets uppermost on the grilling rack on top of 3 tbsp lemon juice...
- Page 41 Recipes for Automatic programmes ° AC 8 W Savoury bakes Rosefish and tomato gratin (serves 4) Vegetable gratin 500 g rosefish fillet (serves 4) 2 tbsp lemon juice 500 g tomatoes 400 g cauliflower or broccoli Herb salt 400 g carrots 2 tsp oregano, finely chopped For the cheese sauce: 150 g Cheddar cheese, grated...
- Page 42 Recipes for Automatic programmes ° Potato cheese gratin (serves 4) 500 g potatoes, peeled 250 ml double cream 125 g crème fraîche 150 g Cheddar, grated 1 clove of garlic Salt, black pepper, nutmeg Butter Slice the potatoes finely, mix with approx.
-
Page 43: Saving Your Favourite Programme
Saving your favourite programme One favourite programme can be saved in memory. This programme can be used for your most frequently cooked recipe. The programme can have up to 3 stages (e.g.: 1 minute at 600 W, followed by 2 minutes on Grill, and finally 3 minutes at 150 W + Grill). - Page 44 Saving your favourite programme To call up your favourite programme ^ Turn the programme selector to the 12 o'clock position. ^ Press the M button. ^ Press the Start button. In the event of a power cut, the favourite programme is no longer saved and must be re-entered.
-
Page 45: Changing The Settings
Changing the settings Some of the standard settings for the The other settings can be changed in appliance (which are set at the factory) the same way. have an alternative which you can ^ When you have finished making the select if required. - Page 46 Changing the settings Setting Settings available (* factory default) Night time switch-off S 0* Night time switch-off is deactivated. Night time switch-off is activated. The time of day display is switched off from 11 pm to 4 am. P 2 Automatic S I* The automatic keep-warm function is keep-warm function...
-
Page 47: Reheating
Reheating Select the following microwave power required depends on the nature of the levels to reheat food: food, its initial temperature and the amount to be cooked. Drinks ..... 800 W Food . -
Page 48: Cooking
Cooking Place the food in a microwave-proof Foods with a thick skin or peel, such as dish and cover it. tomatoes, sausages, jacket potatoes and aubergines, should be pierced or When cooking, it is a good idea to the skin cut in several places before select a power level of 800 W to start cooking to allow steam to escape and with and then when the food is hot... -
Page 49: Defrosting/Defrosting And Reheating Or Cooking
Defrosting/Defrosting and reheating or cooking Defrosting Defrosting followed by reheating or cooking Select the following microwave power settings to defrost food: Deep-frozen food can be defrosted and immediately reheated or cooked. – 80 W for defrosting very delicate food, e.g. After defrosting, select 800 W followed cream, butter, gateau and cheese. -
Page 50: Some Suggested Uses
Some suggested uses Food Quantity Micro- Time Notes wave power minutes) level (in watts) Melting butter and 100 g 1:00 – 1:10 Do not cover. margarine Melting chocolate 100 g 3:00 – 3:30 Do not cover. Stir halfway through melting. Dissolving 1 packet + 0:10 –... -
Page 51: Cleaning And Care
Cleaning and care Miele branded cleaning and conditioning products are available from the Miele Spare Parts Department or via the internet at www.miele-shop.com. Disconnect the microwave oven from the power supply before cleaning (e.g. switch off at the socket and remove the plug). -
Page 52: Appliance Front
If not, it might become impossible to remove and could cause the surface to alter or discolour. Clean the front using a damp Miele microfibre E-cloth or with a clean sponge and a solution of hot water and washing-up liquid. Then dry with a soft cloth. -
Page 53: Accessories Supplied
Cleaning and care To avoid damaging the surface of Rack your appliance, do not use: Wash and dry the rack after each use. It is dishwasher-proof, or can be – cleaning agents containing soda, ammonia, acids or chlorides, washed by hand in hot water with a little washing up liquid. -
Page 54: Problem Solving Guide
. . . the display does not light up. Repairs to this appliance must only Check whether, be carried out by a Miele approved ^ the time of day display has been service technician in strict switched off (press and hold the m accordance with current local and national safety regulations. - Page 55 . . . the time of day in the display is If the microwave oven switches itself off not accurate. repeatedly, please call the Miele Ser- If there has been a power cut, the time vice Department. automatically switches back to 12:00.
-
Page 56: After Sales Service
– your Miele Dealer – the Miele Service Department (see back cover for contact details). Please note that telephone calls may be monitored and recorded to improve our service. -
Page 57: Electrical Connection
If the connection cable is damaged suitable isolator, which complies with it must be replaced by a Miele national and local safety regulations, approved Service Technician only. and the on/off switch should be easily... -
Page 58: Installation
Installation When building in the appliance, For safety reasons, do not build the ensure that the vents at the front of appliance into a wall unit that is the appliances are not obstructed or directly above a hob. blocked by any objects. A minimum installation height of Make sure that there is a gap of at 850 mm must be maintained. - Page 59 Installation M 8151-2 Building-in kit The following items are supplied in the accessory pack for installing the appliance:...
- Page 60 Installation Installation 1. Niche height 350 mm ^ Draw a line on both sides of the The appliance must be built in housing unit 337 mm above the floor before it can be used. Otherwise it of the housing unit. poses an electric shock hazard.
- Page 61 Installation 2. Niche height 360 mm ^ Remove all the accessories, including the turntable and the roller ring, from the microwave oven cavity. ^ Place the microwave on its right-hand side so that the front frame overhangs the front of the table or work surface.
- Page 62 Installation...
- Page 63 Installation...
- Page 64 Alteration rights reserved / 3010 M.-Nr. 07 289 660 / 02 M 8151-2, M 8161-2...
Need help?
Do you have a question about the M 8151-2 and is the answer not in the manual?
Questions and answers