Ubiquiti EdgeRouter Lite ERLite-3 Quick Start Manual
3-port router
Hide thumbs
Also See for EdgeRouter Lite ERLite-3:
- User manual (58 pages) ,
- Quick start manual (21 pages) ,
- Quick start manual (21 pages)
Table of Contents
Advertisement
Quick Links
Download this manual
See also:
User Manual
Advertisement
Table of Contents

Related Manuals for Ubiquiti EdgeRouter Lite ERLite-3


Summary of Contents for Ubiquiti EdgeRouter Lite ERLite-3
- Page 1 EdgeRouter Lite 3-Port Router Model: ERLite-3...
-
Page 3: Package Contents
Introduction Introduction Thank you for purchasing the Ubiquiti Networks EdgeRouter Lite, model ERLite-3. It is part of the EdgeRouter series. For more information, visit www.ubnt.com. This Quick Start Guide is designed to guide you through the installation of the EdgeRouter Lite and show you how to access the EdgeOS Configuration Interface. -
Page 4: Hardware Overview
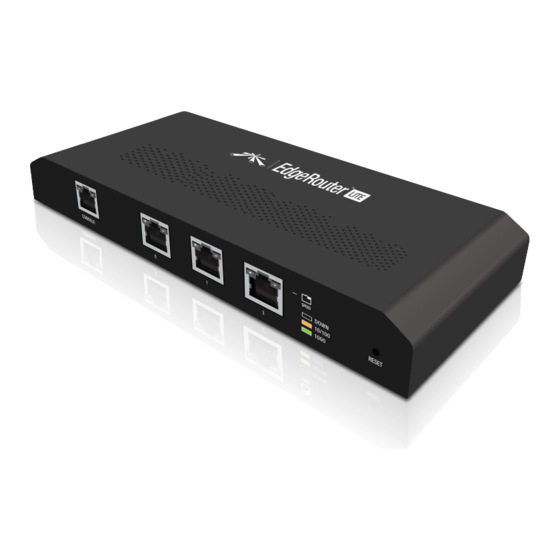
EdgeRouter Lite Quick Start Guide Hardware Overview Back Panel Ventilation Holes Power 12V DC GROUND Grounding Hole with Grounding Screw Front Panel Ports Console Ethernet (0-2) Reset SPEED CONSOLE Interface Description RJ45 serial console port for Command Line Interface Console (CLI) management. -
Page 5: Front Panel Leds
Hardware Overview Front Panel LEDs The LEDs on the left side of each port are not used at this time. Below is a description of the right LED functionality: Power Speed/Link/Act Speed/Link/Act 1000 Mbps 10/100 Mbps SPEED CONSOLE State Status EdgeRouter Lite not powered on. -
Page 6: Hardware Installation
AC ground of the power supply. We recommend that you protect your outdoor networks from the most brutal environments and devastating ESD attacks with industrial-grade shielded Ethernet cable from Ubiquiti Networks . For more details, visit www.ubnt.com/toughcable ™... - Page 7 Hardware Installation 3. Position the EdgeRouter Lite with the Ethernet ports facing down. Place the Wall-Mount Slots of the EdgeRouter Lite over the screw heads on the wall. Then slide the EdgeRouter Lite down to lock it into place. Grounding the EdgeRouter Lite (Optional) The EdgeRouter Lite is grounded through the Power Adapter;...
-
Page 8: Connecting Power
EdgeRouter Lite Quick Start Guide Connecting Power 1. Connect the Power Adapter to the Power port. 2. Connect the Power Cord to the Power Adapter. Connect the other end of the Power Cord to a power outlet. - Page 9 Press enter (PC) or return (Mac). 4. The login screen will appear. Enter ubnt in the Username and Password fields. Read the Ubiquiti License Agreement, and check the box next to I agree to the terms of this License Agreement to accept it.
-
Page 10: Specifications
EdgeRouter Lite Quick Start Guide Specifications EdgeRouter Lite Dimensions 197.52 x 91 x 28 mm Weight 289.2 g Power Input 12VDC, 1A Power Adapter (Included) Button Reset Processor Dual-Core 500 MHz, MIPS64 with Hardware Acceleration for Packet Processing System Memory 512 MB DDR2 RAM Code Storage 2 GB... -
Page 11: Safety Notices
Safety Notices Safety Notices Read, follow, and keep these instructions. Heed all warnings. Only use attachments/accessories specified by the manufacturer. WARNING: Do not use this product in location that can be submerged by water. WARNING: Avoid using this product during an electrical storm. There may be a remote risk of electric shock from lightning. -
Page 12: General Warranty
Buyer for breach of warranty and shall constitute fulfillment of all liabilities of UBIQUITI NETWORKS with respect to the quality and performance of the Products. UBIQUITI NETWORKS reserves the right to inspect all defective Products (which must be returned by Buyer to UBIQUITI NETWORKS factory freight prepaid). -
Page 13: Industry Canada
Compliance Returns In the unlikely event a defect occurs, please work through the dealer or distributor from which this product was purchased. Compliance Changes or modifications not expressly approved by the party responsible for compliance could void the user’s authority to operate the equipment. This device complies with Part 15 of the FCC Rules. -
Page 14: Rohs/Weee Compliance Statement
EdgeRouter Lite Quick Start Guide Japan VCCI-A CE Marking CE marking on this product represents the product is in compliance with all directives that are applicable to it. RoHS/WEEE Compliance Statement English European Directive 2002/96/EC requires that the equipment bearing this symbol on the product and/or its packaging must not be disposed of with unsorted municipal waste. - Page 15 Compliance Español La Directiva 2002/96/CE de la UE exige que los equipos que lleven este símbolo en el propio aparato y/o en su embalaje no deben eliminarse junto con otros residuos urbanos no seleccionados. El símbolo indica que el producto en cuestión debe separarse de los residuos domésticos convencionales con vistas a su eliminación.
-
Page 16: Declaration Of Conformity
UBIQUITI NETWORKS device, megfelel a vonatkozó alapvetõ [Hungarian] követelményeknek és az 1999/5/EC irányelv egyéb elõírásainak. Íslenska Hér me l sir UBIQUITI NETWORKS yfir ví a UBIQUITI NETWORKS device, er í samræmi vi grunnkröfur og a rar kröfur, sem ger ar eru í [Icelandic] tilskipun 1999/5/EC. - Page 17 Declaration of Conformity Latviski Ar o UBIQUITI NETWORKS deklar , ka UBIQUITI NETWORKS device, atbilst Direkt vas 1999/5/EK b tiskaj m pras b m un citiem ar to saist [Latvian] tajiem noteikumiem. Lietuviškai UBIQUITI NETWORKS deklaruoja, kad šis UBIQUITI NETWORKS įrenginys atitinka esminius reikalavimus ir kitas 1999/5/EB...
-
Page 18: Mounting Template
EdgeRouter Lite Quick Start Guide Mounting Template The recommended mounting orientation is horizontal with the ports facing down. Turn this page sideways to mark the holes. Note: The EdgeRouter Lite can also be mounted in a vertical orientation. Keep the page oriented as-is to mark the holes for vertical placement. -
Page 20: Ubiquiti Networks Support
Email: support@ubnt.com Phone (9 a.m. - 5 p.m. PST): 408-942-1153 Online Resources Wiki Page: wiki.ubnt.com Support Forum: forum.ubnt.com Downloads: downloads.ubnt.com w w w . u b n t . c o m © 2012 Ubiquiti Networks, Inc. All rights reserved.
Need help?
Do you have a question about the EdgeRouter Lite ERLite-3 and is the answer not in the manual?
Questions and answers