Advertisement
Table of Contents
- 1 Safety Information
- 2 Explanation of Signal Word Consequences
- 3 Important Notes
- 4 Important Note
- 5 Section 2: Installation
- 6 User Displays
- 7 Section 3: MAINTENANCE
- 8 Section 4: Troubleshooting
- 9 Section 5: Specification and Operating Data
- 10 Section 6: Component Parts List
- 11 Section 6: Front Cover and Drive Assembly
- 12 Section 7: Limited Warranty
- Download this manual
Advertisement
Table of Contents

Related Manuals for aqua-pure CBF100


Summary of Contents for aqua-pure CBF100
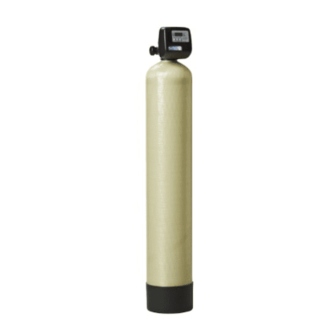
- Page 1 INSTALLATION AND OPERATING INSTRUCTIONS ® AQUA-PURE CBF SERIES RESIDENTIAL BACKWASH FILTRATION SYSTEMS MODELS: CBF100 CBF150 CBF200 Installer, please leave with homeowner. Homeowner, retain for future reference. INSTR2189 0611...
-
Page 3: Safety Information
SAFETY INFORMATION Read, understand, and follow all safety information contained in these instructions prior to installation and use of the CBF Series Residential Backwash Filtration Sys- tems. Retain these instructions for future reference. Failure to follow installation, operation and maintenance instructions may result in property damage and will void warranty. - Page 4 TABLE OF CONTENTS SECTION DESCRIPTION BEFORE INSTALLATION INSTALLATION MAINTENANCE TROUBLESHOOTING SPECIFICATION AND OPERATING DATA COMPONENT PARTS LIST LIMITED WARRANTY • Professional Installation Required: Installation requires shutting water off to home, cutting home water supply pipe and using a soldering torch to add piping and fittings. Specialized tools and skills are required. IMPORTANT: SECTION 1: BEFORE INSTALLATION Inspecting And Handling Your Filtration System: Inspect the equipment for shipping damage.
-
Page 5: Important Note
fl ow rate. Refer to SPECIFICATIONS AND OPERATING DATA for the backwash requirement for models CBF100, CBF150 and CBF200. To measure the pumping rate of your pump, follow these instructions: Make certain no water is being drawn. - Page 6 Facts To Remember While Planning The Installation: CAUTION CAUTION • Installation must comply with existing state or local plumbing codes 1) If lawn sprinkling, geothermal heating/cooling or water for other devices/activities are to be treated by the CBF Series Residential Backwash Filtration System, a larger model system must be selected to accommodate the higher fl...
-
Page 7: Section 2: Installation
SECTION 2: INSTALLATION Proper installation sequence of water conditioning equipment is very important. Refer to the following diagram for your particular water supply. FILTERED WATER FILTERED SOFT WATER PRESSURE TANK BRINE MAKER WELL WATER FILTER SOFTENER PRESSURE SWITCH. CHECK VALVE TYPICAL WELL INSTALLATION FILTERED WATER FILTRED... - Page 8 IMPORTANT NOTES IMPORTANT NOTES • Damage due to heat is not covered under the manufacturer’s warranty and will void the warranty. • The use of fl exible drain lines are prohibited in some states, check with your local code offi cer for requirements. Distance and height affects the perfor- mance of the drain line to discharge at the proper rate to effectively backwash the fi...
- Page 9 Step 4 Please refer to page 6-1 for Component Parts List. Once the fi lter media has been loaded, completely fi ll the media tank with water using a pail or water hose to saturate the media and expel any air out of the media tank.
- Page 10 Step 11 Determination of backwash frequency will vary by media used, the Saturation Time Table amount of water used and the amount of contaminant in the water. Media Time Required Most media should backwash once every four days in backwash fi ltra- tion systems containing activated carbon.
- Page 11 HOW TO SET TIME OF DAY STEP 1 Step 1) Press SET STEP 2 Regen Time Min. Fill Regen Days To Time Regen Use ▲ and ▼ to adjust the current time hour. Time display will be 12 hour with PM indicator with 60 Hz line fre- Step 2) quency detection on power-up.
- Page 12 TO SET TIME OF REGENERATION AND DAYS BETWEEN REGENERATION STEP 1 Follow these steps for initial set-up of or to make adjustments to the time of regeneration and/or the days between regenerations. The number of days between regenerations may need to be varied based on usage and water conditions.
-
Page 13: User Displays
Control Valve Function and Cycles of Operation The AC adapter comes with a 15 foot power cord that is designed for use with the control valve. The AC adapter is for dry location use only. If the power goes out, only the time of day needs to be reset. All other settings are permanently stored in the non-volatile memory. The following chart shows the time for the backwash and rapid rinse cycles for the three available programming options. -
Page 14: Section 3: Maintenance
Section 3: MAINTENANCE At least every six months you should check the time of day setting. Power outages of two (2) hours or less will not affect the time clock as the control valve has the ability to hold the correct time of day due to a battery on the printed circuit board. Power outages of more than two (2) hours will require the resetting of clock to the correct time. -
Page 15: Section 4: Troubleshooting
SECTION 4: TROUBLESHOOTING Problem Possible Cause Solution Timer does not display time of day. Transformer is unplugged Reconnect Transformer No power at outlet Repair working outlet Check circuit breaker in main power box. Damaged transformer Replace transformer Damaged PC board Replace PC board Timer does not display the correct time Outlet on a switched circuit... - Page 16 Problem Possible Cause Solution Media in aerators at the faucets Unit installed backwards Ensure that the piping enters to INLET side of bypass and exits on the OUTLET side. (Refer to red handles on bypass to check for fl ow direction.) Distributor is damaged Remove distributor tube from media tank and in- spect.
-
Page 17: Section 5: Specification And Operating Data
SECTION 5: SPECIFICATION AND OPERATING DATA ITEM CBF100 CBF150 CBF200 Filter Media Volume, cu. ft. (cu. mtr.) (Note 1): 1.0 (0.03) 1.5 (0.04) 2.0 (0.06) Gravel Underbed, lbs. (kg): 13 (5.9) 13 (5.9) 18 (8.2) Service Flow Rate, gpm (lpm) (Note 2): 5 (19) 7 (26.5) -
Page 18: Section 6: Component Parts List
SECTION 6: COMPONENT PARTS LIST Ref. Description CBF100 CBF150 CBF200 Control Valve, Complete, Less Bypass Valve W217530-003-0N W217530-003-0N W217750-003-0N O-ring V3180 V3180 V3180 Bypass Valve V3006 V3006 V3006 Media Tank w/ Base 6236001-1044 6236001-1054 6236001-1252 Distributor Tube 6236435 6236437 6236436... - Page 19 SECTION 6: COMPONENTS ASSEMBLIES BACKWASH FILTER SYSTEM ASSEMBLIES AND COMPONENTS DRIVE CAP ASSEMBLY, DOWNFLOW PISTON, AND SPACE STACK ASSEMBLIES Reference No. Part No. Description Quantity V3005 Spacer Stack Assembly V3004 Drive Cap Assembly V3178 Drive Back Plate V3011 Piston Downfl ow Assembly V3135 O-ring 228 V3180...
-
Page 20: Section 6: Front Cover And Drive Assembly
SECTION 6: FRONT COVER AND DRIVE ASSEMBLY Reference No. Part No. Description Quantity V3175TC-01 Time Clock Front Cover Assembly V3107-01 Motor V3106-01 Drive Bracket & Spring Clip V3108TC Time Clock PC Board V3110 Drive Gear 12 x 36 V3109 Time Clock Cover V3002TC Time Clock Drive Assembly NOT SHOWN... - Page 21 SECTION 6: QUICK CONNECT BYPASS Part Number V3006 Reference No. Part No. Description Quantity V3151 Nut 1” Quick Connect V3150 Split Ring V3105 O-ring Not Shown Part# V3191-01 Vertical Bypass Adapter V3151 1” Quick Connect Nut V3150 Split Ring V3105 O-ring 215 V3191 Vertical Bypass Adapter...
- Page 22 SECTION 6: INSTALLATION FITTING AND ASSEMBLIES Quick Connect Assemblies Part # V3007-02 1” Copper Brass Sweat Adapter Reference Part No. Description: 1” Brass Sweat Assembly Quantity V3151 1” Quick Connect Nut V3150 1” Quick Connect Split Ring V3105 1” Quick Connect O-Ring 215 V3188 1”...
- Page 23 Reference No. Part No. Description Quantity H4615 Elbow Locking Clip PKP10T58-BULK 5/8” Insert Sleeve V3192 Quick Connect 3/4” Drain Elbow Nut V3158-01 Quick Connect 3/4” Drain Elbow V3163 O-ring 019 V3159-01 Drain Line Flow Control Retainer Assembly V3162-042 4.2 gpm Drain Line Flow Control Button V3162-053 5.3 gpm Drain Line Flow Control Button V3162-075...
-
Page 24: Section 7: Limited Warranty
* Water Softeners only 3M is a trademark of 3M Company. 3M Purifi cation Inc. Aqua-Pure is a trademark of 3M Company used under license. 400 Research Parkway All other trademarks are the property of their respective owners. Meriden, CT 06450 ©...
Need help?
Do you have a question about the CBF100 and is the answer not in the manual?
Questions and answers