Table of Contents
Advertisement
Advertisement
Table of Contents

Related Manuals for Bosch BP070


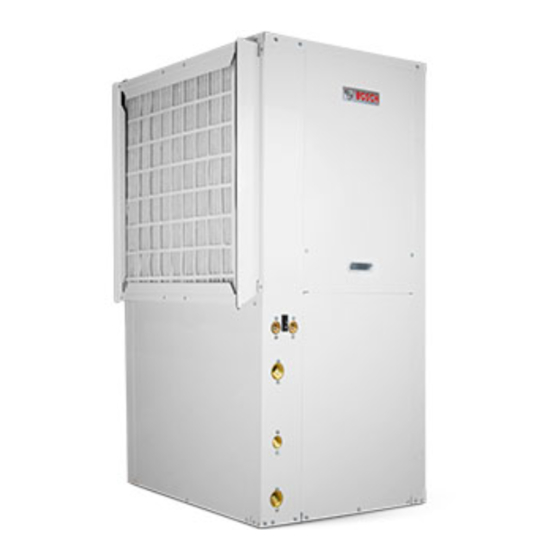
Summary of Contents for Bosch BP070
- Page 1 CP/BP Series Installation and Maintenance Manual 6 720 220 045 Revised 01-11...
- Page 2 ©Copyright 2011 Bosch, Inc All rights reserved...
-
Page 3: Table Of Contents
Table of Contents CP/BP Series TaBle of ConTenTS Model Nomenclature ..................3 Initial Inspection ..................4 General Description ..................4 Moving and Storage ..................4 Safety Considerations .................. 4 Location ....................... 4 Installation ....................5 Mounting Vertical Units ................5 Mounting Horizontal Units ................ -
Page 4: Initial Inspection
CP/BP Series Initial Inspection InITIal InSPeCTIon be left in its shipping carton and stored in a clean, dry area. Units must only be stored or moved in the Be certain to inspect all cartons or crates on each normal upright position as indicated by the “UP” unit as received at the job site before signing the arrows on each carton at all times. -
Page 5: Installation
Installation CP/BP Series InSTallaTIon MounTInG HorIzonTal unITS While horizontal units may be installed on any Remove shipping block under blower housing. level surface strong enough to hold their weight, Loosen compressor mounting bolts. they are typically suspended above a ceiling by threaded rods. -
Page 6: Condensate Drain
CP/BP Series Condensate drain panels, and replacement of air filters for routine (Heat Pumps are not internally trapped). A vertical maintenance. This will ensure proper work space for air vent is sometimes required to avoid air pockets service personnel to perform maintenance or repair. (See Figure #3). -
Page 7: Electrical
Number CP/BP015 450-153 HIGH CP/BP018 450-153 HIGH CP/BP024 450-157 HIGH CP/BP030 450-154 HIGH CP/BP036 450-158 HIGH CP/BP042 450-155 HIGH CP/BP048 450-155 HIGH CP/BP060 450-156 HIGH CP/BP070 450-156 HIGH Revised 01-11 Subject to change without prior notice 6 720 220 045... -
Page 8: Thermostat Connections
(C) side of the to “ON”. transformer, the unit must be provided with a malfunction relay (Bosch option # 660-006) to The factory default for the Freeze setting is in properly energize the light. The relay coil will be Caution “ON”... - Page 9 Thermostat Connections CP/BP Series energized until the low pressure switch closes and the • l.e.d. faulT IndICaTIon—Two L.E.D. indicators anti-short cycle time delay expires. If the low pressure are provided: switch opens 2–4 times in 1 hour, the unit will enter a •...
-
Page 10: Sequence Of Operation
3. Bosch recommends the following guidelines for wiring between a thermostat and the unit: 18 The typical control of a unit is by a thermostat that GA up to 60 foot, 16 GA up to 100 ft and 14 GA senses the temperature in the space. -
Page 11: Fluid Differential Pressure Switch
Sequence of operation CP/BP Series 11 contactor are energized through the contacts of the pressure is reduced causing a loss in heating capacity. reheat relay. See Typical Wiring Diagram page 28. A means of providing higher flow in the heating mode The cooling relay remains de-energized enabling the should be provided. -
Page 12: Water Piping
12 CP/BP Series Water Piping operating Pressures and Temperatures system to avoid possible vibration. Ball valves should be installed in the supply and return lines for unit Operating pressures and temperatures in the reheat isolation and unit water flow balancing. mode vary slightly from standard cooling mode operat- No unit should be connected to the supply or return ing characteristics. -
Page 13: Fresh Water Systems
80°F in the heating mode when equipped with the correct size optional extended range. In the cooling mode, heat is rejected from the Bosch unit into the water loop. A Revised 01-11 Subject to change without prior notice 6 720 220 045... -
Page 14: Unit Start-Up
14 CP/BP Series unit Start up • Verify that the low voltage wiring between the 12. Check for vibrations, leaks, etc... thermostat and the unit is correct 13. Instruct the owner on the unit and thermostat • Verify that the water piping is complete and operation correct MaInTenanCe... -
Page 15: In-Warranty Material Return
66.50 30.00 89.00 22.00 17.75 17.75 V: 28.0 V: 38.0 V: 20”x30”x1” (2) H: 28”x20”x1” (2) H: 54.0 H: 18.5 CP/BP070 26.00 33.50 66.50 30.00 89.00 22.00 17.75 17.75 V: 28.0 V: 38.0 V: 20”x30”x1” (2) * H = Horizontal Unit; V = Vertical Unit... -
Page 16: Fluid Pressure Drops
16 CP/BP Series Unit Specifications Fluid Pressure Drops Table 3: Flow Rate Pressure Pressure Flow Rate Pressure Pressure Model Model (GPM) Drop (FOH) Drop (PSI) (GPM) Drop (FOH) Drop (PSI) 0.61 0.51 1.26 0.91 2.11 1.41 10.1 4.38 2.67 16.9 7.34 4.28 1.00... -
Page 17: Physical Data
334 / 400 360 / 465 CP/BP048 1.11 340 /405 366 / 470 CP/BP060 1.13 396 / 452 422 / 520 CP/BP070 2.27 444 / 494 470 / 562 Revised 01-11 Subject to change without prior notice 6 720 220 045... -
Page 18: Air Temperature Rise/Fall
18 CP/BP Series Unit Specifications Air Temperature Rise/Fall Table 5: COOLING HEATING Entering Fluid Entering Air Temp °F Air Temp Drop °F Entering Air Temp °F Air Temp Rise °F Temp °F 16-8 - 25.1 15.9 - 23.7 14.8 - 22.1 75/63 21.9 - 27.2 20.0 - 28.5... -
Page 19: Refrigerant Pressure Ranges
Unit Specification CP/BP Series 19 Refrigerant Pressure Ranges Table 6: COOLING HEATING Entering Entering Air Temp (Dry Bulb) Entering Air Temp (Dry Bulb) Fluid Fluid Temp Δ T 70 °F 75 °F 80 °F 60 °F 70 °F °F Suction Discharge Suction Discharge... -
Page 20: Blower Performance
1620 1590 1560 1530 1490 1450 1390 High 2400 2350 2325 2300 2260 2205 2200 2195 2167 2105 2085 2060 CP/BP070 Medium 2125 2100 2050 1990 1975 1950 1890 1850 1815 1810 1780 1730 1800 1750 1700 1675 1620 1580... -
Page 21: Typical Wiring Diagrams
Typical Wiring diagrams CP/BP Series 21 TyPICal WIrInG dIaGraMS 1 Stage - 1 Phase - eCM Motor Revised 01-11 Subject to change without prior notice 6 720 220 045... -
Page 22: Single Phase Psc Motor
22 CP/BP Series Typical Wiring diagrams 1 Stage - 1 Phase - PSC Motor 6 720 220 045 Subject to change without prior notice Revised 01-11... -
Page 23: Three Phase 208/230 V Ecm Motor
Typical Wiring diagrams CP/BP Series 23 1 Stage - 1 Phase - direct drive Motor Revised 01-11 Subject to change without prior notice 6 720 220 045... -
Page 24: Three Phase 460 V Ecm Motor
24 CP/BP Series Typical Wiring diagrams 1 Stage - 1 Phase - eCM Motor 6 720 220 045 Subject to change without prior notice Revised 01-11... -
Page 25: Unit Check-Out Sheet
unit Check-out sheet CP/BP Series 25 unIT CHeCK-ouT SHeeT Customer Data Customer Name ________________________________________________ Date __________________________________ Address ________________________________________________________ __________________________________________________________________ Phone __________________________________________________________ Unit Number _________________________ Unit Nameplate Data Unit Make ______________________________________________ Model Number _________________________________________ Serial Number_______________________________ Refrigerant Charge (oz) _____________________ Compressor: RLA ____________________ LRA ______________ Blower Motor: FLA (or NPA) __________... -
Page 26: Troubleshooting
26 CP/BP Series Troubleshooting TrouBleSHooTInG Problem Possible Cause Checks and Corrections Entire unit Power Supply Off Apply power, close disconnect does not run Blown Fuse Replace fuse or reset circuit breaker. Check for correct fuses Voltage Supply Low If voltage is below minimum voltage specified on unit data plate, contact local power company. - Page 27 Troubleshooting CP/BP Series 27 Insufficient Unit undersized Recalculate heating and or cooling loads. If excessive, possibly adding insulation and shading will rectify the problem cooling or heating Check for leaks in duct work or introduction of ambient air Loss of conditioned air by leakage through doors or windows Lack of adequate air flow or improper distribution of air.
- Page 28 601 N.W. 65th Court, Ft. Lauderdale, FL 33309 Phone: 954-776-5471 | Fax: 954-776-5529 www.boschtaxcredit.com | www.fhp-mfg.com...
Need help?
Do you have a question about the BP070 and is the answer not in the manual?
Questions and answers