
Related Manuals for InFocus LitePro 580


Summary of Contents for InFocus LitePro 580
-
Page 1: Table Of Contents
Positioning the projector Connections to the projector Connecting a computer Connecting video equipment Connecting the remote control by cable Powering up and adjusting the LitePro 580 Turning off the LitePro Using the LitePro 580 Basic functions Display mode controls Menu mode controls... - Page 2 Replacing batteries in the remote control Replacing the fuse Troubleshooting Before you call for assistance Common problems and solutions Monitor lights Appendix Compatibility and cabling About broadcast video About computer video Specifications Pin assignments Order information Laptop display activation chart Index LitePro 580 User’s Guide...
-
Page 3: Safety Summary
LitePro. Do not use a power cord if it has become damaged or frayed. Contact your In Focus dealer or call In Focus if you need to replace your LitePro power cord. - Page 4 LitePro. Do not disassemble All service must be performed by an authorized In Focus service center. The only user-serviceable part in the LitePro is the projection lamp, which you can replace by opening the lamp cover on the bottom of the projector.
-
Page 5: Introduction
Introduction The In Focus Systems LitePro 580 is a multimedia projector designed for portability, durability, and ease of use. It displays the brightest and clearest images generated by your computer and video equip- ment. The LitePro 580 connects to most IBM-compatible and Macintosh computers. -
Page 6: Unpacking The Projector
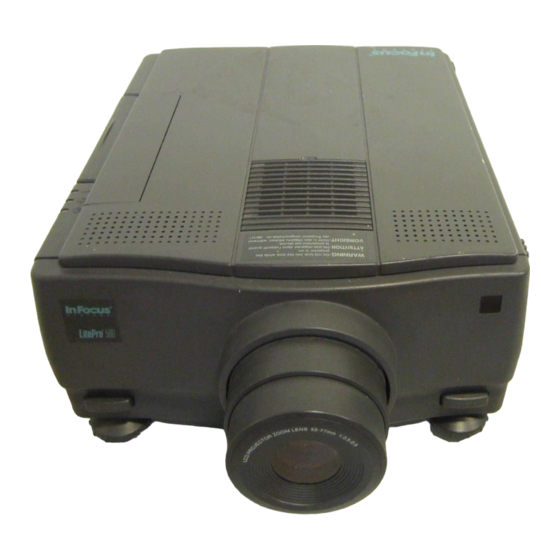
Quick Start card at the front of this manual. For complete details on connecting and operating the projector, refer to the appropriate chap- ters in this manual. Shipping Box Contents 1. LitePro 580 LCD projector 8. Remote control 2. Lens cover 9. Batteries for the remote control 3. - Page 7 Introduction LitePro 580—Front and rear view speakers projector control panel remote control receiver lens zoom ring handle lens focus ring connector ports elevator foot button temperature monitor elevator foot lamp monitor operation monitor fan intake grill power switch power cord...
-
Page 8: Compatibility
Introduction LitePro 580—Bottom view fan intake grill lamp cover elevator feet Compatibility The LitePro 580 is compatible with a wide variety of computers and video devices, including: • IBM-compatible desktop and laptop systems • Macintosh systems (including LC, Performa, Quadra, PowerBook, and Power Mac units) •... -
Page 9: Cables And Adapters
Introduction Cables and adapters The LitePro 580 comes with these cables and adapters: • VGA cable, a Y-shaped cable that connects the LitePro to your computer and its monitor. Its ends are labeled “LCD,” “Monitor,” and “VGA.” • Two Macintosh adapters for the VGA cable. -
Page 10: If You Need Assistance
The first place to look for help is in this manual. Check the chapter on “Troubleshooting” beginning on page 55. If this manual does not answer your question, call your In Focus dealer. You can also call In Focus Technical Support directly at 1-800-294-6400 . -
Page 11: Setting Up The Litepro 580
1. Choose a location where you can dim the lighting. • To use the LitePro in a well-lit room, use a special high gain screen, which you can obtain from your In Focus dealer. 2. Place the LitePro on a flat surface. -
Page 12: Positioning The Projector
Connections to the projector The connection ports of the LitePro 580 are located on the right side of the projector, just below the handle. Push lightly on the panel labeled “Push” to reveal them. Cables from your computer or video source as well as cables to speakers, control devices, and low voltage powered equipment connect to the projector here. -
Page 13: Connecting A Computer
Macintosh differ slightly from those to an IBM-compatible computer. Connections to a desktop unit differ from those to a laptop. The LitePro 580 works with IBM, IBM-compatible, and Macintosh computers that have a video RGB output port. To connect your computer, you need the Y-shaped VGA cable. If you have a Macintosh, you also need the Macintosh adapters. - Page 14 Setting up the LitePro 580 Connecting an IBM-compatible desktop computer 1. Plug the LCD connector on the VGA cable into the projector’s Computer port. 2. Unplug the monitor cable from the computer’s graphic port. 3. Plug the monitor cable that you just removed into the MONITOR connector on the VGA cable.
- Page 15 Setting up the LitePro 580 Connecting a Macintosh desktop computer 1. Attach one Mac adapter to the VGA connector and one Mac adapter to the MONITOR connector of the VGA cable. 2. Plug the LCD connector on the VGA cable into the projector’s Computer port.
- Page 16 Setting up the LitePro 580 Connecting an IBM-compatible laptop computer 1. Plug the LCD connector on the VGA cable into the projector’s Computer port. 2. Plug the VGA connector on the VGA cable into the laptop’s graphics port. 3. Tighten the thumb screws on the connectors to ensure proper grounding.
- Page 17 Setting up the LitePro 580 Connecting a Macintosh PowerBook 1. Attach one Mac adapter to the VGA connector of the VGA cable. 2. Plug the LCD connector on the VGA cable into the projector’s Computer port. 3. Plug the VGA connector (with the Mac adapter) on the VGA cable into the PowerBook’s video port.
-
Page 18: Connecting Video Equipment
Setting up the LitePro 580 Connecting video equipment When connecting your VCR, camcorder, laser disc player, or other video source, use the A/V cable included with the projector and the LitePro 580’s ports marked “Video.” The projector also accommodates higher quality S-Video signals. A round, four-pin connector S-Video cable is not included with the projector but is usually supplied with your video equipment. - Page 19 Setting up the LitePro 580 Connecting audio/video equipment 1. Plug the yellow connector of the audio/video cable into the “Video Out” or “To Monitor” port on your video equipment. To use the S-Video connection, plug the S-Video cable into the “S-Video Out”...
- Page 20 You can use an external public address system or an external self- amplified speaker system for presentations in large halls or lecture rooms. To connect the LitePro 580 to an external sound system, use an audio cable (3.5mm stereo mini plug), an optional accessory available from your In Focus dealer.
-
Page 21: Connecting The Remote Control By Cable
Setting up the LitePro 580 Connecting the remote control by cable If the projector cannot receive the remote’s signal, as may be the case if you are using rear projection, you can connect the remote directly to the LitePro with a cable. The remote cable is an optional accessory available from your In Focus dealer. -
Page 22: Powering Up And Adjusting The Litepro 580
Setting up the LitePro 580 Powering up and adjusting the LitePro 580 1. Turn the power switch on. • Allow ten seconds for the image to appear and 25 seconds for full illumination. • The lamp monitor begins flashing green. Once the projector has warmed up, the lamp monitor stops flashing and lights steadily in green. - Page 23 Setting up the LitePro 580 4. Adjust the height of the projected image. • Raise the front of the projector to the desired angle. • Press the elevator foot buttons until each foot touches the tabletop. • Release the elevator foot buttons.
-
Page 24: Turning Off The Litepro
Setting up the LitePro 580 5. Adjust sync or brightness to fine tune the image. 6. Adjust the volume with the volume control on the projector or the remote control if you have audio input. Turning off the LitePro If you want to turn off the projector for a short period of time, press the Standby button on the projector or the remote control. -
Page 25: Using The Litepro 580
Using the LitePro 580 This section explains how to operate the projector. It provides a reference to the projector and remote control buttons and the menu commands. Basic functions The projector has two modes of operation: display mode menu mode . - Page 26 This optional cable is available from your In Focus dealer. In menu mode, the trackball, the Adjust buttons, and the Menu Select button become active. For more information see “Menu mode controls”...
-
Page 27: Display Mode Controls
Using the LitePro 580 Display mode controls When your computer or video equipment is projecting an image, your projector is in display mode. The buttons on the projector or the remote control provide basic control of how the image is displayed. A... -
Page 28: Menu Mode Controls
Using the LitePro 580 Menu mode controls The LitePro 580’s on-screen menus allow you to adjust the projector’s input, output, and operational settings. These include settings for: • controlling computer input and output (Computer menu) • controlling video input and output (Video menu) •... -
Page 29: Using The Menus
Using the LitePro 580 Using the menus To make adjustments to the projector’s settings, place the projector in menu mode, select the desired menu and menu item, and then change the setting. 1. To place the projector in menu mode, press “Menu” on the projector or the remote control. -
Page 30: Reference To Menu Functions
Using the LitePro 580 Reference to menu functions Computer menu functions Menu item Function Source Indicates input is from a computer or video equipment. Brightness Adjusts image brightness; increases or decreases the brightness of white. Contrast Adjusts image contrast; increases or decreases the difference in brightness between black and white. - Page 31 Using the LitePro 580 Video menu functions Menu item Function Source Indicates input is from a computer or video equipment. Brightness Adjusts image brightness; increases or decreases the brightness of white. Contrast Adjusts image contrast; increases or decreases the difference in brightness between black and white.
- Page 32 Using the LitePro 580 Display menu functions Menu item Function Source Indicates input is from a computer or video equipment. Horiz Adjusts the horizontal display position of the image. Vert Adjusts the vertical display position of the image. Menu Indicates where menu will be displayed on screen.
- Page 33 Using the LitePro 580 Audio menu functions Menu item Function Source Indicates input is from a computer or video equipment. Volume Adjusts sound volume. Balance Adjusts sound balance between the left and right speaker. Audio Activates the audio input from the computer source (C), Source the video source (V), or from either active source (C or V).
- Page 34 Using the LitePro 580 Options menu functions Menu item Function Source Indicates whether input is from a computer or video equipment. Prompt Displays temporarily at the top of the screen the source of the input. Backgnd Chooses the background pattern that is displayed when the projector and lamp are running and no input signal is being received.
- Page 35 Using the LitePro 580 Custom menu functions Menu item Function Source Indicates input is from a computer or video equipment. Pattern Enables the remote’s Custom button to blank the screen to a test pattern. Serial Enables the remote’s Custom button to activate LP Utilities.
-
Page 36: Using Lp Utilities
Using LP Utilities The LitePro 580 projector provides even greater ease of use with LP Utilities, which include two software programs: LP-Link and LP Remote Programmer. LP-Link allows you to operate the projector directly from the computer. LP Remote Programmer allows you to use the trackball and five programmable buttons on the remote control to operate the presentation software and control projector functions. -
Page 37: Installing The Lp Utilities Software
Enter A:\SETUP (if you inserted the diskette in drive A:) to start the installation process. For Macintosh computers: • Double-click the diskette icon to open it. • Double-click the LP Utilities icon to start the installation process. LitePro 580 User’s Guide... -
Page 38: Lp-Link Utility
Launch the LP-Link program and a window opens displaying two areas: • a control panel on the right, marked “Control,” to control basic functions, and • individual control panels on the left, marked “Adjustment,” to adjust settings. LitePro 580 User’s Guide... - Page 39 Selects either a computer or a video device as the source of the signal to be projected. Freeze Freezes the image. To cancel, click the icon again. Mute Shuts off the audio. To cancel, click the icon again. LitePro 580 User’s Guide...
- Page 40 • Click “Reset” to reset the value to their original settings. 3. Close the dialog box. • Click “OK” to save any changes and close the dialog box. You cannot access this dialog when video is being displayed. LitePro 580 User’s Guide...
- Page 41 • Click “Reset” to reset the value to their original settings. 3. Close the dialog box. • Click “OK” to save any changes and close the dialog box. You cannot access this dialog when computer input is being displayed. LitePro 580 User’s Guide...
- Page 42 • Click an option button under Audio Source to select one of three options. • Click “Reset” to reset the value to their original settings. 3. Close the dialog box. • Click “OK” to save any changes and close the dialog box. LitePro 580 User’s Guide...
- Page 43 • Click a check box to select it. Click it again to deselect it. • Click “Reset” to reset the value to their original settings. 3. Close the dialog box. • Click “OK” to save any changes and close the dialog box. LitePro 580 User’s Guide...
- Page 44 • Click a check box to select it. Click it again to deselect it. • Click “Reset” to reset the value to their original settings. 3. Close the dialog box. • Click “OK” to save any changes and close the dialog box. LitePro 580 User’s Guide...
- Page 45 • Click an option button to select one of four options. • Click “Reset” to reset the values to their original settings. 3. Close the dialog box. • Click “OK” to save any changes and close the dialog box. LitePro 580 User’s Guide...
-
Page 46: Lp Remote Programmer Utility
All buttons except the five programmable ones are displayed in gray to indicate that they are unavailable. The text box next to each programmable button shows the keystrokes currently assigned to it. Enter keystrokes here Saves changes Deletes changes Assigned keystrokes are displayed here LitePro 580 User’s Guide... - Page 47 Record button to stop recording, type [SC] (including the brackets), then click Record to start recording again. 4. Click “OK” to stop recording. 5. Repeat steps 1-4 for the other buttons. 6. Save the template by choosing “Save” from the File menu. LitePro 580 User’s Guide...
- Page 48 Left Button Double-Click [MLBDC] Left Button Down [MLBD] Left Button Up [MLBU] Left Button Drag On/Off [MLBDG] Right Button Click [MRBC] Right Button Double-Click [MRBDC] Right Button Down [MRBD] Right Button Up [MRBU] Right Button Drag On/Off [MRBDG] LitePro 580 User’s Guide...
- Page 49 Press a programmed button. LP Remote Programmer displays the keystrokes assigned to the button. To increase or decrease trackball speed on the remote control, choose the desired speed from “Mouse Speeds” in the Special menu. LitePro 580 User’s Guide...
-
Page 50: Maintenance
If you are having problems with your LitePro, refer to the “Troubleshooting” section of this manual. Call In Focus Technical Support if necessary. If your LitePro needs repair, they will refer you to an In Focus Authorized Service Provider. -
Page 51: Cleaning The Remote Control
Be very careful not to press hard on the rubber roller; if it gets out of alignment, the trackball will not work prop- erly. Replace the trackball. 8. Replace the trackball cover. Turn it clockwise to lock it in place. LitePro 580 User’s Guide... -
Page 52: Cleaning The Fan Intake Filter
4. Replace the filter. • First, insert the side with tabs, and then press the other end in place. • If the filter cannot be cleaned or is damaged, contact your In Focus dealer for a replacement. LitePro 580 User’s Guide... -
Page 53: Replacing The Projection Lamp
Be sure to replace it with another metal halide lamp. You can order replacement lamps from In Focus. Refer to “Order information” on page 66 for information. Follow these steps to replace the lamp module. - Page 54 5. Replace the lamp cover. • Reposition the cover in place. • Replace the screws and tighten them. Never operate the LitePro with the lamp cover open or removed. This disrupts the airflow and causes the LitePro to overheat. LitePro 580 User’s Guide...
-
Page 55: Replacing Batteries In The Remote Control
1. Slide the battery cover off the end of the remote. 2. Remove the old batteries. 3. Install two new AAA alkaline batteries. Make sure each is installed in the correction orientation. 4. Slide the battery cover back on the remote. LitePro 580 User’s Guide... -
Page 56: Replacing The Fuse
2. Turn off and unplug the projector. 3. Remove the fuse holder, located just below the power cord con- nector, from the projector. • Pull out the fuse holder with a screwdriver as shown. LitePro 580 User’s Guide... - Page 57 Maintenance 4. Remove the blown fuse from the fuse holder. 5. Push the new fuse into the clips of the holder until it is securely seated. 6. Place the fuse holder back in position. LitePro 580 User’s Guide...
-
Page 58: Troubleshooting
1. Make sure you have connected the LitePro to your equipment as described in section “Setting up the LitePro 580” beginning on page 7. 2. Check cable connections. Verify that all computer, video, and power cables are properly connected. -
Page 59: Common Problems And Solutions
• Make sure the lamp is not too hot to operate. It will not light if it is. Problem: Picture is blurred or only part of image is in focus • Focus the lens. • Make sure the projector is not too close or too far from the screen. - Page 60 • Adjust Volume. • Press the Mute button. • Adjust Fade to balance the internal and any external speaker. Problem: Image is too wide or narrow for screen • Adjust Tracking to reduce or enlarge the projected image. LitePro 580 User’s Guide...
- Page 61 • Make sure nothing is blocking the remote control receiver on the projector. • Make sure you are not too far from the projector when using the remote. It has a limited range. LitePro 580 User’s Guide...
-
Page 62: Monitor Lights
Orange Internal temperature of the projector is too high. Lamp turns off automatically (Solution: Make sure the fan intake grill is not obstructed or dirty. Allow projector to cool before turning on lamp by pressing “Standby.” LitePro 580 User’s Guide... - Page 63 Standby button or change lamp.) Operation monitor Color Explanation Orange Projector in Standby. Green Projector and lamp operating. Flashing green Signal from remote control being received. Flashing red Problem with the projector. (Solution: Turn power switch off and then on.) LitePro 580 User’s Guide...
-
Page 64: Appendix
(S-Video) PAL, SECAM 768x576** Monochrome only; requires special cable. The LitePro 580 displays only 640x480 images; images of higher resolution will be compressed or cropped. About broadcast video Most broadcast video signals in the world are one of three standards: •... -
Page 65: About Computer Video
Computer video generates five separate signals for IBM compatible computers: red, green, blue, H-sync and V-sync. It provides four separate signals for Macintosh computers: red, green, blue, and composite sync. These types of signal are called RGB for red, green, and blue. LitePro 580 User’s Guide... -
Page 66: Specifications
Projection range 3.9 to 40.4 feet (1.2 to 12.3 m) Zoom ratio 1:1.4 Image size 21 in. to 300 in. (.5 m to 7 m) Temperature Operating 5° to 40° C Non-operating -20° to 60° C LitePro 580 User’s Guide... -
Page 67: Pin Assignments
D-style connector. The table below lists its pin assignments. Input Pin Signal Description Output Pin Vertical sync Horizontal sync Blue analog Intensity digital Green digital Red analog Blue digital Red digital Green analog input with composite sync LitePro 580 User’s Guide... -
Page 68: Pin Assignments
15-pin micro-D-style connector. The table below lists the pin assignments for both connectors. Signal Description Red analog input Green analog input with composite sync Blue analog input Red GND Green GND Blue GND Sync GND Horizontal sync/composite sync input Vertical sync input LitePro 580 User’s Guide... -
Page 69: Order Information
Appendix Order information The following In Focus products, used with the LitePro 580, can be ordered from your In Focus dealer. Part Number Standard Accessories (ship with LitePro) LitePro 580 User’s Guide 010-0097-xx Lens cover 340-0182-xx VGA cable 210-0014-xx Mac adapter for VGA cable... -
Page 70: Laptop Display Activation Chart
2 CRT/X at DOS prompt reboot Walkabout Datavue Ctrl-Shift-M Ctrl-Shift-M Dell* Ctrl-Alt-< Ctrl-Alt-> Ctrl-Alt-F10 Ctrl-Alt-F10 Digital automatic reboot FN-F2 FN-F2 Dolch dip switch to CRT dip switch to LCD Epson dip switch to CRT dip switch to LCD LitePro 580 User’s Guide... - Page 71 CRT dip switch to LCD SPARC-Dataview Ctrl-Shift-M Ctrl-Shift-M Tandy* ** Ctrl-Alt-Insert Ctrl-Alt-Insert setup screen option setup screen option Texas Instruments setup screen option setup screen option Top-Link* ** setup screen option setup screen option FN-F6 FN-F6 LitePro 580 User’s Guide...
- Page 72 These manufacturers have other models that automatically send video to the external CRT port when some type of display device is attached. ** These manufacturers offer more than one key command depending on the computer model. LitePro 580 User’s Guide...
-
Page 73: Index
Function Adjust 24 buttons Function Select 24 on projector, function 23 Menu 24 on remote, function 23 Menu Select 24 Mute 23 Standby 23 Sync 23 Video 23 Volume 23 Custom menu 31 Custom, remote button 23 LitePro 580 User’s Guide... -
Page 74: Connecting Your Computer
44 compatibility 4 LP Utilities 31 connecting desktop models 10 connecting your computer 33 connecting laptops 12 description 33 enabling 30 installing software 34 LP Remote Programmer 43 LP-Link 35 using 33 LitePro 580 User’s Guide... - Page 75 2, 7 Mac LC 26 Power Save, menu item 30 Menu 28 PowerBooks Mode 27 connecting 13 Pattern 31 external monitor activation Power Save 30 commands 68 Prompt 30, 31 projection lamp, replacing 50 Rear Proj 28 LitePro 580 User’s Guide...
- Page 76 17, 22 Upside down, menu item 28 not working 58 programming 33 range 22 trackball 22 use of 22 Reset ALL, menu item 30 Reset, menu item 26, 27, 28, 29, 31 reversing colors 28 LitePro 580 User’s Guide...
- Page 77 Video control panel button 23 menu 27 remote button 23 video equipment, connecting 5, 14 Video Mode, menu item 27 Volume adjusting 29 control panel button 23 menu item 29 remote button 23 zoom lens 18 LitePro 580 User’s Guide...
- Page 78 Product for personal or business use and not for the purpose of distribution or resale. Said warranty shall continue for a period of one (1) year from the date of such purchase. In Focus does not warrant that the Product will meet the specific requirements of the first person or entity that purchases the Product for personal or business use.
- Page 79 Part Number 010-0097-01...
Need help?
Do you have a question about the LitePro 580 and is the answer not in the manual?
Questions and answers