
Related Manuals for InFocus LP580


Summary of Contents for InFocus LP580
-
Page 1: Table Of Contents
Usage guidelines If you need assistance Setting up the LitePro 580 Getting started Positioning the projector Connections to the projector Connecting a computer Connecting video equipment Connecting the remote control by cable Powering up and adjusting the LitePro 580 Turning off the LitePro... - Page 2 Maintenance Cleaning the lens Cleaning the remote control Cleaning the fan intake filter Replacing the projection lamp Replacing batteries in the remote control Replacing the fuse Troubleshooting Before you call for assistance Common problems and solutions Monitor lights Appendix Compatibility and cabling About broadcast video About computer video Specifications...
-
Page 3: Safety Summary
LitePro: Do not look into the lens! Be very careful not to look into the projection lens when the projector is turned on. The bright light may harm your eyes. Be especially careful to keep children from looking into the lens. - Page 4 The only user-serviceable part in the LitePro is the projection lamp, which you can replace by opening the lamp cover on the bottom of the projector. Do not open any other part of the LitePro. LitePro 580 User’s Guide...
-
Page 5: Introduction
Introduction The In Focus Systems LitePro 580 is a multimedia projector designed for portability, durability, and ease of use. It displays the brightest and clearest images generated by your computer and video equip- ment. The LitePro 580 connects to most IBM-compatible and Macintosh computers. -
Page 6: Unpacking The Projector
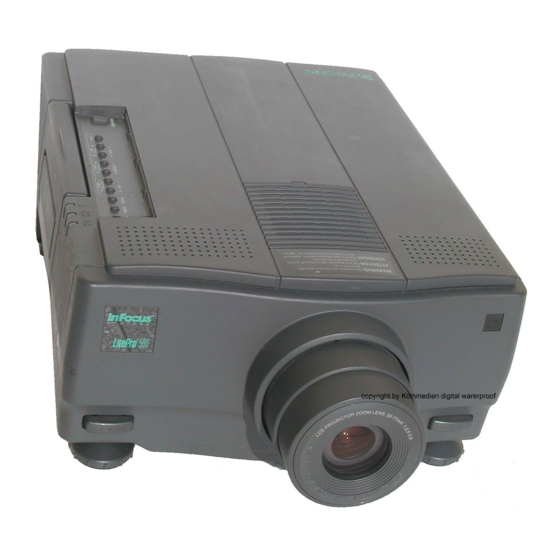
Introduction Unpacking the projector The projector comes with the parts shown below. Check to make sure all are included. If any parts are missing, contact your dealer immedi- ately. If you are experienced in setting up presentation systems, use the Quick Start card at the front of this manual. - Page 7 Introduction LitePro 580—Front and rear view speakers projector control panel remote control receiver lens zoom ring handle lens focus ring connector ports elevator foot button temperature monitor elevator foot lamp monitor operation monitor fan intake grill power switch power cord...
-
Page 8: Compatibility
Introduction LitePro 580—Bottom view elevator feet Compatibility The LitePro 580 is compatible with a wide variety of computers and video devices, including: • IBM-compatible desktop and laptop systems • Macintosh systems (including LC, Performa, Quadra, PowerBook, and Power Mac units) •... -
Page 9: Cables And Adapters
Use extreme care when handling the projector. We recommend that you let the projector cool before lifting it. • Do not block the ventilating grill on the left side of the projector. Restricting the air flow can cause it to overheat and shut down automatically. -
Page 10: If You Need Assistance
Introduction If you need assistance The first place to look for help is in this manual. Check the chapter on “Troubleshooting” beginning on page 55. If this manual does not answer your question, call your In Focus dealer. You can also call In Focus Technical Support directly at 1-800-294-6400 through Friday. -
Page 11: Setting Up The Litepro 580
This chapter describes how to position the LitePro for optimum viewing, how to connect computers and video equipment to the LitePro, and how to power up the projector. Getting started 1. Choose a location where you can dim the lighting. -
Page 12: Positioning The Projector
The table below indicates the size of the screen image when using the maximum or minimum zoom at various distances. Approximate size of image determined by distance of the projector to the screen Distance to screen in ft. (m) Diagonal image size in ft. -
Page 13: Connecting A Computer
To connect your computer, you need the Y-shaped VGA cable. If you have a Macintosh, you also need the Macintosh adapters. We recommend that you turn off your computer, monitor and projector whenever you connect or disconnect cables. LitePro 580 User’s Guide... - Page 14 Setting up the LitePro 580 Connecting an IBM-compatible desktop computer 1. Plug the LCD connector on the VGA cable into the projector’s Computer port. 2. Unplug the monitor cable from the computer’s graphic port. 3. Plug the monitor cable that you just removed into the MONITOR connector on the VGA cable.
- Page 15 1. Attach one Mac adapter to the VGA connector and one Mac adapter to the MONITOR connector of the VGA cable. 2. Plug the LCD connector on the VGA cable into the projector’s Computer port. 3. Unplug the monitor cable from the computer’s monitor port.
- Page 16 Setting up the LitePro 580 Connecting an IBM-compatible laptop computer 1. Plug the LCD connector on the VGA cable into the projector’s Computer port. 2. Plug the VGA connector on the VGA cable into the laptop’s graphics port. 3. Tighten the thumb screws on the connectors to ensure proper grounding.
- Page 17 Connecting a Macintosh PowerBook 1. Attach one Mac adapter to the VGA connector of the VGA cable. 2. Plug the LCD connector on the VGA cable into the projector’s Computer port. 3. Plug the VGA connector (with the Mac adapter) on the VGA cable into the PowerBook’s video port.
-
Page 18: Connecting Video Equipment
The projector automatically detects the broadcast signal of the video input and accommodates the major broadcast systems: NTSC, PAL and SECAM. The projector also allows you to lock the projector to a specific broadcast system signal. (See “Video Mode” on page 27.) However, if the video signal does not match the locked broadcasting system, the projector won’t reproduce the video image properly. - Page 19 To connect a monaural signal, use only the “Audio 3. Plug the other yellow connector of the audio/video cable into the “Video In” port on the projector. If you are using S-Video, plug the other end of the S-Video cable into the projector’s “S-Video”...
- Page 20 (3.5mm stereo mini plug), an optional accessory available from your In Focus dealer. 1. Plug one end of the audio cable into the “Audio Out” port on the projector. 2. Plug the other end of the cable into the corresponding “Audio In” jack on the external speaker(s).
-
Page 21: Connecting The Remote Control By Cable
Setting up the LitePro 580 Connecting the remote control by cable If the projector cannot receive the remote’s signal, as may be the case if you are using rear projection, you can connect the remote directly to the LitePro with a cable. The remote cable is an optional accessory available from your In Focus dealer. -
Page 22: Powering Up And Adjusting The Litepro 580
The bright light may 2. Focus the image. • Turn the focus ring on the projector until the image is sharp. 3. Adjust the projected image size. • First alter the distance from the projector to the screen, then adjust the image size by turning the X1.4 zoom lens ring until... - Page 23 4. Adjust the height of the projected image. • Raise the front of the projector to the desired angle. • Press the elevator foot buttons until each foot touches the tabletop. • Release the elevator foot buttons. • Fine tune the height by manually turning each foot. Turn clockwise to lower the foot, counterclockwise to raise it, as shown in the illustration on the next page.
-
Page 24: Turning Off The Litepro
Turning off the LitePro If you want to turn off the projector for a short period of time, press the Standby button on the projector or the remote control. This turns off the lamp but keeps the projector running. -
Page 25: Using The Litepro 580
Using the LitePro 580 This section explains how to operate the projector. It provides a reference to the projector and remote control buttons and the menu commands. Basic functions The projector has two modes of operation: mode . In display mode, while images are projected, you can control image sync to stop flickering, image brightness, image freezing, volume, muting, and the source of the video signal. - Page 26 The range for optimum operation is within 30 degrees of the receiver at a distance of about 35 feet (10 meters). If you can’t aim the remote control at the projector so that its signal is received—for example, when using rear projection—you can connect the remote directly to the projector with a cable.
-
Page 27: Display Mode Controls
Display mode controls When your computer or video equipment is projecting an image, your projector is in display mode. The buttons on the projector or the remote control provide basic control of how the image is displayed. A summary of these controls follows:... -
Page 28: Menu Mode Controls
Using the LitePro 580 Menu mode controls The LitePro 580’s on-screen menus allow you to adjust the projector’s input, output, and operational settings. These include settings for: • controlling computer input and output (Computer menu) • controlling video input and output (Video menu) •... -
Page 29: Using The Menus
1. To place the projector in menu mode, press “Menu” on the projector or the remote control. • The Computer menu appears at the bottom of the screen. -
Page 30: Reference To Menu Functions
Adjusts the intensity of blue. Text Compresses image display of DOS text screens wider than the projector’s image area. Select only if using DOS. Mac LC Adjusts tracking and removes fuzzy vertical bars when using any Macintosh. This option appears and replaces “Text”... - Page 31 Menu item Function Source Indicates input is from a computer or video equipment. Brightness Adjusts image brightness; increases or decreases the brightness of white. Contrast Adjusts image contrast; increases or decreases the difference in brightness between black and white. Sharpness Sharpens the image.
- Page 32 Using the LitePro 580 Menu item Function Source Indicates input is from a computer or video equipment. Horiz Adjusts the horizontal display position of the image. Vert Adjusts the vertical display position of the image. Menu Indicates where menu will be displayed on screen. Select bottom or top display.
- Page 33 Menu item Function Source Indicates input is from a computer or video equipment. Volume Adjusts sound volume. Balance Adjusts sound balance between the left and right speaker. Audio Activates the audio input from the computer source (C), Source the video source (V), or from either active source (C or V). Bass Adjusts low tones.
- Page 34 Displays temporarily at the top of the screen the source of the input. Backgnd Chooses the background pattern that is displayed when the projector and lamp are running and no input signal is being received. Select “Test Pattern,” “Black” background, or “Blue” background. Serial Enables LP Utilities.
- Page 35 Menu item Function Source Indicates input is from a computer or video equipment. Pattern Enables the remote’s Custom button to blank the screen to a test pattern. Serial Enables the remote’s Custom button to activate LP Utilities. (See “Using LP Utilities” starting on page 35.) Blank Enables the remote’s Custom button to blank the screen to blue, white, or black.
-
Page 36: Using Lp Utilities
Using LP Utilities The LitePro 580 projector provides even greater ease of use with LP Utilities, which include two software programs: LP-Link and LP Remote Programmer. LP-Link allows you to operate the projector directly from the computer. LP Remote Programmer allows you to use the trackball and five programmable buttons on the remote control to operate the presentation software and control projector functions. -
Page 37: Installing The Lp Utilities Software
Using LP Utilities IBM-Compatible PC Macintosh 4. Turn on the projector, monitor, and computer. Installing the LP Utilities software To install the LitePro Utilities software, insert the LP Utilities diskette into your computer. For IBM-compatible computers, running Microsoft Windows •... -
Page 38: Lp-Link Utility
LP-Link Utility The LP-Link utility allows you to control your projector from your computer. Having this control on the computer monitor avoids displaying menus and making adjustments on the projection screen during a presentation. Launch the LP-Link program and a window opens displaying two areas: •... - Page 39 Using LP Utilities Using the control icons The LP-Link function controls are the same as those on the projector and the remote. Select a button to change its setting. Select and hold down the mouse button to increase or decrease values. A list of the...
- Page 40 Using the adjustment control panels LP-Link’s adjustment control panel allows you to adjust the projector’s input, output, and operational settings. Adjusting the Computer settings 1. Double-click the Computer control panel icon. • The Computer settings dialog box appears. Adjusts image...
- Page 41 Using LP Utilities Adjusting the Video settings 1. Double-click the Video control panel icon. • The Video settings dialog box appears. Adjusts image brightness Adjusts image contrast Adjusts the sharpness of the image Adjusts the color density of the image Adjusts the tint Resets changes to default settings 2.
- Page 42 Adjusting the Audio settings 1. Double-click the Audio control panel icon. • The Audio settings dialog box appears. Adjusts the volume Adjusts bass Adjusts treble Adjusts the balance between the left and right speakers Adjusts the audio level between the internal and exter- nal speakers Resets changes to default settings...
- Page 43 Using LP Utilities Adjusting the Display settings 1. Double-click the Display control panel icon. • The Display settings dialog box appears. Sets the color of the display when the screen is blank Flips image hor- izontally for rear projection Flips image verti- cally so it appears upside down Inverts the colors...
- Page 44 • Click “OK” to save any changes and close the dialog box. LitePro 580 User’s Guide Using LP Utilities Activates on- screen display of input source Enables the LP Remote Programmer Places projector in standby when powered on Indicates source of input Closes dialog box...
- Page 45 Using LP Utilities Adjusting the Custom settings 1. Double-click the Custom control panel icon. • The Custom Key settings dialog box appears. Displays the back- ground pattern. Enables LP Remote Programmer Blanks the screen to selected pattern Displays input source on screen 2.
-
Page 46: Lp Remote Programmer Utility
LP Remote Programmer Utility LP Remote Programmer allows you to use the remote’s trackball as you do your computer’s mouse, control presentation software as an electronic clicker, and customize buttons to carry out commands. It also provides button templates for popular presentation software applications. - Page 47 Using LP Utilities Macros and templates A sequence of keystrokes assigned to a button is called a macro. A set of macros is stored in a file called a template. You can create as many templates as you like: one for each presentation software application, for example.
- Page 48 To type a macro: 1. Click the button you want to program. (You can also press Enter on an IBM-compatible computer or Select on a Macintosh to select a button to program.) • The text box at the top of the window displays the keystrokes that are already assigned to the button.
- Page 49 Using LP Utilities To include non-character keys on Apple Macintosh computers: • Use the recording method as described on the previous page; simply press the keys you want to include. Open “Mouse/ Special Buttons” in the Special menu to insert non-character keys.
-
Page 50: Maintenance
Maintenance This section describes how to: • clean the lens • clean the air filter • replace the projection lamp • replace the batteries in the remote control • replace the fuse Except for the projection lamp, there are no user- cause electric shock! If you are having problems with your LitePro, refer to the “Troubleshooting”... -
Page 51: Cleaning The Remote Control
Follow these steps to clean the trackball and the remote control. 1. Turn off the projector. 2. Using 2 pointed objects, such as pens, remove the trackball cover. Put the pointed ends into the two holes in the trackball cover. -
Page 52: Cleaning The Fan Intake Filter
Cleaning the fan intake filter The fan intake filters on the bottom and top of the projector catch dust and particles in the air. If a filter becomes clogged, the projector will not cool properly and may malfunction. To prevent this, clean the filters after every 100 hours of use. -
Page 53: Replacing The Projection Lamp
Maintenance Replacing the projection lamp If the lamp fails to come on and the lamp monitor on the projector lights in red, you must replace the bulb. Be sure to replace it with another metal halide lamp. You can order replacement lamps from In Focus. Refer to “Order information”... - Page 54 Do not drop the lamp module or touch the glass 4. Fit the new lamp in place. • Align the lamp in the correct direction. • Lightly press on it until it touches bottom. • Tighten the two screws. 5. Replace the lamp cover. •...
-
Page 55: Replacing Batteries In The Remote Control
Maintenance Replacing batteries in the remote control The life of the remote batteries depends on how often and how long you use the remote. Symptoms of low battery charge include erratic responses when using the remote and a reduced range where the remote works. -
Page 56: Replacing The Fuse
Follow these steps to replace the fuse. 1. Make sure that the condition that caused the fuse to blow no longer exists. 2. Turn off and unplug the projector. 3. Remove the fuse holder, located just below the power cord con- nector, from the projector. - Page 57 Maintenance 4. Remove the blown fuse from the fuse holder. 5. Push the new fuse into the clips of the holder until it is securely seated. 6. Place the fuse holder back in position. LitePro 580 User’s Guide...
-
Page 58: Troubleshooting
LitePro, monitor, computer.) 6. If the problem still exists, read through the problems and solutions in this chapter. LitePro 580 User’s Guide Do not open the LitePro case! Opening the case may cause electric shock! your projector needs repair. -
Page 59: Common Problems And Solutions
• Make sure projector is plugged in a live AC outlet or power strip. • Check to see that the projector is not too hot to operate and that the temperature monitor light is not orange. • If the projector lamp was replaced, make sure the new one is fitted correctly and the lamp door is properly fastened. - Page 60 • Adjust Tint. • Adjust Red, Green, and Blue. • Use a shorter cable between video source and the projector. • Verify that the projector is set to receive the appropriate video broadcast format. Problem: Only the test pattern is displayed •...
- Page 61 • Make sure nothing is blocking the remote control receiver on the projector. • Make sure you are not too far from the projector when using the remote. It has a limited range. LitePro 580 User’s Guide...
-
Page 62: Monitor Lights
Monitor lights The projector has three lights that monitor its operations: 1. Operation monitor—indicates the projector is on, is in Standby mode, or is receiving signals from the remote control. 2. Lamp monitor—indicates if lamp is warming up, lit, or cooling down. - Page 63 Lamp is not working. (Solution: Press Standby button or change lamp.) Explanation Projector in Standby. Projector and lamp operating. Signal from remote control being received. Problem with the projector. (Solution: Turn power switch off and then on.) LitePro 580 User’s Guide...
-
Page 64: Appendix
Standard 640x480 graphics, 8- and 640x400 24-bit color monitor NTSC 640x480 PAL, SECAM 768x576** NTSC 640x480 PAL, SECAM 768x576** Cable VGA cable supplied with projector VGA cable with Mac adapters supplied with projector A/V cable supplied with projector S-Video cable... -
Page 65: About Computer Video
Appendix • SECAM (Sequentiel Couleur à Mémoire)—a 50 Hz 768x576 resolution standard similar to PAL used in France, Eastern Europe, and some African and Middle Eastern countries. PAL and SECAM differ in the way color information is encoded on the broadcast signal. -
Page 66: Specifications
1.3A, 50/60 Hz Three (3) AAA alkaline cells Approximately 35 feet (10 m.) when aimed at the projector or reflected off a white wall or projection screen within 30° of the projection axis 4 (H) X 3(V) average 200 lumens (measured by ANSI 9 point method) 1.3:1 maximum... -
Page 67: Pin Assignments
Appendix Altitude Operating Non-operating Humidity Operating Non-operating Dimensions LitePro 580 Weight Unpacked Pin assignments VGA Cable The Y-shaped VGA cable that shipped with your LitePro has three connectors, they are labeled “Monitor,” “VGA,” and “LCD.” The pin assignments for these connectors are listed here. “LCD”... -
Page 68: Pin Assignments
Input Pin Monitor” and “VGA” Connectors The pin assignments are the same for the “Monitor” and “VGA” connectors. The “Monitor” connector is a female video RGB, 15-pin micro-D-style connector. The “VGA” connector is a male video RGB, 15-pin micro-D-style connector. The table below lists the pin assignments for both connectors. -
Page 69: Order Information
Mac adapter for VGA cable A/V cable Projection lamp Fan intake filter Fan intake cover Projector connection ports cover Projector control panel cover LP Utilities kit Fuse, 6.3A. 250 V.T. 5x20mm Power Cords (one ships with LitePro) North American Power Cord... -
Page 70: Laptop Display Activation Chart
Laptop display activation chart The LitePro connects to a laptop computer through the computer’s external monitor port. Most laptop computers do not automatically activate this port when a device such as the LitePro is connected. The following chart lists the commands that activate the external monitor port for a variety of computers. - Page 71 Appendix Computer Everex** For-A Gateway 2000 Grid* ** Hyundai IBM 970 IBM ThinkPad Kris Tech** Mac Portable Mac PowerBook 140, 145, 170 160, 165, 180, 250 Mastersport Micro Express Microslave Mitsubishi NEC* Packard Bell* Panasonic Samsung Sanyo Sharp SPARC-Dataview Tandy* ** Texas Instruments Top-Link* ** Key command to...
- Page 72 Computer Toshiba* ** 4500 Wyse Zenith These manufacturers have other models that automatically send video to the external CRT port when some type of display device is attached. ** These manufacturers offer more than one key command depending on the computer model.
-
Page 73: Index
2, 5, 15 LitePro 2, 5, 9 pin assignments for VGA cable 64 power 2, 5, 7 serial 2, 5, 33 supplied with the projector 5 S-Video 14, 61 VGA 2, 5, 9 Color, menu item 27 color, not displayed correctly 56... - Page 74 8 Invert, menu item 28 lamp monitor 60 lamp, replacing 50 Language, menu item 30 laptop computers activate projector’s display 67 compatibility 4 connecting 12 lens, cleaning 47 Light, remote button 23 Loudness, menu item 29 LP Remote Programmer...
- Page 75 LP-Link adjusting Audio settings 39 adjusting Computer settings 37 adjusting Custom settings 42 adjusting Display settings 40 adjusting Options settings 41 adjusting Video settings 38 adjustment 35, 37–42 control panel 35 description 33 Mac LC, menu item 26 Macintosh computers compatibility 4 connecting desktop models 11 connecting PowerBooks 13...
- Page 76 Index projector accessories 66 adjusting 18 control panel 21 doesn’t turn on 56 fuse 53 maintenance 47 monitor lights 59 operating 21 positioning 8 shipping contents 2 specifications 63 turning off 20 turning off temporarily 20 turning on 18 Prompt, menu item 30, 31...
- Page 77 Vert, menu item 28 vertical display,adjusting 28 VGA cable attaching Mac adapter 11, 13 connecting to LitePro 10–13 pin assignments 64 Video control panel button 23 menu 27 remote button 23 video equipment, connecting 5, 14 Video Mode, menu item 27 Volume adjusting 29 control panel button 23...
- Page 78 LIMITED WARRANTY In Focus Systems Inc. (“In Focus”) warrants that each LitePro 580 (“the Product”) sold hereunder will conform to and function in accordance with the written specifications of In Focus. Said limited warranty shall apply only to the first person or entity that purchases the Product for personal or business use and not for the purpose of distribution or resale.
- Page 79 Part Number 010-0097-01...
Need help?
Do you have a question about the LP580 and is the answer not in the manual?
Questions and answers