Yongnuo TOYUG YN-622C User Manual
Flash controller/ trigger system for canon dslr cameras
Hide thumbs
Also See for TOYUG YN-622C:
- User manual (31 pages) ,
- Quick start manual (2 pages) ,
- User manual (23 pages)
Table of Contents

Related Manuals for Yongnuo TOYUG YN-622C


Summary of Contents for Yongnuo TOYUG YN-622C
- Page 1 The Other YN-622C User Guide v.4.09 “TOYUG” The Other YN-622C User Guide YONGNUO YN-622C FLASH CONTROLLER/ TRIGGER SYSTEM FOR CANON DSLR CAMERAS Version 4.09 © Clive D Bolton, 11 December 2014 Tauranga, New Zealand 11/12/2014 Page 1 of 64...
-
Page 2: Introduction
The author has no association with the manufacturer other than as a paying customer. Some additional samples were received; my thanks to Yongnuo. Testing equipment included EOS 50D, 7D and 6D; Speedlites 580EX II, 430EX II and 550EX; Yongnuo YN-568EX flash, YN-622C and YN-622C-TX triggers. -
Page 3: Prefaces
Version 4 of TOYUG represents a complete re-organisation, and in many parts a re-write of earlier versions. In the 21 months since its first release, the YN-622C has shown good reliability and great versatility. There have been firmware and hardware updates to improve performance and compatibility, and to add extensions. -
Page 4: Original - August 2012
However, kudos to Pixel for pioneering this category of trigger/controller. Now we have the Yongnuo YN-622C which seems to fulfil the promise of a full implementation of Canon flash technologies over a radio link. It seems that Yongnuo has not only achieved this objective, but has added a wide range of triggering and photographer-friendly capabilities. -
Page 5: Table Of Contents
The Other YN-622C User Guide v.4.09 CONTENTS Introduction ......2-7 Part II – 622C Transceiver..25-33 Declaration of Interest Transmitter Remote/Mix Modes ..26 Copyright Setting the Mode Prefaces ........3-4 Camera Remote Mode On-Flash Mix Mode Update – June 2014 Original –... - Page 6 The Other YN-622C User Guide v.4.09 Part II – 622C continued Part III – C-TX Controller..35-44 Transceiver Features....31-33 C-TX Control Modes ....... 36 Saving the Settings Remote Control AF-Assist Beam Local Control Autofocus Assist Base Trigger Setting Confirmation Fuji Cameras...
- Page 7 The Other YN-622C User Guide v.4.09 Useful Stuff ......47-63 Servicing........59-62 AF-Assist Beam Canon External Flash Menus..48-50 Hot-Foot Solder Joints 2007 style menus Opening the Case 2012 style menus Case Repair What’s Inside the Cases? Lighting Scenarios ....51-54 E-TTL Ratio Other Resources ......
-
Page 8: Terms And Definitions
(The transmitter will still act as a Remote to another transceiver transmitting on the same channel.) Remote Receiver (RX): A YN-622C transceiver (first released in August 2012) in the role of a receiver with a remote flash connected by hot-shoe or PC-sync cable. -
Page 9: Part I - The 622C System
The Other YN-622C User Guide v.4.09 PART I – THE 622C SYSTEM 11/12/2014 Part 1 – The System Page 9 of 64... -
Page 10: Flash Controller/Remote
The Other YN-622C User Guide v.4.09 622C Flash Controller/Remote Control by Camera 622C Functions Simple to Complex setups • The minimum setup is two (2x) 622Cs, one on camera as a transmitter, and one under a flash as remote receiver. Any practical number of 622C remotes can be added. - Page 11 The Other YN-622C User Guide v.4.09 622C Specifications Standard Pack • 2 x Transceivers, default mode Remote/Receiver, auto-switching to Transmitter when required. (Some resellers may offer single or multiple units.) • Quick Start Guide; User Manual Transceiver Measurements • 90 x 53 x 25mm (39mm incl. hot-foot).
-
Page 12: Tx Flash Controller
The Other YN-622C User Guide v.4.09 622C-TX Flash Controller Control by LCD Display and Camera C-TX Functions Simple or Complex setups • The controller’s LCD menu provides an alternative to the camera’s External Flash menus, and enables extensions not provided by Canon. -
Page 13: Lcd Display
LCD backlight which lights for a few seconds when any button is pressed. C-TX Specifications Standard Pack • 1 x YN-622C-TX Controller. (Resellers may offer the C-TX with single or multiple 622C Remotes.) • User Manual with Warranty Card •... - Page 14 The Other YN-622C User Guide v.4.09 Indicators • Status LED: indicates when communicating, when triggering and on remote shutter release. Controls • [On/Off] power switch. • “Setting” buttons – multi-purpose selection of values. They have no labels, so in this Guide are called [Up], [Down], [Left], [Right] and [Set].
-
Page 15: Compatibility
COMPATIBILITY The Key For the YN-622C (and many other triggers) it’s about what each camera body provides for digital data in and out through the accessory shoe, and what the flash moves in and out through it’s hot- foot. These capabilities are set by the manufacturers. However, the 622C can massage the data as it transmits it back and forth, providing numerous functions not provided by Canon. -
Page 16: Camera Compatibility
The Other YN-622C User Guide v.4.09 CAMERA COMPATIBILITY Cameras can be put into one of three types for use with the 622C system. The “RT” capable flashes are currently classed as Type A. Both triggers work with all classes of camera and all types of flash. -
Page 17: Type C - Sync Only
The Other YN-622C User Guide v.4.09 Type C Camera – Sync only • Does not support HSS or E-TTL functions. • Max speed sync is 1/250s or less. 622C Transmitter and C-TX Controller using all flash classes: A “fire!” synchronised signal •... -
Page 18: Class 4 - No E-Ttl, Sync Only
The Other YN-622C User Guide v.4.09 Class 3 Flash – Remote E-TTL; Manual Levels not provided 622C Set On-Camera: Sync mode (1CS, 2CS, HSS); ETTL (FEC, FEB, FEL and Ratio). Set on-flash: Flash mode (ETTL, M, Multi); Zoom. C-TX Set on-C-TX: or by External Flash menus For remote Manual levels, set C.Fn 05 to “On”, and set the mode on Flash to “E-TTL”. -
Page 19: Getting Started
The Other YN-622C User Guide v.4.09 GETTING STARTED 1. Prepare the Camera • Set the camera to a Creative exposure mode (P, Av, Tv or M), not a Basic mode (Scenic, Sports or Flash-disabled.) • Set External Flash menu to Flash Firing = Enabled, and Wireless = Disabled. - Page 20 The Other YN-622C User Guide v.4.09 4. Check the Firmware 622C When first released in 2012, there were two changes in the firmware. One (Sep. 2012) fixed a transmitter mode problem when using 1D series bodies. The other a little later matched a hardware change.
-
Page 21: 6. Configure Transmitter Or Controller
The Other YN-622C User Guide v.4.09 6. Configure Transmitter or Controller Using Type A Cameras 622C C-TX • Keep Transmitter in Remote mode. • • Set a channel for the Transmitter (1 to Set a channel (1 to 7) for the Controller 4).using the Wireless function menu, or... -
Page 22: 8. Prepare The 622C Receiver
The Other YN-622C User Guide v.4.09 7. Mount Remote Flash on a Remote 622C • Loosen the locking ring or lever on the flash to withdraw the locating pin. • Mount the flash on the 622C. Press the foot firmly forward to ensure all contacts are secure. -
Page 23: 11. Testing The Lighting Setup
The Other YN-622C User Guide v.4.09 11. Testing the Lighting Setup The setup can be tested to ensure that all devices are powered up and that the communication is working. In addition, actual lighting outputs can be metered if manual levels are being used. - Page 24 The Other YN-622C User Guide v.4.09 11/12/2014 Part 1 – The System Page 24 of 64...
-
Page 25: Part Ii - 622C Transceiver
The Other YN-622C User Guide v.4.09 PART II – 622C TRANSCEIVERS Part II – 622C Transceivers 11/12/2014 Page 25 of 64... -
Page 26: Transmitter Remote/Mix Modes
622C TRANSCEIVER CONTROL MODES REMOTE & MIX The original YN-622C transceiver can work in either of two modes – Remote or Mix. Remote Mode implements standard Canon wireless protocols. Mix Mode can work with E-TTL and manual modes together, but loses the ability to manage manual levels from the camera. -
Page 27: E-Ttl Mode
The Other YN-622C User Guide v.4.09 E-TTL MODE Automatic Adjustable Metering Type A cameras Camera menus or buttons • All (global), A:B (ratio), A:B C (ratio + FEC). • FEC +/- 2 f/stops, with on-flash FEC settings adding to the result. -
Page 28: Flash Exposure Lock Fel
The Other YN-622C User Guide v.4.09 Flash Exposure Lock (FEL) • The camera must be in a creative mode. • Live View mode must be disabled. • Flash mode must be E-TTL. • First focus on subject. • Then press the camera’s [*] or [FEL] or [M-Fn] button, or as custom re-configured. -
Page 29: Multi (Stroboscopic) Mode
The Other YN-622C User Guide v.4.09 MULTI (STROBOSCOPIC) MODE Usage is similar to Remote Manual and On-flash Manual. Stroboscopic mode is particularly effective with a highly-reflective subject against a dark background. Consider using a tripod, remote shutter release and external battery pack. -
Page 30: Camera Features
The Other YN-622C User Guide v.4.09 CAMERA FEATURES Ambient-only shot • Turn transmitter off. 622C settings are remembered when powered up again. • Or use type A camera menu Flash Firing – Disable. High-speed Continuous Shooting • Trigger keeps up with camera. (Tested at 6.5 fps.) •... -
Page 31: Lcd Display
The Other YN-622C User Guide v.4.09 LCD Display • Flash zoom, focal length, ISO, shutter speed, FE Lock, HSS change with settings. Pilot Indicator • A test flash can be fired on any individual flash by pressing that flash’s Pilot Indicator. - Page 32 The Other YN-622C User Guide v.4.09 Channel Indicators The channel can be set by either the camera menu (Ch. 1-4 typically) or on the Transmitter. CH LED Radio Channel No Ch 1 Ch 2 Ch 3 Ch 4 Ch 5...
-
Page 33: Part Ii – 622C Transceiver
The Other YN-622C User Guide v.4.09 Group Indicators There are two independent Group types: Receiver Group Test Firing Group • Each current Group setting is remembered at power-down. • An on-TX flash has no group indication. It is deemed to be in Group A, and uses Group A’s settings. - Page 34 The Other YN-622C User Guide v.4.09 Part II – 622C Transceivers 11/12/2014 Page 34 of 64...
-
Page 35: Part Iii - C-Tx Controller
The Other YN-622C User Guide v.4.09 PART III – C-TX CONTROLLER Part III – C-TX Controller 11/12/2014 Page 35 of 64... -
Page 36: C-Tx Control Modes
The Other YN-622C User Guide v.4.09 C-TX CONTROL MODES There are three control modes available. Remote Control This is the primary control method. Groups, flash modes, sync modes, FEC or M output can be set remotely. Local Control Settings for Flash Mode and its parameters are made on-flash, which then over-rides the remote settings. -
Page 37: C-Tx Interface
The Other YN-622C User Guide v.4.09 C-TX INTERFACE The Buttons The C-TX provides a set of buttons for changing its settings. • The camera’s External Flash menus can set some values, but these are limited to only those that are appropriate for the C-TX. -
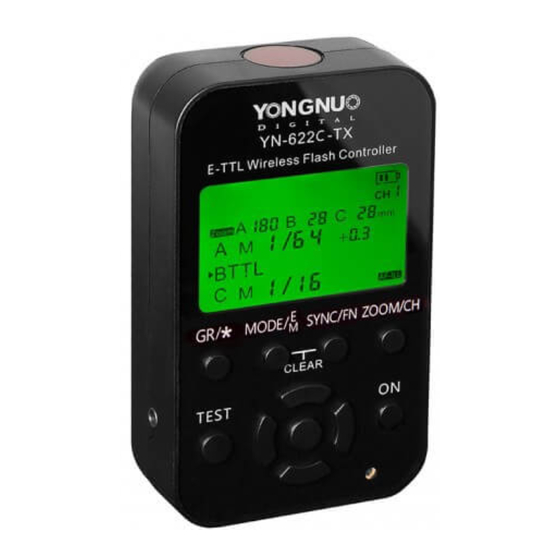
Page 38: The Lcd Display
The Other YN-622C User Guide v.4.09 The LCD Display Groups screen • The default Groups screen is shown in the image. • The last-used screen appears at power-on. • Various operations terminate and return to Groups by Timeout, by pressing [Set/OK], by cycling through from a selection operation. -
Page 39: Exposure Modes
The Other YN-622C User Guide v.4.09 EXPOSURE MODES Selecting a Group’s Settings [Gr] • [GR] cycles through the three lines – Group s A, Group B and Group C. • The arrow head on the left indicates which row is active. -
Page 40: Using Flash Exposure Lock
The Other YN-622C User Guide v.4.09 Using Flash Exposure Lock FEL • FEL is processed entirely in-camera. • The C-TX works fully with FEL. • Both Global FEC and Group FEC as set on the C-TX will be applied. Enable Ratio and Back Lighting... -
Page 41: Manual Mode
The Other YN-622C User Guide v.4.09 MANUAL Mode Set Group Manual Output [Left] [Right] [Up] [Down] • Ensure that the required Group is active and in M mode. • Default is 1/16 output • Then use [Left], [Right], [Up], [Down] to change Manual output from 1/1 to 1/128. -
Page 42: Camera Features
The Other YN-622C User Guide v.4.09 CAMERA FEATURES Camera External Flash Menus The camera’s menus are controlled by the C-TX. An over-view of a pre-2012 camera menu: Settings controlled by Menus only • E-TTL II mode – Evaluative or Average can be set. -
Page 43: C-Tx Controller Features
If there is a problem getting the driver installed in Win 8.1, download https://dl.dropboxusercontent.com/u/63687922/YN_Trigger_Updater_Setup.zip Unzip and run. Or, go to your Program Files / Yongnuo Trigger Updater / Driver / dpinst_x64.exe (or _x86.exe for 32-bit systems), and run it. 2. Download and Unzip - YN_622C-TX_FW_V 1.04.zip (or later) The YN web page may not yet show the latest version. -
Page 44: Set Channel
The Other YN-622C User Guide v.4.09 Set Channel [Ch] There are 7 radio channels which can be used to avoid interference from other photographers, or from sources like wireless network hubs. • Default value is 1. • Long press [Ch] to activate channel selection. The current value will wink. -
Page 45: Enable Use On Non-Canon Cameras
The Other YN-622C User Guide v.4.09 Enable use on non-Canon cameras [Fn] 04 Legacy Flash Trigger Only Canon cameras talk the Canon code that the C-TX works with. Some other brands, like Fuji, falsely make the C-TX think it is on a Canon camera. Function 04 prevents the false detection, and the C-TX then works as a simple trigger. - Page 46 Change the value to ON (Left/Right. • Place the YN622C-TX anywhere within the transmission range of YN560-TX. • Use YN560-TX to control Manual output/zoom of the ettl flashes on YN-622C remotes. Part III – C-TX Controller 11/12/2014 Page 46 of 64...
-
Page 47: Useful Stuff
The Other YN-622C User Guide v.4.09 USEFUL STUFF Part II – 622C Transceivers 11/12/2014 Page 47 of 64... -
Page 48: Canon External Flash Menus
The Other YN-622C User Guide v.4.09 CANON EXTERNAL FLASH MENUS The camera’s External Flash menus are the main interface for using the 622Cs. The menus change interactively as selections are made. The 622C controls or disables some menu items. •... - Page 49 The Other YN-622C User Guide v.4.09 Wireless Settings • Wireless Function Enable, Disable. • Master flash Enable, Disable. On-TX flash will emit preflash and focus-assist, but not exposure flash. • Channel 1 to 4. Firing Group, in E-TTL II flash mode •...
- Page 50 The Other YN-622C User Guide v.4.09 New Quick Flash Control Panel Starting Menu - 6D, 5D III, 650D/T4i Select Camera 2 menu, External Speedlite control item. • Flash Firing Enable or disable the 622C transmitter. • E-TTL II metering Evaluative or Average.
-
Page 51: Lighting Scenarios
The Other YN-622C User Guide v.4.09 LIGHTING SCENARIOS E-TTL Ratio – Main and On-camera Fill Automatic flash exposure, remotely controlled, with type A camera and class 1, 2 and 3 Flashes On shutter release, the camera will call for pre-flashes, evaluate power levels required, and produce a normal exposure from the group B flashes, with reduced fill from the on-camera flash. -
Page 52: Augmented Ambient
The Other YN-622C User Guide v.4.09 Augmented Ambient – House Lighting + Flashes, and on-camera Main Mixed E-TTL automatic Main flash exposure, with flashes in Manual lifting ambient light. Indoor event photographers sometimes use flashes high on light-stands to bounce light off the ceiling to improve background detail, or to provide hair- or rim-light. -
Page 53: Continued
The Other YN-622C User Guide v.4.09 Using class 4 augmenting flashes Instead of using Class 1 flashes on stands, use Class 4 flashes like the YN-560. The maximum sync speed may be 1/250s 622C Transmitter C-TX Controller • On camera: Set Flash mode to E-TTL. -
Page 54: Two-Shooter Setup
The Other YN-622C User Guide v.4.09 Two-Shooter setup A second shooter can share the augmenting flashes. But, there is a problem – preventing the zooming and firing of the other camera’s on-TX flash. 622C Transmitter With C-TX Controller Both Cameras Both Cameras •... -
Page 55: Suggestions
The Other YN-622C User Guide v.4.09 SUGGESTIONS Batteries The 622C is designed primarily as a 3v (2x 1.5v) unit, but can be used with lower-output batteries e.g. 2.4v (2x 1.2v). However, they require more constant attention by the user to battery condition. -
Page 56: Wireless Mode Setting
The Other YN-622C User Guide v.4.09 Numbering the Units Record the serial number and date of purchase. It is found on the printed label inside the battery case (622C) or stamped into the bar between the batteries. I use the end digits on a label attached to the end to identify the unit –... -
Page 57: Trouble Shooting
The Other YN-622C User Guide v.4.09 TROUBLE SHOOTING Aperture, distance are not displayed on the flash when half pressing the shutter • With the flash on the transmitter, use the menus to set the flash mode or shutter sync. Cold temperature results in failure •... - Page 58 The Other YN-622C User Guide v.4.09 Fails to power on or automatically shuts down • The batteries are installed incorrectly or are exhausted. The device will power down automatically before the battery is fully depleted to avoid being over-discharged. •...
-
Page 59: Servicing
The Other YN-622C User Guide v.4.09 SERVICING If a malfunction of a 622C is suspected, first check through this guide, and photographic forums. If the problem remains, contact your supplier – they are responsible to YongNuo for providing support. Or, email service@hkyongnuo.com. AF-Assist Beam The AF-Assist Beam sometimes needs re-alignment, and some have fixed the LED and cradle. -
Page 60: What's Inside The Cases
The Other YN-622C User Guide v.4.09 What’s Inside the 622C Cases? Many thanks to Phil Weston for providing the following excellent pics with notations: Part II – 622C Transceivers 11/12/2014 Page 60 of 64... - Page 61 The Other YN-622C User Guide v.4.09 Part II – 622C Transceivers 11/12/2014 Page 61 of 64...
- Page 62 The Other YN-622C User Guide v.4.09 Part II – 622C Transceivers 11/12/2014 Page 62 of 64...
-
Page 63: Other Resources
The Other YN-622C User Guide v.4.09 OTHER RESOURCES Current version of this document https://docs.google.com/open?id=0B77OmmGIg0gMVFpqNkpBYXBHajA Deutsche translation of this document by J. Wahl https://docs.google.com/open?id=0B__QoUj_xlYSNUpQdnhFbE91LTA User Manuals online: 622C: Full English/Chinese http://www.yongnuoebay.com/sm/yn622cy.pdf English only https://docs.google.com/open?id=0B77OmmGIg0gMYTNTWEhIOXZNYlU C-TX: Full English/Chinese http://yongnuo.com.cn/usermanual/pdf/YN622C-TX_UserManual.pdf https://drive.google.com/file/d/0B77OmmGIg0gMSHN6SE81Y3NwZEU YongNuo Official Website (English): http://www.hkyongnuo.com/e-aboutus.php... - Page 64 The Other YN-622C User Guide v.4.09 TOYUG Useful Stuff 11/12/2014 Page 64 of 64...
Need help?
Do you have a question about the TOYUG YN-622C and is the answer not in the manual?
Questions and answers