Table of Contents
Advertisement
Quick Links
Installation & Operation Manual
INSTALLER: Leave this manual with party responsible for use and operation.
OwNER: Retain this manual for future reference.
Contact your local dealer with questions on installation, operation or service.
NOTICE: SAVE THESE INSTRUCTIONS
Model(s):
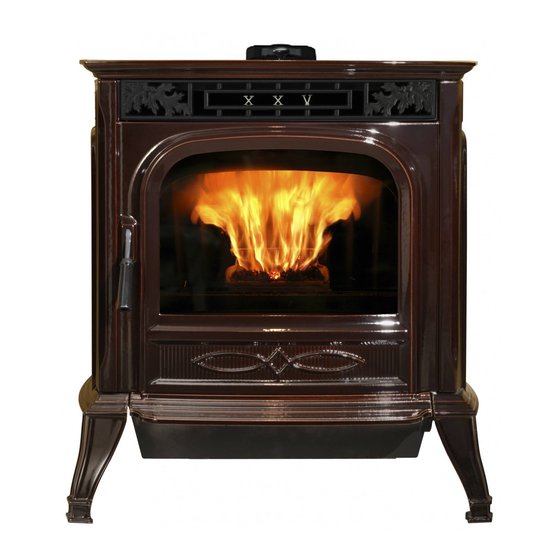
XXV Freestanding Pellet Stove
!
Tested and approved for wood pellets and shelled field
corn fuel only. Burning of any other type of fuel voids
your warranty.
!
Check building codes prior to installation.
• Installation MUST comply with local, regional, state and
national codes and regulations.
• Contact local building or fire officials about restrictions
and installation inspection requirements in your area.
Care and Operation
caution
caution
wARNING
Please read this entire manual before
installation and use of this pellet fuel-
burning room heater.
Failure to follow these instructions could
result in property damage, bodily injury
or even death.
• Do not store or use gasoline or other flammable vapors
and liquids in the vicinity of this or any other appliance.
• Do not overfire - If any external part starts to glow, you
are overfiring. Reduce feed rate. Overfiring will void
your warranty.
• Comply with all minimum clearances to combustibles
as specified. Failure to comply may cause house fire.
wARNING
HOT SURFACES!
Glass and other surfaces are hot
during operation AND cool down.
Hot glass will cause burns.
• Do not touch glass until it is cooled
• NEVER allow children to touch glass
• Keep children away
• CAREFULLY SUPERVISE children in same room as
stove.
• Alert children and adults to hazards of high temperatures.
High temperatures may ignite clothing or other
flammable materials.
• Keep clothing, furniture, draperies and other flammable
materials away.
NOTE
To obtain a French translation of this manual, please
contact your dealer or visit www.harmanstoves.com
Pour obtenir une traduction française de ce manuel, s'il
vous plaît contacter votre revendeur ou visitez www.
harmanstoves.com
3-90-00885R17_02/15
Advertisement
Table of Contents

Related Manuals for Harman XXV Freestanding Pellet Stove


Summary of Contents for Harman XXV Freestanding Pellet Stove
-
Page 1: Care And Operation
Failure to follow these instructions could result in property damage, bodily injury or even death. Model(s): • Do not store or use gasoline or other flammable vapors XXV Freestanding Pellet Stove and liquids in the vicinity of this or any other appliance. • Do not overfire - If any external part starts to glow, you are overfiring. Reduce feed rate. Overfiring will void your warranty. • Comply with all minimum clearances to combustibles as specified. Failure to comply may cause house fire. - Page 2 Fuel Specifications Fuel and Fuel Storage Size • Pellets are either 1/4 inch or 5/16 inch (6-8mm) in Pellet fuel quality can fluctuate from manufacturer to diameter manufacturer, and even from bag to bag. • Length should be no more than 1-1/2 inches (38mm) Hearth & Home Technologies recommends using only fuel • Pellet length can vary from lot to lot from the same that is certified by the Pellet Fuels Institute (PFI).
-
Page 3: Model: Xxv
This label is located on the back of the unit. Harman XXV Pellet Stove Please copy the Serial Number for future reference. Serial #: 5.5" Model: XXV Residential Space Heating Appliance Fire by Wood Pellets This pellet burning appliance has been tested and listed for use in Manufactured Homes in accordance with OAR 814-23-900 through 814-23-909 OMNI-Test Laboratories, Inc. -
Page 4: Table Of Contents
Introduction Thank you for purchasing the Harman® XXV Pellet Stove. The Harman® XXV Pellet Stove is the culmination of elegance, convenience, functionality and dependability The XXV was thoughtfully designed to look captivating in every home. Intricately detailed oak leaves express the magnitude of craftsmanship that goes into making this stove a masterpiece. These beautiful castings are proudly made in the U.S.A. Built to strict Harman® standards, the XXV has the most advanced construction of any Harman® Pellet Stove. This 25th Anniversary Stove is based on Harman® patented pellet stove technology and goes a few steps further. The glass hopper lid allows you to see the fuel level while the mirrored front glass transforms into clear glass with the radiance of the fire. A new concept for the XXV is the ability to use the top vent option. Using this method, the XXV can easily replace a wood stove by placing the top vent adapter over the rear vent. We put all of our favorite features into the XXV, fusing the highest caliber pellet stove innovations with the allure of cast iron. For Your Safety: When installing a solid fuel appliance, it is Table of Contents also recommended to install Smoke and Carbon Monoxide Detectors on every level of the house. During the initial firing of the appliance, some smoke or odor may occur due to Assembly & Installation paint curing. You may want to keep some windows open for ventilation during the first few hours of burning to prevent smoke Installation detector activation. Test your smoke and carbon monoxide... -
Page 5: Assembly & Installation
Clothing and other flammable materials should not be HOPPER LId TIGHTLY CLOSEd dURING OPERATION. placed on or near this unit. Installation and repair of this Harman® stove should be done by a qualified service person. We recommend caution that the stove be inspected before use and at least annually by a qualified service person. -
Page 6: Installation
Installation Installing Place the stove on a non-combustible floor protector that extends a minimum of 6 inches to the front (152mm), 6 inches to the sides (152mm) and 0"(152mm) to the rear, which is flush with the rear of the hopper. Front and side floor protection measurements are made from the firebox or window opening. Floor protection must also be positioned under horizontal flue pipe, extending 2" (51mm) beyond each side of the pipe. NOTE for Canadian installation only: Per ULC-S627-00, If installed on a combustible floor, the need to provide a noncombustible floor protector covering the area beneath the space heater and extending at least 17.72" (450mm) on the firing side and at least 7.87" (200mm) on the other sides. In Canada, you may follow smaller U.S. floor protection requirements ONLY if the user agrees to completely shut- down the appliance, and allow it to cool to where all fire is extinguished and the combustion blower and its indicator light shuts off, prior to opening the firebox door or ash door. - Page 7 Installation Connect the power cord to a 240 VAC, 50 HZ grounded receptacle. (A surge protector is recommended to protect the circuit board.) Also be sure that the polarity of the outlet that the stove is plugged into is correct. Prior to installing the flue pipe, connect a draft meter. Turn the Feed Adjuster dial to "Test". Record the first reading. Connect flue pipe to stove and be sure all doors and windows in the home are closed. Record the second draft reading_______. If the second reading is more than .05" lower than the first 18"/ reading, check for possible restrictions or the need for outside 457mm air (see page 10). For more information on the draft test procedure, refer to Page 17.
-
Page 8: Venting
venting Requirements for Terminating the venting I. The clearance to service regulator vent outlet must be a minimum of 6 feet. WARNING: Venting terminals must not be recessed into a wall or siding. J. The clearance to a non-mechanical air supply inlet to the building or the combustion air inlet to any other appliance NOTE: Only "pellet" vent pipe wall pass-throughs and fire must be a minimum of 48”. stops should be used when venting through combustible materials. K. The clearance to a mechanical air supply inlet must be a minimum of 10 feet. (with outside air installed, 6 feet ) NOTE: Always take into consideration the effect the prevailing wind direction or other wind currents will cause L. The clearance above a paved sidewalk or a paved with flyash and/or smoke when placing the termination. - Page 9 = Positive Static Pressure NOTE: Simpson duravent Pelletvent Pro Harman® = Negative Static Pressure Adapter Part #3PvP-AdHb and Pelletvent Pro Harman® Fig. 6 Adapter Increaser Part #3PvP-X4AdHb are highly recommended to be installed on the starter collar to INSTALL vENT AT CLEARANCES SPECIFIEd bY THE insure a proper pipe connection to the unit.
- Page 10 There is a break-away hole on the rear panel of the stove which must be removed to connect the flex pipe. The Indoor Half maximum length run of this pipe is 15 feet. If a longer run Fig. 8 is needed the size must be increased to 3". Inlet cover part number 1-10-09542 should be used to keep birds, rodents, direct vent wall Passthrough etc.out of the pipe unless the Harman® wall passthrough is The Harman® Direct Vent Wall Passthrough (Part # 1-00- being used. 677177) makes installing your Harman® Pellet Stove with outside air easier. It combines the needed wall protection for the venting, with a source of intake air for combustion. It is made to fit walls from 4 1/2" to 10 1/8" thick with a single square opening in the wall of 6-1/2 inches. Canadian Standard, ULC-S627-00 Requires that all outdoor-aired appliances must be secured to the structure.
- Page 11 venting NOTICE Use only components specified by the venting manufacturer or the appliance manufacturer, including the proper wall pass-through and termination cap. The use of mis-matched or makeshift venting components may cause exhaust spillage and/or increase fire risk. #1 Preferred method This method provides excellent venting for normal operation and allows the stove to be installed closest to the wall. Two inches from the wall is safe; however, four inches allows...
- Page 12 venting #3 Installing into an existing chimney This method provides excellent venting for normal operation. This method also provides natural draft in the event of a power failure. If the chimney condition is questionable* you may want to install a liner as in method #6. *The chimney should be inspected and cleaned before installing your stove. If you discover that the chimney does not have a clay tile liner or has cracks or flaking of the tile liner you will need to install a stainless steel liner within the chimney. In most cases the inside diameter of this liner should be 4". Either flexible or rigid liner may be used for this purpose. Refer to Method 6.
- Page 13 venting #5 Installing into an existing fireplace chimney (US and Canada) This method can be done with or without a flue liner. Without a liner, the damper area must be sealed off with a steel plate. Kaowool, mineral wool or an equivalent non-combustible insulation is recommended on top of the steel plate to minimize condensation. In this method a cap should also be installed on the chimney to keep out rain. Some places in the US and Canada require that the vent pipe extend all the way to the top of the chimney. Per ULC S628. Be sure to use approved pellet vent pipe fittings. Seal pipe joints with silicone or aluminum tape in addition to the sealing system used by the manufacturer. Pipe size should be increased to 4" using this method.
- Page 14 venting #7 Installing into an existing chimney using 3" pellet vent in combination with 6" or 8" single or double wall stove pipe. This method allows the installer to use 6" or 8" single and double wall stove pipe (sealed seam not snap lock) and an existing masonry or class A chimney to vent the stove. The stove must use pellet vent and 90 degree elbow to start at the stove connector and then use the approved pipe adapter to connect to the size of vent that continues into the chimney connector. Support of the assembly must follow any pipe and connector manufacturers recommendations. Due to combustible fuel, vent pipe to hopper clearances must meet guidelines stated by NFPA or local codes. WaRninG CHIMNEY ANd CONNECTOR MUST MAINTAINEd IN GOOd CONdITION ANd KEPT CLEAN Fig.
- Page 15 venting min. wall to outlet 12" Minimum flue vent configuration It is recommended that outside air be installed with this venting configuration to reduce smoke and creosote smell in the room in the event of power failure. Fig. 19 Fig. 18 Vent Configurations: To reduce probability of reverse drafting during shut-down conditions, Hearth & Home Technologies strongly recommends: • Installing the pellet vent with a minimum vertical run of five feet, preferably terminating above the roof line.
-
Page 16: Esp Control
Allows you to choose between For dealer maintenance only. Requires special Allows you to adjust the room Room Temp Mode, Stove Temp DDM monitor supplied to Harman® Dealers temperature in Room Temp Mode Mode, or OFF. Also allows you to exclusively. -
Page 17: Low Draft Voltage Adjustment
Low draft voltage Adjustment INCHES OF WATER Fig.29 MAGNEHELIC Combustion Motor Speed Control Low draft only set point. The small straight screwdriver slot is plastic; therefore, the unit can The rear panel will need to be removed prior to installing the draft be adjusted while in operation. -
Page 18: Automatic Operation
MAINTAIN ALL GASKETS ANd SEALS IN GOOd you light the stove manually, should the igniter fail for any CONdITION. reason. Secondly, if you are using the Harman® battery NOTE: ALL PACKAGING & SHIPPING MATERIALS back up system the Manual setting will prevent the stove MUST bE REMOvEd FROM THE STOvE bEFORE from turning off and on during a power failure, which will OPERATING. - Page 19 Automatic Ignition Stove Temperature Mode Stove Temperature Mode In the Stove Temperature Mode and with the igniter toggle switch in the Auto position, the stove will light automatically and can be adjusted to the desired setting using the same temperature control dial as is used in the Room Temperature Mode. The heat output and fuel consumption will remain constant regardless of room temperature. The settings from 1 to 7 on the inner ring of the dial provide for relative heat output settings with 1 being low and 7 being the maximum. In Stove Temperature Mode, the stove will not automatically shut off unless the stove runs out of fuel or is turned off. Never disconnect the power cord to shut down the stove. This will stop the combustion blower and smoke will escape This setting, see above, will produce continuous medium heat output with the through window and door gaskets.
- Page 20 Automatic Start Up Starting Fire / Igniter Switch to "AUTO" (down position) Make sure the unit is plugged into a 240 VAC, 50 HZ electrical source. The power light should be the only light lit. To avoid unwanted smoke, be sure there is no fuel in the See Note 7 ash pan prior to lighting. Flame Guide 1" 1. Turn Mode Selector to "OFF". 2. Fill hopper with pellets.
-
Page 21: Manual Operation
Manual Ignition The XXV Pellet Stove is capable of manual operation. This also allows the operator to manually control operation during an emergency (i.e. igniter failure, or when using certain generators.) The unit can be switched between "AUTO" and "MANUAL" at any time during operation. NOTE: when starting the unit in "AUTO" mode and switching to "MANUAL": Once an ignition cycle has started, it will continue regardless of mode. Switching from "Auto"... - Page 22 Manual Start Up Manual "Cold" Start / Igniter Switch to "MANUAL" (up position) Make sure the unit is plugged into a 240 VAC, 50 HZ electrical source. IMPORTANT: To avoid unwanted smoke, Be sure there is no fuel or other combustibles in the ash pan prior to lighting. Fig. 27 Keep all doors closed during operation. Maintain all seals and gaskets in good condition. Use only the burn pot, as supplied in the firebox, to support Fig. 26 See Note 7 or contain the burning fuel. No other form of grate or rack 1" is permitted. 1. Turn FEEd AdJUSTER to the desired feed rate. No. 4 is good for most pellets.
-
Page 23: Room Sensor
Room Sensor Installation Room sensor Installation The room sensor is a small temperature sensor on the end of a 60" wire. This sensor is installed much like a standard wall thermostat. Because it is so small, it can be hidden along the trim of a doorway or even up the leg of a coffee table. There is a remote room sensor port on the rear of the unit for easy external connection. Use standard 18-2 thermostat wire to extend the distance to the desired location (50' maximum). The room sensor should be installed in the location where you want to control the temperature. In most installations locating the room sensor behind the stove near the distribution fan works well because the sensor monitors the room air being drawn into the distribution fan. NOTE: Distances of more than 25 feet from the unit or in another room are not recommended. The room sensor is essential for the XXV's excellent efficiency. NOTE: It is recommended that the room sensor be installed, even if only installed on the rear of the unit as a return air sensor. -
Page 24: Maintenance
Maintenance Removing Ashes: Fuel quality and moisture content will dictate how often it will be necessary to empty the ash pan. disposal of Ashes Ashes should be placed in a steel container with a tight fitting lid. The closed container of ashes should be moved outdoors immediately and placed on a noncombustible floor or on the ground, well away from all combustible materials, pending final disposal. - Page 25 Maintenance 7. Remove the combustion blower by loosening the 3 Clean these areas with brush and wing nuts, twisting the combustion blower mount plate vacuum counterclockwise to unlock, and pulling the blower out. 8. Clean the combustion blower wheel with a brush and a vacuum cleaner. Note: Do not use a household vacuum to clean the stove. We recommend that you use a shop vacuum that is equipped with a fine dust filter called a HEPA filter or a vacuum specially made for fly ash and soot. USING A VACUUM WHICH IS NOT EQUIPPED WITH A FINE DUST FILTER WILL BLOW FLY ASH AND SOOT OUT INTO THE ROOM.
- Page 26 burn Pot Maintenance burn Pot Cleaning and Maintenance 1. Scrape the top holed surface and sides of the burn pot. (Fig. 39) It is not necessary to completely remove all loose material from the burn pot. The excess will be pushed out during the next use. 2. With the fire out and burn pot cold, use the supplied allen wrench to remove any build-up that may have accumulated in the holes of the burn pot grate. Simply push the allen wrench down through each hole ensuring it is clear of any build-up paying attention not to damage the igniter element in the process. Fig. 39 dANGER Disconnect the power to the unit before removing cover.
- Page 27 Wing Nut the stove is cool and that the surface to be painted is clean. Apply in several light coats and take care to only coat the chipped area. Allow the paint to dry for 24 hours before Fig. 43 touching or firing the stove. viewing Glass The glass in your Harman® stove is a special ceramic glass. • Do not abuse the glass by striking or slamming the door. • Never burn the appliance if the door glass is cracked or broken. • Replace only with 5mm ceramic glass supplied by your Gasket Harman® dealer. Soot and/or fly-ash may accumulate on the viewing glass, Glass and will ocassionally need to be cleaned. Clean the glass with a soft cloth and mild glass cleaner. Do not clean the glass when hot, and avoid the use of abrasive cleaners.
-
Page 28: Options
Options XXv Top Flue Option - Harman® Part #1-00-677120 The Top Flue option attaches to the exhaust on the rear of the stove, and extends it to the top with a six inch stub. This gives the appearance of a wood stove and also allows venting with existing single wall, connector. A 12 inch piece of 4" pellet vent is included to act as an insulator only. Note: The top flue adaptor is not approved for use with pellet vent pipe. It is only tested for use with chimney connector (6- inch pipe) into an existing "class A" chimney. Side View direct vent wall Passthrough Harman® Part #1-00-677177 The Harman® Direct Vent Wall Passthrough makes installing your Harman® Pellet Stove with outside air a lot easier. It is... -
Page 29: Trouble Shooting
Trouble-Shooting STOvE dOES NOT FEEd SMOKE IS vISIbLE COMING OUT OF vENT 1. No fuel in hopper. 1. Air-fuel ratio is too rich. 2. Firebox draft may be too low for sensing switch in feeder a. Feed rate too high. circuit to operate. Check for closed doors, loose or b. Draft too low caused by a gasket leak. missing gasket on doors or hopper lid. LOw HEAT OUTPUT 3. Hopper lid must contact the lid position switch. 1. Feed rate too low 4. Feed motor will not run until the ESP control senses a 2. Draft too low because of gasket leak. certain temperature. Maybe you did not put enough fuel 3. Poor quality or damp pellets or starting gel in the burn pot before manually lighting the... -
Page 30: Specifications
Flue Size 3 inch or optional 6" top exit Outside Air Size 3" Inch Fuse Rating 6 amp wiring diagram HARMAN - ACCENTRA, XXV PELLET STOVE WIRING DIAGRAM 1-90-05471 1-90-00885 LINE FILTER 250 V.A.C. 50 HZ. IEC 950 comp. BROWN BROWN... -
Page 31: Power Failure / Back-Up
Contact your dealer if you have questions about UPS compatibility with your appliance. Harman® Surefire 512H Battery Back-up The 512H connects to a 12 volt deep cycle battery that will run your appliance for up to eight (8) hours. It includes a trickle charge feature that keeps your battery charged when power is available. -
Page 32: Warranty
Hearth & Home Technologies LIMITEd LIFETIME wARRANTY Hearth & Home Technologies, on behalf of its hearth brands (”HHT”), extends the following warranty for HHT gas, wood, pellet, coal and electric hearth appliances that are purchased from an HHT authorized dealer. wARRANTY COvERAGE: HHT warrants to the original owner of the HHT appliance at the site of installation, and to any transferee taking ownership of the appliance at the site of installation within two years following the date of original purchase, that the HHT appliance will be free from defects in materials and workmanship at the time of manufacture. After installation, if covered compo- nents manufactured by HHT are found to be defective in materials or workmanship during the applicable warranty period, HHT will, at its option, repair or replace the covered components. HHT, at its own discretion, may fully discharge all of its obligations under such warranties by replacing the product itself or refunding the verified purchase price of the product itself. The maximum amount recoverable under this warranty is limited to the purchase price of the product. This warranty is subject to conditions, exclusions and limitations as described below. wARRANTY PERIOd: Warranty coverage begins on the date of original purchase. In the case of new home construction, warranty coverage begins on the date of first occupancy of the dwelling or six months after the sale of the product by an independent, authorized HHT dealer/ distributor, whichever occurs earlier. The warranty shall commence no later than 24 months following the date of product shipment from HHT, regardless of the installation or occupancy date. The warranty period for parts and labor for covered components is produced in the following table. The term “Limited Lifetime” in the table below is defined as: 20 years from the beginning date of warranty coverage for gas appliances, and 10 years from the beginning date of warranty coverage for wood, pellet, and coal appliances. These time periods reflect the minimum expected useful lives of the designated components under normal operating conditions. Warranty Period HHT Manufactured Appliances and Venting Components Covered Parts Labor Wood Pellet Coal Electric Venting Wood All parts and material except as covered by Conditions, 1 Year... -
Page 33: Warranty Conditions
wARRANTY CONdITIONS: • This warranty only covers HHT appliances that are purchased through an HHT authorized dealer or distributor. A list of HHT authorized dealers is available on the HHT branded websites. • This warranty is only valid while the HHT appliance remains at the site of original installation. • This warranty is only valid in the country in which the HHT authorized dealer or distributor that sold the appliance resides. • Contact your installing dealer for warranty service. If the installing dealer is unable to provide necessary parts, contact the nearest HHT authorized dealer or supplier. Additional service fees may apply if you are seeking warranty service from a dealer other than the dealer from whom you originally purchased the product. • Check with your dealer in advance for any costs to you when arranging a warranty call. Travel and shipping charges for parts are not covered by this warranty. wARRANTY EXCLUSIONS: This warranty does not cover the following: • Changes in surface finishes as a result of normal use. As a heating appliance, some changes in color of interior and exterior surface finishes may occur. This is not a flaw and is not covered under warranty. • Damage to printed, plated, or enameled surfaces caused by fingerprints, accidents, misuse, scratches, melted items, or other external sources and residues left on the plated surfaces from the use of abrasive cleaners or polishes. • Repair or replacement of parts that are subject to normal wear and tear during the warranty period. These parts include: paint, wood, pellet and coal gaskets, firebricks, grates, flame guides, batteries and the discoloration of glass. • Minor expansion, contraction, or movement of certain parts causing noise. These conditions are normal and com- plaints related to this noise are not covered by this warranty. • Damages resulting from: (1) failure to install, operate, or maintain the appliance in accordance with the installation instructions, operating instructions, and listing agent identification label furnished with the appliance; (2) failure to install the appliance in accordance with local building codes; (3) shipping or improper handling; (4) improper opera- tion, abuse, misuse, continued operation with damaged, corroded or failed components, accident, or improperly/ incorrectly performed repairs; (5) environmental conditions, inadequate ventilation, negative pressure, or drafting caused by tightly sealed constructions, insufficient make-up air supply, or handling devices such as exhaust fans or forced air furnaces or other such causes; (6) use of fuels other than those specified in the operating instructions; (7) installation or use of components not supplied with the appliance or any other components not expressly authorized and approved by HHT; (8) modification of the appliance not expressly authorized and approved by HHT in writing;... -
Page 34: Corn Burning Info
Addendum for Burning Corn and Pellet Fuel Mixture Harman® pellet burning, free-standing stoves and inserts have been tested to ASTM E1509 for burning shelled corn in a mixture with wood pellets. The listing approves up to a 50% corn and 50% pellet mixture. Different mixtures of corn will have distinctively different burn characteristics depending upon moisture content and variety. - Page 35 Service & Maintenance Log Date Of Service Performed By Description Of Service XXV Pellet Stove 3-90-00885R17_02/15...
- Page 36 At Harman®, we build each product to a standard, not a price. This powerful heating appliance boasts uncompromising attention to detail and helps preserve our planet by using environmentally responsible fuels. (Signature of Boxer) Your premium quality hearth product designed and assembled by the experienced and skilled members at Harman®...
Need help?
Do you have a question about the XXV Freestanding Pellet Stove and is the answer not in the manual?
Questions and answers