
Related Manuals for Celestron The G-8 11023


Summary of Contents for Celestron The G-8 11023
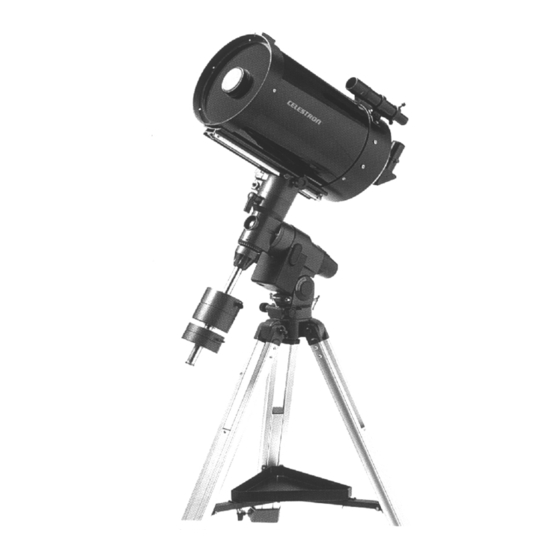
- Page 1 The G-8 Model #11023 8" OPTICAL TUBE ASSEMBLY Model #11023-1 CG-5 EQ Mount Model # 91515 INSTRUCTION MANUAL...
-
Page 2: Table Of Contents
Adjusting the Mount in Azimuth ..................15 Disassembling and Transporting Your G-8 ................16 Storing Your G-8 ......................16 L L L L L THE CELESTRON 8 OPTICAL TUBE ASSEMBLY ................17 Setting Up your C8 OTA ....................18 Installing the Finderscope ....................18 Attaching the Finder Bracket to the Telescope ..............18... - Page 3 Polar Alignment ..........................31 Finding the Pole ..........................32 Latitude Scales ........................ 33 Pointing at Polaris ......................34 Declination Drift ........................35 Polar Alignment Finders ....................36 Aligning the R.A. Setting Circle ..................36 L L L L L CELESTIAL OBSERVING ........................37 Observing the Moon ........................37 Observing the Planets ........................37 Observing the Sun .........................38 Observing Deep-Sky Objects ......................39...
-
Page 4: L L L L L Introduction
With a mirror diameter of 8 inches, your Celestron C8 has a light gathering power of 800 times that of the unaided human eye. -
Page 5: How To Use This Manual
A Word of Caution Your G-8 telescope is designed to give you hours of fun and rewarding observa- tions. However, there are a few things to consider before using your telescope that will ensure your safety and protect your equipment. WARNING ! NEVER LOOK DIRECTLY AT THE SUN WITH THE NAKED EYE OR WITH A TELESCOPE. -
Page 6: The Schmidt-Cassegrain Optical System
Figure 1-1 This cross-sectional diagram shows the light path of the Schmidt- Cassegrain optical system. Note that the light rays travel the length of the telescope tube three times, making this a compact optical design. Note that the curve of the corrector plate is greatly exaggerated. Introduction •... -
Page 7: L L L L L Assembling Your G - 8
The G-8 (#11023), is the only version of the C8 that is offered on a German equatorial mount. Like all Celestron 8 models, the G-8 uses a Schmidt- Cassegrain optical design. The G-8 is shipped in two boxes. The first con- tains the optical tube (i.e., telescope) and all the standard accessories, which... - Page 8 The G-8 Figure 2-1 1. Finderscope 12. Counterweight Safety Screw 2. Eyepiece 13. Counterweights 3. Star Diagonal 14. Counterweight Shaft 4. Dovetail Bar Clamp Knob 15. Counterweights shaft Lock Collar 5. R.A. Setting Circle 16. DEC Circle 6. Latitude Scale 17.
-
Page 9: Assembling The Cg-5 Equatorial Mount
Assembling the CG-5 Equatorial Mount (#91515) Setting Up the Tripod The tripod comes fully assembled with the metal plate, called the tripod head, that holds the legs together at the top. In addition, the brackets that support the accessory tray are also attached to the tripod. Stand the tripod upright and pull the tripod legs apart until the leg brace assembly for the accessory tray is fully extended (see figure 2-2). -
Page 10: Attaching The Accessory Tray
With the tripod set up, you are ready to attach the accessory tray to the tripod. Attaching the Accessory There are three wing bolts that hold the accessory tray to the bracket. Tray 1. Locate the three wing bolts. 2. Place the accessory tray over the bracket and position it so the thread holes in the accessory tray are above the slotted holes in the bracket. -
Page 11: Attaching The Equatorial Mount
Attaching the Equatorial The equatorial mount allows you to tilt the telescope’s axis of rotation so that you can track the stars as they move across the sky. The CG-5 mount is a Mount German equatorial mount that attaches to the tripod head (i.e., metal plate on the tripod). -
Page 12: Attaching The R.a. Slow Motion Knob
Attaching the R.A. Slow Motion Knob With the mount securely in place, you are ready to attach some of the acces- sories (the telescope tube will be added last). Start with the Right Ascension (R.A.) slow motion knob. The R.A. slow motion knob allows you to make fine pointing adjustments in the direction the telescope is aiming (once it is attached to the mount). -
Page 13: Attaching The Declination Slow Motion Knob
Attaching the Declination Slow Motion Knob Like the R.A. slow motion knob, the DEC slow motion knob allows you to make fine pointing adjustments in the direction the telescope is pointed. The DEC slow motion knob attaches in the same manner as the R.A. knob. The shaft that the DEC slow motion knob fits over is toward the top of the mount, just below the telescope mounting platform. -
Page 14: Attaching The Counterweight Bar And Counterweights
Attaching the Counterweight Bar and Counterweights The last item to be mounted before the telescope tube is the counterweight bar and counterweights. Used to balanced the telescope, the counterweight bar attaches to the opposite side of the mount as the telescope. To install the counterweight bar: 1. -
Page 15: Attaching The Telescope To The Mount
With the mount fully assembled, you are ready to attach the telescope to the Attaching the Telescope mount. to the Mount • Before you attach the optical tube, fully tighten the right ascension and declination clamps. This will prevent the telescope from moving suddenly once attached to the mount. -
Page 16: Removing The Lens Cap
The G-8 lens cap utilizes a bayonet-type locking mechanism to hold it in Removing the Lens Cap place. To remove the lens cap, hold the cover firmly and rotate the outer edge 1/2” counterclockwise and pull off. To eliminate undue stress on the mount, the telescope should be properly Balancing the Telescope balanced around the polar axis. -
Page 17: Balancing The Telescope In Dec
The telescope should also be balanced on the declination axis to prevent any Balancing the Telescope sudden motions when the DEC clamp is released. To balance the telescope in in DEC DEC: 1. Release the R.A. clamp and rotate the telescope so that it is on one side of the mount (i.e., as described in the previous section on balancing the telescope in R.A.). -
Page 18: Adjusting The Mount In Altitude
Adjusting the Mount For the purpose of polar alignment, there are two directions in which the mount in Altitude can be adjusted; vertically, which is called altitude and horizontally, which is called azimuth. There are several ways to align on the celestial pole, many of which are discussed later in this manual. -
Page 19: Disassembling And Transporting Your G-8
When not in use, your Celestron G-8 can be left fully assembled and set up. Storing Your G-8 However, all lens and eyepiece covers should be put back in place. The opening to the rear cell must also be covered. -
Page 20: L L L L L The Celestron 8 Optical Tube Assembly
T H E 8 " O P T I C A L T U B E A S S E M B L Y (#11023-1) The Celestron 8 Optical Tube Assembly (OTA) is simply the telescope without an equatorial mount and clock drive unit. In its standard configuration, the C8 Optical Tube Assembly is designed to attach to a standard, but very rigid, photographic tripod for terrestrial viewing. -
Page 21: Setting Up Your C8 Ota
Setting Up Your C8 OTA The C8 Optical Tube Assembly attaches to any photographic tripod with a 1/ 4x20 threaded screw. The telescope attaches to the tripod via a balance bracket which has two 1/4x20 holes. The two holes are on either end of the bracket. -
Page 22: Attaching The Finder To The Bracket
Attaching the Finder to the Bracket With the bracket firmly attached to the telescope, you are ready to attach the finder to the bracket. 1. Thread the three screws into the finder bracket that will hold the finder in place. Do not thread them in completely or they will interfere with the placement of the finder. -
Page 23: L L L L L Telescope Basics
This section deals with basic telescope opera- tions that are common to all Celestron 8 telescopes. Attaching the There are several accessories that come standard with all the Celestron 8 telescopes. The installation and use of each of these is described in this Accessories section. -
Page 24: The Eyepiece
For more information on how to determine power, see the section on Figure 4-1 “Calculating Magnification.” Barrel diameter is the diameter of the barrel that slides into the star diagonal or visual back. All Celestron C8 telescopes use eyepieces with a 1-1/4" barrel diameter. Figure 4-2 Telescope Basics... -
Page 25: Image Orientation
Image Orientation It should be noted that the image orientation will change depending on the viewing configuration. When using the star diagonal, the image is right-side- up, but reversed from left-to-right. If inserting the eyepiece into the visual back (i.e., without the star diagonal), the image is inverted (upside down and re- versed from left-to-right). -
Page 26: Focusing
Focusing Each of the Celestron 8 telescopes uses the same focusing mechanism. The primary mirror is mounted on a ring which slides back and forth on the primary baffle tube (see figure 4-5). The focusing knob, which moves the primary mirror, is on the rear cell of the telescope. -
Page 27: Aligning The Finder
Aligning the Finder The G-8 and the C8 Optical Tube Assembly come with a 6x30mm finder. The finder is designed to help you find objects that are easily overlooked in the main optics of the telescope. The first number used to describe the finder is the power. -
Page 28: Your First Look
Daytime Observing As mentioned in the introduction, your Celestron G-8 telescope works well as a terrestrial spotting scope. When not used to examine objects in the night sky, it can be used to study objects here on Earth. -
Page 29: Nighttime Observing
10. Take your time and study your subject. If looking at the Moon, look for small details in the craters. That’s all there is to using your Celestron telescope. However, don’t limit your view of an object to a single eyepiece. After a few minutes, try using a different optional eyepiece, a more powerful one. -
Page 30: Calculating Magnification
Calculating You can change the power of your Celestron G-8 telescope just by changing the eyepiece (ocular). To determine the magnification for your telescope, you Magnification would simply divide the focal length of the telescope (2000mm) by the focal length of the eyepiece that you are using. In equation format, the formula... -
Page 31: General Observing Hints
If you have astigmatism, corrective lenses should be worn at all times. Your Celestron telescope can be used for both terrestrial and astronomical General Photography photography. Your G-8 has a fixed aperture and, as a result, a fixed f/ratio. To... -
Page 32: L L L L L Astronomy Basics
Your Celestron telescope comes equipped with setting circles that translate the celestial coordinates into a precise location for the telescope to point. The setting circles will not work properly until you have polar aligned the telescope and set the R.A. -
Page 33: Motion Of The Stars
Like the Sun, the stars also appear to move across the sky. This motion is Motion of the Stars caused by the Earth’s rotation. For observers in the northern hemisphere, all stars appear to move around the north celestial pole. For observers in the southern hemisphere, all stars appear to move around the south celestial pole. -
Page 34: Polar Alignment
Polar Alignment In order for the telescope to track the stars it must meet two criteria. First, you need a drive motor that will move at the same rate as the stars. For the G- 8 there are two optional motor drives (#93518 and #93820-C) that can be fitted to it. -
Page 35: Finding The Pole
Finding the Pole For each hemisphere, there is a point in the sky around which all the other stars appear to rotate. These points are called the celestial poles and are named for the hemisphere in which they reside. For example, in the northern hemisphere all stars move around the north celestial pole. -
Page 36: Latitude Scales
Latitude Scales The easiest way to polar align a telescope is with a latitude scale. Unlike other methods that require you to find the celestial pole by identifying certain stars near it, this method works off of a known constant to determine how high the polar axis should be pointed. -
Page 37: Pointing At Polaris
Pointing at Polaris This method utilizes Polaris as a guidepost to the celestial pole. Since Polaris is less than a degree from the celestial pole, many amateurs simply point the polar axis of their telescope at Polaris. Although this is by no means a perfect alignment, it is close. -
Page 38: Declination Drift
Declination Drift This method of polar alignment allows you to get the most accurate alignment on the celestial pole and is required if you want to do long exposure deep-sky astrophotography through the telescope. The declination drift method requires that you monitor the drift of selected guide stars. The drift of each guide star tells you how far away the polar axis is pointing from the true celestial pole and in what direction. -
Page 39: Polar Alignment Finders
. If you don’t, they can be learned by using the Celestron Sky Maps (#93722) or consulting a current astronomy magazine. To align the R.A. setting circle: 1. -
Page 40: L L L L L Celestial Observing
C E L E S T I A L O B S E R V I N G With your telescope set up, you are ready to use it for celestial observing. This section covers visual observing of both solar system and deep-sky objects. -
Page 41: Observing The Sun
This can damage the telescope and/or any accesso- ries attached to the telescope. For safe solar viewing, use a Celestron solar filter (#94162). This filter reduces the intensity of the Sun’s light, making it safe to view. With this filter you can see sunspots as they move across the solar disk and faculae, which are bright patches seen near the Sun’s edge. -
Page 42: Observing Deep-Sky Objects
They include star clusters, planetary nebulae, diffuse nebulae, double Objects stars, and other galaxies outside our own Milky Way. The Celestron Sky Maps (#93722) can help you locate the brightest deep-sky objects. Most deep-sky objects have a large angular size. Therefore, low-to-moderate power is all you need to see them. -
Page 43: Star Hopping
Star Hopping You can use your setting circles to find these objects (as described earlier in this manual) or try star hopping. Star hopping is done by using bright stars to guide you to an object. Here are directions for two popular objects. The Andromeda Galaxy, M31, is an easy first target. - Page 44 Star hopping may take some getting used to since you can see more stars through the finder than you can see with the naked eye. And, some objects are not visible in the finder. One such object is M57, the famed Ring Nebula. Here’s how to find it: 1.
-
Page 45: Viewing Conditions
Viewing Conditions Viewing conditions affect what you can see through your G-8 telescope during an observing session. Conditions include transparency, sky illumination, and seeing. Understanding viewing conditions and the affect they have on observ- ing will help you get the most out of your telescope. Transparency Transparency is the clarity of the atmosphere and is affected by clouds, moisture, and other airborne particles. - Page 46 rium. Once adjusted to the outdoor temperature, don’t touch the telescope tube with your hands. When pointing the telescope, hold the telescope by the star diagonal. If observing with others, make sure no one stands in front of or directly below the telescope tube. The images produced by Type 2 seeing conditions don’t move as quickly as those produced by Type 1 conditions, but the images are quite blurry.
-
Page 47: L L L L L Celestial Photography
P H O T O G R A P H Y After looking at the night sky for awhile you may want to try photographing it. Several forms of celestial photography are possible with your Celestron G-8N telescope. The most common forms of celestial photography, in order of difficulty are: short exposure prime focus, piggyback, eyepiece projection, and long exposure deep sky. -
Page 48: Short Exposure Prime Focus
ISO 200 ISO 400 Crescent 1/15 Quarter 1/15 1/30 1/60 1/125 Full 1/30 1/60 1/125 1/250 Table 6-1 Above is a listing of recommended exposure times when photographing the Moon at the prime focus of your Celestron G-8N. Celestial Photography •... - Page 49 This technique is also used for photographing the Sun with the proper Celestron solar filter. • Celestial Photography...
-
Page 50: Piggyback
Piggyback The easiest way to enter the realm of deep-sky, long exposure astrophotography is via the piggyback method. Piggyback photography is done with a camera and its normal lens riding on top of the telescope. Through piggyback photography you can capture entire constellations and record large scale nebulae that are too big for prime focus photography. - Page 51 The longer the focal length, the more accurate your guiding must be. You can continue to increase the focal length of the lens until you are ready for prime focus photography with your Celestron G- •...
-
Page 52: Eyepiece Projection
This form of celestial photography is designed for objects with small angular sizes, Eyepiece Projection primarily the planets and individual lunar features. Planets, although physically quite large, appear small in angular size because of their great distances. Moderate to high magnification is, therefore, required to make the image large enough to see any detail. - Page 53 Planet ISO 50 ISO 100 ISO 200 ISO 400 Moon Mercury Venus 1/15 Mars Jupiter Saturn Table 7-2 The exposure times listed here should be used as a starting point. Always make exposures that are longer and shorter than the recommended time. Also, try bracketing your exposures, taking a few photos at each shutter speed.
-
Page 54: Long Exposure Prime Focus
Prime Focus Most of these objects cover large angular areas and fit nicely into the prime focus field of your Celestron G-8 telescope. The brightness of these objects, however, requires long exposure times and, as a result, are rather difficult. - Page 55 • Ektar 1000 (color print) • Konica 3200 (color print) • Fujichrome 1600D (color slide) • 3M 1000 (color slide) • T-Max 3200 (black and white print) • T-Max 400 (black and white print) As you perfect your technique, try specialized films, that is films that are designed or specially treated for celestial photography.
-
Page 56: Ccd Imaging
25 times shorter than those needed with a f/10 system! Used with Celestron’s PixCel CCD System, objects will be easily found due to the ultra wide 2/3° by 1/2° field of view provided. With the optional Fastar lens assembly you can easily convert your Fastar compatible telescope to f/1.95 prime focus use in a... -
Page 57: Description Of F-Numbers
8 inches. This makes the system an f/10, (focal length divided by diameter). When the secondary is removed and the CCD is placed at the Fastar position, the system becomes f/1.95, this is unique to Celestron telescopes (see figures below). -
Page 58: Imaging At F/1.95
As stated above, the exposure times are much shorter at f/1.95 than at f/6.3 or Imaging at f/1.95 f/10. The field-of-view is wider, so it is easier to find and center objects. Also with a wider field-of-view you can fit larger objects (such as M51, The Whirlpool Galaxy) in the frame. -
Page 59: Imaging At F/20
Planetary or Lunar-- Imaging at f/20 f/20 is a great way to image the planets and features on the moon. With the PixCel CCD camera and optional Color Filter Wheel, it is easy to take tri-color images of planets also. When imaging the planets, very short exposures are needed. -
Page 60: L L L L L Telescope Maintenance
Occasionally, you may experience dew build-up on the corrector plate of your G-8 during an observing session. If you want to continue observing, the dew must be removed, either with a Celestron Dew Eliminator (# 94122) or by pointing the telescope at the ground until the dew has evaporated. The optional Dew Cap/Lens Shade (#94017) helps reduce the amount of dew build- up on the corrector plate. - Page 61 To check the collimation of your telescope you will need a light source. A bright star near the zenith is ideal since there is a minimal amount of atmo- spheric distortion. Turn your telescope motor drive on so that you don’t have to manually track the star.
- Page 62 Ultima eyepieces. Model #93507 is a compact achromatic Barlow lens that is under three inches long and weighs only 4 oz. It works very well with all Celestron eyepieces. Carrying Case (#302070) - This rugged case (for the G-8 optical tube assem- bly only and accessories) is constructed of space age resin, making it water- proof, unbreakable, airtight and extremely durable.
- Page 63 113 to 313 power on the G-8. Eyepiece Filters - To enhance your visual observations of solar system objects, Celestron offers a wide range of colored filters that thread into the 1-1/ 4" oculars. Available individually are: #12 deep yellow, #21 orange, #25 red, #58 green, #80A light blue, #96 neutral density - 25%T, #96 neutral density - 13%T, and polarizing.
- Page 64 3 ounces. Operates on two AA batteries (included). Night Vision Flashlight - (#93588) - Celestron’s premium model for as- tronomy, using two red LEDs to preserve night vision better than red filters or other devices.
-
Page 65: L L L L L Optional Accessories
The Celestron Planisphere makes it easy to locate stars for observing and is a great planet finder as well. A map of the night sky, oriented by month and day, rotates within a depiction of the 24 hours of the day, to display exactly which stars and planets will be visible at any given time. - Page 66 OBJECTIVE WITH AN OPAQUE COVER. T-Adapter (#93633-A) - T-Adapter (with additional T-Ring) allows you to attach your 35mm SLR camera to the rear cell of your Celestron G-8. This turns your G-8 into a 2032mm telephoto lens perfect for terrestrial photography and short exposure lunar and filtered solar photography.
-
Page 67: L L L L L The Messier Catalog
THE MESSIER CATALOG The Messier Catalog, compiled by Charles Messier, was the first extensive listing of star clusters and nebulae. Messier’s primary observational purpose was to discover comets. He compiled this list so that others searching for comets would not be confused by these objects. His list still remains popular today because all of these objects are easily visible in amateur telescopes. - Page 68 NGC# Const. R.A. Type Proper Name H M S ° ‘ NGC 1960 5 36.3 34 08 Op. Cl. NGC 2099 5 52.0 32 33 Op. Cl. NGC 1912 5 28.7 35 50 Op. Cl. NGC 7092 21 32.3 48 26 Op.
- Page 69 NGC# Const. R.A. Type Proper Name H M S ° ‘ NGC 3031 9 55.8 69 04 Sp. Gx. Bodes Nebula NGC 3034 9 56.2 69 41 Ir. Gx. NGC 5236 13 37.7 -29 52 Sp. Gx. NGC 4374 12 25.1 12 53 El.
-
Page 70: L L L L L List Of Bright Stars
LIST OF BRIGHT STARS The following is a list of bright stars that can be used to align the R.A. setting circle. All coordinates are in epoch 2000.0. Epoch 2000.0 Star Name Constellation R.A. Magnitude H M S ° ‘ “ Sirius 06 45 09 -16 42 58... - Page 71 FOR FURTHER READING The following is a list of astronomy books that will further enhance your understanding of the night sky. The books are broken down by classification for easy reference. Astronomy Texts Astronomy Now ..................Pasachoff & Kutner Cambridge Atlas Of Astronomy ..............Audouze & Israel McGraw-Hill Encyclopedia Of Astronomy ..........
- Page 72 CELESTRON ONE YEAR WARRANTY Celestron International (CI) warrants this telescope to be free from defects in materials and workmanship for one year. CI will repair or replace such product or part thereof which, upon inspection by CI, is found to be defective in materials or workmanship. As a condition to the obligation of CI to repair or replace such product, the product must be returned to CI together with proof-of-purchase satisfactory to CI.
- Page 73 Celestron International 2835 Columbia Street Torrance, CA 90503 Tel: 310-328-9560 Fax: 310-212-5835 Web site: http://www.celestron.com Copyright 1999 Celestron International All right reserved (Products or instructions may change without notice or obligation). Item #11023-INST 10-99 Price $10.00...
Need help?
Do you have a question about the The G-8 11023 and is the answer not in the manual?
Questions and answers