Table of Contents
Advertisement
Quick Links
Advertisement
Table of Contents

Subscribe to Our Youtube Channel
Related Manuals for Medion GoPal E4x70


Summary of Contents for Medion GoPal E4x70
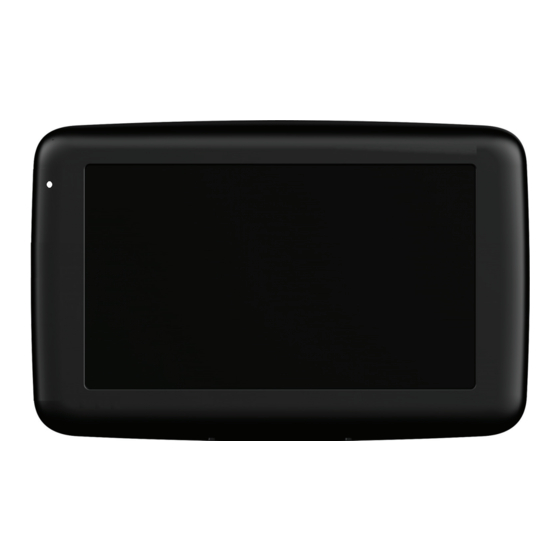
- Page 1 10.92 cm / 4.3“ Navigation System MEDION GoPal ® ® E4x70 Instruction Manual...
-
Page 2: Table Of Contents
Table of contents About these Instructions ................5 1.1. Symbols and Key Words Used in these Instructions ........5 1.2. Proper Use ......................... 6 1.3. Information about Conformity ................. 6 Safety Instructions ..................7 2.1. Dangers for children and people with reduced ability to operate electronics ......................... - Page 3 9.2. Aerial Orientation ....................31 9.3. Mounting the Car Holder ...................31 9.4. Attaching the Navigation System ..............32 9.5. Connecting the Car Adapter ................32 9.6. Starting the Navigation Software ..............33 Warning Function for Traffic Monitoring Points (optional) ....34 Speech Commands (optional)..............37 Bluetooth (optional) ..................
- Page 4 22.2. Connecting with the PC ..................68 22.3. Working with Microsoft® ActiveSync® ............69 GPS (Global Positioning System) .............. 70 TMC (Traffic Message Channel) (optional) ..........71 24.1. Premium TMC (optional) ...................71 Working with Memory Cards ..............72 25.1. Inserting Memory Cards ..................72 25.2.
-
Page 5: Copying This Manual
Personal Data Take a note for your proof of ownership: Serial Number .......................... Password .......................... Information note .......................... SuperPIN .......................... UUID .......................... Date of Purchase .......................... Place of Purchase .......................... Please record the serial number into any appropriate guarantee documents. You will enter your own password and information note using the Security Function. -
Page 6: About These Instructions
1. About these Instructions Read these operating instructions carefully before using the appliance for the first time. Note the warnings on the unit and in the operating instructions. Always keep the operating instructions close to hand. If you sell the equipment or give it away, make sure you also hand over these instructions and the warranty card. -
Page 7: Proper Use
Guideline. This device fulfils the basic requirements and the relevant regulation of the Ecodesign Guideline 2009/125/EG. Complete declarations of conformity are available under www.medion.com/conformity. PLEASE NOTE! You can find detailed operating instructions for the sat nav on the CD/ DVD, as well as via the online help for the device. -
Page 8: Safety Instructions
2. Safety Instructions 2.1. Dangers for children and people with reduced ability to operate electronics • Do not allow small children to play unattended with electrical equipment. Children are incapable of judging potential risks properly. • Keep the appliance and its accessories out of reach of children. DANGER! Keep plastic packaging out of reach of children. -
Page 9: Never Carry Out Repairs Yourself
• Please contact our Service Centre if you encounter technical problems with your appliance. • In the event a repair becomes necessary, please use Medion authorised Service Partners. The address can be found on the back of your guarantee card or online at www.medion.co.uk 2.4. -
Page 10: Ambient Temperature
2.6. Ambient Temperature • The appliance will operate effectively at an ambient temperature of between +32°F and +95°F (0 °C and 35 °C) and at a relative humidity of between 10 % and 90 % (non-condensing). • In the powered down state the appliance can be stored at between -4°F and +140°F (-20 °C + to 60 °C). -
Page 11: Connection
2.8. Connection When connecting your appliance it is important to observe the fol- lowing instructions: 2.8.1. Power supply through Car Adapter • The car adapter should only be connected to the lighter socket of a car (car battery = DC 12V , truck battery = DC 24V ). -
Page 12: Maintenance
2.11. Maintenance CAUTION! There are no user-serviceable parts which require cleaning inside the housing of the appliance. You can prolong the life of the appliance by taking the following sim- ple steps: • Always remove the power plug and all connecting cables before cleaning. -
Page 13: Supplied Items
3. Supplied Items Please check the condition of items supplied and check for missing items using the list below. If you find your package to be incomplete, please forward to us all claims for missing items within 14 days from the date of purchase. The package should include the following: •... -
Page 14: Views
4. Views 4.1. Front Components Ref. Component Description The LED will flash orange during the charging process. Battery Charge It will shine constant green when the accumulator is Indicator fully charged. Displays the output of your appliance. Tap on the screen with your finger, a stylus or a „blunt“... -
Page 15: Back Components
4.2. Back Components Ref. Component Description Loudspeaker Plays back music, language statements and warnings. 4.3. Top Components Ref. Component Description Turn the device on or off by pressing and holding the On-/ Off On/Off button. You will switch to the stand-by mode or button reactivate the device by quickly pressing the button. -
Page 16: Left Components
4.4. Left Components Component Description Memory card insertion slot Accepts an optional memory card for removable storage. with cover Connection to external power supply as well as connection Mini-USB- for connecting to a PC by means of the USB cable (for data Connector matching) PLEASE NOTE! -
Page 17: Initial Set Up
5. Initial Set up The following is a step by step guide to assist in the initial Set-up of the navigation system. Start by removing the protective plastic from the display. 5.1. Charging the Battery The battery of your navigation system can be charged in the following ways: •... -
Page 18: Power Supply
5.2. Power Supply 5.2.1. Car Adapter Plug the jack of the connection cable into the corresponding receptor of your navigation system. Insert the power adapter into the cigar lighter socket ensuring, that it will not lose contact while driving. This could cause a malfu. 5.2.2. - Page 19 The following options will be available to you subsequently: • You will receive a short introduction about bringing your navigation device and the navigation software through the switch. The mounting in the vehicle, entering and administering navigation destinations, general instructions for use, etc. are described here, among other aspects. •...
- Page 20 5.3.1. Main Views You will find an overview of the different main views of the Main menu here. Button Description Main Screen Viewing maps Navigation menu Extras Settings 19 of 82...
- Page 21 PLEASE NOTE! You will not be able to select the Navigation menu or the settings if the navigation software does not find any map files in the device or on a memory device. Then the Extras menu will appear automatically. Brief pressure on the on/off button will be enough to switch the device on or off, provided that your navigation system is connected to an external source of electricity or is running in battery operation (standby...
-
Page 22: General Operating Instructions
6. General Operating Instructions 6.1. Switching on/off the Device Your device will be in its normal operating state after the initial set up. You can activate and deactivate your device with the On-/Off switch. To start your navigation system press briefly the On-/Off switch. PLEASE NOTE! Your device is delivered in a status in which it will not switch off independently. -
Page 23: Security
7. Security You have the possibility of protecting your device against external access by means of this function. Some one-off settings will have to be made before you will be able to use this function. Proceed as follows to do this: 7.1. -
Page 24: Making Settings
7.2. Making settings The following selection window, through which you will make the settings for the Security Function, will appear after you have entered the password and the information note successfully. Button Description Set here whether the device should request the password after a hard reset. -
Page 25: Superpin And Uuid
7.3. SuperPIN and UUID The SuperPIN and the UUID (Universally Unique IDentifier = definite device identification) will appear on the display after you have confirmed the settings . PLEASE NOTE! Record this data in your Operating Instructions and keep them in a safe place. -
Page 26: Making Subsequent Settings
7.4. Making subsequent settings Start the Security Function if you have already entered a password and would like to make a subsequent setting or to change the password. The following display will appear: Button Description Change the password or the information text Authentication settings (see page 23, Making settings) Display SuperPIN and UUID (see page 24) -
Page 27: Password Request
7.4.1. Password Request A password request will appear at the restarting of the device, according to the setting, if you have established a password by means of the Security Function. Enter the password stored by you by means of the keyboard. PLEASE NOTE! The password will be displayed in the form of small stars (****). -
Page 28: Resetting The Navigation System
8. Resetting the Navigation System You can reset your navigation system if it is no longer reacting or working properly. This option restarts the navigation system, without reinstallation being necessary. A reset is often used in order to reorganise the memory. In doing so all programs that are running are interrupted and the working memory is reinitialised. -
Page 29: Switching The Device Off Completely / Hard Reset
8.2. Switching the Device off Completely / Hard Reset ATTENION! A hard reset will delete all data in the temporary memory. Your navigation system will normally be in the Standby Mode, if you have switched it off by pressing the on/off button briefly. In addition, the system can be switched off completely;... -
Page 30: Navigation
9. Navigation The bundled product CD/DVD contains a comprehensive instruction manual. 9.1. Safety Instructions for Navigation • Do not adjust or configure the navigation system whilst driving, this is to protect yourself and others from accidents! • In the event that you do not understand the voice instruction or if you are in any doubt about what to do at the next intersection, then the map or arrow displayed on the screen will provide you with a quick orientation. - Page 31 • The direction statements of the navigation system given do not release the driver of the vehicle from his or her duty of care or personal responsibility. • Plan routes before you leave. If you want to plan a new route whilst on the road pull over and stop driving.
-
Page 32: Aerial Orientation
9.2. Aerial Orientation The aerial must have unrestricted access to the sky to receive GPS satellite signals. Place the aerial as horizontally as possible for this reason. Try out aerial and installation possibilities in the vehicle if the reception is inadequate. 9.3. -
Page 33: Attaching The Navigation System
9.4. Attaching the Navigation System Connect the car adapter and, if necessary, insert the memory card. Place the device below in the centre of the holder. Press it gently backwards until it engages audibly. (similar picture) Now you will be able to place the complete unit on the cleaned windscreen or the suction. -
Page 34: Starting The Navigation Software
9.6. Starting the Navigation Software PLEASE NOTE! Your memory card will always have to be inserted into the device during the use of the navigation system, if the card contains (additional) mapping material. It will be necessary to carry out a reset to restart the navigation system if the memory card has been removed while the system was being used (see page 27). -
Page 35: Warning Function For Traffic Monitoring Points (Optional)
10. Warning Function for Traffi c Monitoring Points (optional) The following display will appear if the warning function for traffic monitoring points has been installed: Confirm with , if you want to use navigation with the warning function for traffic monitoring points. - Page 36 Tap on Speed cam (stationary) here, in order to make the settings for the ‘radar fixes’: Here, you have the option of having the traffic monitoring points represented on a map or faded out. You can also set whether you would like to be informed by acoustic signals before reaching a traffic monitoring point.
- Page 37 Acoustic information about a traffic monitoring point will be given by a warning sound approx. 15 seconds before it is reached. Then, another double warning sound will be given approx. 7 seconds before it is reached. Four warning sounds will give information that the speed is too high.
-
Page 38: Speech Commands (Optional)
11. Speech Commands (optional) The Speech Entry mode can be activated by means of the function during navigation. A short information sound will indicate that the navigation system is ready for the speech entry. Explanation of the symbol: • ( ) optional words; •... - Page 39 Range of validity Command next page | scroll down List commands previous page | scroll up [enter] new destination | Enter address [show] map [ view ] Main menu settings (other | additional) (applications) | additional applications | extras directions| route description routes | route options | route settings | Routes (traffic [jam] | congestion) (information | situation | info | Current route /...
- Page 40 Range of validity Command [display|show] (compass [view] | G P S view) no map | map off | (switch off | hide) map three dimensional) [view | map | perspective] [display|show] (turn icons | arrow | arrow view | direction changes) [display|show] (2 D | two dimensional) [view | map | perspective]...
-
Page 41: Bluetooth (Optional)
12. Bluetooth (optional) The Bluetooth technology serves to bridge short distances wirelessly. Bluetooth devices transmit data wirelessly, so that other devices that also support this technology can communicate with each other without cables. Both devices will have to be adjusted to each other (pairing), before you will be able to use your navigation system as handsfree equipment with your Bluetooth mobile phone. -
Page 42: Pairing The Navigation Device And The Mobile Phone
Button Name Description Back Previous Page of the main display. Delete the number entered by means of the keyboard Delete with this field. Select the number entered by means of the keyboard Calling with this field. Enter the digits of the telephone number to be called by Keypad means of the keyboard. -
Page 43: Accepting Incoming Calls
Select the option (Pairing). The search for a blue-tooth device will start automatically during the first setting up of the device. You will start the search again with ‘Search for mobile’ . Select the corresponding mobile phone from the list. ... -
Page 44: Making Calls
12.5. Making Calls Tap on the keypad in the main Bluetooth screen and enter the number that you wish to call. Start the call with 12.6. Show and Read Out Incoming Messages You will be able to read incoming messages or also to have them read out in addition, if your mobile supports these functions. -
Page 45: During A Call
12.7. During a Call Button Description End call Mute for microphone and volume settings Return the conversation to your mobile 44 of 82... -
Page 46: Mp3 Player (Optional)
13. MP3 Player (optional) Depending on the software equipment your navigation system is equipped with a MP3 Player. Start the MP3 player from the menu Extras by tapping the MP3 Player switch area. All the MP3 files located on a memory card can be taken into a List of Favourites and will be available for replay. -
Page 47: Select A Title And Move It Into The List Of Favourites
13.2. Select a Title and Move it into the List of Favourites Tap on and select the title that you would like to move into the List of Favourites, in order to select a title. You will have three possibilities of marking the title here: ... -
Page 48: List Of The Established Bookmarks
13.2.1. List of Favourites You will reach the List of Favourites by tapping on the You will delete all titles with You will delete individual titles with Confirm with , in order to take over the new selection into the List of Favourites. -
Page 49: Picture Viewer (Optional)
14. Picture Viewer (optional) Depending on the software equipment your navigation system is equipped with a Picture Viewer. You can view the jpg format images on your memory card on your navigation system, with the Picture Viewer. All the images on the memory card will be available immediately. -
Page 50: Full Image View
14.2.1. Full Image View Fig.: Full image view without service strip Tap in the lower area of the screen in the full image view, in order to activate the service strip: Fig.: Full image view with service strip Button Description Turn it clockwise by 90°... - Page 51 You will return to the miniature view by tapping in the centre of the image. The image displayed will be subdivided into 6 fields by tapping on the symbol (fade in grid). Fig.: Full image mode with grid ...
-
Page 52: Travel Guide (Optional)
15. Travel Guide (optional) Depending on the software equipment your navigation system is equipped with a Travel Guide. The Travel Guide will supply general information about the different areas of individual towns and cities or regions in Europe, such as sights, restaurants, culture and travel information. - Page 53 Fig. 5 Fig. 6 Fig. 7 Confirm with Navigate, if you want to navigate to the destination displayed. The address will then be available to the navigation software as the destination. Button Description Previous image Address Shows the address of the selected category Pictures Shows the available images in the selected category.
-
Page 54: Where Am I? (Optional)
16. Where am I? (optional) About the Where am I? function Receive information about your current location, insofar as a GPS signal is available. Tap in Extras one Where am I? In order to add the current location to your favourites, tap on Save current position. -
Page 55: Eco Expert (Optional)
17. Eco Expert (optional) This function provides you with information about the environmental impact of your driving style using a points system and contains tips for environmentally friendly driving behaviour (Eco tips). 17.1. Overwiev of the Main Screen Tap in Extras on Eco Expert. You will find a current overview under Eco points today. - Page 56 You can reset the points score at any time by tapping on the Reset points button. You can display the statistics for the last 30 days via the option Eco points last 30 days. Tap on Settings on the main screen to amend the various settings options: 55 of 82...
-
Page 57: Alarm Clock (Waking Function) (Optional)
18. Alarm Clock (waking function) (optional) Depending on the software equipment your navigation system is equipped with a Alarm Clock/waking function. Start this function from the menu Extras by tapping on the Alarm Clock button. The waking function can work when the device is switched off (Standby Mode / Power Saving Mode) as well as a reminder during the current navigation. -
Page 58: Setting The System Time
18.2.1. Setting the System Time The display of the current time will be located in the upper right corner of the screen. You can adjust it as follows: Tap on in the main screen. The following screen will appear: ... -
Page 59: Selecting An Alarm Signal
18.3. Selecting an Alarm Signal To select an alarm signal touch the symbol. Select the desired alarm sound and confirm the selection with Tap on the corresponding file in the Memory Card directory if you would like to select an alarm tone from the storage card and confirm again with ... -
Page 60: Setting The Volume
18.4. Setting the Volume You can adjust the volume of the alarm signal by tapping on the interface. PLEASE NOTE! The volume configured here only relates to the alarm signal and will not change the volume of the language output of the navigation system or other functions of the system. -
Page 61: Snooze Function
18.5. Snooze Function You will have the possibility of making the waking signal repeat at regular intervals by means of the Snooze function, once it has sounded at the alarm time set. Tap on to activate the Snooze function. ... -
Page 62: Sudoku (Optional)
19. Sudoku (optional) Depending on the software equipment your navigation system is equipped with the game Sudoku. Start the game from the menu Extras by tapping on the Sudoku switch field. Sudoku is a number puzzle. The puzzle area is square and subdivided into nine sections. -
Page 63: Overview Of The Game Field
Button Description Settings You have the following possibilities in the Settings menu: The current game will be stored by tapping on this control button. You will load a game that you have started onto the screen by tapping on this control button. Delete a stored game status. -
Page 64: Traffic Rules Europe
20. Traffi c Rules Europe You will receive a range of basic information about the traffic regulations of the respective country and its emergency numbers by means of the switch in the Extras menu. Select the required country to have the information displayed to you (all information without liability). -
Page 65: Special Cleanup Function
21. Special CleanUp Function The CleanUp function serves the targeted deletion of data, without using a PC. PLEASE NOTE! Please use this function very carefully, because it is possible for data to be deleted that can only be entered again manually afterward. The CleanUp function is activated when the ‘o’... - Page 66 7. GPS Factory Reset Performs a factory reset of the GPS receiver. When using the GPS function after having performed a factory reset, the GPS receiver must orientate itself again. This process may take a while. 8. DC AutoSuspend/Wakeup You can select here when your navigation system should go into Standby mode automatically after the withdrawal of the external power supply.
- Page 67 9. Auto Mass Storage Here you can control the behaviour of your device when connected to a USB port. In the setting Auto Mass Storage: Off - You can select between mass storage and ActiveSync® modes. In Auto Mass Storage: On - Your device will automatically be set to the mass storage mode.
-
Page 68: Synchronisation With The Pc
22. Synchronisation with the PC 22.1. Installing Microsoft® ActiveSync® In order to transfer data between your PC and your navigation system you need the Microsoft® ActiveSync® program. The cost of the navigation system includes a license for this program which can be found on the CD/DVD. -
Page 69: Connecting With The Pc
22.2. Connecting with the PC Press the On/Off button to start your navigation system. Connect the USB cable to your navigation system. Push the USB connector into a free USB port on your computer. The following screen will appear after the navigation system has been connected: ActiveSync®... -
Page 70: Working With Microsoft® Activesync
22.2.2. ActiveSync®-Mode Repeat the attempt to connect, if it has failed the first time, if you have selected the ActiveSync® mode. Follow the instructions on your screen. The program will now set up a partnership between your PC and navigation system. PLEASE NOTE! The navigation system must have been recognized when setting up the ActiveSync®... -
Page 71: Gps (Global Positioning System)
23. GPS (Global Positioning System) GPS is a satellite-backed system for determining your position. With the help of 24 satellites revolving around the earth, it is possible to determine your position on earth with the accuracy of a few meters. The satellite signals are received by the antenna of the built-in GPS receiver, which must have a “line of sight”... -
Page 72: Tmc (Traffic Message Channel) (Optional)
24.1. Premium TMC (optional) If your navigation system features premium TMC, you will obtain more accurate TMC information provided by NAVTEQ Traffic. Your MEDION GoPal utilizes this information at no extra cost. Depending on your configuration this premium TMC information is made available for the corresponding countries. -
Page 73: Working With Memory Cards
25. Working with Memory Cards 25.1. Inserting Memory Cards Carefully take the optional memory card out of its packing (if included). Take care not to touch or dirty the contacts. Insert the memory card carefully into the card bay with contacts pointing forward. -
Page 74: Additional Card Material
25.3. Additional Card Material Your navigation system is already equipped with digitalised map material in the internal memory and/or memory card at the factory. Depending on the configuration, additional maps may be included on your navigation CD/DVD. You will be able to transfer these cards to a memory card immediately. It is recommended that you use an external card reader (see also page 72). -
Page 75: Internal Memory
25.3.3. Transferring Installation Files and Map Material to the Internal Memory PLEASE NOTE! The navigation system must be connected to a computer by means of ActiveSync® for the transfer of the data. Your device has an internal, permanent memory, which is located in the \My Flash Disk directory. -
Page 76: Faq
26. FAQ Where can I find more information on the navigation system? Detailed operating instructions for navigation can be found on the corresponding CD/DVD, which accompany your navigation system. Also use the additional Help functions that are available with a single touch of a button (usually F1 on the PC), or by selecting the Help option, as additional assistance. -
Page 77: Customer Service
27. Customer Service 27.1. Faults and Possible Causes The navigation system no longer reacts or is behaving atypically. Carry out a reset. The navigation system is recognised only as a guest by ActiveSync®. See information on page 67. The GPS receiver cannot be initialised or found. -
Page 78: Transport
27.3. Transport When transporting the appliance please follow the instructions below: • After transporting the appliance wait until the unit has acclimatised and adjust to surrounding conditions (e.g. room temperature and humidity) prior to use. In the event of large fluctuations in temperature or humidity, condensation or moisture may form inside the appliance. -
Page 79: Specifications
29. Specifi cations Parameter Information Power supply CA-051-00U-00 / DDA-5J-05 050100 (Mitac) Power supply cable for a cigarette lighter 12-24V DC, 1A / fuse 2A Input (F2AL/250V) Output 5V / 1A (max.) Battery Li-Ion, 3.7 V Memory card type Micro-SD Bluetooth (optional) Class 2 USB interface... -
Page 80: Fcc Compliance Statement
31. FCC Compliance Statement This equipment has been tested and found to comply with the limits for a Class B digital device, pursuant to Part 15 of FCC Rules. These limits are designed to provide reasonable protection against harmful interference in a residential installation. This equipment generates, uses, and can radiate radio frequency energy and, if not installed and used in accordance with the instructions, may cause harmful interference to radio communications. -
Page 81: Index
CleanUp ............64 32. Index Customer Service ........76 Accessing Memory cards ......72 Data exchange..........72 ActiveSync®-Mode ........69 Data Security ...........8 Additional card material ......73 DC AutoSuspend ........65 Aerial Orientation ........31 Alarm Clock Eco Expert ............. 54 Ending ............ - Page 82 Starting the Navigation Software ..33 SuperPIN ..........24, 25 Supplied Items ..........12 On-/ Off button ........... 14 Synchronisation with the PC ....67 Operating Switching on/off the device ....21 TMC ..............71 Operating Environment ......8 Touch Screen ..........13 Operational Safety ........7 Traffic Rules Europe ........
- Page 83 82 of 82...
- Page 84 Hotline: 0871 37 61 020 (Costs 7p/min from a BT ladline, mobile costs maybe higher) Fax: 01793 71 57 16 To contact us by email please visit the „Service and Support“ section of our website at www.medion.co.uk. www.medion.co.uk MSN 4004 4407...
Need help?
Do you have a question about the GoPal E4x70 and is the answer not in the manual?
Questions and answers