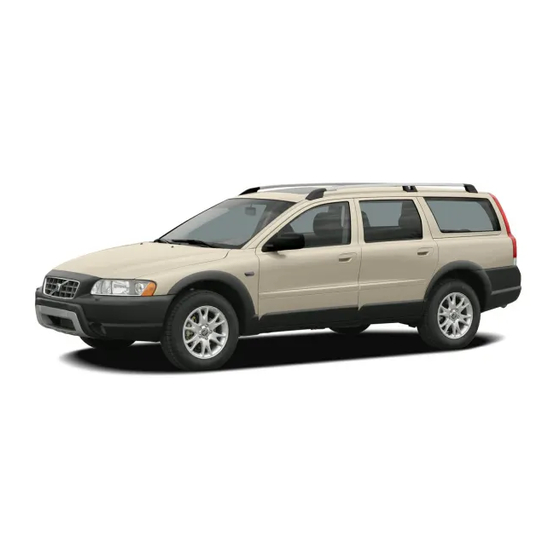
Volvo 2006 XC70 Owner's Manual
Hide thumbs
Also See for 2006 XC70:
- Owner's manual (250 pages) ,
- Overview (32 pages) ,
- Wiring diagram (29 pages)
Table of Contents
Advertisement
Quick Links
Advertisement
Chapters
Table of Contents

Related Manuals for Volvo 2006 XC70


Summary of Contents for Volvo 2006 XC70
- Page 1 2006...
- Page 2 VOLVO OWNERS MANUAL XC70 TP 7857 (USA & Canada). AT 0520. Printed in Sweden, Elanders Infologistics Väst AB, Mölnlycke 2005...
- Page 3 This manual deals with the operation and care of your Volvo Welcome to the worldwide family of Volvo owners. Your Volvo is designed to meet all applicable safety and We trust that you will enjoy many years of safe driv-...
-
Page 5: Table Of Contents
Chapter 5 - Keys, Locks, Alarm Chapter 6 - Starting and driving Chapter 7 - Wheels and tires Chapter 8 - Maintenance/Servicing Chapter 9 - Specifications Chapter 10 - Audio systems HomeLink® Universal Transceiver (option) Index © 2005 Volvo Cars of North America, LLC... -
Page 6: Fuel Filler Door
Please note that the fuel filler Volvo reserves the right to make model changes at any time, or to door will remain unlocked until the car begins to move forward. -
Page 7: Volvo And The Environment
Caring for the environment means an everyday involvement in at advanced technology alternative-fuel vehicles. reducing our environmental impact. When you drive a Volvo, you become our partner in the work to lessen Volvo's environmental activities are based on a holistic view, which the car's impact on the environment. -
Page 9: Chapter 1 - Safety
Chapter 1 - Safety Occupant safety Seat belts Supplemental Restraint System (SRS) Front airbags Occupant weight sensor (OWS) Side impact (SIPS) airbags Volvo Inflatable Curtain (VIC) Inspecting SRS system components Whiplash Protection System (WHIPS) Child safety... -
Page 10: Volvo Cars Of North America, Llc
Washington D.C. 20590. Safety is the Volvo cornerstone. Our concern You can also obtain other information dates back to 1927 when the first Volvo rolled • about motor vehicle safety from the off the production line. Three-point seat belts Hotline. -
Page 11: Seat Belts
Seat belts Ar4m Ar4m Buckling a seat belt 1695 040413 IMPORTEDBYVOLVONORTH AMERICACORP.ROCKLEIGH BELTNO.XXXXXX VOLVOGOTHENBURG MADEINSWEDEN DATEOFMANUFACTURE • YEAR WEEK • • IMG-203420 • 8801947d Adjusting the seat belt Sample label on all seat belts with tensioners When wearing the seat belt remember: •... - Page 12 • Never repair the belt yourself; have this work done by an authorized Volvo service 8803443a technician only. • Seat belt use during pregnancy...
-
Page 13: Supplemental Restraint System (Srs)
If the SRS warning light stays on after the engine has started or if it illuminates while you are driving, have the vehicle inspected by a trained and qualified Volvo service technician as soon as possible. • Never try to repair any component or part of the SRS yourself. -
Page 14: Front Airbags
Front airbags WARNING! • The airbags in the vehicle are designed to be a SUPPLEMENT to—not a replace- ment for—the three-point seat belts. For maximum protection, wear seat belts at all times. Be aware that no system can prevent all possible injuries that may occur in an accident. - Page 15 Front airbags Front airbag deployment WARNING! • • Do not use child safety seats or child booster cushions/backrests in the front • passenger’s seat. We also recommend that occupants under 4 feet 7 inches (140 cm) in height who have outgrown these devices sit in the rear seat with the seat belt fastened •...
- Page 16 • • Children must never be allowed in the No objects or accessory equipment, e.g. front passenger’s seat. Volvo recommends dashboard covers, may be placed on, that ALL occupants (adults and children) attached to, or installed near the air bag...
-
Page 17: Occupant Weight Sensor (Ows)
Occupant Weight Sensor (OWS) Passenger's Passenger's Seat Indicator side front occupancy light status airbag status status Seat Passenger's unoccupied/ indicator light side front airbag person or disabled object is not lit weighing less than approx. 15 lbs (7 kg) on seat Seat Passenger's... - Page 18 Maintenance or repairs should only be weight, this extra weight could cause the carried out by an authorized Volvo service OWS system to enable the airbag, which technician. •...
- Page 19 Occupant Weight Sensor (OWS) WARNING! • The full weight of the front seat passenger should always be on the seat cushion. The passenger should never lift him/herself off the seat cushion using the armrest in the door or the center console, by pressing the feet on the floor, by sitting on the edge of the seat cushion, or by pressing against the backrest in a way that reduces pressure on...
-
Page 20: Side Impact (Sips) Airbags
SIPS airbag system. This 8802205d should be done only by a trained and Location of the side impact (SIPS) airbag qualified Volvo service technician. • Side impact airbags - front In order for the SIPS airbag to provide its... -
Page 21: Volvo Inflatable Curtain (Vic)
Never try to open or repair any components of the VIC system. heads of the occupants of the front seats and the occupant of the This should be done only by a trained and qualified Volvo service outboard rear seating positions in certain side impact collisions. -
Page 22: Inspecting Srs System Components
Inspecting SRS system components Inspection date WARNING! This is a sample of the decal located in the left rear door opening... -
Page 23: Whiplash Protection System (Whips)
Whiplash Protection System (WHIPS) WARNING! • The WHIPS system is designed to supplement the other safety systems in your car. For this system to function properly, the three- point seat belt must be worn. Please be aware that no system can prevent all possible injuries that may occur in an accident. - Page 24 • If your car has been involved in a rear-end collision, the front seat backrests must be inspected by a trained and qualified Volvo service technician, even if the seats appear to be undamaged. Certain components in the WHIPS system may need to be replaced.
-
Page 25: Child Safety
Child safety Children should be seated safely • WARNING! • Do not use child safety seats or child booster cushions/backrests in the front passenger’s seat. We also recommend that children under 4 feet 7 inches (140 cm) in height who have outgrown these devices sit in the rear seat with the seat belt fastened. - Page 26 Child safety WARNING! • Both rear seat backrests must be up when the auxiliary seat is being used. • Do not use a booster cushion or child seat in conjunction with the auxiliary seat. • The luggage net should be retracted. •...
- Page 27 Child safety Integrated booster cushions, outboard positions (optional) Use this booster cushion only with children who weigh between 33 and 80 lbs (15 and 36 kg) and whose 8502798a 8502778a height is between 38 and 54 in (97 Integrated booster cushion - outboard positions Integrated booster cushion - outboard positions and 137 cm).
- Page 28 The booster cushion should also be replaced if it is badly worn or damaged in any way. This work should be performed by an authorized Volvo retailer only.
- Page 29 Emergency Locking Retractor When attaching the seat belt to a child seat: • • • Volvo has some very specific recom- • mendations: • • A sound from the seat belt retractor will be audible at this time and is normal.
-
Page 30: Child Restraint Anchorages
Child safety • ISOFIX/LATCH symbols WARNING! • Child restraint anchorages are designed to withstand only those loads imposed by correctly fitted child restraints. Under no circumstances are they to be used for adult seat belts or harnesses. The anchorages are not able to withstand excessive forces on 8802354m them in the event of collision if full... -
Page 31: Chapter 2 - Instruments, Switches And Controls
Chapter 2 - Instruments, switches and controls Interior Exterior Instruments Instrument panel Indicator and warning lights Text information window Switches in the center console Trip computer Cruise control Lighting panel Steering wheel adjustment/lock, Ignition switch Left-side steering wheel lever Right-side steering wheel lever Tailgate wipers/washers, Water repellent glass Warning flashers, heated mirrors/rear window, heated front seats Parking brake, auxiliary socket/ashtrays... -
Page 32: Interior
Interior 8502691M... -
Page 33: Exterior
Exterior 8000256M... -
Page 34: Instruments
Instruments... -
Page 35: Instrument Panel
Instrument panel 3800662d High beam indicator light Turn signals Please note that this symbol does not indicate a fault with your car. Text window Tachometer At low speeds or when the car is not moving, Indicates engine speed in thousands of rpm. Temperature gauge the temperature readings may be slightly Do not drive for long with the needle in the red... -
Page 36: Indicator And Warning Lights
Indicator and warning lights The indicator and warning lights described on pages 28 and 29 should never stay on when driving* When the ignition key is turned, all of the warning lights in the lower system indicated should be inspected. right-hand side of the instrument panel should go on to test the function NOTE: The parking brake reminder light will not go off until the of the bulbs. - Page 37 When this happens, please have your car Stability Traction Control (STC) system checked by a Volvo retailer as soon as (option), or Dynamic Stability Traction possible. Supplemental Restraint System (SRS)
-
Page 38: Text Information Window
Refer to your owner’s manual. For additional information, please contact your Volvo retailer. SERVICE REQUIRED: Take your car to a trained and qualified Volvo service technician for inspection as soon as possible (but preferably before the next scheduled maintenance service). -
Page 39: Switches In The Center Console
Switches in the center console 3603558m The positions of these buttons may vary, 3603553m 3603550m depending on the specifications of your car Disconnecting the alarm Power child locks (option) This button is used to temporarily disconnect See page 86 for more information on this alarm sensors. -
Page 40: Trip Computer
Trip computer (option) The trip computer can be reset (current data will be erased from system memory) by pressing RESET (button C). 1. Driving distance on current fuel reserve This function shows the approximate distance that can be driven on the fuel remaining in the tank. -
Page 41: Cruise Control
Cruise control Acceleration Momentary acceleration, such as when passing another car, does not affect cruise control operation. The car will automatically return to the previously set speed when the accelerator pedal is released. Disengaging cruise control NOTE: 3603568m • V70/XC70 V70 R •... - Page 42 Cruise control Temporarily disengaging cruise control • • WARNING!
-
Page 43: Lighting Panel
Lighting panel • Headlights • • An indicator light in the button illuminates • when the rear fog light is on. NOTE: The rear fog light is considerably brighter than the normal tail lights and should be used only when conditions such as fog, rain, snow, smoke or dust reduce visibility for NOTE: other vehicles to less than 500 ft. -
Page 44: Steering Wheel Adjustment/Lock, Ignition Switch
Steering wheel adjustment/lock, Ignition switch Steering wheel lock Ignition switch Locked position: WARNING! In order to help reduce car theft, make sure the steering wheel lock is engaged before leaving the car. WARNING! Intermediate position**: Drive position: 6400296A Pull down the lever (A) to adjust height (B), or reach (C) 3300013A Starting position:... -
Page 45: Left-Side Steering Wheel Lever
Left-side steering wheel lever NOTE: High/low beam headlights Continuous high beams • • 3602430m Lever positions High beam flash • • Home safe lighting Turn signals When turning • • • When changing lanes... -
Page 46: Right-Side Steering Wheel Lever
Right-side steering wheel lever Rain sensor (option) Continuous wiper function High wiper speed sensitivity Windshield washer Activating the rain sensor CAUTION: 3603483j Windshield wiper/washer Deactivating the rain sensor Windshield wipers/washers • Headlight wiper/washer (certain models) Windshield wipers off • When the lever is pulled to wash the wind- Single sweep position: Move the lever shield, high pressure jets mounted in the slightly upward from the 0 position for... -
Page 47: Tailgate Wipers/Washers, Water Repellent Glass
Tailgate wipers/washers, Water repellent glass Water repellent glass–option CAUTION! • Use only suitable plastic scrapers to remove ice or snow from the mirrors. Using a metal ice scraper could damage the water repellent coating. • Tailgate wiper/washer Use the heating function to remove ice, snow, or mist from the mirrors. -
Page 48: Warning Flashers, Heated Mirrors/Rear Window, Heated Front Seats
Warning flashers, Heated mirrors/rear window, Heated front seats 8702787d 8702784d 8702783d 3602314M Hazard warning flashers Heated sideview mirrors/rear Heated front seats (option) window • • NOTE: •... -
Page 49: Parking Brake, Auxiliary Socket/Ashtrays
Ashtrays parking brake is applied only slightly. Be sure to pull the lever up Volvo cars in North America do not have an ashtray in the front seat as sufficiently. standard equipment. If you want to have an ashtray in the front seat,... -
Page 50: Electrically Operated Windows
Electrically operated windows Auto up/down function (front doors only): Auto down: Press the front part of the button as far down as possible and release it immedi- ately. To stop the window at any time, pull the button up. Auto up: Pull the front part of the button up as far as possible and release it immediately. -
Page 51: Rearview Mirror
Rearview/sideview mirrors Remote central locking and sideview mirror memory If you lock the car and later unlock it with the same remote control and open the driver’s door, the sideview mirrors will automatically move to the position they were in when you left the car. -
Page 52: Power Moonroof
Power moonroof (option) WARNING! • Never open/close the moonroof if it is obstructed in any way when in operation. • Never allow a child to operate the moonroof. • Never extend any object or body part though the open moonroof, even if the vehicle’s ignition is completely switched off. -
Page 53: Sun Visor
Sun visor 8301256d Sun visor Sun visor: The optional moonroof also features a sliding sun visor. The visor slides open automatically when the moonroof is opened. The visor must be closed manually. -
Page 55: Chapter 3 - Climate Control System
Chapter 3 - Climate control system Ventilation Climate control system - general information Electronic Climate Control (ECC) Manual climate control with air conditioning, A/C... - Page 56 Ventilation 8703156M 8702835d 8703155M Air vents in dash Air vents in door pillars Air vents (dash) Air flow Air vents in door pillars The air that is drawn into the passenger compartment is distributed from 14 ventilation points.
- Page 57 Climate control maintenance Special tools and equipment are required to maintain and carry out repairs on the climate system. Work of this type should only be done by a trained and qualified Volvo service technician. Refrigerant Sensors Climate system blower...
- Page 58 Electronic Climate Control (ECC) Defroster - windshield/front Recirculation/Multifilter Heated rear window/ side windows Automatic air flow sideview mirrors Recirculation Temperature sensor A/C ON/OFF Heated passenger’s seat (option) 8703333d Temperature control - Temperature control - Heated driver’s seat (option) Blower control driver’s side passenger’s side Air flow...
- Page 59 Electronic Climate Control (ECC) AUTO Defroster This function automatically regulates the This function demists/de-ices the windshield and Electronic Climate Control system so that the front side windows. The LED in the switch will selected temperatures are maintained. The light up to indicate that the defrost function is blower, heating, air distribution (air flow) and engaged.
- Page 60 Electronic Climate Control (ECC) - manual settings Recirculation (see also page 55) Air flow Air flow to windows Air from panel vents Air through floor vents 8702776d 8702781d • Press AUTO to automatically regulate air flow or press any combina- tion of the controls shown in the illustration to manually adjust air flow.
- Page 61 Electronic Climate Control (ECC) with Interior Air Quality system (option) Keep the following in mind: Interior Air Quality system • (option) • • 8703250d • Operation: • 8702780d 8703250d 8703250d 8703250d 8703250d 8703250d 8703250d...
- Page 62 Manual climate control with air conditioning, A/C Recirculation Air distribution Rear window and sideview mirror defroster A/C on/off Heated front seats (option) Blower 8702611d Heating/cooling Heating/cooling driver’s side Passenger’s side...
- Page 63 Manual climate control with air conditioning, A/C Recirculation Blower A/C - ON/OFF 8702776d 8702831d 8702777d Temperature Heated front seats (option) Please see page 40 for more information on 8702834d this function 8702784d Air distribution • Heated rear window/ sideview mirrors This function demists/ de-ices the rear window •...
- Page 64 Manual climate control with air conditioning, A/C Air distribution...
-
Page 65: Chapter 4 - Interior
Chapter 4 - Interior Front seats (electrically operated) Front seats (manually operated) Storage compartments Front storage compartments, coat hanger Folding table in rear seat Rear seat and cargo area Cargo area Securing cargo Steel grid/cargo net Nylon cargo net (XC70 with 3-section rear seat) Cargo area cover, Vanity mirrors Spare tire Auxiliary seat in cargo area, Extra handgrip - XC70... -
Page 66: Front Seats (Electrically Operated)
Front seats Electrically operated seats (option) Operation Driver’s seat: 8504933m NOTE: with the • Power seat adjustment controls ignition off • NOTE: • • • • Emergency stop WARNING! Passenger’s seat: • NOTE: Because the driver's seat can be adjusted with the ignition off, children should never be left unattended in the car. -
Page 67: Front Seats (Manually Operated)
Front seats • Do not adjust the seat while driving. The seat should be adjusted so that the brake pedal can be depressed fully. In addition, position the seat as far rearward as comfort and control allow. • Check that the seat is securely locked into 8505040m Programming the driver’s seat memory position after adjusting. - Page 68 Front seats 8501727A Folding front seat backrest • • • • • WARNING!
-
Page 69: Storage Compartments
Storage compartments WARNING! - Page 70 Storage compartments 8504939m 8504938m Storage compartments in the Cup holder for rear seat center console passengers • 1. Storage compartment cover 2. Front storage compartment • This storage space is fitted with a sliding cover (not on XC70 models) 3. 12-volt socket 8505227m 4.
-
Page 71: Front Storage Compartments, Coat Hanger
Front storage compartments, Coat hanger Cup holders in the center console—V70 (option) To remove the cup holders: • • • Return the cup holder to the storage space in the reverse order. Cup holders in the center console XC70 (option) 8503126m To remove the cup holders: •... -
Page 72: Folding Table In Rear Seat
Folding table in rear seat 8901908m 8503132m 8503131m Fold the armrest in the backrest forward. Fold To close: Fold the table section upward into Folding Table (option) out the table so that it rests on the armrest. place. Fold the arm under the table inward Pull the tab and fold the table section forward. -
Page 73: Rear Seat And Cargo Area
Rear seat and cargo area 8503020m 8503022m 8504748d Lowering the center head restraint Folding down an outboard head restraint Tipping an outboard backrest forward Center seat head restraint Extending the cargo area WARNING! red lock indicator Models with 2-section rear seat The rear seat is split in two sections and each section can be folded forward separately. - Page 74 Rear seat and cargo area 8503022m 8503341m 8503344m Center head restraint release button Adjusting center head restraint height–XC70 with optional 3-section rear seat Folding down the center Center head restraint (rear) WARNING! section of the backrest The center head restraint can be adjusted •...
-
Page 75: Center Armrest
Rear seat and cargo area Replacing the center backrest • • WARNING! • For safety reasons, the center section of 8503343m the backrest or seat cushion should not be 8503317m left in the car after they have been Center armrest removed. - Page 76 Rear seat and cargo area Partition with storage pockets (accessory) XC70 with the optional 3-section rear seat...
-
Page 77: Rear Seat Backrest
Rear seat and cargo area 8501274A 8503125m 8503150m A - Catch in closed position. B - Catch in open position. NOTE: Make sure that the holes in the plastic Removing the seat cushion ferrules on the top of the backrest engage the Rear seat backrest Models with 2 or 3-section rear seat hooks on the bottom of the seat cushion. -
Page 78: Cargo Area
Cargo area 8901657m 3903052m 3501056m Cargo area lighting Holder for grocery bags Auxiliary 12 Volt socket in (option) cargo area (option) An extra roof lamp is fitted at the end of the cargo area. Open the tailgate. Hang or secure your grocery Fold down the cover when you want to use the bags by means of tensioning straps or holders. -
Page 79: Securing Cargo
Securing cargo 8502788m 8501266A 8502786m • against Securing cargo Auxiliary seat • • • WARNING! • Remember the following when loading the car: • WARNING! Remember that a 44 lbs object produces a force of 2,200 lbs in a head-on collision at 30 mph! -
Page 80: Steel Grid/Cargo Net
Steel grid/Cargo net 8503129m 8504154m Steel grid Cargo net • WARNING! Steel grid (accessory) • To remove the steel grid: • • NOTE: Make sure that the cargo net is To install the steel grid, perform the steps in securely fastened in the hooks. To remove, the reverse order. -
Page 81: Nylon Cargo Net (Xc70 With 3-Section Rear Seat)
Nylon cargo net (XC70 with 3-section rear seat) CAUTION: • If the net is installed in the forward position and the rear seat cushions are folded forward, the net should be posi- tioned so that it is in front of the rear seat cushions but behind the front seat backrests (C). -
Page 82: Cargo Area Cover, Vanity Mirrors
Cargo area cover, Vanity mirrors 3903067m 8502006d Vanity mirror Vanity mirrors Cargo area cover* Withdraw the cargo area cover, pull it over the luggage compartment and hook it in the holes in the rear cargo area pillars. Removing the cargo area cover: •... -
Page 83: Spare Tire
Spare tire Jack Tool bag Securing bracket Spare tire 7700313m 8503191m Spare tire Spare tire, tool bag, jack - cars with subwoofer (option) • • • • • • • • • • • • WARNING! •... -
Page 84: Auxiliary Seat In Cargo Area, Extra Handgrip - Xc70
Auxiliary seat in cargo area, Extra handgrip - XC70 WARNING! • If your car is equipped with an auxiliary seat (option or accessory), the tailgate must be fitted with a lock cylinder. Unlocking from the outside can then be carried out in the usual way (key in driver's door and/or remote control) and also by using the key in the tailgate. -
Page 85: Interior Lighting
Interior lighting Courtesy light Overriding the Interior Courtesy Lights 3501410r 3500887e Rear reading lights Front reading lights Courtesy light Reading lights - front/rear The courtesy light can be turned on or off by The reading lights can be switched on or off by pressing the button. -
Page 87: Chapter 5 - Keys, Locks, Alarm
Chapter 5 - Keys, Locks, Alarm Keys, Immobilizer Remote keyless entry system Locking and unlocking the car Alarm Child safety locks - rear doors... -
Page 88: Keys, Immobilizer
Keys, Immobilizer Turn the key once Each key has a unique code, which your Volvo retailer uses if new keys are required. A Turn the key again (within 10 seconds) to maximum of six remote controls/keys can be unlock all doors and the tailgate. -
Page 89: Remote Keyless Entry System
Wait for at least If one of the transmitters is misplaced, contact 1 second and press the button again (within 10 your nearest authorized Volvo retailer for seconds) to unlock all doors, and the tailgate. replacement. - Page 90 Remote keyless entry system NOTE: WARNING! Remote keyless entry system - replacing batteries If the range of the transmitter is noticeably reduced, this indicates that the battery is weak and should be replaced. To replace the battery • • •...
-
Page 91: Locking And Unlocking The Car
Locking and unlocking the car Unlocking the tailgate • • • twice • Automatic relocking: 8301395M Central locking buttons Central locking buttons NOTE: These buttons (located on the both front door armrests) can be used to lock/unlock all doors remain and the tailgate and set the alarm. -
Page 92: Alarm
Alarm Alarm Audible alarm signal • "Panic" button • • • • • The function can be turned off by pressing any of the buttons on the remote control or will stop automatically after 25 seconds. When a • button is pressed, there is a 5 second delay before the panic alarm is deactivated. - Page 93 Alarm To temporarily turn off the inclination and movement alarm sensors from the alarm system: The position of this button may vary, depending on the specifica- tions of your car. 3602421d NOTE: Temporarily turning off the inclination and • • movement alarm sensor(s) - accessory LED alarm status signals •...
-
Page 94: Child Safety Locks - Rear Doors
Child safety locks - rear doors 3602377m 8302518d Child safety lock control in left rear door Child safety lock control in right rear door Power child safety lock button Power child safety locks Child safety locks - rear WARNING! (option) doors The controls are located on the rear door jambs*. -
Page 95: Chapter 6 - Starting And Driving
Chapter 6 - Starting and driving Fuel requirements Refueling Starting the engine Manual transmission Automatic transmission (AW5) Automatic transmission (Geartronic) All Wheel Drive Four-C active chassis system (option) Front/rear park assist (option/accessory) Driving economy, Handling Points to remember Roof racks/load carriers Emergency towing Vehicle towing information Towing a trailer... -
Page 96: Fuel Requirements
Gasoline containing alcohol and ethers Fuel requirements ”Oxygenated fuels” Octane rating: Volvo engines are designed for optimum performance on unleaded premium gasoline with an octane rating AKI of 91, or above. AKI (ANTI KNOCK INDEX) is an average of the Research Octane Number, RON, and the Motor Octane Number, MON. - Page 97 Fuel requirements Carbon Monoxide – Important Warning Fuel formulations Use of Additives...
-
Page 98: Refueling
* If the fuel filler cap is not closed tightly or if the engine is running when the car is refueled, the Check Engine light (malfunction indicator lamp) may indicate a fault. However, your vehicle’s performance will not be affected. Use only Volvo original or approved fuel filler caps... -
Page 99: Starting The Engine
Starting the engine NOTE: NOTE: Starting the engine • KEYLOCK WARNING! • (automatic transmission) (SHIFT- LOCK). Manual transmission: the clutch must be fully depressed. 3. Without touching the accelerator pedal, * Your car is equipped with an electronic start inhibitor (immobilizer). The keys you received with your car are specially coded. - Page 100 Starting the engine CAUTION: WARNING! • • The engine should be idling when you Always place the gear selector in Park or move the gear selector. Never accelerate in reverse on models with a manual until after you feel the transmission transmission, and apply the parking brake engage! Accelerating immediately after before leaving the vehicle.
-
Page 101: Manual Transmission
Manual transmission M 56 M 56 4302395n 4301589e 5-speed manual 6-speed manual transmission Engaging reverse gear transmission (option on certain models) CAUTION: WARNING! * Clutch interlock... -
Page 102: Automatic Transmission Aw5
Automatic transmission AW5 WARNING! NOTE: • • R (Reverse) N (Neutral) D (Drive) 4303308e P (Park) 4 (Intermediate gear) Never use P while the car is in motion. The gear selector is mechanically locked in The transmission cannot shift up to (D)rive the P position (SHIFTLOCK). - Page 103 Automatic transmission AW5 Kickdown Cold starts 4301618e 4302473d Automatic transmission - Winter/Wet driving mode shift gate positions - enhanced vehicle traction • • • • NOTE:...
-
Page 104: Automatic Transmission (Geartronic)
Automatic transmission (Geartronic) R (Reverse) N (Neutral) D (Drive) Kickdown 4302939n 4302474d Shift gate positions P (Park) Automatic transmission - shift gate positions You can move the gear selector freely Kickdown does not function when the Never use P while the car is in motion. between the (MAN)ual and (D)rive positions transmission is in the manual shift while driving. - Page 105 Automatic transmission (Geartronic) • Manual shifting - Geartronic You can move the gear selector freely between NOTE: does the (MAN)ual and (D)rive positions while not function driving. Gears 2, 3, 4, and 5 have a "lock-up" function which reduces engine speed and helps save fuel.
-
Page 106: All Wheel Drive
All Wheel Drive (option) All Wheel Drive (AWD) - Temporary Spare general information Tire dimensions... -
Page 107: Four-C Active Chassis System (Option)
Four-C active chassis system (option) Comfort Four-C NOTE: ACTIVE CHASSIS SETTINGS COMFORT SPORT ADVANCED Sport 4303270m V70 R buttons on the dashboard Advanced sport (V70 R only) 3603554m... -
Page 108: Front/Rear Park Assist (Option/Accessory)
Front/rear park assist (option/accessory) NOTE: NOTE: • • Rear park assist: • • Front park assist: When park assist is actively working: Faults in the system A - front (accessory as available), B - rear (option) Cleaning the sensors Front/rear park assist Rear: Front: WARNING! -
Page 109: Driving Economy, Handling
Driving economy, Handling Economical driving conserves natural resources NOTE Better driving economy may be obtained by thinking ahead, avoiding rapid starts and stops and adjusting the speed of your vehicle to immedi- ate traffic conditions. Observe the following rules: • Handling, roadholding •... -
Page 110: Cooling System
Points to remember Cooling system Electrical system WARNING! The risk for engine overheating is greatest, When replacing the battery or when carrying especially in hot weather, when: out work involving the electrical system, the • • • CAUTION: • • •... -
Page 111: Roof Racks/Load Carriers
Roof racks/Load carriers Load carriers (accessory) Cover Tightening wheel • Check periodically that the load carriers and load are properly secured. • 8902060m Reducing wind noise and improving fuel economy • WARNING! Load carrier attachment points • Attaching load carriers •... - Page 112 Load carriers (models with rails) 8901878m 8901672m 8901671d Position of load carriers Fitting the load carriers Load carrier cover (accessory) Make sure that the wing-shaped load carriers The car's ignition key or the stud on the edge are installed on the roof rails with the rounded of the supplied torque wrench can be used to Make sure that the load carrier is pressed edge forward (see the inset illustration above).
-
Page 113: Emergency Towing
Emergency towing CAUTION: • Please check with state and local authori- ties before attempting this type of towing, as vehicles being towed are subject to regulations regarding maximum towing speed, length and type of towing device, lighting, etc. • If the car’s battery is dead, do not attempt to start the vehicle by pushing or pulling it as this will damage the three-way catalytic converter(s). -
Page 114: Vehicle Towing Information
Towing cars with all wheel drive/front wheel drive Volvo recommends the use of flat bed equipment. If wheel lift equipment must be used, please use extreme caution to help avoid damage to the car. In this case, the car should be towed with the rear wheels on the ground if at all possible. -
Page 115: Towing A Trailer
(using too high a gear). • • The drawbar assembly/trailer hitch may be certified for trailers that are heavier than the car is designed to tow. Please adhere to Volvo’s • recommended trailer weights. • •... -
Page 116: Detachable Trailer Hitch
Detachable trailer hitch (accessory) - installing/removing Removing the ball holder NOTE: 8903039r A - ball holder, B - locking bolt, C - safety wire attachment, D- hitch assembly, E - cotter pin Installing the ball holder... -
Page 117: Jump Starting
Jump starting • CAUTION: WARNING! • Do not connect the jumper cable to any part of the fuel system or to any moving parts. Avoid touching hot manifolds. • Never expose the battery to open flame or electric spark. • Do not smoke near the battery. -
Page 118: Winter Driving
Winter driving • washer fluid reservoir Cold weather precautions • antifreeze The use of ”recycled” antifreeze is not approved by Volvo. Different types of antifreeze must not be mixed. • • NOTE: • fuel tank Winter/Wet driving mode - enhanced vehicle traction •... -
Page 119: Long Distance Trips
Long distance trips Before a long distance trip • • • • • • • • • • •... -
Page 120: Three-Way Catalytic Converter
Three-way catalytic converters • NOTE: 2500779e Three-way catalytic converter cautions • Do not continue to operate your vehicle if you detect engine misfire, noticeable loss of power or other unusual operat- ing conditions, such as engine overheating or backfiring. • •... -
Page 121: Brake System
Brake system BRAKE Brake circuit malfunction Water on brake discs and brake pads affects braking Driving in rain and slush or passing through an automatic car wash can cause water to collect on the brake discs and pads. This will cause a delay in braking effect when the pedal is depressed. -
Page 122: Anti-Lock Brake System
If the warning lamp lights up there is a malfunction of the ABS system (the standard braking system will however function) and the vehicle should be driven cautiously to a Volvo retailer for inspection. The Anti-lock Braking System (ABS) helps to improve vehicle control •... -
Page 123: Stc/Dstc
STC/DSTC When the SC function has been switched off: • Stability Traction Control (STC)*/ • Dynamic Stability Traction Control (DSTC)** The following function is only available with DSTC: 3. Active Yaw Control (AYC) The stability systems consist of a number of functions: The following two functions are common to both STC/DSTC 1. - Page 124 STC/DSTC The warning symbol in the instrument panel A steady yellow glow indicates: • The STC/DSTC button • NOTE: NOTE: The Stability Control indicator light The Stability Control indicator light will flash when: • • •...
-
Page 125: Chapter 7 - Wheels And Tires
Chapter 7 - Wheels and tires General information Tire inflation Tire inflation pressure tables Tire Pressure Monitoring System (TPMS) Self supporting run flat tires Tire designations Glossary of tire terminology Vehicle loading Uniform Tire Quality Grading Snow chains, snow tires, studded tires Temporary spare Changing a wheel... -
Page 126: General Information
General information Storing wheels and tires CAUTION! Tread wear indicator WARNING! • The wheel and tire sizes for your Volvo are specified to meet stringent stability and handling requirements. Unapproved wheel/tire size combinations can negative- ly affect your vehicle's stability and New tires handling. - Page 127 Wheels and tires • Tire age IMG-201620 Improving tire economy: • • • • • •...
-
Page 128: Tire Inflation
Wheels and tires WARNING! TIREANDLOADINGINFORMATION TIREANDLOADINGINFORMATION SEATINGCAPACITY SEATINGCAPACITY TOTAL5 TOTAL5FRONT2 FRONT2 REAR3 REAR3 Thecombinadwaightofoccupantsandcargoshouldneverexeedxxxkgorxxxpounds TIRESIZE OR GINAL TIRESIZE COLDTIREINFLATIONPRESSURE FRONT 200KPA,29PSI P195/70R14 REAR 200KPA,29PSI COMPACTSPARETIRE COLDTIREINFLATIONPRESSURE T125/70D15 420KPA,60PSI 8903541j 7700591p 8903767a 8903767j Tire inflation placards on U.S. models Tire inflation placard on Canadian models, 1. XC70, 2. V70 NOTE: Tire inflation •... - Page 129 Wheels and tires NOTE: • • To check inflation pressure:...
-
Page 130: Tire Inflation Pressure Tables
Wheels and tires Optional tire pressure Tire inflation pressure tables V70 R V70 R XC70 XC70... -
Page 131: Tire Pressure Monitoring System (Tpms)
Wheels and tires Tire Pressure Monitoring System (TPMS) - option on NOTE: certain U.S. models only NOTE: Erasing warning messages WARNING! WARNING! (Contd. on following page) - Page 132 Wheels and tires Changing tires • • • • • CAUTION!
-
Page 133: Self Supporting Run Flat Tires
Wheels and tires Self supporting run flat tires WARNING! • Only specially trained persons should (option) mount self supporting run flat tires. • If self supporting run flat tires are mounted, the vehicle must be equipped with a Tire Pressure Monitoring System. •... -
Page 134: Tire Designations
Wheels and tires Tire designations NOTE: 7700524n Tire designations... -
Page 135: Glossary Of Tire Terminology
Wheels and tires • • B-pillar: Cold tires: Glossary of tire terminology • Bead area of the tire: • Sidewall of the tire: Glossary of tire terminology • Tire information placard: • Tread area of the tire: • Rim: • Tire Identification Number (TIN): •... -
Page 136: Vehicle Loading
Wheels and tires Vehicle loading Gross vehicle weight (GVW) NOTE: • • WARNING! Steps for Determining Correct Load Limit Curb weight Capacity weight NOTE: Permissible axle weight... -
Page 137: Uniform Tire Quality Grading
Wheels and tires Uniform Tire Quality Grading WARNING! ALL PASSENGER VEHICLE TIRES MUST CONFORM TO FEDERAL SAFETY REQUIREMENTS IN ADDITION TO THESE GRADES Quality grades can be found, where TEMPERATURE applicable, on the tire sidewall between the tread shoulder and maximum section width. For example: Treadwear 200 Traction AA Temperature A TREADWEAR... -
Page 138: Snow Chains, Snow Tires, Studded Tires
Wheels and tires • Snow chains, snow tires, CAUTION! studded tires • Check local regulations regarding the use of snow chains before installing. • Snow chains • Always follow the chain manufacturer’s installation instructions carefully. Install chains as tightly as possible and retighten •... -
Page 139: Temporary Spare
Wheels and tires Temporary Spare CAUTION! WARNING! -
Page 140: Changing A Wheel
Wheels and tires 7700333m 7700422 7700265d Insert flat end of lug wrench and turn/pull straight out Loosen wheel bolts Attaching the jack Changing a wheel The base of • the jack must be flat on a level, firm, non- NOTE: •... - Page 141 Wheels and tires WARNING! Installing the wheel • The jack’s attachment must engage the bar in the jack attachment (see inset illustration in right column on the previous page). The car’s weight must not rest on the jack attachment. • Be sure the jack is on a firm, level, non-slippery surface.
-
Page 143: Chapter 8 - Maintenance/Servicing
Chapter 8 - Maintenance/Servicing Fuses Replacing bulbs Paint touch up Washing the car Cleaning the upholstery Maintenance service, Warranty Fuel/emissions systems Drive belt, Coolant Maintaining your car Servicing Opening the hood, Engine compartment Engine oil Power steering/Brake fluid reservoirs Replacing the battery Battery maintenance Replacing wiper blades... -
Page 144: Fuses
Fuses Fuse removal tool Intact fuse Defective (blown) fuse 3703475m Replacing fuses same color and amperage WARNING! - Page 145 Fuses in the engine compartment Relays/fuses in the engine compartment When replacing fuses, be sure to replace a blown fuse with a new one of the same color and amperage (written on the fuse). Fuse amperage is also indicated on the inside of the fuse box cover. Fuses in positions marked X are replacement fuses.
- Page 146 Fuses in the passenger compartment Fuse box on the edge of the dashboard Fuses are located inside the access panel on the edge of the dashboard. When replacing a blown fuse, be sure to replace it with a new one of the same color and amperage (written on the fuse).
- Page 147 Fuses in the passenger compartment Fuse box in the passenger compartment, behind the plastic cover This fuse box is located behind the plastic cover below the steering wheel. When replacing a blown fuse, be sure to replace it with a new one of the same color and amperage (written on the fuse).
- Page 148 Fuses in the cargo compartment Fuses in the cargo area The fuses in the cargo area are located behind the panel on the driver’s side of the cargo compartment. When replacing a blown fuse, be sure to replace it with a new one of the same color and amperage (written on the fuse).
-
Page 149: Replacing Bulbs
Replacing bulbs Replacing bulbs 3501232m Replacing bulbs at the front of the Location of the bulbs in the headlight vehicle housing WARNING! - Page 150 Replacing bulbs 3501788 3501802m 3501786m Low beam bulb High beam bulb Installing the new bulb: High beam headlight Low beam headlight Removing the defective bulb: Removing the defective bulb: NOTE: Installing the new bulb:...
- Page 151 Replacing bulbs 3501792m 3501787m 3602534m Parking light bulb Turn signal, driver’s side Turn signal, passenger’s side Parking light Removing the defective bulb: Installing the new bulb: Installing the new bulb: Installing the new bulb: Turn signal, passenger’s side Removing the defective bulb: Turn signal, driver’s side Removing the defective bulb:...
- Page 152 Replacing bulbs 3501789m 3500894d 3500889d Side marker light Front fog light Side turn signal Front fog lights (option) Side marker light Side turn signal Removing the defective bulb: Removing the defective bulb: Installing the new bulb: Installing the new bulb:...
- Page 153 Replacing bulbs Replacing backup lights, Replacement of rear turn rear parking lights and signal and brake light bulbs rear fog light Speaker grille Bulb holder Panel 3501707m NOTE: 3501077m...
-
Page 154: License Plate Lights
Replacing bulbs 3501410r 3500998m 3501378m License plate lights Vanity mirror Front courtesy lights These bulbs may be difficult for you to replace yourself. We recommend that you let an authorized Volvo retailer replace these bulbs if necessary. - Page 155 Replacing bulbs NOTE: Other bulbs may be difficult for you to replace yourself. Let an authorized Volvo retailer replace these bulbs if necessary. 3500871d 3500887e Door step courtesy lights Rear reading lights The door step courtesy lights are located under These bulbs may be difficult for you to replace the dash on the driver’s and passenger’s sides.
-
Page 156: Paint Touch Up
Paint touch up Paint touch-up Minor stone chips and scratches NOTE: Minor scratches can be repaired by using Volvo touch-up paint. NOTE: Minor scratches on the surface 8100503A MADE IN VOLVO CAR CORP. SWEDEN Deep scratches 0300048A Paint code... -
Page 157: Washing The Car
Washing the car • Washing the car • • • Suitable detergents: Special car washing detergents should be used. Mix according to manufacturer's instructions. Exterior plastic components • Bird droppings: • • WARNING! • • When the car is driven immediately after being washed, apply the •... -
Page 158: Polishing And Waxing
• We do NOT recommend washing your car in an automatic wash Volvo does not recommend the use of long-life or durable paint during the first six months (because the paint will not have protection coatings, some of which may claim to prevent pitting, fading, oxidation, etc. -
Page 159: Cleaning The Upholstery
Cleaning the upholstery Fabric CAUTION! • Under no circumstances should gasoline, naphtha or similar cleaning agents be used on the plastic or the leather since these can cause damage. • Take extra care when removing stains such as ink or lipstick since Interior plastic components the coloring can spread. -
Page 160: Specifications
• Maintenance services • • Your Volvo passed several major inspections before it was delivered to • you, in accordance with Volvo specifications. The maintenance services outlined in the Warranty and Service Records Information booklet, many of which will positively affect your vehicle’s emissions, should be performed as indicated. -
Page 161: Fuel/Emissions Systems
Fuel/emissions systems Fuel system Evaporative control system Heated oxygen sensor NOTE: • Crankcase ventilation • • PremAir® CAUTION:... -
Page 162: Drive Belt, Coolant
Drive belt, Coolant Belt check CAUTION: NOTE: WARNING! WARNING! Check coolant level Changing coolant NOTE:... -
Page 163: Maintaining Your Car
Maintaining your car Owner maintenance Each time the car is refueled: • • Monthly: • • • • • As needed: • •... -
Page 164: Emission Inspection Readiness
Maintaining your car • Emission inspection readiness What is an Onboard Diagnostic System (OBD II)? • How do states use OBD II for emission inspections? How can my vehicle fail OBD II emission inspection? • • • How can I prepare for my next OBD II emission inspection? •... -
Page 165: Servicing
Servicing 3601948d 7700243d Front Rear Washer fluid reservoir Hoisting the car Ensure that the jack is positioned so that the car cannot slide off it. Always use axle stands or similar structures. -
Page 166: Opening The Hood, Engine Compartment
Opening the hood, Engine compartment Pull the handle... 8200092d 2000280m ...press up and open the hood Opening the hood Engine compartment • 1. Expansion tank - coolant 7. Brake fluid reservoir 2. Power steering fluid reservoir 8. Relay/fuse box • 3. -
Page 167: Engine Oil
Engine oil Oil specifications American Petroleum Institute (API) symbol Oil additives must not be used. The API Service Symbol “donut” is divided into three parts: • NOTE: • • Oil viscosity (stable ambient temperatures) Operation in temperate climates Viscosity (stable ambient temperatures) Operation in hot climates Extreme engine operation 2201671v... - Page 168 Engine oil Changing engine oil and oil filter Oil level should be between the MIN and MAX marks on the dipstick NOTE: CAUTION! • • Not checking the oil level regularly can OIL LEVEL LOW/ result in serious engine damage if the oil STOP SAFELY-->STOP ENGINE-->SEE •...
-
Page 169: Power Steering/Brake Fluid Reservoirs
Power steering/Brake fluid reservoirs Brake fluid FULL Power steering fluid 5200354m Power steering fluid Brake fluid NOTE:... -
Page 170: Replacing The Battery
• provided (see illustration). Be sure the ventilation hose is free of debris. Only use replacement batteries equipped • • with a ventilation hose. Consult your Volvo retailer. • • NOTE: • • • • •... -
Page 171: Battery Warning Symbols
Battery maintenance Battery warning symbols must WARNING! • Never expose the battery to open flame or electric spark. • Do not smoke near the battery. • Battery fluid contains sulfuric acid. Do not allow battery fluid to contact eyes, skin, fabrics or painted surfaces. -
Page 172: Replacing Wiper Blades
Replacing wiper blades Long Short 3602076D Headlight wiper blades Replacement of tailgate wiper (certain models) blade Pull the wiper arm out away from the glass. Pull off the wiper blade outwards toward the tailgate. Press the new wiper blade into place. Check that it is properly secured. -
Page 173: Chapter 9 - Specifications
Chapter 9 - Specifications Label information Dimensions and weights Engine specifications Oil/fluid specifications and volumes Fuel system, Distributor ignition system, Suspension Electrical system Volvo On Call Roadside Assistance... -
Page 174: Label Information
Label information 1 Loads and Tire Pressures 2 Child safety latch label VACUUMHOSEROUTING 3 Federal Motor Vehicle Safety Stan- dards (FMVSS) specifications (USA) and Ministry of Transport (CMVSS) standards (Canada) VEHICLEEMISSIONCONTROLINFORMATION MANUFACTURER:VOLVOCARCORP.,SWEDEN ENGINE:B5254S ENGINEDISPLACEMENT:2435cm149cuin ENGINEFAMILY:TVV2.4VJGKEK EVOPARATIVEFAMILY:TVV1143AYPEA(86.130-96PROCEDURES) 24VJGKEF EXHAUSTEMISSIONCONTROLSYSTEM:SFI,HO2S(2),TWC,AIR EXHAUSTEMISSIONArialS ArialCATEGORY CERTIFICATION TLEV IN-USE... -
Page 175: Dimensions And Weights
Dimensions and weights Dimensions All specifications are subject to change without prior notice. - Page 176 Dimensions and weights Canada Weights Max roof load Canada Max trailer weight Gross vehicle weight (GVW)* (w/o brakes) Max trailer weight** (with brakes, 2” ball) V70 Turbo man. 4710 lbs 2140 kg (with brakes, 1 7/8” ball) V70 Turbo aut. 4730 lbs 2150 kg V70 AWD...
-
Page 177: Engine Specifications
Engine specifications Designation: Volvo B 5254 T4 Designation: Volvo B 5254 T2 Charge air cooler (Intercooler) Output 208 hp at 5000 rpm Output 300 hp at 5500 rpm* (220 kW/92 rps)* (154 kW/83 rps) Designation: Volvo B 5244 S Output... -
Page 178: Oil/Fluid Specifications And Volumes
Oil/fluid specifications and volumes Engine oil Power steering fluid Volvo synthetic power steering fluid (Pentosin CHF 11S) P/N 1161529 or equivalent. Volume: Brake fluid Manual transmission oil Volume: Climate control system - refrigerant (R 134a) Automatic Transmission Fluid Volume: Fuel... -
Page 179: Fuel System, Distributor Ignition System, Suspension
Fuel system, Electronic ignition system, Suspension Fuel system Front suspension Distributor ignition system Rear suspension WARNING! • Replacing ignition components e.g. plugs, coil, etc. • Do not touch any part of the ignition system while the engine is running. This may result in a shock and bodily injury. All specifications are subject to change without prior notice. -
Page 180: Electrical System
Electrical system Bulb Type Socket Electrical system Battery WARNING! Bulbs Generator Bulb Type Socket Starter motor: All specifications are subject to change without prior notice. -
Page 181: Volvo On Call Roadside Assistance
Volvo On Call Roadside Assistance Volvo On Call Roadside Assistance Technician certification In the U.S.A In Canada:... -
Page 183: Chapter 10 - Audio Systems
Chapter 10 - Audio systems Introduction Audio system HU-650 - overview Audio system HU-850 - overview Radio functions RBDS functions HU - 650 CD player HU - 850 internal CD changer External CD changer (option) Dolby Surround Pro Logic II Specifications HomeLink®... -
Page 184: Introduction
Introduction Compact disc care • • HU-650 • HU-850 • • • • •... -
Page 185: Audio System Hu-650 - Overview
Audio system HU-650 - overview COMPACT DIGITALAUDIO HU-650 3905003m... -
Page 186: Audio System Hu-850 - Overview
Audio system HU-850 - overview COMPACT DIGITALAUDIO HU-850 3905001m... -
Page 187: Radio Functions
Radio functions HU-650/HU-850 Volume control - ALARM 3902418d Switch on/off Press the knob to switch on or turn off the radio. Volume control 3903096m Turn the knob clockwise to increase volume. Volume control is electronic and does not have Volume control - Subwoofer an end stop. - Page 188 Radio functions HU-650/HU-850 balance. Press the button back in when you have made the adjustment. Balance right/left Adjust left/right speaker balance by pressing the button to extend the control, and turning it to the left (more sound from the left speakers) or to the right (more sound from the right speakers).
- Page 189 Radio functions HU-650/HU-850 Manual station search Press and hold it down. MAN will be shown in the display. The radio scans slowly in the selected direction and will increase the scanning speed after a few seconds. Release the button when the desired frequency appears in the display.
-
Page 190: Storing Stations
Radio functions HU-650/HU-850 3905086m V70/XC70 V70 R 3905009m 3905067m Storing stations Storing stations automatically To store a selected station under one of the station setting buttons 1-6: This function automatically searches for and stores up to 10 strong AM or FM stations in a separate memory. -
Page 191: Rbds Functions
The RBDS or Radio Broadcast Data System operates in the FM band only, and the information transmitted is supplied exclusively by participating broadcasters. Volvo has no Alarm control over the accuracy of the data or Alarms bulletins are transmitted automatically information. - Page 192 RBDS functions Program type/station format - Station formats Format Display text PTY OFF The PTY function allows you to find stations News NEWS whose programs suit your taste. Use the PTY Current affairs AFFAIRS function to select among the different station Information INFO formats shown in the list.
- Page 193 RBDS functions Automatic Frequency update ASC - speed compensated (AF) volume The AF function tunes to the strongest The audio system’s volume is adjusted transmitter for the current station, if that automatically according to the speed of the station supports alternative frequencies. AF is vehicle.
-
Page 194: Hu-650 - Cd Player
HU-650 - CD player Starting the CD player Scan Please refer to the illustration on page 177 for This function plays the first 10 seconds of each the location of the buttons referred to on this track on the CD. •... -
Page 195: Hu-850 - Internal Cd Changer
HU-850 - internal CD changer Starting the CD changer Fast forward/back CD eject The HU-850 is equipped with an internal, 6- This function makes it possible to eject a Press and hold down the keys to disc CD changer. single disc, or to eject all of the discs in the search within a track or the entire disc. -
Page 196: External Cd Changer (Option)
External CD changer (option) If there are discs in the player when CD mode Random play is selected, the changer will resume playing This function plays the tracks on a CD in the disc and track that were most recently random order (shuffle). -
Page 197: Dolby Surround Pro Logic Ii
Dolby Surround Pro Logic II - HU-850 only Dolby Surround Pro Logic II Dolby Surround Pro Logic II, together with a center speaker in the dashboard, offers you a sound experience very close to a live perfor- 3905088d mance. The normal left-right stereo channels 3901877d 3 Channel stereo are divided to left-center-right. - Page 198 Dolby Surround Pro Logic II - HU-850 Center level Surround level This function is used to set the level of the This function is used to set the level of the of center speaker in the dashboard. To set the the rear speakers.
-
Page 199: Specifications
Specifications HU-650 Alarm CAUTION: Radio Subwoofer Low battery voltage HU-850 Radio... -
Page 200: Homelink® Universal Transceiver (Option)
HomeLink® Universal Transceiver (option) Indicator light HomeLink®® Universal Transceiver 8901344e Hand-held transmitter HomeLink® Universal Transceiver HomeLink® is an advanced system that can be programmed to learn the codes of three different remote controlled-devices (e.g., garage door WARNING! openers, remote lighting, entry door lock). HomeLink®’s sun visor- •... - Page 201 HomeLink® Universal Transceiver (option) NOTE - Canadian residents: During programming, your hand-held transmitter may automatically stop transmitting. To successfully train HomeLink®, continue to hold the HomeLink® button. At the same time, repeatedly press and hold your hand-held transmitter’s button at two-second intervals until HomeLink® The remaining two HomeLink®...
- Page 202 HomeLink® Universal Transceiver (option) Reprogramming a single HomeLink® button Do not release The previously programmed device has now been erased and the new device can be activated by pressing the HomeLink® button that has just been programmed. This procedure will not affect any other programmed HomeLink®...
-
Page 203: Index
Index... - Page 204 Index...
- Page 205 Index...
- Page 206 Index...
- Page 207 Index...
- Page 211 Volvo retailer knows where accessories may and may convenience. When used properly and safely, they enrich the driving not be safely installed in your Volvo. In all cases, please consult your experience. Improperly used, any of these could cause a distraction.
Need help?
Do you have a question about the 2006 XC70 and is the answer not in the manual?
Questions and answers