
Related Manuals for Vista Quantum QX960H08-series


Summary of Contents for Vista Quantum QX960H08-series
- Page 1 Quantum 960H DVR range Quick User guide Quick user guide for the Vista Quantum 960H range of DVRs, models included QX960H08-xxx QX960H16-xxx QP960H04-xxx QP960H08-xxx QP960H16-xxx Full manual found on the CD supplied with the DVR...
- Page 2 Quantum 960H DVR range – User guide V1.0...
-
Page 3: Table Of Contents
Contents SCOPE OF USE ..............................3 FRONT PANEL CONTROLS ..........................4 REAR PANEL CONNECTORS ..........................5 DVR OPERATION ..............................6 OSD Description .............................. 6 Live View ................................6 Digital Zoom ..............................7 SEARCHING AND PLAYING BACK VIDEO FOOTAGE ..................8 Playback ................................ -
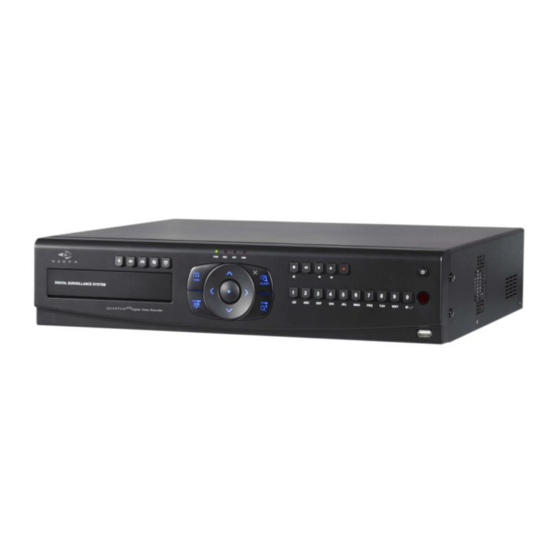
Page 4: Front Panel Controls
Front Panel Controls ①②③④ ⑤ ⑥ ⑦ ⑧ ⑨ ⑩⑪⑫ ⑬ ⑭ ⑮ ① Volume Up & Down ( To increase or decrease the volume. ② Audio Selection Switches between audio channels ③ Multi-screen Display Use the Multi-screen display button to select the display mode (single/4/9/16 way). ④... -
Page 5: Rear Panel Connectors
⑬ Zoom To control the zoom in & out of PTZ camera ⑭ Numeric & Character Input for numbers & letters within the setup menus and searches ⑮ USB Port USB connector for mouse control & downloading to USB memory. Rear Panel Connectors ( Image shows the QX960H) ①... -
Page 6: Dvr Operation
⑩ USB Port USB 2.0 port for mouse ⑪ RS232 Serial Communication (for service) ⑫ PTZ Camera Controller Serial Communication for Pan / Tilt Camera ⑬ Keyboard Controller Serial Communication for P/T/Z Control Keyboard ⑭ Alarm Output Alarm(relay) output port ⑮... -
Page 7: Digital Zoom
Select the Multi-screen display icon to step through the split screen options: 4 way quad, 9 way and 16 way. Any camera in a split screen display can be displayed full screen byt double clicking on the segment showing that camera. Alternatively use the arrow icons to step forward and back through the full screen displays in numerical order. -
Page 8: Searching And Playing Back Video Footage
Searching and playing back video footage Playback To enter the playback mode, right click on the main screen, the following on screen display will appear: Select the Play Icon the screen will now switch to play back mode, the following playback tool bar will appear at the bottom of the screen: ①... -
Page 9: Search Options
Search options Within the search menu there are 4 ways of Search reviewing recorded footage: 1. Date and Time 2. Event 3. Calendar 4. Bookmark The following sections describes how to use the Calendar search method, for descriptions of the other 3 methods, please refer to the main manual on the supplied CD. -
Page 10: Archiving Footage To Cd/Dvd Or Usb
Archiving footage to CD/DVD or USB Quick Archive The Quick Archive function can be accessed either via the Q-Arc key on the VKBD4 keyboard or from the Quick Archive icon displayed on the playback tool bar. To Display the playback toolbar right click on the Live screen and select the playback icon During playback Quick Archive can be selected, the Archive screen will appear, the DVR will search for the Archive media (USB, CD/DVD) Ensure one form of Archiving media is present prior to starting Quick... -
Page 11: Direct Playback Archive
Direct Playback Archive While reviewing recorded information it is possible to tag a start and stop time, which will then automatically open the Archive menu with these times pre loaded. This function is only accessible via the mouse. Ensure an Archive media is present e.g. CD/DVD or USB 1. -
Page 12: Standard Archiving Process
Standard Archiving process The Archiving of recorded information can be transferred onto various Archive media: Internal – CD/DVD drive External – USB memory sticks or drives Ensure the one form or Archive media is present before entering the Archive mode The Archive screen is access from the main Search screen (see previous section), choose the Archive icon on the Left hand side. - Page 13 Once downloading you can press the Search button, to exit the Archive screen and return to normal operation of the DVR while the archive is completed. Playing back information from DVD/CD Insert the disc into a PC. The disk will auto run and start playing the video footage, single cameras and multi- screen views can be selected.
-
Page 14: Ptz Functions
PTZ functions The telemetry function of the Quantum Plus can be controlled via 4 different interfaces: Remote keyboard Front panel buttons Remote control Software viewer Remote Keyboard See keyboard manual for control of PTZ cameras Front Panel Camera selection The PTZ cameras can be controlled in either full screen or split screen mode. If in full screen mode press the camera selection key , the camera icon will step from one camera to the next on the split screen. -
Page 15: Remote Control Functions
Preset positions 1. To store a preset position Move the camera to the required position then press the record key followed by the number key of the preset to be stored (1 – 9) 2. To recall a Preset Press the search key followed by the number (1 -9). - Page 16 Focus Near = Focus Far = Preset positions 3. To store a preset position Move the camera to the required position then press the record key followed by the number key of the preset to be stored (1 – 9) 4.
-
Page 17: Client Program
Client Program Network Connection & Minimum PC specification CPU: Core 2 Duo 1.8GHz, Graphic: 256MB 1) IP connection via Internet Explorer – Open up Internet Explorer and type in the IP address of the DVR (assuming it is a fixed IP address). If a fixed IP address is not available a DDNS server such as www.ddns-dvr.com can be used, refer to main manual on the supplied CD, Appendix 3 page 114. -
Page 18: Default Passwords
Default Passwords Front panel The default user is: Admin and password is: “00000000” i.e. 8xZero’s. This is required to: Enter menus, Power down, Stop recording, The adjacent prompt will be displayed asking for the password. Simplest method of inputting password is to use the mouse. -
Page 19: Operators Notes
Operators Notes: Quantum 960H DVR range – User guide V1.0... - Page 20 Quantum 960H DVR range – User guide V1.0...
Need help?
Do you have a question about the Quantum QX960H08-series and is the answer not in the manual?
Questions and answers