Table of Contents
Advertisement
Advertisement
Table of Contents

Related Manuals for Hensel Integra Mini 300


Summary of Contents for Hensel Integra Mini 300
- Page 1 Integra Mini 300 Kompaktblitzgerät Compact flash...
- Page 2 SLAVE LAMP TEST 115/230 V~ / 50-60 Hz FUSE 4AF...
-
Page 3: User Manual Integra Mini
User manual Integra Mini 300 HENSEL-VISIT International GmbH Robert-Bunsen-Str. 3 D-97076 Würzburg-Lengfeld GERMANY Tel. +49 (0) 931 27881-0 Fax: +49 (0) 931 27881-50 E-mail: info@hensel.de Internet: http://www.hensel.de © HENSEL-VISIT International GmbH, 2011 Distribution and reproduction of this document, and the use and transfer of its content is not permitted unless such right is explicitly granted. -
Page 4: Preface
User manual Integra Mini 300 1 Preface Dear Photographer, By purchasing a Hensel-Visit compact flash unit Integra Mini 300, you have purchased a high-quality and high-performance product. We want you to use this product successfully for years to come and the following user information will provide you with the necessary information. -
Page 5: Table Of Contents
User manual Integra Mini 300 2 Content 1 Preface ................2 2 Content ................3 3 Safety indication ..............5 4 General ................8 Description ..............8 Scope of delivery ............8 5 Technical data ..............9 6 Summary of control elements .........10 7 Initial use ...............11 Acclimatization ............11... - Page 6 User manual Integra Mini 300 Replacing the fuses ...........19 Replacement of flash tube .........20 Replacement of modeling light ........22 Error messages ............22 Warranty ..............24 Disposal ..............24 10 Customer service points ..........25 Manufacturer’s service ..........25 Service points listed in the Internet ......25 11 Accessories ..............26...
-
Page 7: Safety Indication
Proper use The compact flash unit Integra Mini 300 is intended for profes- sional use by a photographer. It is only intended to be used with the HENSEL-VISIT approved accessories listed in this manual. - Page 8 Use the safety screw 20 inside the tilting bracket and also secure the device with an arresting cable. Arresting cables can be ordered from HENSEL-VISIT, see „11 Accessories“ on page 26. HENSEL-VISIT International GmbH...
- Page 9 User manual Integra Mini 300 Generators, compact flash units, and flash heads ATTENTION! Defective flash tubes and false handling can pose a mortal danger. A damaged flash tube can mean mortal danger because you could come in contact with the electrodes conducting high vol- tage.
-
Page 10: General
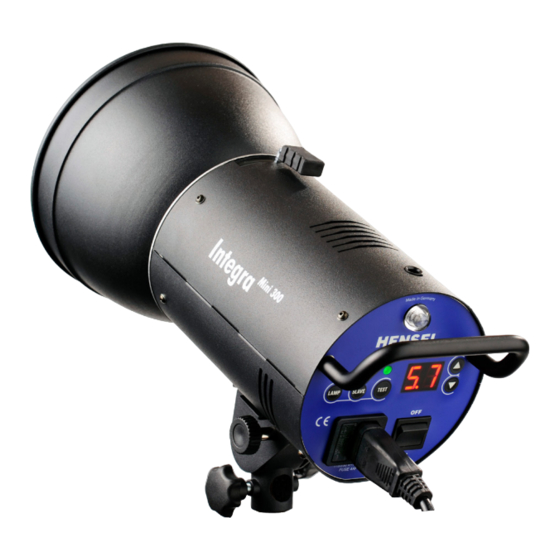
User manual Integra Mini 300 4 General Description The Integra Mini 300 is a high-performance, entry-level com- pact flash unit. A bright, proportional modeling light, adjus- table in 6 f-stops, high-quality performance electronics and an EH-reflector connector are built-in to a sturdy metal housing. -
Page 11: Technical Data
User manual Integra Mini 300 5 Technical data Unit series/ unit type Integra Mini 300 Performance output: 300 J Lead aperture 100 ASA, t 1/60, 12“-Reflektor, 100% performance 1 m distance / 2 m distance: f 64 3/10 / f 32 3/10... -
Page 12: Summary Of Control Elements
User manual Integra Mini 300 6 Summary of control elements 1 ..Power connector plug 2 ..Power switch 3 ..Display for selected energy/flash counter 4 ..Adjustment key DOWN 5 ..Adjustment key UP 6 ..Handle bar 7 .. -
Page 13: Initial Use
User manual Integra Mini 300 7 Initial use ATTENTION! Please make sure that the unit is not connected to any power supply when preparing for initial use. Acclimatization When relocating the device from and to locations with marked temperature differences, place the unit inside the room where it is to be used and first let it sit for some time. -
Page 14: Insert Flash Tube
User manual Integra Mini 300 Disassemble  Tilt the protective glass cover slightly until it releases from the first and then the second spring.  Remove the protective glass cover by gently pulling it straight out of the last spring. -
Page 15: Set-Up
Fuse protection, modeling light The safety fuse ensures the protection of the modeling light. The compact flash unit Integra Mini 300 is protected by a 4 A fuse which reacts quickly (F 4 A H). The listed safety values are valid when the device is used with a 300 W halogen lamp. - Page 16 User manual Integra Mini 300 Fuse protection, device The inside of the unit contains a built-in fuse. When this fuse responds, the unit is damaged. ATTENTION! Only authorized dealers may replace this fuse, see „10 Custo- mer service points“ on page 25.
-
Page 17: Operation
User manual Integra Mini 300 Operation Switch on/off The main switch ON/OFF 2 turns the compact flash unit on or off. The unit is ready to flash when the ready indicator 10 lights up. ATTENTION! The power switch must be accessible and operational at all times. -
Page 18: Performance Output Adjustment
User manual Integra Mini 300 Change the time with the keys q 4 and p 5 in 5-minute  steps, up to a maximum of 90 minutes. Selecting „--“ turns the function off completely. Normal operation is resumed automatically 5 sec. after the last use of any key. -
Page 19: Synchronization
User manual Integra Mini 300 Synchronization via cable The compact flash unit is connected to the camera via synchro- nization cable by connecting the jack plug to the sync plug 8 on the camera. The synchronizing process employs the latest semiconduc-... - Page 20 User manual Integra Mini 300 Daily flash count The number of flashes which were triggered since last resetting the counter is displayed on LED-display 3. This is how you read the daily flash count: Â Hold down the touch key SLAVE 14 for one second.
-
Page 21: Maintenance
ATTENTION! The device must be disconnected from any power supply before attempting any maintenance procedure. The compact flash unit Integra Mini 300 does not require much maintenance. The outside of the unit must be regularly cleaned of dust and dirt to guarantee the electrical safety of the device. -
Page 22: Replacement Of Flash Tube
User manual Integra Mini 300 This is how you replace a fuse: Â Open the fuse drawer 16 with the help of a small screwdri- ver and pull it out. Note: The drawer can only be pulled out approximately 1 cm. - Page 23 Â Wind ignition wire B around the connector pin C. Fitting flash tubes for the compact flash unit Integra Mini 300 can be found in the chapter „11 Accessories“ on page 26.
-
Page 24: Replacement Of Modeling Light
User manual Integra Mini 300 Replacement of modeling light The halogen lamp for the compact flash unit’s modeling light is plug-in style. In case of a defect, the lamp can be replaced by the operator. ATTENTION! Turn the unit off and disconnect it from any power supply before replacing the modeling light. -
Page 25: Warranty
 Send the unit to the next available service point and indicate the error code. Warranty The warranty period for Integra Mini 300 depends on the country of delivery. You can obtain information pertaining warranty periods on the web pages of the distributing companies. -
Page 26: Disposal
User manual Integra Mini 300 Normal usage, meeting the safety requirements in the inst- ruction manual, and adhering to the information therein, are prerequisites for this warranty. Unauthorized manipulation and tampering with the unit void any warranty claim. Flash tubes, modeling lamps, protective glass covers, and de- fective power cables are excluded from any warranty. -
Page 27: Customer Service Points
Tel.: +49 (0)931 278 810 Fax: +49 (0)931 278 815 0 E-Mail: info@hensel.de Service points listed in the Internet Additional national and international service and distribution addresses can be found on the web page of HENSEL-VISIT International: www.hensel.de HENSEL-VISIT International GmbH... -
Page 28: Accessories
Item No. 9412400 : Safety fuses F 4 A H Sync cable different length Radio remote Strobe Wizard Plus Profoto Air Arresting cable Item No.: 769 Additional information concerning accessories can be found on the web page of HENSEL-VISIT International: www.hensel.de HENSEL-VISIT International GmbH... -
Page 29: Subject Index
User manual Integra Mini 300 12 Subject index Daily flash count 18 Energy saving mode 15 Flash ready display 15 Flash tube 7, 8, 9, 12, 20, 26 Fuses 10, 13, 14, 19 Halogen lamp 12, 13, 23 Listing 6, 13... -
Page 30: Declaration Of Conformity
User manual Integra Mini 300 13 Declaration of Conformity for Electromagnetic Compatibility and Safety HENSEL-VISIT International GmbH...
Need help?
Do you have a question about the Integra Mini 300 and is the answer not in the manual?
Questions and answers