Table of Contents
Advertisement
Quick Links
OPERATOR'S
MANUAL &
PARTS LIST
Beginning with Serial Number 180001
READ THIS BOOK
This book has important information for the use and safe operation of this machine. Failure
to read this book prior to operating or attempting any service or maintenance procedure to
your machine could result in injury to you or to other personnel; damage to the machine or to
other property could occur as well. you must have training in the operation of this machine
before using it. If you or your operator(s) cannot read English, have this manual explained
fully before attempting to operate this machine.
All directions given in this book are as seen from the operator's position at the rear of the machine.
For new books, write to: Clarke 2100 Highway 265, Springdale, Arkansas 72764
Part No. 2-86-00318
CLARKE
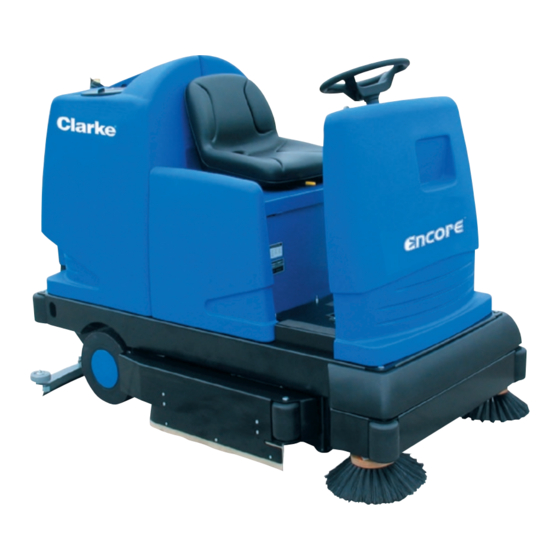
ENCORE MAX
Clarke
2003 Clarke
Division of
®
ENCORE MAX
SCRUBBER
ISO 9001
U L
®
#
FILE A2287
Printed in the USA
1-1
Advertisement
Table of Contents
Troubleshooting

Related Manuals for Clarke ENCORE MAX


Summary of Contents for Clarke ENCORE MAX
- Page 1 FILE A2287 All directions given in this book are as seen from the operator's position at the rear of the machine. For new books, write to: Clarke 2100 Highway 265, Springdale, Arkansas 72764 Printed in the USA Part No. 2-86-00318...
- Page 2 NOTES CLARKE ENCORE MAX...
-
Page 3: Table Of Contents
MAINTENANCE 39 OPERATING INSTRUCTIONS 30 ORDERING PARTS 10 SAFETY PRECAUTIONS 11 SPECIFICATIONS 14 STANDARD HARDWARE & TORQUE VALUES 7 SYMBOLS 9 TROUBLESHOOTING 50 WIRE HARNESS CONNECTIONS 54 WIRE HARNESS CONNECTIONS-SPRAY WAND 58 WIRE HARNESS ROUTING & CONNECTIONS 56 CLARKE ENCORE MAX... -
Page 4: Disclaimer
No portion of this manual may be reproduced without the express written consent of: CLARKE Product Engineering 1100 Haskins Road Bowling Green, OH 43402 Telephone: (419) 352-7511 Fax: (419) 373-4284 Copyright 2003 Clarke. All rights reserved. Printed in USA March 2003 CLARKE ENCORE MAX... -
Page 5: Decimal-Metric Conversion Table
DECIMAL-METRIC CONVERSIONTABLE DECIMAL DECIMAL FRACTION MILLIMETER FRACTION MILLIMETER C-2001/9907 CLARKE ENCORE MAX... -
Page 6: Hardware Abbreviations
= Square Head Setscrew = Knurled Cup Point Setscrew -KCP = Cup Point Setscrew = Oval Point Setscrew = Full Dog Point Setscrew -FDP = Half Dog Point Setscrew -HDP = Flat Point Setscrew = Cone Point Setscrew -COP C-2004 CLARKE ENCORE MAX... -
Page 7: Standard Hardware & Torque Values
F = Fine Thread * = Torque values for #6 through 1/4 are lb./in. All others are lb./ft. NOTE Decrease the torque by 20% when using thread lubricant The torque tolerance is ± on torque values. C2000/9905 CLARKE ENCORE MAX... -
Page 8: Hydraulic Torque Requirenments
92-100 1 5/16-12 200-220 1 11/16-12 125-140 1 5/8-12 210-280 2-12 150-165 1 7/8-12 270-360 * O-Ring face seal type end not defined for this tube size. NOTE Parts must be lightly oiled with hydraulic fluid. C-2002 CLARKE ENCORE MAX... -
Page 9: Symbols
Moving Fan Blade Pinch Point/Crush Hazard Power Recovery Tank High Cover or Hopper Could Close/ Engage Support Scrub Brush Down & On Turn Key Off/Lock Wheel Before Leaving Seat WARNING! / ATTENTION! Scrub Brush Up and Off CLARKE ENCORE MAX... -
Page 10: Ordering Parts
ORDERING PARTS Parts may be ordered from Clarke authorized distributors. Record the Parts may be ordered from Clarke authorized distributors. Record the information from the serial number plate to avoid delays in filling your order. information from the serial number plate to avoid delays in filling your order. -
Page 11: Safety Precautions
Scrub deck presents hazard for crushing, entanglement, WARNING friction and abrasion ELECTRICAL HAZARD - Shocks can cause serious personal injury Disconnect battery before working in this area Repairs must be performed by authorized personnel only CLARKE 1-11 ENCORE MAX... -
Page 12: Safety Precautions
This machine is not at tow truck and should not be used for towing. • Do not use this machine as a step or furniture. • Do not operate machine on public highways, gravel, sand, grass and other unsafe surfaces. 1-12 CLARKE ENCORE MAX... - Page 13 Do not put tools or other metal objects across the battery terminals, or the tops of batteries. • Keep electrical parts of the machine dry. • Make sure that all labels, decals, warnings, cautions and instructions are fastened to the machine. Get new labels and decals from American-Lincoln. CLARKE 1-13 ENCORE MAX...
-
Page 14: Specifications
36 volt (6-6 volt batteries) 340 AH or 370 AH Encore Max (38”) 36 volt (6-6 volt batteries) 340 AH or 370 AH Encore Max (34” & 38”) For machine to operate properly, voltage reading should fall within the 32-40V range CHARGER Encore Max (34”... - Page 15 SPECIFICATIONS WIDTH Encore Max (34”) Machine 33.5” (85 cm) Brush Housings 38.0” (96.5 cm) Squeegee 42.0” (106.7cm) Encore Max (38”) Machine 33.5” (85 cm) Brush Housings 41.0” (104.1 cm) Squeegee 42.0” (106.7 cm) HEIGHT 51” (129.5 cm) HEIGHT W/OHG 80” (203.2 cm) WEIGHT Encore Max (34”)
- Page 16 SPECIFICATIONS 1-16 CLARKE ENCORE MAX...
-
Page 17: Machine Preparation
UNPACKING AND ASSEMBLING MACHINE The Encore Max is shipped on a pallet covered by a plastic bag and fastened with four hold down brackets. 1. Remove plastic bag. 2. Unbolt lag screws located on each corner of machine. - Page 18 Do not charge batteries on a concrete grounded surface. Hydrogen gas is formed during the charging operation and is explosive. Only charge batteries in a well ventilated area with the lid open. Avoid any smoking, open flame, or electrical sparks. 1-18 CLARKE ENCORE MAX...
- Page 19 Connect battery connector wires in series to batteries as shown in figure 8. WARNING Do not leave charged batteries on concrete surface, they will discarge. CLARKE 1-19 ENCORE MAX...
- Page 20 Plug the battery connector assembly from the battery to the machine connector assembly as shown in figure 10. Reinstall the side panel and then release the safety latch and lower the seat as shown in figure 11. 1-20 CLARKE ENCORE MAX...
-
Page 21: Controls
Low Solution Light (Left) High Recovery Light (Right) Scrub Pressure Switch Squeegee Vacuum Switch Light Switch, Optional LCD Display Forward/Reverse Switch Key Switch Secondary Optional Brake Pedal (Bottom), Pedal Lock (Top) Horn Button, Optional Foot Throttle CLARKE 1-21 ENCORE MAX... - Page 22 LCD DISPLAY SCREEN CONTROL BUTTON The Encore Max is equipped with an LCD display allowing the operator to monitor machine operation. The LCD display button is located in the center of the console to the right under the display. Pushing on the menu button enables the operator to view screen functions and monitor machine status and operation.
- Page 23 Selected pressure is displayed as a bar on the LCD control panel. Pressing the scrub pressure switch down selects the next lowest setting available, decreasing pressure as shown in figure 17. CLARKE 1-23 ENCORE MAX...
- Page 24 19. Pressing down on the foot throttle with the forward/reverse switch in the reverse position will raise the squeegee when it is down. The vacuum will turn off in 15 seconds after the squeegee is raised. 1-24 CLARKE ENCORE MAX...
- Page 25 The high recovery red indicator light is located on the left side above the switches on the console to the right of the low solution indicator light as shown in figure 21. When the high recovery indicator light illuminates the recovery tank is full and needs to be drained and cleaned out. CLARKE 1-25 ENCORE MAX...
- Page 26 The horn button is located on the floor of the operator’s compartment to the left of the optional parking brake peda as shown in figure 24. Pressing the button with the left foot will activate the horn. 1-26 CLARKE ENCORE MAX...
- Page 27 The foot brake is not a method for slowing machine travel or for stopping under normal conditions. This is accomplished by releasing the foot throttle. CLARKE 1-27 ENCORE MAX...
- Page 28 The hour meter is activated when the key switch is in the “on” position. Screen 2 on the LCD display shows total hours and panel screen display 3 shows total hours, brush hours and traction hours. This is useful for determining service intervals. 1-28 CLARKE ENCORE MAX...
- Page 29 The machine will stop immediately if there is no operator present in the seat. HAND LEVER Fig. 29 PRE SWEEP (OPTION) The sweeper is designed to turn the broom on as it is lowered. To lower the broom release hand lever on right side. CLARKE 1-29 ENCORE MAX...
-
Page 30: Operating Instructions
3. Push down on the foot throttle to obtain desired travel speed, release foot throttle to stop. WARNING Do not turn the steering wheel sharply when the machine is in motion. The sweeper is very responsive to movement of the steering wheel. Do not make sudden turns. 1-30 CLARKE ENCORE MAX... - Page 31 BRUSHES OFF IN NEUTRAL - Scrub brushes automatically disengage when machine is idle. PARKING BRAKE INTERLOCK - Parking brake will automatically set when foot pedal is released. AUTOMATIC RECOVERY VACUUM SHUT-OFF - Vacuum fans will shut down when recovery tank is full. CLARKE 1-31 ENCORE MAX...
- Page 32 Sensors in each tank will indicate, by lights on the control panel, when the water in the solution tank is too low or when the water in the recovery tank is too high. 1-32 CLARKE ENCORE MAX...
- Page 33 After scrubbing, the dirty solution is vacuumed from the floor and discharged into the recovery tank. At intervals, a float switch activates the recycling pump, which sends filtered solution from the recovery tank to the solution tank. CLARKE 1-33 ENCORE MAX...
- Page 34 Discontinue the scrubbing cycle, put all controls in the forward position for transport and drive to the drain area. NOTE After stopping, perform these post operation checks. 1-34 CLARKE ENCORE MAX...
- Page 35 The local city and state regulations regarding wastewater discharge may be in effect in your area. Understand and follow the regulations in your area. Be aware of the environmental hazards associated with the substances you dispose of. CLARKE 1-35 ENCORE MAX...
- Page 36 Fig. 40 Fig. 41 Inspect the disc brushes and replace when bristles are reduced to 3/4 inch length as shown in figure 40 and 41. To order replacement brushes, see scrub brush options in this manual. 1-36 CLARKE ENCORE MAX...
- Page 37 This process can be repeated until all four edges are worn. If the squeegee blade has become rippled, it will need to be replaced. Inspect the inner flap on the rear squeegee for wear and to ensure it has not been torn or damaged. CLARKE 1-37 ENCORE MAX...
- Page 38 The filter bag should be checked every time the pre sweep is used and replaced when full as shown in figure WARNING There is a potential risk of the bag tearing and causing premature failure to the dust control motor and the main and side broom motor. 1-38 CLARKE ENCORE MAX...
-
Page 39: Maintenance
American-Lincoln parts. Refer all Maintenance and Service Requirements to Qualified Maintenance Personnel. Do not attempt to service this machine until you have read and understood all Safety Warnings associated with the equipment you are working on. CLARKE 1-39 ENCORE MAX... - Page 40 If it becomes necessary to remove such equipment for repair or maintenance, this equipment must be reinstalled before machine is placed back in operation. 1-40 CLARKE ENCORE MAX...
- Page 41 2. Insert charging plug into battery receptacle. 3. Plug power cord into proper AC source. 4. Follow the charging instructions provided on the charger. 5. Maintain electrolyte level in batteries, check after charging. Add distilled water as needed. CLARKE 1-41 ENCORE MAX...
- Page 42 The battery box can slide off a forklift and cause severe personal injury or damage to equipment. Ensure that the battery box is properly secured to the forks of the forklift during transport, drive and stop with caution. 1-42 CLARKE ENCORE MAX...
- Page 43 3. Unplug the battery connector assembly from the battery to the machine connector assembly. 4. Disconnect the battery connector wires from the batteries. Remove battery spacers holding batteries in place. 6. Use a 100 lb. (454 KG) lifting mechanism to lift and remove batteries. CLARKE 1-43 ENCORE MAX...
- Page 44 (See replacing the scrub brushes) To change pad follow this procedure. 1. The pad driver is held in place by a ring. Pull the pad driver straight down to remove it. 2. Remove the pad holder using the spring wire retainer. 3. Replace the worn pad. 1-44 CLARKE ENCORE MAX...
- Page 45 Inspect the squeegee blade. If the blade is worn, turn the blade so that a new edge is in the wiping position. Reinstall squeegee assembly on the machine. Note Toothed lock washers must be on top of support plate CLARKE 1-45 ENCORE MAX...
- Page 46 Remove the cover from the solution tank, rotate the handle on the drain plug counterclockwise and then pull up as shown in figure 61. After the tank has drained, flush out with clean water and reinstall the plug. 1-46 CLARKE ENCORE MAX...
- Page 47 PULL FORWARD TO TIGHTEN BELT TO ADJUST BELT SIDE BROOM BELT Fig. 64 Side Broom Belt 1. Check belt tension adjustment as shown in figure 64. 2. Loosen pulley and broom nut. 3. Force pulley and broom forward. 4. Retighten. CLARKE 1-47 ENCORE MAX...
- Page 48 These fuses are manufactured by: Cooper-Bussmann, Inc., P.O. Box 14460, St. Louis, MO 63178-4460 Figure 67 Figure 68 Fuse Part No. Fuse Part Nos. 8-28-05019 (American-Lincoln) 2-00-05861 (American-Lincoln/2 amp) ABC-2 (Cooper Bussmann/2 amp) ACK-70 (Cooper Bussmann) 2-00-05860 (American-Lincoln/10 amp) ABC-10 (Cooper-Bussmann/10 amp) 1-48 CLARKE ENCORE MAX...
- Page 49 Replace fuses with the same size fuse to avoid damage to electrical components. Power Panel fuses are manufactured by: Cooper-Bussmann, Inc., P.O. Box 14460, St. Louis, MO 63178-4460 Fuse Part Nos. 2-00-05861 (American-Lincoln/2 amp) ABC-2 (Cooper Bussmann/2 amp) 2-00-05860 (American-Lincoln/10 amp) ABC-10 (Cooper-Bussmann/10 amp) CLARKE 1-49 ENCORE MAX...
-
Page 50: Troubleshooting
3. Adjust or replace 4. Hopper not installed broom belts. Reset correctly. circuit breakers 5. Poor broom pattern. adjust broom micro 6. Flaps worn. switches. Repair loose wire connections. 4. Reinstall. 5. Adjust sweep pattern. 6. Repair or replace. 1-50 CLARKE ENCORE MAX... - Page 51 4. Remove obstruction, 4. Overload of drive put drive pedal in circuit. neutral. 5. Adjust. Machine does not move. 1. Blown fuse. 1. Check fuse and 2. Battery unplugged. replace if necessary. 2. Plug in battery. CLARKE 1-51 ENCORE MAX...
-
Page 52: Trouble Shooting
4. Check position of switches direction 1. Lift actuator out of 1. Adjust Squeegee leaves wet spots adjustment 2. Squeegee wheels out of 2. Adjust adjustment Squeegee makes excessive 1. Blades worn or damaged 1. Replace noise 1-52 CLARKE ENCORE MAX... -
Page 53: Electrical Schematic
REMOVE & INSERT 11 X 17 ELECTRICAL SCHEMATIC PG 53 CLARKE 1-53 ENCORE MAX... -
Page 54: Wire Harness Connections
REMOVE & INSERT 11 X 17 WIRE HARNESS CONNECTIONS PG 54 1-54 CLARKE ENCORE MAX... - Page 55 NOTES CLARKE 1-55 ENCORE MAX...
-
Page 56: Wire Harness Routing & Connections
WIRE HARNESS ROUTING & CONNECTIONS ITEM QTY PART NUMBER DESCRIPTION 0795-169 MACHINE HARNESS 0795-175 TRACTION MOTOR HARNESS 0795-176 BATTERY-POWER PANEL HARNESS 1-56 CLARKE ENCORE MAX... - Page 57 REMOVE & INSERT 11 X 17 WIRE HARNESS ROUTING PG 57 Ref# 71716-3 CLARKE 1-57 ENCORE MAX...
-
Page 58: Wire Harness Connections-Spray Wand
11 x 17 WIRE HARNESS CONNECTIONS-SPRAY WAND PG 58 1-58 CLARKE ENCORE MAX... - Page 59 2102 error Possible controller fault. Replace controller if not cleared by disconnecting Progress counter 2103 batteries for 1 minute. error 2 Low battery error 2C00 Low voltage warning. Recharge batteries immediately. Low battery error 2 2C01 CLARKE 1-59 ENCORE MAX...
- Page 60 Open circuit on brush motors or Check brush motor connection to Trio & wiring disconnected error brush motor wiring from this connector down to brush motor, check- ing connections all the way. Otherwise, possible brush motor fault. 1-60 CLARKE ENCORE MAX...
- Page 61 E-stop input active or wiring fault Check for wiring short circuits on Trio’s 20-way activated (programmed as belly button). connector, the LCD’s 16-way connector (if used) & the wiring to emergency stop switch & switch itself. Otherwise, incorrect operation of machine. CLARKE 1-61 ENCORE MAX...
Need help?
Do you have a question about the ENCORE MAX and is the answer not in the manual?
Questions and answers