Table of Contents
Advertisement
Advertisement
Table of Contents

Subscribe to Our Youtube Channel
Related Manuals for Trannergy PVI1300TL


Summary of Contents for Trannergy PVI1300TL
- Page 1 User Manual PVI1300/1800/2300/2700/3000/3200/4000/4600/5400TL...
-
Page 2: Table Of Contents
Contents Copyright Declaration ....................... 3 1. Introduction ........................... 4 1.1. Introduction ........................4 1.2. How to Use this manual ....................4 1.3. Applied Designations (Warning, Caution, Note) ............4 1.4. Important Safety Information ..................5 1.5. General Safety Rules for Working on Electrical Equipment .......... 6 1.6. - Page 3 5.4. Auto Test Settings ......................28 5.5. Power Factor Settings ....................30 5.6. Power Limit Settings ....................30 6. Communication and Monitoring ..................31 6.1. Communication Interfaces .................... 31 6.2. Communication ......................31 6.2.1. RS-232 Communication for single inverter type ........... 31 6.2.2.
-
Page 4: Copyright Declaration
Copyright Declaration The copyright of this manual belongs to Trannergy Co., Ltd. Any corporation or individual should not plagiarize, partially copy or fully copy it (including software, etc.), and no reproduction or distribution of it in any form or by any means. All rights reserved. -
Page 5: Introduction
1. Introduction 1.1. Introduction This manual describes Trannergy solar inverters PVI1300TL,PVI1800TL ,PVI2300TL, These PVI2700TL,PVI3000TL,PVI3200TL, PVI4000TL, PVI4600TL and PVI5400TL. products are among the most technologically advanced and efficient inverters on the market and are designed to ensure a stable power supply for many years. -
Page 6: Important Safety Information
Additionally it will lead to the cancelling of all inverter operating approval certificates. The Trannergy inverters in the PVI range are all designed according to the German VDE0126-1-1standard. If non-original spare parts are used, the compliance with CE guidelines in respect of electrical safety, EMC and machine safety is not guaranteed. -
Page 7: General Safety Rules For Working On Electrical Equipment
1.5. General Safety Rules for Working on Electrical Equipment All persons installing, maintaining or servicing inverters should be trained in and have experience with the general safety rules to be observed when working on electrical equipment. Installation and service personnel should also be familiar with local requirements, rules and regulations as well as safety requirements. -
Page 8: System Sizing
The limitation is calculated continuously and always allows the maximum possible amount of energy to be produced. Please use the tool supplied by Trannergy when dimensioning a photovoltaic system. 1.7. DC-switch On1y trained and authorized personnel familiar with local electrical codes may perform service or maintenance on the inverter. -
Page 9: Technical Description Of Inverters
2. Technical Description of Inverters 2.1. Mechanical design Figure 2-1 shows the outline dimensions of PVI1300/1800/2300/2700/3000TL: Figure 2-1 Figure 2-2 shows the outline dimensions of PVI3200/4000/4600/5400TL: Figure 2-2 User Manual... -
Page 10: Electrical System Design
Note: The AC output terminal is most length part at the bottom of inverter, so take care of the AC output terminals, do not make it stand on the ground or other materials while moving or lifting the inverters otherwise will make terminal damaged. 2.2. - Page 11 We recommend a 32A DC Breaker located at the input of the DC input, and a 32A AC Breaker located at the output of the AC part. Notes: When choose the breaker, please call your installer for technique support For the input and output wire selection, we recommend UL1015 wire, please see the following table.
-
Page 12: Operation Mode Definition
3. Operation Mode Definition The inverter has four standard operation modes. 3.1. Waiting mode In waiting mode, the inverter is ready to switch into connecting mode. As decision variable the input voltage of the PV generator is used. Inverter is waiting to checking when output DC voltage from PV panels is greater than 100V (lowest start-up voltage) but less than 150V (lowest operating voltage). - Page 13 PV over voltage 1. Check the open circuit voltage of the PV generator, see if it is greater than or too close to 450VDC (for PVI1300TL/PVI1800TL) or 500VDC (for PVI2300TL /PVI2700TL /PVI3000TL) 2. If PV voltage is less than 450VDC or 500VDC, and the problem still occurs, please call the service.
-
Page 14: Installation And Startup
The Trannergy inverter may become hot in normal operation. Do not install the Trannergy inverter on easily flammable materials and where flammable materials are stored. Do not install the Trannergy inverter where there is a risk of explosion. Caution! Danger of burns from hot housing components! Install the Trannergy inverter at a proper place where it cannot be touched unintentional. - Page 15 Figure 4-2 Ambient conditions User Manual...
- Page 16 The area where the Trannergy inverter installed is as dry as possible in order to extend their service life. Ensure good access to the unit for installation or any service work that may later be required. Ensure that equipment out of the children's reach.
-
Page 17: Installing The Inverter
The unit has been designed for vertical or tilted backwards by max.15° installation. Do not install the Trannergy inverter forwards. Never install it horizontally. Install at eye level makes it easier to operate and read the display. - Page 18 Figure 4-5 Attention! Before inserting expansion bolts, measure the depth of every hole and measure the distance between every two holes. If the measures values do not meet installing requirements, re-drill holes in the wall. c) Hung the inverter on the installation board,Fit washers and bolts(double) Fit washers and bolts (double) Figure 4-6 d) Check both sides for correct positioning.
-
Page 19: Electrical Connection
4.3. Electrical connection Product A: Product B: Figure 4-7 Object Description Plug connectors for DC input. Their polarity is signed lost to the Corresponding connectors Communication terminal:RS485 or RS232 interface Terminal for grid connection (AC output) DC Switch(optional) User Manual... -
Page 20: Connection To The Grid (Ac) For Product A
Note! 1) After the inverter has been installed in its fixed position, the electrical connection to the unit can be established. 2) Make sure Max. Open Voltage and short-circuit current of the PV string accord with the Spec. 3) Choose the appropriate cable width for AC/DC wire. 4) To connect the inverter, the AC and DC side must be disconnected from all power. - Page 21 Strip the jacket of cable(40±1mm) and strip the insulation(7.5±0.5mm), see Figure 4-10. Figure 4-10 Amphenol specified strip tool can be used in this step. Adjust the striper stopper and put the cable in the corresponding notch to strip the length of 7.5mm as male side.
- Page 22 When the separation of connector is necessary, use common tool to separate (A word screwdriver). Lay the tooling in the location of snap and press the tool down. Then the male side can be pushed from the female insert by hand, see Figure4-14. Figure 4-14 ...
-
Page 23: Connection To The Grid (Ac) For Product B
The breaker should have certain capacity of over current and over voltage. In addition, before cutting off the DC end connection please cut off the AC end connection at first. Type Maximum input voltage[V] Maximum input current[A] 18.4 PVI1300TL 18.4 PVI1800TL 18.4 PVI2300TL User Manual... - Page 24 PVI3000TL PVI3200TL PVI4000TL PVI4600TL PVI5400TL For the inverter PVI1300TL/1800TL/PVI2300TL/PVI2700TL/PVI3000TL, there is a pair of DC connection and one MPPT tracker. For the inverter PVI3200TL, PVI4000TL, PVI4600TL and PVI5400TL, there are two pair of DC connection and two MPPT trackers. Attention! The open circuit voltage of the PV generator must be measured, which must not exceed the maximum input voltage of the unit.
- Page 25 Strip the cable 7 mm, see Figure4-20. Figure 4-20 Insert striped cable into contact barrel, and insure all conductor strands are captured in the contact barrel. Crimp contact barrel by using a hex crimping die. A specified crimping tool can be used in this step.
-
Page 26: Run The Inverter
4.4. Run the inverter Start inverter after checking all below steps a) Make sure all the DC breaker and AC breaker are disconnected. b) AC cable is connected to grid correctly. c) All PV panels are connected to inverter correctly,DC connectors which are not used should be sealed by cover. -
Page 27: Human Machine Interface
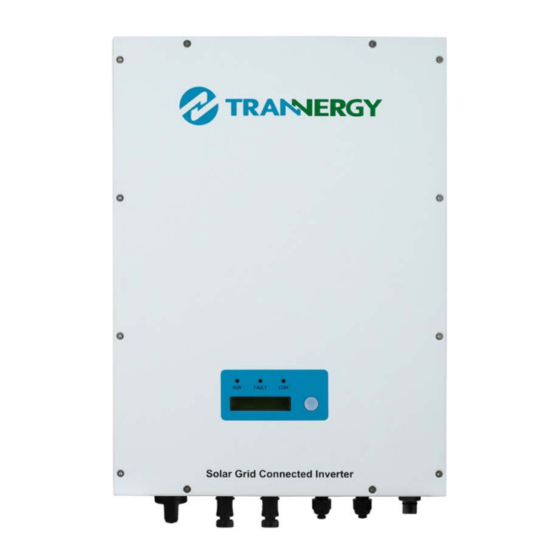
5. Human Machine Interface 5.1. Control Panel Figure 5-1 A—Green LED: Working Normally B—Red LED: Fault detected. C—Yellow LED: Communication or updating firmware D—Function key: For settings. It can alternate among different parameters and different languages. User Manual... -
Page 28: Lcd Functions
5.2. LCD Functions Current State The grid voltage Current output pow (w) E-today The energy generated today(kwh) Current output pow (w) Set Language Languages are provided, you can select any one you require Current output pow (w) E-total The energy generated since starting up the inverter (kwh) Current output pow (w) The firmware version... -
Page 29: Auto Test Settings
Normal Pac = xxx.Xw Press the Function Key for 10 times, it will display the language menu. Select language Pac = xxx.Xw Press and hold the Function Key to change language English Pac = xxx.Xw After a brief period of inactivity, the display returns to “Normal”... - Page 30 Normal Normal running state. Pac = xxx.Xw Press the function key for about 14 times, until see the following menu Auto Test Set Pac = xxx.Xw Press and hold the function key, until seeing the following menu to prepare for the grid voltage upper limit test.
-
Page 31: Power Factor Settings
5.5. Power Factor Settings For the VDE-AR-N 4105 standard, customers need to adjust PF. Firstly, confirm that the inverter is set to VDE-AR-N 4105 standard. Then do the following: During connecting state or normal Connecting running state. Pac = xxx.x W Preferably connecting state. -
Page 32: Communication And Monitoring
6. Communication and Monitoring 6.1. Communication Interfaces This product has a communication interface RS-232, RS-485 and Wireless (optional). Operating information like output voltage, current, frequency, fault information, etc., can be delivered to PC or hardware storage devices or other monitoring equipment via communication interface. 6.2. -
Page 33: Rs-485 Communication For Several Inverters
Notes: If your computer doesn’t have the DB9 communication interface, you can use RS232-USB cable to achieve this function. One inverter can only be communicated with one PC at the same time through RS-232 port. Thus this method is generally used for single inverter’s communication, for examples, software updating and serviceman’s testing. -
Page 34: Wireless
6.2.3. Wireless PVI1300/1800/2300/2700/3000/3200/4000/4600/5400TL can be communicated with wireless. Trannergy can customize the required special device from customers to realize wireless communication. 6.3. Monitoring System monitor PVCS should be configured to realize one PC communicates with multi inverters at the same time. Through PC PVCS could get real time PV plants operating data. -
Page 35: Service And Repair
7. Service and repair 7.1. Safety during service and repair In this chapter the term ‘event’ describes all conditions preventing the inverter from operating properly. An event can occur in any part of the system (grid, PV modules, cables and connectors, inverter), and does not automatically indicate an inverter failure. - Page 36 Use this check list first if you experience problems with your PV system: 1) Check the event at the LCD, An event is indicated at the LCD 2) Check that AC grid voltage is within the normal range(see LCD information) 3) If not, check whether the AC isolation switch is connected, and whether the AC grid is available.
-
Page 37: Technique Specification
8. Technique specification This specification is regarding to a series of Transformerless Photovoltaic Inverters (PV Inverter) developed by Trannergy for customers. The inverter is used to convert DC power from solar array to AC power fed to grid in distributed power applications. -
Page 38: Output Specification
8.1.2. Output Specification Model PVI1300TL PVI1800TL PVI2300TL PVI2700TL PVI3000TL PVI3200TL PVI4000TL PVI4600TL PVI5400TL Nominal output 1000W 1500W 2000 W 2500W 2800W 2800 W 3650 W 4000 W 4600 W power Maximum output 1100W 1650 W 2200 W 2750W 3080W 3080 W... - Page 39 Operation -20 to +60ºC (up 45 ºC derating) temperature Humidity 0 to 95%, non-condensing Heat Dissipation Air convection Acoustic noise <35dB <40dB level Altitude Up to 2000m above sea level without derating Manufacturing Unleaded, meet RoHS process DC switch Optional Weight [kg] 27.5 27.8...
-
Page 40: Qualification
9. Qualification We grant a warranty of 60 months as standard, starting from the date of the purchase invoice marked. We will only perform warranty services when the faulty unit is returned to us together with a copy of the invoice and warranty card which are issued by the dealer to the user. -
Page 41: Contact Information
10. Contact Information If you have any further technical questions about our products, please contact us: Trannergy Co., Ltd. www.trannergy.com Add: No.188, Weiwu Road, Jiading District, Shanghai, China, 201802 Tel: +86 21 38953908 Fax: +86 21 38953905 E-mail: info@trannergy.com User Manual... -
Page 42: Appendix A: Faq (Frequently Asked Questions)
Appendix A: FAQ (Frequently asked questions) Sometimes, the PV system does not work normally; we recommend the following solutions for average troubleshooting. This can help the technician to understand the problem and take a proper action. LCD display Possible actions Isolation Fault 1. -
Page 43: Appendix B: Abbreviation
Appendix B: Abbreviation Alternating Current Direct Current Data Logger Unit Digital Signal Processing EEPROM Electrically Erasable Programmable Read-Only Memory Electro Magnetic Compatibility Electro Magnetic Interference GFCI Ground Fault Circuit Interrupter Hall Current Transformer Human Machine Interface Liquid Crystal Display Light Emitting Diode MPPT Maximum Power Point Track Personal Computer... - Page 44 P/N:540-00002-03 Ver:00 User M anual...
Need help?
Do you have a question about the PVI1300TL and is the answer not in the manual?
Questions and answers