Table of Contents
Advertisement
Advertisement
Table of Contents

Subscribe to Our Youtube Channel
Related Manuals for Trannergy TRN010KTL


Summary of Contents for Trannergy TRN010KTL
- Page 1 User Manual TRN010KTL/TRN012KTL/TRN015KTL/TRN017KTL TRN020KTL/TRN023KTL/TRN025KTL...
-
Page 2: Table Of Contents
Contents 1. Introduction ................................4 1.1. Introduction ............................... 4 1.2. How to Use this manual ............................. 4 1.3. Applied Designations (Warning, Caution, Note) ....................4 1.4. Important Safety Information ..........................4 1.5. General Safety Rules for Working on Electrical Equipment ................5 1.6. - Page 3 5.4.2. Energy yield .............................. 25 5.4.3. Inverter state ............................. 25 5.4.4. Device Information ........................... 25 5.4.5. log Information ............................26 5.5. Display of Fault ............................... 26 6. Communication and Monitoring ..........................27 6.1. Communication Interfaces ..........................27 6.2. Communication ............................... 27 6.2.1.
- Page 4 (including software, etc.), and no reproduction or distribution of it in any form or by any means. All rights reserved. Trannergy reserves the right of final interpretation. This manual is subject to change according to user’s or customer’s feedback.
-
Page 5: Introduction
1. Introduction 1.1. Introduction This manual describes Trannergy solar inverters TRN inverters. These products are among the most technologically advanced and efficient inverters on the market and are designed to ensure a stable power supply for many years. The TRN inverter is a transformerless based inverter. -
Page 6: General Safety Rules For Working On Electrical Equipment
Unauthorized changes of functional safety parameters may cause injury or accidents to people or inverter. Additionally it will lead to the cancelling of all inverter operating approval certificates. The Trannergy inverters in the TRN range are all designed according to international safety requirements. -
Page 7: System Sizing
The limitation depends mainly on internal and ambient temperatures. The limitation is calculated continuously and always allows the maximum possible amount of energy to be produced. Please use the tool supplied by Trannergy when dimensioning a photovoltaic system. User Manual... -
Page 8: Technical Description Of Inverters
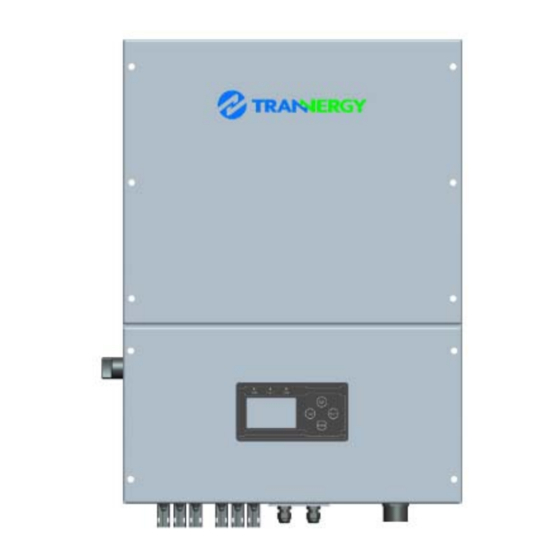
2. Technical Description of Inverters 2.1. Mechanical design Figure 2-1 shows the outline dimensions of TRN inverters Figure 2-1 Outline dimensions of TRN inverters The AC output terminal is most length part at the bottom of inverter, so take care of the AC output terminals, do not make it stand on the ground or other materials while moving or lifting the inverters otherwise will make terminal damaged. -
Page 9: Electrical System Design
2.2. Electrical system design Figure 2-3 wiring diagram of the whole system TRN inverters Please refer to chapter 4 for the detail connecting and install methods. 2.3. The illustration of derating and limit the input power To avoid inverter to be damaged by over temperature or over current. ... -
Page 10: Operation Mode Illustration Of The Inverter
3. Operation mode illustration of the inverter Our inverter has five operation modes during the whole work process; they are wait, check, normal, fault and flash modes. Its detail illustration is shown by Figure 3-1 below. Check Mode Flash Event Flash Event Default: Wait Mode... -
Page 11: Fault Mode
3.4. Fault mode When there are fault during the inverter running, it will stop generating power and turn to fault mode and display the fault information on LCD. Before do this, it will store the generated power number into EEPROM automatically. Many not very serious fault will be cleared after 5s automatically and retry to run. -
Page 12: Installation And Startup
Inverters must be installed by qualified person. Trannergy assures the product guarantee of the TRN series inverters during five years after your purchase, if the installation site does not meet the instructions described in this manual, it is out of warranty. - Page 13 5X Φ 10,45-50mm,Deep Figure 4-2 Dimensions of drilling holes Note! Keep drilling vertical to the wall, and don’t shake when drilling to avoid damage to the wall. It need repositioning and drilling holes if the hole with much error. Step2: Put the expansion pipe showing in Figure 4-3 into the hole vertically, use hammer to tap the pipe into the wall completely.
-
Page 14: Electrical Connection
4.3. Electrical connection 4.3.1. Connection to the grid (AC output) Attention Safeguard each inverter with an individual manual AC breaker in order that inverter can be safely disconnected under load when installation & maintenance Connection Procedure: Step1: Switch off the AC breaker secure against being switched back on inadvertently. Step2: strip the cable as the following figure: (Recommended cable specification: 10mm Figure 4-6... -
Page 15: Connection To Pv Generator (Dc Input)
Attention! Please ensure the corresponding relationship between polarities the core cable and the hole of the terminal is correct. Step6: Screw these components tightly after connecting the wires: Figure 4-10 Step7: Connect AC female terminal to AC male terminal on inverter and then screw them together. 4.3.2. - Page 16 Amphenol specified strip tool can be used in this step. Adjust the striper stopper and put the cable in corresponding notch to strip the length of 7mm. See below figures. Figure 4-13 Insert striped cable into contact barrel and insure all conductor strands are captured in the contact barrel and the conductors are visible in the contact barrel observation hole.
- Page 17 Insert contact cable assembly into back of male and female connector. A “click” should be heard or felt when the contact cable assembly is seated correctly. See below figures. Figure 4-17 Wrest the cap by using the torque of 2.6~2.9NM. Figure 4-18 Step2: Mate and separate Helios H4 connector: ...
-
Page 18: Test Run
Figure 4-20 DANGER! DANGER to life due to potential fire or electric shock. NEVER connect or disconnect the DC connectors under load. 4.4. Test run Before turn on the inverter, please confirm: a) Three phase five wires (R/S/T/N/PE) cable correctly connected to the inverter AC side through AC circuit breaker;... -
Page 19: Human Machine Interface
5. Human Machine Interface 5.1. Control and Display Panel Info provided here mainly includes LED display, LCD display, function keys and display fault etc. All function including parameter review, setting, and malfunction info etc can be realized at this interface. It is showing as the follow (Figure 5-1). Figure 5-1 Control and Display Panel Object Description... -
Page 20: Led Display
DOWN Button: move cursor to down or decrease the values. ESC Button: exit current menu into main menu. 5.2. LED Display TRN inverters are equipped with three LEDs including “Green”, “Yellow” and “Red” which provide information about various operating status. ... -
Page 21: Lcd Display
Fan Lock Fan malfunction. AC Voltage Out of Range The measured AC voltage is out of tolerable range. Isolation Fault Isolation resistance of PV to earth is too low. DC Injection High The DC injection to grid is too high. Consistent Fault Different measurements between Master and Slave. - Page 22 Figure 5-3 Main Interface 2 Figure 5-4 Main Interface 3 Object Description Working status of inverter and Ethernet Real-time power of inverter. Power generated today in kilowatt hours. Total power generated since inverter starting up. Display date & time. Specific parameters, curve display area. Main menu: generated inverter state, energy yield, parameter setting, device &...
-
Page 23: Function Keys
Language and Time Safety Parameters Power Management Settings Clear Data Ethernet Settings Error Information Serial number、safety type、version i n formation Device Information Fault display: When fault happens, the specific fault information will show in main window on LCD display. At the same time, the red LED lights up and the green LED goes out. - Page 24 Language setting When the cursor is at the “Language” column, you can choose “Chinese”, “English” or “German” etc, and then press “enter”, you can confirm “Language” setting. Date setting When the cursor is at the “Date”, at first you can set the “Year” by pressing the “up” and “down” keys.
- Page 25 Figure 5-8 Safety Parameters Setting After that, you can choose “ok”, “Default” to confirm parameter change, restore original data . Press “OK” and exit this interface to enter main menu. 5.4.1.3. Clear Data when pressing the“enter” key, you will find a pull-down menu. Choose “Clear Data” menu and press “enter”...
-
Page 26: Energy Yield
5.4.2. Energy yield Press the “enter” key, and then you will find a pull-down menu. Please move the cursor to “E-Week” by pressing the “up” or “down” key, then press “enter”, the relevant information will be shown. (E-Week is default status) Figure 5-12 week Energy Wave Using the same operating procedures, you can check “E- Month”, “E-Year”. -
Page 27: Log Information
5.4.5. log Information Press the “enter” key and you will find main menu. Move the cursor to “Log” by pressing the “up” or “down” key, and then press the “enter” key, you will find the log fault column, including time fault happened and fault info. -
Page 28: Communication And Monitoring
6. Communication and Monitoring 6.1. Communication Interfaces This product has a communication interface RS-232,RS-485/422and WiFi/ GPRS/ Ethernet (optional). Operating information like output voltage, current, frequency, fault information, etc., can be delivered to PC or hardware storage devices or other monitoring equipment via communication interface. -
Page 29: Rs-485/422 Communication
RX termination of inverter connect with TX termination of USB to RS-485/422 converters. 6.2.3. WiFi/GPRS/Ethernet Communication TRN inverters can be communicated with . Trannergy can customize the WiFi/ GPRS/ Ethernet required special device from customers to realize wireless communication. User Manual... -
Page 30: Usb Communication
At Apple’s and Android’s app store, you can input the key words: Trannergy-log, then you can download and install the Trannergy-log to your Mobile equipment. After the download and installed, input your user name and password, then visit your station,(we supply a free demo, for the users who do not register)choose the power station and enter the main interface, then you the daily energy etc. -
Page 31: Maintenance And Repair
7. Maintenance and Repair 7.1 Routine maintenance Generally, the inverter needn’t to maintain or calibrate, but you need to ensure the heat sink uncovered by the dust or dirty things. In order to prove the inverter’s normal function and long life, you best to clean the inverter and heat sink regularly and ensure there is enough space for air flow around the heat sink. -
Page 32: Technical Data
8. Technical data MODEL TRN010KTL TRN012KTL TRN015KTL TRN017KTL TRN020KTL TRN023KTL TRN025KTL Rated AC power 10000 W 12000 W 15000 W 17000 W 20000 W 23000 W 25000 W Maximum AC power 10000 VA 12000 VA 15000 VA 17000 VA 20000 VA... - Page 33 Data interface RS232 / RS_485/ RS_422 / Ethernet / WiFi / GPRS/USB Thermal protection Noise emission < 45dB Ambient operating -25 °C - +60 °C temp Casing Aluminium CERTIFICATIONS Safety compliance VDE AR-N-4105, VDE 0126-1-1+A1, CE, G83/2, UTE C15-712, MEA, PEA, AS4777, NB/T32004-2013 User Manual...
-
Page 34: Warranty
Alternatively, please contact your specific dealer or installer if your unit is defective or faulty. To claim the warranty under the warranty terms of Trannergy, you need to supply us with the following information and documentation regarding the faulty unit: (email to our service mail is high recommended) ... -
Page 35: Exclusion Of Warranty Claims
Trannergy. If the unit needs to be replaced following assessment, Trannergy will send a replacement unit immediately. The defective inverter should be sent back to the closest Trannergy office by packing in its original package if possible or other comparable packaging. -
Page 36: Contact Information
Loosterwegnoord 2J, 2161AP Lisse, The Netherlands Email: service@trannergy.com Hotline: +31 2 02170801 Trannergy Australia Service Center Email: service@trannergy.com Hotline: +61 ( 0 )9 2188 2117 Signature: Date: Mar.1 2015 For further information of Trannergy warranty regulation and reliability, please visit www.trannergy.com User Manual... -
Page 37: Appendix A: Faq (Frequently Asked Questions)
Appendix A: FAQ (Frequently asked questions) Sometimes, the PV system does not work normally; we recommend the following solutions for average troubleshooting. This can help the technician to understand the problem and take a proper action. LCD display Possible actions Isolation Fault 1. -
Page 38: Appendix B: Abbreviation
increase to support the inverter’s startup, while the problems remain, please call service. Except the frequent problems as above, if you still have any problems which cannot be solved, please contact us and we will offer the best services as we can. Appendix B: Abbreviation Alternating Current Direct Current... - Page 39 P/N: 540-00045-01 Ver: 00...
Need help?
Do you have a question about the TRN010KTL and is the answer not in the manual?
Questions and answers