Table of Contents
Advertisement
Advertisement
Table of Contents

Subscribe to Our Youtube Channel
Related Manuals for Trannergy TRM025KTL


Summary of Contents for Trannergy TRM025KTL
- Page 1 User Manual TRM025KTL/TRM030KTL/TRM033KTL/TRM035KTL...
-
Page 2: Table Of Contents
Contents 1. Introduction ................................4 1.1. Introduction ............................... 4 1.2. How to Use this manual ............................. 4 1.3. Applied Designations (Warning, Caution, Note)....................4 1.4. Important Safety Information ..........................4 1.5. General Safety Rules for Working on Electrical Equipment ................5 1.6. - Page 3 5.3. LCD Display ..............................21 5.4. Function Keys ..............................23 5.4.1. Configure ..............................23 5.4.2. Energy yield .............................. 26 5.4.3. Inverter state ............................. 26 5.4.4. Device Information ........................... 27 5.4.5. log Information ............................27 5.5. Display of Fault ............................... 27 6.
-
Page 4: Copyright Declaration
(including software, etc.), and no reproduction or distribution of it in any form or by any means. All rights reserved. Trannergy reserves the right of final interpretation. This manual is subject to change according to user’s or customer’s feedback. Please check latest version at: http://www.trannergy.com. -
Page 5: Introduction
Check for damage to inverter and packaging. If you are in doubt, please contact your supplier before installing the inverter. Check the voltages of the solar modules and make sure they are within the limits of the Trannergy inverter specifications before connecting them to the inverter. -
Page 6: General Safety Rules For Working On Electrical Equipment
Unauthorized changes of functional safety parameters may cause injury or accidents to people or inverter. Additionally it will lead to the cancelling of all inverter operating approval certificates. The Trannergy inverters in the TRM range are all designed according to international safety requirements. -
Page 7: System Sizing
The limitation depends mainly on internal and ambient temperatures. The limitation is calculated continuously and always allows the maximum possible amount of energy to be produced. Please use the tool supplied by Trannergy when dimensioning a photovoltaic system. User Manual... -
Page 8: Technical Description Of Inverters
2. Technical Description of Inverters 2.1. Mechanical design Figure 2-1 shows the outline dimensions of TRM025KTL/030KTL/033KTL /035KTL: Figure 2-1 Outline dimensions of TRM025KTL/030KTL/033KTL/035KTL The DC switch is the most length part at the left of inverter, so take care of the DC switch terminal. -
Page 9: Electrical System Design
2.2. Electrical system design Figure 2-3 wiring diagram of the whole TRM inverter system Please refer to chapter 4 for the detail connecting and install methods. 2.3. The illustration of derating and limit the input power To avoid inverter to be damaged by over temperature or over current. ... -
Page 10: Operation Mode Illustration Of The Inverter
3. Operation mode illustration of the inverter TRM inverter has five operation modes during the whole work process; they are wait, check, normal, fault and flash modes. Its detail illustration is shown by Figure 3-1 below. Check Mode Flash Event Flash Event Default: Wait Mode... -
Page 11: Flash Mode
Inverters must be installed by qualified person. Trannergy assures the product guarantee of the TRM series inverters during five years after your purchase, if the installation site does not meet the instructions described in this manual, it is out of warranty. -
Page 12: Install Steps
4.2. Install steps 4.2.1 Install on the wall Setp1: Drill Fix Ø14 holes in the wall according to the dimensions shows in Figure 4-2: Φ 14,65-70mm,Deep Figure 4-2 Dimensions of drilling holes Note! Keep drilling vertical to the wall, and don’t shake when drilling to avoid damage to the wall. -
Page 13: Install On The Bracket
Figure 4-5 Hung the inverter 4.2.2 Install on the bracket Setp1: Drill Fix Ø12 holes in the bracket according to the dimensions shows in Figure 4-6: 5XΦ12 Figure 4-6 Dimensions of drilling holes Step2: Put the mounting panel on the bracket and use the M10 screws fix the mounting panel. Figure 4-7 Install the mounting panel Setp4: Hung the inverter on to the mounting panel: Figure 4-8 Hung the inverter... -
Page 14: Electrical Connection
4.3. Electrical connection 4.3.1. Connection to the grid (AC output) Attention Safeguard each inverter with an individual manual AC breaker in order that inverter can be safely disconnected under load when installation & maintenance TRM inverter integrated universal current-sensitive residual current monitoring unit inside, the inverter will disconnect from mains as soon as a fault current of more than limit value has been detected. -
Page 15: Connection To Pv Generator (Dc Input)
There are two MPPT trackers (A & B route) provided by the TRM Inverter, and each MPPT tracker provides 3 DC input interface. Before connecting PV modules to Trannergy, please make sure the polarity of the DC input connectors is correct. - Page 16 Attention! The maximum current of each string is less than 12A; The maximum open voltage of each string is less than 950V Attention! Connectors must not be connected or disconnected under load! Figure 4-13 Step1: Assembly Instruction for the male side and female side connector: ...
- Page 17 Crimp contact barrel by using the hex crimping die. See below figures Figure 4-17 Amphenol specified crimping tool can be used in this step. Put the contact barrel with striped cable in the corresponding crimping notch and crimp the contact. See below figures. Figure 4-18 ...
-
Page 18: Grounding The Inverter
“click” is heard or felt. Figure 4-21 When the separation of connector is necessary, use the Amphenol specified tool (Ring tool or wrench tool) to separate. And while using the ring tool or wrench tool, please make sure the wedge side of the fingers faces the female connector and push the tool down. -
Page 19: Test Run
4.4. Test run Before turn on the inverter, please confirm: a) Three phase five wires (PE/L1/L2/L3/N) cable correctly connected to the inverter AC side through AC circuit breaker; b) The DC cable connected correctly to the inverter DC side through DC circuit breaker, please be attention to the cable connected to the two string correctly and it’s polarity;... -
Page 20: Human Machine Interface
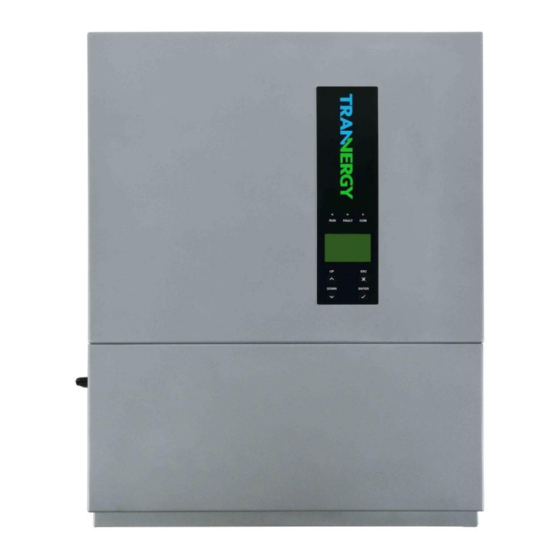
5. Human Machine Interface 5.1. Control and Display Panel Info provided here mainly includes LED display, LCD display, function keys and display fault etc. All function including parameter review, setting, and malfunction info etc can be realized at this interface. It is showing as the follow (Figure 5-1). Figure 5-1 Control and Display Panel Object Description... -
Page 21: Led Display
LCD 240× 160 MONO LCD. Function keys OK Button: confirm the selection. UP Button: move cursor to up selection or increase the values. DOWN Button: move cursor to down or decrease the values. ESC Button: exit current menu into main menu. 5.2. -
Page 22: Lcd Display
GFCI Failure The GFCI detection circuit is abnormal. AC HCT Failure The AC output sensor is abnormal. Consistent Fault: Different measurements between Master and Slave for DC output current. DC inj. differs for M-S Consistent Fault: Different measurements between Master and Slave for GFCI. - Page 23 Figure 5-2 Main Interface 1 Figure 5-3 Main Interface 2 Figure 5-4 Main Interface 3 Object Description Working status of inverter and Ethernet Real-time power of inverter. Power generated today in kilowatt hours. Total power generated since inverter starting up. Display date &...
-
Page 24: Function Keys
Contents of menu: Function Content AC Parameter Inverter state DC Parameter Frequency E-Week Energy yield E-Month E-Year Language and Time Safety Parameters Settings Power Management Clear Data Ethernet Settings Error Information Device Information Serial number、safety type、version information Fault display: When fault happens, the specific fault information will show in main window on LCD display. At the same time, the red LED lights up and the green LED goes out. - Page 25 Figure 5-6 Language and Time Setting Language setting When the cursor is at the “Language” column, you can choose “Chinese”, “English” or “German” etc, and then press “enter”, you can confirm “Language” setting. Date setting When the cursor is at the “Date”, at first you can set the “Year” by pressing the “up” and “down” keys.
- Page 26 Figure 5-7 Password Input Interface Figure 5-8 Safety Parameters Setting After that, you can choose “ok”, “Default” to confirm parameter change, restore original data . Press “OK” and exit this interface to enter main menu. 5.4.1.3. Clear Data when pressing the“enter” key, you will find a pull-down menu. Choose “Clear Data” menu and press “enter”...
-
Page 27: Energy Yield
5.4.1.5. Ethernet Settings when pressing the“enter” key, you will find a pull-down menu. Choose “ ” menu and Ethernet Settings press “enter” to get into state. In this menu, user have two choice: obtain IP address Ethernet Settings automatically and fixed IP address. if user choose to obtain IP address automatically, it can obtain current IP and mask automatically. -
Page 28: Device Information
5.4.4. Device Information Press the “enter” key and you will find main menu. Move the cursor to “Device information” by pressing the “up” or “down” key, and then press the “enter” key, you will find the information of “Device Model”, “SN”, “HMI/SW”, “CU/SW” etc. Press the “esc” key exit this interface. Figure 5-14 Device Information 5.4.5. -
Page 29: Communication And Monitoring
6. Communication and Monitoring 6.1. Communication Interfaces TRM inverter has a communication interface RS-232, RS-485/422and WiFi/GPRS/Ethernet (optional). Operating information like output voltage, current, frequency, fault information, etc., can be delivered to PC or hardware storage devices or other monitoring equipment via communication interface. -
Page 30: Rs-485/422 Communication
RS-485/422 converters. 6.2.3. WiFi/GPRS/Ethernet Communication TRM025KTL/TRM030KTL/TRM033KTL/TRM035KTL communicated with . Trannergy can customize the required special device from customers to realize WiFi/GPRS/Ethernet wireless communication. 6.2.4. USB Communication USB interface is specially designed for maintenance engineer to realize burning and updating of PCU firmware. -
Page 31: Monitoring System
, after register and log in, you can monitor information of inverter. At Apple’s and Android’s app store, you can input the key words: Trannergy-log, then you can download and install the Trannergy-log to your Mobile equipment. After the download and installed, input your user name and password, then visit your station,(we supply a free demo, for the users who do not register)choose the power station and enter the main interface, then you the daily energy etc. -
Page 32: Notes Of Maintain Or Service
6. Have the installer of the PV generator check the affected string and order the fuse from Trannergy. 7. Replace the broken fuse and close the inverter and startup the inverter again. -
Page 33: Technical Data
8. Technical data MODEL TRM025KTL TRM030KTL TRM033KTL TRM035KTL Rated AC power 25000 W 30000 W 33000 W 35000 W Maximum AC power 25000 VA 30000 VA 33000 VA 35000 VA INPUT Maximum input power 26000W 32000 W 35000 W 37000 W... -
Page 34: Warranty
Alternatively, please contact your specific dealer or installer if your unit is defective or faulty. To claim the warranty under the warranty terms of Trannergy, you need to supply us with the following information and documentation regarding the faulty unit: (email to our service mail is high recommended) ... -
Page 35: Exclusion Of Warranty Claims
Trannergy reserves the right of final interpretation of all the terms. 9.6. Service after Warranty Expiration For products which are out of warranty, Trannergy charges an on-site service fee, parts, labor cost and logistic fee to end-user which can be any/all of: ... -
Page 36: Contact Information
Loosterwegnoord 2J, 2161AP Lisse, The Netherlands Email: service@trannergy.com Hotline: +31 2 02170801 Trannergy Australia Service Center Email: service@trannergy.com Hotline: +61 (0)9 2188 2117 Signature: Date: Mar.1 2015 For further information of Trannergy warranty regulation and reliability, please visit www.trannergy.com User Manual... -
Page 37: Appendix A: Faq (Frequently Asked Questions)
Appendix A: FAQ (Frequently asked questions) Sometimes, the PV system does not work normally; we recommend the following solutions for average troubleshooting. This can help the technician to understand the problem and take a proper action. LCD display Possible actions Isolation Fault 1. -
Page 38: Appendix B: Abbreviation
If the PV DC voltage is higher than 250V, while the inverter still doesn’t work, please call the local service. During periods of little or no sunlight, the inverter may continuously start up and shut down. This is due to insufficient power generated and it is normal working state. If sunlight strengthens or energy increase to support the inverter’s startup, while the problems remain, please call service. - Page 39 P/N:540-00042-01 Ver:00 User Manual...
Need help?
Do you have a question about the TRM025KTL and is the answer not in the manual?
Questions and answers