Advertisement
Table of Contents
ATTENTION!
If any components of this unit are broken, do not operate properly, or for product returns,
please contact Weston Products LLC
Phone: 1-800-814-4895 (Outside the U.S. 440-638-3131)
Mail: 20365 Progress Drive, Strongsville, Ohio 44149
E-Mail: CustomerService@WestonProducts.com
Web Site: WestonProducts.com
All Trademarks and Registered Trademarks are property of the respective companies.
SAVE THESE INSTRUCTIONS!
Refer to them often and use them to instruct others.
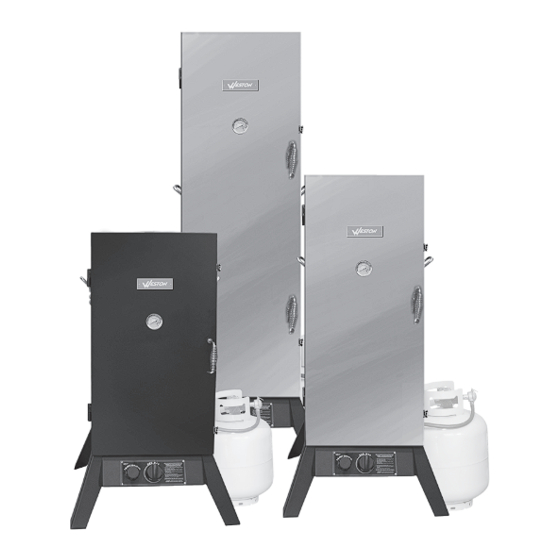
OUTDOOR
PROPANE
VERTICAL
SMOKER
INSTRUCTIONS
30" MODEL NO. 41-0701-W
36" MODEL NO. 41-0301-W
48" MODEL NO. 41-0401-W
ATTENTION CONSUMER!
Read and understand all of these instructions and keep them for future reference!
IF YOU SMELL GAS:
1. IMMEDIATELY shut off the gas to the Smoker.
2. IMMEDIATELY extinguish any open flames.
3. Open the door of the Smoker.
4. If the odor continues, IMMEDIATELY call your gas supplier or your local fire department for assistance!
DO NOT attempt to use the unit until any gas leaks are fixed and/or the source of the unburned gas odor is ac-
counted for!
FOR YOUR SAFETY
1. Do not use or store gasoline or any other flammable vapors or liquids within 25 feet (7.62m) of this or any other appliance.
2. An LP gas cylinder that is not connected for use should not be stored within 10 feet (3.05m) of this or any other appliance.
Propane Tank Is Not Included
Advertisement
Table of Contents

Subscribe to Our Youtube Channel
Related Manuals for Weston 41-0701-W

Summary of Contents for Weston 41-0701-W
-
Page 1: Save These Instructions
ATTENTION! If any components of this unit are broken, do not operate properly, or for product returns, OUTDOOR please contact Weston Products LLC Phone: 1-800-814-4895 (Outside the U.S. 440-638-3131) Mail: 20365 Progress Drive, Strongsville, Ohio 44149 PROPANE E-Mail: CustomerService@WestonProducts.com Web Site: WestonProducts.com VERTICAL All Trademarks and Registered Trademarks are property of the respective companies. - Page 2 41-0110 41-0110 41-0110 Smoker Box / Wood Chip Box invoice. Weston Products LLC will repair (or at its discretion, replace) the product free of charge, if in the judgment of the 41-0111 41-0111 41-0111 Wood Chip Box Stand company, it has been proven to be defective as to seller’s labor and material, within the warranty period.
- Page 3 SMOKER ASSEMBLY ADDITIONAL ACCESSORIES AVAILABLE BURNER #22 Stainless Steel Pro-Series Electric Meat Grinder 08-2201-W ASSEMBLY #32 Stainless Steel Pro-Series Electric Meat Griner 08-3201-W Stainless Steel Manual Jerky Slicer 07-3501-W Heavy-Duty 9” Food Slicer 61-0901-W Hog Ring Pliers 47-1401 Mahogany Casings 1 1/2” Diameter x 12” Long 19-0201-W Mahogany Casings 2 1/2”...
-
Page 4: Save These Instructions
AFTER USE SAFETY & MAINTENANCE GENERAL SAFETY RULES Use caution when lifting and moving the Smoker to avoid strains or back injury. Two people are recommended to lift or move the Smoker. READ AND FULLY UNDERSTAND ALL INSTRUCTIONS AND WARNINGS PRIOR TO USING THIS APPLIANCE. - Page 5 COOKING INSTRUCTIONS ASSEMBLY STEP 1 BURNER CHAMBER INSTALLATION IMPORTANT: Before each use, clean and inspect the hose and the connection to the LP cylinder. If there is evidence of abrasion, wear, cuts or leaks, the hose must be replaced before the Smoker is used. Refer to the “CHECK FOR GAS LEAK” instructions in the LP tank TOOLS NEEDED connection portion of this manual.
-
Page 6: Ignitor Lighting System
ASSEMBLY STEP 2 LIGHTING PROCEDURES MOUNTING THE LEGS IGNITOR LIGHTING SYSTEM Check all connections for leaks using the “soapy water” test as explained in the “CHECK FOR GAS LEAKS!” section of this manual. TOOLS NEEDED LOCATE THESE PARTS Open the Smoker Cabinet Door. Check for any blockage to the Venturi Tube or Burner. -
Page 7: Seasoning Your Smoker
OPERATING INSTRUCTIONS ASSEMBLY STEP 3 CONTROL PANEL / HVR SYSTEM / IGNITOR INSTALLATION SEASONING YOUR SMOKER Before you cook food in your Smoker, it is important to “season” your Smoker. Seasoning seals the paint and interior of your Smoker to LOCATE THESE PARTS TOOLS NEEDED CONTROL... - Page 8 ASSEMBLY STEP 4 CHECK FOR GAS LEAKS! SECURING THE GAS LINE After all connections are completed, check all connections and fittings for leaks with a soap solution. With all valves closed, apply the leak check solution (50/50 mix of dish washing detergent and water) to all gas carrying connections and fittings.
- Page 9 ASSEMBLY STEP 6 CONNECTING THE LP TANK SECURING THE HANDLES TOOLS NEEDED LOCATE THESE PARTS WARNING! ALL OF THE INSTRUCTIONS AND SAFEGUARDS ON THIS PAGE TOOLS NEEDED LOCATE THESE PARTS MUST BE FOLLOWED TO PREVENT FIRE, DAMAGE AND/OR INJURY! WARNING! The knob on the LP tank must be closed.
- Page 10 ASSEMBLY STEP 8 ASSEMBLY STEP 10 WATER BOWL INSTALLATION HEAT INDICATOR INSTALLATION CABINET FIGURE 17 FIGURE 14 HARDWARE HARDWARE BAG TOOLS NEEDED LOCATE THESE PARTS COOKING COOKING RACKS RACKS Door 1/2” WRENCH WASHER WATER TEMPERATURE BOWL GAUGE 30” MODEL HAS 3 RACKS 36”...
Need help?
Do you have a question about the 41-0701-W and is the answer not in the manual?
Questions and answers
Where can I obtain a gas igniter handle knob, and a temperature control knob for my Weston 14-0701smoker 30 inch.
You can find a gas igniter handle knob (Ignitor Knob, part number 41-0115) and a temperature control knob (Control Knob, part number 41-0116) for the Weston 41-0701-W smoker from Weston Products.
This answer is automatically generated