Table of Contents
Advertisement
Quick Links
Advertisement
Table of Contents

Related Manuals for Edimax IC-3110


Summary of Contents for Edimax IC-3110
- Page 1 IC-3110 ANUAL 07‐2012/V1.0...
-
Page 2: Table Of Contents
Edimax EdiView Installation Package ........ - Page 3 IC-3110 SERIES ABLE OF ONTENTS Locating Network Cameras on the Network............2-18 Viewing a List of Network Cameras .
- Page 4 IC-3110 SERIES ABLE OF ONTENTS Configuring Network Settings ..............3-15 LAN .
- Page 5 Adding a Network Camera on the Cloud in Edimax PnV Mode ......
- Page 6 IC-3110 SERIES ABLE OF ONTENTS General Configuration Options ..............3-72 General .
- Page 7 IC-3110 SERIES ABLE OF ONTENTS iOS Surveillance Software Configuration Options ........... . . 3-96 Configuring Network Settings on a LAN in IP Mode .
- Page 8 IC-3110 SERIES ABLE OF ONTENTS Snapshot ................. . 4-15 Recording .
- Page 9 IC-3110 SERIES ABLE OF ONTENTS Pan/Tilt Live View ................4-27 Viewing Camera Events .
- Page 10 IC-3110 SERIES ONVENTIONS Conventions The following conventions are used to give the user additional information about specific procedures or content. It is important to pay attention to these conventions as they will prevent the user from causing damage to themselves, equipment, or the their environment.
-
Page 11: Typographical Conventions
IC-3110 SERIES ONVENTIONS Example: Indicates information used to demonstrate or explain an associated concept. Typographical Conventions The following typographical conventions are used in this document: Italics Indicates book titles, directory names, file names, path names, and program/process names. Constant width Indicates computer output shown on a computer screen, including menus, prompts, responses to input, and error mes- sages. - Page 12 (and not this company, its distributor, or its dealer) assumes the entire cost of all necessary servicing, repair, and any inciden- tal or consequential damages resulting from any defect in the software. Edimax Technology Co., Ltd. reserves the right to revise this publication and to make changes from time to time in the contents hereof without the obligation to notify any person of such revision or changes.
- Page 13 IC-3110 SERIES OPYRIGHT Edimax Technology Co., Ltd. Add: No. 3, Wu-Chuan 3rd Rd., Wu-Ku Industrial Park, New Taipei City, Taiwan Tel: +886-2-77396888 Email: sales@edimax.com.tw...
- Page 14 The GNU GPL and GNU LGPL software codes used in Edimax products are distributed without any warranty and are subject to the copyrights of their respective authors. The firmware files for this product can be found under the “Download”...
- Page 15 What’s Inside...
-
Page 16: Package Contents
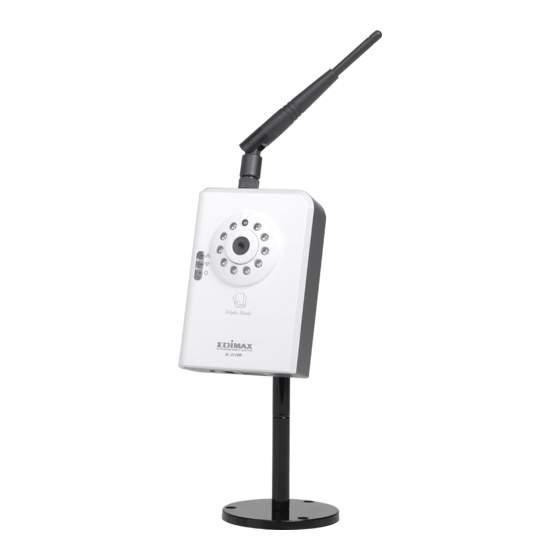
‟ NSIDE ACKAGE ONTENTS 1.1 Package Contents Before you start using this product, please check if there is anything missing in the package and contact your dealer to claim the missing item(s): ITEM NAME QUANTITY Network Camera Detachable Antenna (IC-3110W only) Power Adapter Ethernet Cable CD with Utility Software, User Manual, and Multi-language QIG... -
Page 17: Hardware Overview
‟ NSIDE ARDWARE VERVIEW 1.2 Hardware Overview Front View ITEM DESCRIPTION Power / Cloud The power LED flashes while connect- Focus Ring IR LED IR LED ing to the cloud. The LED The stops flashing when connected to the cloud. LAN LED When the network camera is linked to a wired network the LED lights up. - Page 18 ‟ NSIDE ARDWARE VERVIEW ITEM DESCRIPTION Focus Ring Change the focus of the camera by rotating the focus ring clockwise or counterclockwise. IR LEDs Lights up when the environment is too dark.
-
Page 19: Ic-3110
‟ NSIDE ARDWARE VERVIEW Top View IC-3110W IC-3110 USB Port Antenna Port SD Card Slot SD Card Slot... -
Page 20: Ic-3110P
ITEM DESCRIPTION SD Card Slot Accepts SD / SDHC memory card for image / video storage. USB Port Accepts a USB Wi-Fi adapter to enable wireless access. (IC-3110 only) Antenna Port Connects to supplied antennas. (IC-3110W only) SD Card Slot... -
Page 21: Back View
‟ NSIDE ARDWARE VERVIEW Back View ITEM DESCRIPTION Tripod Connector Attaches to the enclosed tripod stand Tripod Connector MAC Address Unique MAC address (Cloud ID) of the camera MAC Address... -
Page 22: Bottom View
‟ NSIDE ARDWARE VERVIEW Bottom View ITEM DESCRIPTION WPS/Reset Press this button to activate WPS mode, or hold the button down for 10 seconds to reset the camera to factory default settings. 12V DC Connects to the 12V power adapter. Connects to the Ethernet LAN cable. -
Page 23: Getting Started
Getting Started... -
Page 24: Installing The Camera
ETTING TARTED NSTALLING THE AMERA 2.1 Installing the Camera Please refer to the following instructions to set up your network camera. 1. Remove the camera and its accessories from the packag- ing. 2. Review the contents and compare with the component list. If any components are missing, please contact the supplier. - Page 25 ETTING TARTED NSTALLING THE AMERA 4. Connect antenna to the antenna connector located at the top of the network camera. Note: This step applies to the IC-3110W model only.
- Page 26 ETTING TARTED NSTALLING THE AMERA 5. Place the camera on a flat surface and point it in the direction you want to monitor. If you want to place the camera on the ceiling or a wall, secure the camera using the tripod connector located at the back of the camera. Tripod Connector...
- Page 27 ETTING TARTED NSTALLING THE AMERA 6. There are two ways to power the device: To use the 12V DC power adapter, plug the adapter into an electrical socket and connect the power cable into the power jack located at the rear of the network camera. To use an Ethernet cable, insert the Ethernet cable into a PoE switch or PoE injector (IC-3110P only).
-
Page 28: Edimax Ediview Installation Package
TARTED DIMAX NSTALLATION ACKAGE 2.2 Edimax EdiView Installation Package The network camera package includes a CDROM that con- The following options are available on the CDROM: tains utilities and reference manuals to assist in installing, locating and using the network camera. When the CDROM Setup Utility: Installs the EdiView Finder utility is inserted in the computer, the following screen is shown. -
Page 29: Installing Ediview Finder Utility Software
ETTING TARTED NSTALLING INDER TILITY OFTWARE 2.3 Installing EdiView Finder Utility Software Click the Setup Utility icon to start the installation wizard. 1. Click Next to start the installation process. Note: Click Cancel at any time to exit the installation. - Page 30 ETTING TARTED NSTALLING INDER TILITY OFTWARE 2. To set the application installation folder: 4. To set the application startup options Click Next to use the default value or Select Create a desktop icon to add an appli- cation icon to the desktop Click Browse to select a different location on your file system Select Create a Quick Launch icon to add an...
- Page 31 ETTING TARTED NSTALLING INDER TILITY OFTWARE 6. The application is ready to install. Review the installa- 8. The progress of the installation is displayed in the fol- tion settings in the information window. lowing window. This step may take several minutes to complete.
- Page 32 ETTING TARTED NSTALLING INDER TILITY OFTWARE 10.EdiView Finder is installed. Click Launch EdiView Finder Utility if you want to use the application after the installation is finished. 11.Click Finish to close the installation window.
-
Page 33: Running Ediview Finder For The First Time
INDER FOR THE IRST 2.4 Running EdiView Finder for the First Time Wired and PoE Models Note: This section applies to the IC-3110/3110P model(s) only 1. Run EdiView Finder and double click on a listed net- work camera. Note: Alternative method: select a network camera and click the configure icon. - Page 34 ETTING TARTED UNNING INDER FOR THE IRST 2. The utility automatically detects the cloud connection. 3. When the utility establishes a connection to the cloud, click Next to set the network‟s name and password. 2-11...
- Page 35 ETTING TARTED UNNING INDER FOR THE IRST 4. Enter a camera name. Note: See Configuring the Web-Based Management Note: Interface (page 3-4) for a detailed explanation on If no password is entered, the default 1234 is used. configuring the advanced settings. 5.
-
Page 36: Wireless Models
ETTING TARTED UNNING INDER FOR THE IRST Wireless Models Note: Please set your wireless router or access point to use WPA2-AES encryption. Using different encryp- tion settings may impact camera performance and security. Please refer to your router or access point user manual for more details. - Page 37 ETTING TARTED UNNING INDER FOR THE IRST 2. The utility automatically detects the cloud connection. 3. When the utility prompts to configure wireless settings, click Yes to set up a wireless connection. 4. Pick the SSID for the wireless router and enter the password.
- Page 38 ETTING TARTED UNNING INDER FOR THE IRST 5. Click Start to continue. Note: Alternative method, run WPS mode to connect to the wireless router. Make sure your wireless router supports WPS. 2-15...
- Page 39 ETTING TARTED UNNING INDER FOR THE IRST 6. Unplug the network camera‟s Ethernet cable and click 7. When the network camera has successfully connected Next. to your wireless router, the utility shows Connection detected. 8. Click Next to continue. 2-16...
- Page 40 ETTING TARTED UNNING INDER FOR THE IRST 9. Enter a camera name. 11.If the setup is successful, a dialogue is shown with a URL for remotely viewing the camera over the cloud. Note: If no password is entered, the default 1234 is used. 10.Enter a password twice.
-
Page 41: Locating Network Cameras On The Network
ETTING TARTED OCATING ETWORK AMERAS ON THE ETWORK 2.5 Locating Network Cameras on the Network Viewing a List of Network Cameras The network camera comes with a software utility, called EdiView Finder, which locates and sets up network cam- era(s) on a LAN and defines a camera‟s name and pass- After EdiView Finder is launched, all cameras found on the word. -
Page 42: Obtaining Network Camera Connection Information
ETTING TARTED OCATING ETWORK AMERAS ON THE ETWORK Obtaining Network Camera Connection 1. Click the rectangular icon next to the camera‟s informa- Information tion. Preview Window Icon Connection information for a network camera is displayed in 2. Enter the password for the camera. The default pass- each listing under IP Address. - Page 43 ETTING TARTED OCATING ETWORK AMERAS ON THE ETWORK 3. Click OK to open a preview window or Cancel to close the login window. 2-20...
-
Page 44: Configuring The Surveillance Software
Configuring the Surveillance Software... -
Page 45: Configuring The Ediview Finder Utility
ONFIGURING THE URVEILLANCE OFTWARE ONFIGURING THE INDER TILITY 3.1 Configuring the EdiView Finder Utility Toolbar Features The EdiView Finder utility provides the ability to locate and configure camera(s) on your network. The EdiView Finder utility has two buttons, one to search for network cameras and one to display a camera‟s configura- tion settings. -
Page 46: Setting The Interface Language
ONFIGURING THE URVEILLANCE OFTWARE ONFIGURING THE INDER TILITY Setting the Interface Language 2. Enter the password for the camera (default: 1234) in the login dialogue. The utility software supports three languages: English, Tra- ditional Chinese, and Simplified Chinese. You can select the language to use from the language dropdown menu located in the lower-right corner of EdiView Finder. - Page 47 ONFIGURING THE URVEILLANCE OFTWARE ONFIGURING THE INDER TILITY 4. Select DHCP or Static IP to set the camera‟s IP address. 5. Select DHCP to have the network router designate an IP address, or select Static IP to enter the desig- nated IP address, subnet mask, gateway and DNS information.
-
Page 48: Configuring The Web-Based Management Interface
ONFIGURING THE URVEILLANCE OFTWARE ONFIGURING THE ASED ANAGEMENT NTERFACE 3.2 Configuring the Web-Based Management Interface 3.2.1 Installing the Web-Based Management Interface Viewing the Web-Based Management Note: Interface To get the IP address of a specific network camera, refer to Obtaining Network Camera Connection Information (page 2-19). - Page 49 ONFIGURING THE URVEILLANCE OFTWARE NSTALLING THE ASED ANAGEMENT NTERFACE 4. If the following prompt is displayed, click OK. 1. Launch IE and type the IP address of the network camera in the address bar. 2. Enter the username and password. The default user- name is admin, and the default password is 1234.
- Page 50 ONFIGURING THE URVEILLANCE OFTWARE NSTALLING THE ASED ANAGEMENT NTERFACE 6. Click Run to start the installation. 7. The following confirmation prompt appears. 8. Click Run to install the plugin or Don’t Run to cancel the installation. 9. Click Next to start the installation.
- Page 51 ONFIGURING THE URVEILLANCE OFTWARE NSTALLING THE ASED ANAGEMENT NTERFACE 10.Click Finish to complete the installation. Follow the on-screen Set Up Wizard until the installa- tion is complete. The management interface screen is now displayed on the browser. Note: Press F5 or CTRL-R to reload web page if the configuration screen is not visible.
- Page 52 ONFIGURING THE URVEILLANCE OFTWARE NSTALLING THE ASED ANAGEMENT NTERFACE Note: DirectX and system drivers may be required. ® Download Microsoft DirectX from ® http://www.microsoft.com...
-
Page 53: Configuring Video
ONFIGURING THE URVEILLANCE OFTWARE ONFIGURING IDEO 3.2.2 Configuring Video M-JPEG There are five features that can be set to configure how video is managed by the software. The first three features are codecs which affect how the video is recorded, the Adjust the video resolution, quality and frame rate settings fourth sets the parameters for the camera‟s night vision. -
Page 54: Mpeg-4
ONFIGURING THE URVEILLANCE OFTWARE ONFIGURING IDEO MPEG-4 ESCRIPTION Video Quality Changes video quality. There are five Adjust the video resolution, quality and frame rate settings levels of video quality from lowest to on the MPEG-4 configuration screen. highest. Selecting a higher value will provide better video quality but requires more network bandwidth. -
Page 55: H.264
ONFIGURING THE URVEILLANCE OFTWARE ONFIGURING IDEO H.264 ESCRIPTION Video Quality Changes video quality. There are five Adjust the video resolution, quality and frame rate settings levels of video quality from lowest to on the H.264 configuration screen. highest. Selecting a higher value will provide better video quality but requires more network bandwidth. -
Page 56: On-Screen Display
ONFIGURING THE URVEILLANCE OFTWARE ONFIGURING IDEO On-Screen Display ESCRIPTION Video Quality Changes video quality. There are five Choose what information to show in the on-screen display. levels of video quality from lowest to highest. Selecting a higher value will provide better video quality but requires more network bandwidth. -
Page 57: Night Vision
ONFIGURING THE URVEILLANCE OFTWARE ONFIGURING IDEO Night Vision ESCRIPTION Select Enable to show the current date Show Date The camera is equipped with 9 IR LEDs to enhance video on the camera‟s display image or Dis- quality in low-light environments. able to hide it. - Page 58 ONFIGURING THE URVEILLANCE OFTWARE ONFIGURING IDEO ESCRIPTION Auto Mode Let the camera decide when to switch the LED lights on or off automatically; LEDs will activate when it's too dark. If you do not know which option to select on this page, select this one. Schedule Mode Switch IR LEDs on or off by schedule.
-
Page 59: Configuring Network Settings
ONFIGURING THE URVEILLANCE OFTWARE ONFIGURING ETWORK ETTINGS 3.2.4 Configuring Network Settings All network-related settings can be found in this menu. It is necessary to specify TCP/IP parameters in this menu if you want to change the camera's IP address, use PPPoE, Choose the how the camera connects to the LAN. - Page 60 ONFIGURING THE URVEILLANCE OFTWARE ONFIGURING ETWORK ETTINGS ESCRIPTION ESCRIPTION Secondary DNS Enter the IP address of the backup Network Type This camera can obtain an IP address DNS server here. When the primary from a DHCP server automatically (if DNS is unreachable, the network cam- you have one), or be set a fixed IP era will use the IP address specified address.
-
Page 61: Wlan
ONFIGURING THE URVEILLANCE OFTWARE ONFIGURING ETWORK ETTINGS WLAN ESCRIPTION Username Enter the PPPoE username assigned Set how the camera connects to the WLAN. by your ISP here. Password Enter the PPPoE password assigned by your ISP here. Enter the MTU (Maximum Transmission Unit) given by your ISP here. - Page 62 ONFIGURING THE URVEILLANCE OFTWARE ONFIGURING ETWORK ETTINGS ESCRIPTION ESCRIPTION Available Net- This shows all wireless access points Select Enable to activate the wireless Wireless Con- works found by this network camera. Please nection network feature of this network camera, note not all access points will be dis- select Disable to disable it.
- Page 63 ONFIGURING THE URVEILLANCE OFTWARE ONFIGURING ETWORK ETTINGS ESCRIPTION ESCRIPTION Signal Shows the radio signal strength in per- SSID Enter the SSID of the wireless access cent. point you wish to connect to. It should be less than 32 alphanumerical charac- Channel Shows the radio channel of this wire- ters.
- Page 64 ONFIGURING THE URVEILLANCE OFTWARE ONFIGURING ETWORK ETTINGS ESCRIPTION ESCRIPTION WPA Pre- Push Button Click this button and the camera will Shared Key Configuration enter a PBC-style WPS connection state for 120 seconds. Please push the WEP Key Start button on the wireless access Length point you wish to connect to within 120 seconds to establish a WPS connection...
-
Page 65: Dynamic Dns
ONFIGURING THE URVEILLANCE OFTWARE ONFIGURING ETWORK ETTINGS Dynamic DNS If your ISP does not give you a fixed Internet IP address (i.e. ESCRIPTION the Internet address you are using when you access the Internet is not always the same – ask your ISP for detailed Select Enable to activate the Dynamic Enable DDNS information), you can use this feature to help you locate the... -
Page 66: Upnp
ONFIGURING THE URVEILLANCE OFTWARE ONFIGURING ETWORK ETTINGS UPnP After the UPnP feature is activated, a popup message will appear. When the UPnP feature is activated, all UPnP-compatible computers and network devices on the same network will be able to discover this network camera automatically. This feature is useful since you do not have to remember the IP address of this network camera. -
Page 67: Login Free
ONFIGURING THE URVEILLANCE OFTWARE ONFIGURING ETWORK ETTINGS Login Free Click the message to open My Network Places and you will see the network camera: This camera provides a method to let unauthorized users view the image captured by this camera, which is called LoginFree. -
Page 68: Rstp
ONFIGURING THE URVEILLANCE OFTWARE ONFIGURING ETWORK ETTINGS RSTP Please note that no authentication will be required to see the captured image. If you wish to disable this feature, clear the text in the Filename field and click Apply. If you want to watch video captured by this network camera on your own RTSP (Real Time Streaming Protocol) media player, you can use this feature to set up RTSP parameters, so your RTSP-compatible player will be able to receive... - Page 69 ONFIGURING THE URVEILLANCE OFTWARE ONFIGURING ETWORK ETTINGS ESCRIPTION MPEG-4 RTSP Enter the path of the MPEG-4 RTSP Path video file. When you use a RTSP-com- patible media player to play the RTSP stream, remember to add .sdp as the file extension. H.264 RTSP Enter the path of the H.264 RTSP video Path...
-
Page 70: Configuring Motion Detection
ONFIGURING THE URVEILLANCE OFTWARE ONFIGURING OTION ETECTION 3.2.5 Configuring Motion Detection Motion Detection When you wish to use this camera to monitor activities within a specific region, the motion detection feature is very useful. The camera will detect motion within a defined You can use this menu to set up basic motion detection set- region and take a snapshot when motion is detected. -
Page 71: Motion Detection
ONFIGURING THE URVEILLANCE OFTWARE ONFIGURING OTION ETECTION ESCRIPTION Motion Select the time interval between two motions from the dropdown menu. Detection When a motion is detected, the camera will not detect any motion again within Interval the time interval you specified here. Available options are from 0 second (always detect new motion) to 60 sec- onds. - Page 72 ONFIGURING THE URVEILLANCE OFTWARE ONFIGURING OTION ETECTION ESCRIPTION ESCRIPTION Select Enable to send the saved file to Send snapshot Authentication If a username and password are not file to FTP required to write files to a specified an appointed FTP server when a folder, select Anonymous;...
-
Page 73: Detect Regions
ONFIGURING THE URVEILLANCE OFTWARE ONFIGURING OTION ETECTION Detect Regions ESCRIPTION Motion Detec- Click and hold the mouse button on a You can define the motion detection region within the image tion Schedule time line to set a schedule start time. that the camera captures, so this camera will ignore motions Drag the mouse to a desired schedule which are not covered by the motion region setting, and... - Page 74 ONFIGURING THE URVEILLANCE OFTWARE ONFIGURING OTION ETECTION To change the motion detection region, you can „resize‟ and „reposition‟ it: ESCRIPTION Region 1 – 3 Check the box to enable motion detec- tion region 1 to 3. You can check multi- ple boxes to enable multiple motion detection regions.
-
Page 75: Email
ONFIGURING THE URVEILLANCE OFTWARE ONFIGURING OTION ETECTION Email ESCRIPTION SMTP Server Enter the IP address or host name of You can define the destination address for sending email as the SMTP server. If you don't know, well as mail server parameters here. please refer to the SMTP server you're using in your email software, such as Outlook or Outlook Express, or ask... -
Page 76: Ftp Configuration
ONFIGURING THE URVEILLANCE OFTWARE ONFIGURING OTION ETECTION FTP Configuration ESCRIPTION SMTP Authenti- Some SMTP servers require mail send- You can set the FTP server‟s parameters here. cationers to be authenticated before they can send email. If your SMTP server requires you to do so, please select Enable, or select Disable to disable If you don't know, please refer to the SMTP server you're using in your email... - Page 77 ONFIGURING THE URVEILLANCE OFTWARE ONFIGURING OTION ETECTION 1. Click Apply to save the settings. ESCRIPTION 2. Click Upload a Test File to send a file to the FTP Password Enter the password of the FTP server server to confirm the configuration settings are correct. you wish to use here.
-
Page 78: Sd Card Settings
ONFIGURING THE URVEILLANCE OFTWARE ONFIGURING OTION ETECTION SD Card Settings Click Apply to save the settings. You can define the filename and destination folder when saving a file in a SD card. ESCRIPTION Enable Cycle Check the box and this camera will Recording automatically erase older image files to make room for new ones when the SD... -
Page 79: Configuring System
ONFIGURING THE URVEILLANCE OFTWARE ONFIGURING YSTEM 3.2.6 Configuring System Camera Information You can use this menu to get the operational information of this camera: Camera information allows you to set the name and admin- istrator‟s password. After you select System, a sub-menu appears. There are six available sub-menus: Camera Information, Date / Time Setting, Schedule, Utilities, Status, and System Log. -
Page 80: Date / Time Settings
ONFIGURING THE URVEILLANCE OFTWARE ONFIGURING YSTEM Date / Time Settings ESCRIPTION This setting allows you to change the date and time of the Camera Name Please specify the name of this network real time clock in this network camera. You can set the time camera. - Page 81 ONFIGURING THE URVEILLANCE OFTWARE ONFIGURING YSTEM ESCRIPTION ESCRIPTION Daylight Saving If your area of residence uses daylight If you select Set Date/Time manu- saving, select Yes, otherwise select No. Set Date/Time Time manually / NTP ally, you can set the date and time of Synchronize Click to enter the current time of your Server...
-
Page 82: Schedule
ONFIGURING THE URVEILLANCE OFTWARE ONFIGURING YSTEM Schedule ESCRIPTION You can use this menu to set up Scheduled Snapshot/ Select Enable to send the scheduled Upload to FTP Recording settings: snapshot to the appointed FTP server, or select Disable to disable this fea- ture. - Page 83 ONFIGURING THE URVEILLANCE OFTWARE ONFIGURING YSTEM ESCRIPTION ESCRIPTION File Control This option allows you to choose to Time Interval This option allows the network camera upload each scheduled snapshot with a to send one recorded video file accord- different file name composed of the ing to the time interval you wish.
-
Page 84: Utilities
ONFIGURING THE URVEILLANCE OFTWARE ONFIGURING YSTEM Utilities ESCRIPTION File Control This option allows you to choose to This menu allows you to upgrade firmware, clear all settings, upload each recorded video with a dif- reboot the network camera, and switch LED lights on/off. ferent file name composed of the date/ time, or to choose to upload the recorded video with the same file name... - Page 85 ONFIGURING THE URVEILLANCE OFTWARE ONFIGURING YSTEM ESCRIPTION ESCRIPTION Reset to Fac- Replace current settings with the fac- Upgrade Firm- If you downloaded the latest firmware tory Defaults tory defaults. ware file from our website, you can click the Browse button to pick a firmware file Note: located on your computer‟s hard drive The IP address will be reset to the fac-...
-
Page 86: Status
ONFIGURING THE URVEILLANCE OFTWARE ONFIGURING YSTEM Status System Log This menu provides all information about this network cam- All activities of this network camera are logged. The logs can be seen under the System Log menu. era, such as the firmware version, system uptime, date / time, and network information. -
Page 87: Configuring Account
ONFIGURING THE URVEILLANCE OFTWARE ONFIGURING CCOUNT 3.2.7 Configuring Account Account If you wish to allow other people to view the live image cap- tured by this camera, but don‟t want to allow them to modify system settings, you can give them a user-level username After you select Account, you will be prompted to enter and password, so they can only view the image and can not user account information:... - Page 88 ONFIGURING THE URVEILLANCE OFTWARE ONFIGURING CCOUNT Note: Only one user, including the administrator, is able to ESCRIPTION view the image of a network camera at any time. User List Lists all users currently available. Username If you wish to allow other people to view the live image cap- Enter the login name (username) of this account.
-
Page 89: Anonymous
ONFIGURING THE URVEILLANCE OFTWARE ONFIGURING CCOUNT Anonymous Enable this feature to allow users to view the camera image without requiring a user ID and password. ESCRIPTION Select Enable to activate the anony- Anonymous Login mous account or Disable to deacti- vate it. -
Page 90: Configuring Sdhc
SDHC ONFIGURING THE URVEILLANCE OFTWARE ONFIGURING 3.2.8 Configuring SDHC Status Configure the settings for using an SD card to store the video recording data from the camera. The used and free space information is shown here. Note: SD card storage is activated under the Motion Detection menu. -
Page 91: Space Alarm
SDHC ONFIGURING THE URVEILLANCE OFTWARE ONFIGURING Space Alarm ITEM DESCRIPTION When an SD card is close to full capacity, the camera can Recipient Email Enter the recipient's email address. send an alert email. Address Email Subject Enter the subject of the outbound email. SMTP Server Enter the IP address or host name of the SMTP server. -
Page 92: File Management
SDHC ONFIGURING THE URVEILLANCE OFTWARE ONFIGURING File Management ITEM DESCRIPTION SMTP Authenti- Select Enable if the SMTP server You can use this menu to manage the files stored on the SD cationyou're using requires authentication, card. and enter the username and password below. -
Page 93: Configuring Myedimax.com
ONFIGURING THE URVEILLANCE OFTWARE ONFIGURING MYEDIMAX 3.3 Configuring myedimax.com 1234567890ab.myedimax.com into your web Note: browser. This feature requires a web browser that sup- ports JAVA applets. If JAVA applets are not viewable in the browser, visit www.java.com to download and install the JAVA software. Launching myedimax.com 123456789ab Note:... - Page 94 ONFIGURING THE URVEILLANCE OFTWARE ONFIGURING MYEDIMAX 2. If the following window is shown, click Run. 5. The network camera can now be controlled from the applet. 3. When myedimax.com loads, enter the camera‟s pass- word. The default password is 1234. 4.
-
Page 95: Configuring The Network Camera From Myedimax.com
ONFIGURING THE URVEILLANCE OFTWARE ONFIGURING MYEDIMAX Configuring the Network Camera from speed. Use the dropdown lists to change the video res- myedimax.com olution and operating language. 3. Click Apply to save the changes or Cancel to discard The network camera can be operated and configured by them. -
Page 96: Configuring The 16-Channel Viewer
An alternative to the web-based interface is the desktop 16- Channel Viewer software, which offers the ability to view wizard. multiple cameras at once. Note: For information about the EdiView installation package, see Edimax EdiView Installation Package (page 2-5). 3-52... - Page 97 16-C ONFIGURING THE URVEILLANCE OFTWARE NSTALLING THE HANNEL IEWER OFTWARE 1. Click Next to start the installation process. 2. Click Browse to set the application installation folder or click Next to use the default value. 3. Click Next to continue or Back to return to the previ- ous step.
- Page 98 16-C ONFIGURING THE URVEILLANCE OFTWARE NSTALLING THE HANNEL IEWER OFTWARE 4. To set the application startup options: The application is ready to install. Review the installation details information in the information window. Select Create a desktop icon to add an appli- cation icon to the desktop.
- Page 99 16-C ONFIGURING THE URVEILLANCE OFTWARE NSTALLING THE HANNEL IEWER OFTWARE 7. The progress of the installation is displayed in the fol- The 16-channel viewer application is installed. lowing window. This step may take several minutes to complete. 9. Click Finish to exit the installation. 8.
-
Page 100: Adding Network Cameras
Adding a Network Camera on the LAN in Man- ual Mode A network camera can be added to the system in three dif- ferent modes: Manual, DDNS free and Edimax PnV. Cameras added in manual mode can only be accessed from the LAN. -
Page 101: Adding A Network Camera On The Cloud In Edimax Pnv Mode
7. Click OK to save the changes or Cancel to discard. Adding a Network Camera on the Cloud in Edimax PnV Mode 3. Select a Channel from one to sixteen. 4. Select the Camera tab. - Page 102 HANNEL IEWER OFTWARE 2. Click Configure Cameras to show the configuration able. You can add an Edimax Plug-n-View camera at a remote site using PnV mode. screen. To add a network camera in PnV mode: 1. Click the Set Up button to show the configuration menu.
-
Page 103: Adding A Network Camera On The Cloud In Ddns Free Mode
16-C ONFIGURING THE URVEILLANCE OFTWARE NSTALLING THE HANNEL IEWER OFTWARE Adding a Network Camera on the Cloud in Camera ID DDNS Free Mode Password The Camera ID is the camera's MAC address, which is Cameras added in Dynamic Domain Name System (DDNS) found on the camera itself, or by running the EdiView Free mode can be accessed from anywhere an Internet Finder utility. - Page 104 16-C ONFIGURING THE URVEILLANCE OFTWARE NSTALLING THE HANNEL IEWER OFTWARE 2. Click Configure Cameras to show the configuration Camera ID screen. Password The Camera ID is the camera's MAC address, which is found on the camera itself, or by running the EdiView Finder utility.
-
Page 105: User Interface Overview
ONFIGURING THE URVEILLANCE OFTWARE NTERFACE VERVIEW 3.4.2 User Interface Overview Language Display Layout Video Display Area Full Screen / Scan Close Window (Stop Surveillance) / Minimize Window Zoom Out / Zoom In PTZ Control / Home Recording / Set Up Message Display Box / Playback / Snap Shot 3-61... - Page 106 ONFIGURING THE URVEILLANCE OFTWARE NTERFACE VERVIEW Click the IPCam Surveillance Software icon on the ITEM DESCRIPTION desktop, quick launch bar or start menu to start the network camera surveillance software. Scan Click this button to automatically cycle through the images of all connected cameras.
- Page 107 ONFIGURING THE URVEILLANCE OFTWARE NTERFACE VERVIEW ITEM DESCRIPTION ITEM DESCRIPTION PTZ Control There are 8 directions in the PTZ Playback Play back a recorded video file. control ring. If the camera you con- nect to supports PTZ, you can use the PTZ control ring to change the direction that camera points to.
-
Page 108: Network Camera Configuration Options
ONFIGURING THE URVEILLANCE OFTWARE ETWORK AMERA ONFIGURATION PTIONS 3.4.3 Network Camera Configuration Options Camera Before using the surveillance software, the camera(s) must be configured. Click the Set Up button, , and a popup menu appears. Select Configure Cameras to show the camera configu- ration dialogue. - Page 109 Search box, and click Select to fill in set. the parameters of the selected camera Network Mode Select Edimax PnV, DDNS Free or in every camera configuration field. In Manual. the event the software cannot detect the network camera on the LAN auto-...
- Page 110 ONFIGURING THE URVEILLANCE OFTWARE ETWORK AMERA ONFIGURATION PTIONS ESCRIPTION Username* Enter the username of the camera. Web Port* Enter the web port of the camera. The default is 80. Password Enter the password of the camera. Default value is 1234. You should change the pre-inserted password if you changed the password of the selected camera.
-
Page 111: Schedule Recording
ONFIGURING THE URVEILLANCE OFTWARE ETWORK AMERA ONFIGURATION PTIONS Schedule Recording ITEM DESCRIPTION Channel Select the channel number you wish to set. One Time You can specify a one-time schedule for Schedules the selected camera; this schedule will be executed once only. Click this button to show the One Time Schedule window: (One Time... - Page 112 ONFIGURING THE URVEILLANCE OFTWARE ETWORK AMERA ONFIGURATION PTIONS ITEM DESCRIPTION ITEM DESCRIPTION Edit Modify a scheduled recording item. Define the recording schedule that will Select a schedule in the One Time be executed at the specified time of cer- Schedules list. Click the Edit button (Weekly Sched- tain weekday(s) in a week.
- Page 113 ONFIGURING THE URVEILLANCE OFTWARE ETWORK AMERA ONFIGURATION PTIONS ITEM DESCRIPTION Edit You can modify a scheduled recording item. Select a schedule in the One Time Schedules list, and click the Edit button to edit the start and end time of this schedule. Delete Delete a selected schedule item.
-
Page 114: Audio
ONFIGURING THE URVEILLANCE OFTWARE ETWORK AMERA ONFIGURATION PTIONS Audio ESCRIPTION Channel Select the channel number you wish to set. Mute Audio Check this box and the network camera surveillance software will not play the audio captured by this camera. Record Video Check this box and the network camera Only surveillance software will not record the... -
Page 115: Motion-Triggered Recording
ONFIGURING THE URVEILLANCE OFTWARE ETWORK AMERA ONFIGURATION PTIONS Motion-Triggered Recording disk storage space on images you don‟t need to pay atten- tion to. WARNING! For applications where security is of primary ESCRIPTION importance, it is not recommended to use this Channel Select the channel number you wish to feature. -
Page 116: General Configuration Options
ONFIGURING THE URVEILLANCE OFTWARE ENERAL ONFIGURATION PTIONS 3.4.4 General Configuration Options General General settings like file storage directory and recording spaces are set here. ESCRIPTION Primary Folder Set the directory you wish to store the recorded videos and captured images. Click the Browse button to pick a direc- tory on your hard disk. -
Page 117: Email Setting
ONFIGURING THE URVEILLANCE OFTWARE ENERAL ONFIGURATION PTIONS Email Setting ESCRIPTION Available Displays remaining storage space. Recording Space Maximum Video Defines the maximum file size for vid- File Size eos. When the size of the file exceeds this value, the application will open another file and continue recording. - Page 118 ONFIGURING THE URVEILLANCE OFTWARE ENERAL ONFIGURATION PTIONS ITEM DESCRIPTION ITEM DESCRIPTION SMTP Authenti- Specify the IP address or host name of Email Subject The subject of the outbound email. cationthe SMTP server you wish to use. Most Recipient Email The list of all email addresses. ISPs will only allow their subscribers to Address use their SMTP servers.
-
Page 119: Security
ONFIGURING THE URVEILLANCE OFTWARE ENERAL ONFIGURATION PTIONS Security ITEM DESCRIPTION SMTP Account Enter the username for the SMTP If you don‟t want other people to access this network cam- server. In most cases, it‟s the same as era surveillance software, you can set a password to protect your POP3 username. -
Page 120: About
ONFIGURING THE URVEILLANCE OFTWARE ENERAL ONFIGURATION PTIONS About You'll need to enter the password every time you wish to use this network camera surveillance software. ESCRIPTION Enable Requires password authentication when this software starts. Disable Password authentication is not required when this software starts. -
Page 121: Configuring The Android Surveillance Software
ONFIGURING THE URVEILLANCE OFTWARE ONFIGURING THE NDROID URVEILLANCE OFTWARE 3.5 Configuring the Android Surveillance Software 3.5.1 Installing the Android Surveillance Software To install the EdiView Network Camera application on an 2. Tap the magnifier icon at the upper-right corner of the Android market and enter ediview in the search field. - Page 122 ONFIGURING THE URVEILLANCE OFTWARE NSTALLING THE NDROID URVEILLANCE OFTWARE 3. Tap Ediview to download and install the application. 4. At the installation confirmation screen, tap Install to start installation or Cancel to exit. 3-78...
- Page 123 ONFIGURING THE URVEILLANCE OFTWARE NSTALLING THE NDROID URVEILLANCE OFTWARE 5. When the application is successfully installed, Appli- The installation status displays on screen. The process cation installed is displayed on the screen. takes several minutes depending on connection speed. 6. Tap Open to launch the EdiView application or tap Done to close the window.
-
Page 124: Adding Network Cameras
Automatically Adding a Camera When the EdiView application is launched, it automatically There are two ways to add a network camera to the camera searches the LAN for all Edimax network cameras. list: Automatically scan and add available cameras located on the network. - Page 125 ONFIGURING THE URVEILLANCE OFTWARE NSTALLING THE NDROID URVEILLANCE OFTWARE If no camera is found, tap OK to close the information dia- If a camera is found, it is shown in the camera list. logue. 3-81...
- Page 126 ONFIGURING THE URVEILLANCE OFTWARE NSTALLING THE NDROID URVEILLANCE OFTWARE Tap Manually to manually add a new network camera. 3-82...
-
Page 127: Manually Adding A Network Camera On A Lan In Ip Mode
ONFIGURING THE URVEILLANCE OFTWARE NSTALLING THE NDROID URVEILLANCE OFTWARE Manually Adding a Network Camera on a LAN 2. Enter information into the following fields: in IP Mode PARAMETER DESCRIPTION Note: Camera Name Define a name for the camera that is displayed in the camera list. Cameras added in IP mode can only be accessed on the local network. -
Page 128: Manually Adding A Network Camera On The Cloud With Cloud Mode
ONFIGURING THE URVEILLANCE OFTWARE NSTALLING THE NDROID URVEILLANCE OFTWARE Manually Adding a Network Camera on the 2. Enter information into the following fields: Cloud with Cloud Mode PARAMETER DESCRIPTION 1. Tap the Cloud/IP Mode button to set the mode to Camera Name Define a name for the camera that Cloud. -
Page 129: Android Surveillance Software Configuration Options
To add a network camera to the camera list tion settings. see Adding Network Cameras (page 3-85). The EdiView application automatically searches the LAN for existing Edimax network cameras and adds them to the camera list. 3-85... -
Page 130: Configuring Network Settings On A Lan In Ip Mode
ONFIGURING THE URVEILLANCE OFTWARE NDROID URVEILLANCE OFTWARE ONFIGURATION PTIONS Configuring Network Settings on a LAN in IP Mode PARAMETER DESCRIPTION Camera Name Define a name for the camera that is displayed in the camera list. 1. Tap the text box of a parameter and enter new informa- tion to change the configuration settings. -
Page 131: Configuring Network Settings On The Cloud In Cloud Mode
ONFIGURING THE URVEILLANCE OFTWARE NDROID URVEILLANCE OFTWARE ONFIGURATION PTIONS Configuring Network Settings on the Cloud in Cloud Mode PARAMETER DESCRIPTION Camera Name Define a name for the camera that is displayed in the camera list. 1. Tap the text box of a parameter and enter new informa- tion to change the configuration settings. -
Page 132: Configuring Video Display Parameters
ONFIGURING THE URVEILLANCE OFTWARE NDROID URVEILLANCE OFTWARE ONFIGURATION PTIONS Configuring Video Display Parameters 2. Drag the slider bars right or left to configure brightness, saturation, sharpness, video quality and pan/tilt speed. To configure the video display parameters of the network 3. -
Page 133: Removing A Network Camera From The List
ONFIGURING THE URVEILLANCE OFTWARE NDROID URVEILLANCE OFTWARE ONFIGURATION PTIONS Removing a Network Camera from the 2. When the Delete Network Camera dialogue List shows, remove your finger. To remove a network camera from the list, do the following: 1. Tap a camera in the list and hold. 3. -
Page 134: Configuring The Ios Surveillance Software
URVEILLANCE OFTWARE 3.6 Configuring the iOS Surveillance Software 3.6.1 Installing the iOS Surveillance Software 1. Tap Edimax Ediview to download and install the Note: application. Make sure the device is connected to a Wi-Fi or 3G network before launching the application. - Page 135 OS S ONFIGURING THE URVEILLANCE OFTWARE NSTALLING THE I URVEILLANCE OFTWARE 2. When the application is successfully installed the Edi- View icon is shown on the screen. 3. Launch EdiView by tapping the EdiView icon. 3-91...
-
Page 136: Adding Network Cameras
Automatically Adding a Camera When the EdiView application is launched, it automatically There are two ways to add a network camera to the camera searches the LAN for all Edimax network cameras. list: Automatically scan and add available cameras located on the network. - Page 137 OS S ONFIGURING THE URVEILLANCE OFTWARE NSTALLING THE I URVEILLANCE OFTWARE If a camera is found, it is shown in the camera list. If no camera is found, an empty list is shown. Tap Add New Camera to manually add a new network camera. 3-93...
-
Page 138: Manually Adding A Network Camera On A Lan In Ip Mode
OS S ONFIGURING THE URVEILLANCE OFTWARE NSTALLING THE I URVEILLANCE OFTWARE Manually Adding a Network Camera on a LAN in IP Mode PARAMETER DESCRIPTION Camera Name Define a name for the camera that is displayed in the camera list. Note: IP Address Enter the IP address of a network Cameras added in IP mode can only be accessed on... -
Page 139: Manually Adding A Network Camera On The Cloud With Cloud Mode
OS S ONFIGURING THE URVEILLANCE OFTWARE NSTALLING THE I URVEILLANCE OFTWARE Manually Adding a Network Camera on the 2. Enter information into the following fields: Cloud with Cloud Mode PARAMETER DESCRIPTION Note: Camera Name Define a name for the camera that is displayed in the camera list. -
Page 140: Ios Surveillance Software Configuration Options
Tap on a camera in the list to edit the configuration settings. Note: To add a network camera to the camera list, see Adding Network Cameras (page 3-85). The EdiView application automatically searches the LAN for existing Edimax network cameras and adds them to the camera list. 3-96... -
Page 141: Configuring Network Settings On A Lan In Ip Mode
OS S ONFIGURING THE URVEILLANCE OFTWARE URVEILLANCE OFTWARE ONFIGURATION PTIONS Configuring Network Settings on a LAN in IP Mode PARAMETER DESCRIPTION Camera Name Define a name for the camera that is displayed in the camera list. 1. Tap the text box of a parameter and enter new informa- tion to change the network configuration settings. -
Page 142: Configuring Network Settings On The Cloud With Cloud Mode
OS S ONFIGURING THE URVEILLANCE OFTWARE URVEILLANCE OFTWARE ONFIGURATION PTIONS Configuring Network Settings on the Cloud with Cloud Mode PARAMETER DESCRIPTION Camera Name Define a name for the camera that is displayed in the camera list. 1. Tap the text box of a parameter and enter new informa- tion to change the network configuration settings. -
Page 143: Configuring Video Display Parameters
OS S ONFIGURING THE URVEILLANCE OFTWARE URVEILLANCE OFTWARE ONFIGURATION PTIONS Configuring Video Display Parameters ARAMETER ESCRIPTION 1. Tap the parameter and enter the new information to change the video display configuration settings. Brightness Set the brightness level of the video (1 is darkest and 5 is bright- est) Saturation Set the saturation level of the video... -
Page 144: Removing A Network Camera From The List
OS S ONFIGURING THE URVEILLANCE OFTWARE URVEILLANCE OFTWARE ONFIGURATION PTIONS Removing a Network Camera from the 2. Tap to remove the selected camera. List To remove a network camera from the list, do the following: 1. Tap Edit. 3-100... - Page 145 OS S ONFIGURING THE URVEILLANCE OFTWARE URVEILLANCE OFTWARE ONFIGURATION PTIONS 3. Tap Delete to remove the network camera from the list. 3-101...
-
Page 146: Using The Surveillance Software
Using the Surveillance Software... -
Page 147: Using The Web-Based Management Interface
SING THE URVEILLANCE OFTWARE SING THE ASED ANAGEMENT NTERFACE 4.1 Using the Web-Based Management Interface Camera Settings Note: The Web-Based Management Interface is activated by entering the camera's IP address into the address bar The Camera menu is where the camera direction is con- of Internet Explorer. - Page 148 SING THE URVEILLANCE OFTWARE SING THE ASED ANAGEMENT NTERFACE Click the Camera menu item to return to this screen. ITEM DESCRIPTION Frequency If the place where this network camera points to has fluorescent light(s), the image may flicker. Adjust this setting to match the frequency of your electrical ITEM DESCRIPTION...
- Page 149 SING THE URVEILLANCE OFTWARE SING THE ASED ANAGEMENT NTERFACE ITEM DESCRIPTION ITEM DESCRIPTION Click the Snapshot button to save the Volume Adjust the volume of audio output. Snapshot Press the + or - button to increase or display image as an image file, a mes- decrease the volume.
- Page 150 SING THE URVEILLANCE OFTWARE SING THE ASED ANAGEMENT NTERFACE ITEM DESCRIPTION ITEM DESCRIPTION Recording Press this button to record the dis- Digital Zoom If you wish to enlarge certain portions of played image as a video file in AVI for- the captured image, you can click this mat, which can be played back in button to set digital zoom.
-
Page 151: Full Screen
SING THE URVEILLANCE OFTWARE SING THE ASED ANAGEMENT NTERFACE ITEM DESCRIPTION Full Screen Click this button to display the image in full-screen mode. -
Page 152: Using Myedimax.com
SING THE URVEILLANCE OFTWARE SING MYEDIMAX 4.2 Using myedimax.com Network Camera Image Toolbar Note: To access myedimax.com, enter [Cloud ID].myedi- max.com into the web browser‟s address bar, where Manage the network camera by clicking the icons on the [Cloud ID] is the twelve character Cloud ID of the net- toolbar located below the image. -
Page 153: Pan-Tilt Control
SING THE URVEILLANCE OFTWARE SING MYEDIMAX Pan-Tilt Control 2. Click an arrow to move the network camera in that direction. 3. Click the circle, located in the center of the arrow set, to (Only for supported cameras) return the network camera to the home, or original, position. -
Page 154: Snapshot
SING THE URVEILLANCE OFTWARE SING MYEDIMAX Snapshot Full-Screen View 1. Click the snapshot icon to take a picture of the current 1. Click the full-screen icon to enlarge image view to full- image and save it on a local hard drive. screen size. -
Page 155: Using The Surveillance Software On The Desktop
SING THE URVEILLANCE OFTWARE SING THE URVEILLANCE OFTWARE ON THE ESKTOP 4.3 Using the Surveillance Software on the Desktop 4.3.1 Changing the Display Layout There are 8 display layouts to choose from. LAYOUT DESCRIPTION Displays the video of 1 camera only. Displays the video of up to 4 cameras. - Page 156 SING THE URVEILLANCE OFTWARE HANGING THE ISPLAY AYOUT LAYOUT DESCRIPTION Displays the video of up to 10 cameras. Displays the video of up to 13 cameras. Displays the video of up to 16 cameras. 4-10...
-
Page 157: Full-Screen Mode
SING THE URVEILLANCE OFTWARE CREEN 4.3.2 Full-Screen Mode To maximize the display space on your monitor, view the camera layout in full-screen mode. Click the full-screen button to active full-screen mode. Full-Screen To exit full-screen mode, press the key. 4-11... -
Page 158: Scanning
SING THE URVEILLANCE OFTWARE CANNING 4.3.3 Scanning If you have more than one camera configured, and you wish to switch the displaying image between cameras, you can click the Scan button to switch between all configured cam- eras. Note: If a camera is configured but disconnected, it will still be displayed in a scan sequence (The camera display will be blank, and you'll see Disconnected displayed at the upper-left corner of the display image). -
Page 159: Zoom-In / Zoom-Out
SING THE URVEILLANCE OFTWARE 4.3.4 Zoom-in / Zoom-out For cameras that support the zoom feature, you can use this feature to see more objects within the camera's view, or enlarge the image size to see certain objects in more detail. Please select a camera in the video display area by clicking on its image, then click to see more objects within the... -
Page 160: Pan-Tilt Zoom
SING THE URVEILLANCE OFTWARE 4.3.5 Pan-Tilt Zoom For cameras that support the pan-tilt zoom (PTZ) feature, you can change the position of the camera's lens to see dif- ferent areas within the camera's view. To use the PTZ feature, click on a camera in the video dis- play area. -
Page 161: Snapshot And Recording
SING THE URVEILLANCE OFTWARE NAPSHOT AND ECORDING 4.3.6 Snapshot and Recording Snapshot Recording You can start recording the image of a selected camera by You can take a snapshot with a selected camera and save clicking the Start Recording button. the image to a local directory. -
Page 162: Video Playback
SING THE URVEILLANCE OFTWARE IDEO LAYBACK 4.3.7 Video Playback Searching for Recorded Video You can playback all recorded video by clicking the Video Playback button. To play recorded video, you must search for the video file(s). there are two kinds of search functions: Video Playback Time Search -- Search all video files within a given time... -
Page 163: Using The Surveillance Software On Android
SING THE URVEILLANCE OFTWARE SING THE URVEILLANCE OFTWARE ON NDROID 4.4 Using the Surveillance Software on Android 4.4.1 Software Overview Main Menu Buttons Reload the network camera list. To show the EdiView menu buttons, press the menu button on the Android device. The EdiView menu buttons perform the following functions: Show information about the EdiView application. -
Page 164: Viewing The Camera List
SING THE URVEILLANCE OFTWARE IEWING THE AMERA 4.4.2 Viewing the Camera List Viewing a Live View If there are new events available, tap the icon. If the network camera is connected, you'll see a picture appear. Tap the picture to view the live image. To configure the network camera's parameters, tap the icon. -
Page 165: Taking A Snapshot
SING THE URVEILLANCE OFTWARE IEWING THE AMERA Taking a Snapshot Viewing Multiple Cameras To take a snapshot of the current live image and save it on If you have more than one network camera, tap the but- your Android device, tap the button. -
Page 166: Pan/Tilt Live View
SING THE URVEILLANCE OFTWARE IEWING THE AMERA Pan/Tilt Live View Tap the button to see up to twelve network cameras at Note: Only for supported cameras the same time. Tap a network camera in the camera list to see a live image. Hold the Android device horizontally to enlarge the network camera's live image view. -
Page 167: Viewing Camera Events
SING THE URVEILLANCE OFTWARE IEWING THE AMERA Viewing Camera Events All events are displayed along with the time when the event Viewing an Event Image was triggered. When a new event, or movement, has been detected by the network camera, the icon appears in the network cam- era list. -
Page 168: Saving An Event Image Snapshot
SING THE URVEILLANCE OFTWARE IEWING THE AMERA Saving an Event Image Snapshot The image of the event is displayed along with the time it was triggered. To see an enlarged picture, hold the Android device horizontally. To save a snapshot of this event, tap the button. -
Page 169: Mapping A Camera
SING THE URVEILLANCE OFTWARE APPING A AMERA 4.4.3 Mapping a Camera Tap the Map button at the bottom of the device to access the Use the mapping feature to mark the location of the network camera on Google Maps. map menu. An active Internet connection is required to show the map on the Android device. - Page 170 SING THE URVEILLANCE OFTWARE APPING A AMERA When you find the location where a network camera is Note: installed, press the Menu button on your Android device and Using the Android device indoors may hinder the ser- tap Locate and a camera list is shown. vice‟s ability to find the device location.
-
Page 171: Refreshing The Camera List
SING THE URVEILLANCE OFTWARE EFRESHING THE AMERA 4.4.4 Refreshing the Camera List If new cameras are added or removed from the network, scan the network again to update your camera list. To update the cameras displayed in the camera list, tap Refresh. -
Page 172: Using The Surveillance Software On Ios
SING THE URVEILLANCE OFTWARE SING THE URVEILLANCE OFTWARE ON I 4.5 Using the Surveillance Software on iOS 4.5.1 Software Overview Main Menu Buttons Show a list of available network cameras. To show the EdiView menu buttons, press the menu button on the iOS device. -
Page 173: Viewing The Camera List
SING THE URVEILLANCE OFTWARE IEWING THE AMERA 4.5.2 Viewing the Camera List Viewing Multiple Camera Live Views Pan/Tilt Live View Tap the button on the upper right corner of the screen to Tap the button on the upper left corner of the screen to switch to Gesture mode. -
Page 174: Viewing Camera Events
SING THE URVEILLANCE OFTWARE IEWING AMERA VENTS 4.5.3 Viewing Camera Events Viewing an Event Image Select a network camera to show an event list. To view events, which are motions detected by the network camera, tap the Events button. 4-28... - Page 175 SING THE URVEILLANCE OFTWARE IEWING AMERA VENTS Tap an event to see an enlarged image. 4-29...
-
Page 176: Mapping A Camera
SING THE URVEILLANCE OFTWARE APPING A AMERA 4.5.4 Mapping a Camera You can use this feature to mark your network cameras on Note: Google Maps so you can locate them and remember their You need an active Internet connection to show a map physical locations easily. - Page 177 SING THE URVEILLANCE OFTWARE APPING A AMERA Google Maps attempts to locate the iOS device‟s current location by GPS and the network. Note: Using the iOS device indoors may hinder the service‟s ability to find the device location. To manually find the device location, drag a finger over the map in a direc- tion until the desired location is found.
-
Page 178: Troubleshooting
PPENDIX ROUBLESHOOTING Appendix A A.1 Troubleshooting This information lists the most common troubleshooting questions. Before contacting the dealer, review this material first. This may help you to solve the problem by yourself and therefore saves your valuable time. SCENARIO POSSIBLE SOLUTION I can not connect to the network 1. - Page 179 PPENDIX ROUBLESHOOTING SCENARIO POSSIBLE SOLUTION 5. If you're trying to connect to the network camera from the Internet, please make sure the port that the network camera uses is not blocked by a firewall or other software / hardware. See Configuring Network Settings (page 3-19) for more details.
- Page 180 PPENDIX ROUBLESHOOTING SCENARIO POSSIBLE SOLUTION Network camera is not responding 1. Is the network cable or wireless connection disconnected? Please check it. 2. Unplug the power adapter from the wall socket and plug it in again after 10 sec- onds, then try to connect to the network camera again. 3.
- Page 181 PPENDIX ROUBLESHOOTING SCENARIO POSSIBLE SOLUTION I set the network camera to send 1. If the image is sent by email, please make sure it's not blocked by any anti-spam images by email or FTP, but nothing mechanism. is received 2. Please make sure you have enough permission for FTP uploading (You can try this by clicking the Upload a Test File button).
-
Page 182: Configuring Your Pc"S Ip Address
PC‟ IP A PPENDIX ONFIGURING DDRESS Appendix B B.1 Configuring Your PC’s IP Address 1. Click Start > Control Panel If you are unable to locate the network camera with the Edi- View Finder utility and there is no DHCP server in your net- work environment, perform the following instructions to manually set up an IP address that is within the same net- work segment as your network camera. - Page 183 PC‟ IP A PPENDIX ONFIGURING DDRESS 2. Double-click the Network Connections icon. 3. Right-click Local Area Connection, and click Properties.
- Page 184 PC‟ IP A PPENDIX ONFIGURING DDRESS 4. Select Internet Protocol (TCP/IP), then click 5. In the IP address field, enter an IP address begin- Properties. ning with 192.168.2, and ending with a value greater than 2 and less than 254, for example 192.168.2.339. In the Subnet mask field, enter 255.255.255.0.
- Page 185 PC‟ IP A PPENDIX ONFIGURING DDRESS Press and hold the Reset button located on the network camera to clear all settings and reset the IP address back to 192.168.2.3. Current settings on the network camera are lost. Ask the network administrator to check the DHCP release table.
Need help?
Do you have a question about the IC-3110 and is the answer not in the manual?
Questions and answers