Advertisement
CAUTION:
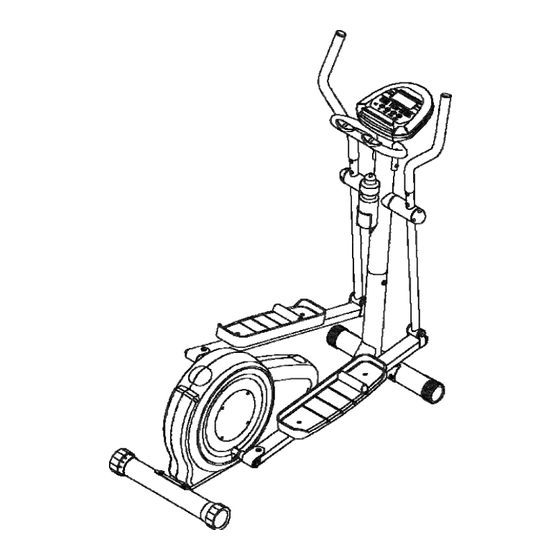
Weight on this product should not exceed 250 lbs.
Owner's Manual
Exercise can present a
health risk. Consult a
physician before beginning
any exercise program with
this equipment. If you feel
faint or dizzy, immediately
discontinue use of this
equipment. Serious bodily
injury can occur if this
equipment is not assembled
and used correctly. Serious
bodily injury can also occur if
all instructions are not
followed. Keep others and
pets away from equipment
when in use. Always make
sure all bolts and nuts are
tightened prior to each use.
Follow all safety instructions
in this manual.
MADE IN TAIWAN
Product May Vary Slightly
WARNING
From Pictured.
Advertisement
Table of Contents

Summary of Contents for CyClone Elliptical Trainer
- Page 1 Owner's Manual WARNING Exercise can present a health risk. Consult a physician before beginning any exercise program with this equipment. If you feel faint or dizzy, immediately discontinue use of this equipment. Serious bodily injury can occur if this equipment is not assembled and used correctly.
-
Page 2: Table Of Contents
TABLE OF CONTENTS Page Page Safety Instructions Computer Instructions Hardware Illustrations Conditioning Guidelines Assembly Instructions Warm-up and Cool-Down Exercise Workout Product Parts Drawing Storage Parts List Maintenance SAFETY INSTRUCTIONS WARNING: To reduce the risk of serious injury, read the following Safety Instructions before e ELLIPTICAL. -
Page 3: Hardware Illustrations
HARDWARE ILLUSTRATIONS This chart is provided to help identify some of the small parts used in the assembly of this product. This sheet may not include all the hardware needed to assemble your product. It is intended to be used as a guide to help simplify your assembly process. -
Page 4: Assembly Instructions
ASSEMBLY INSTRUCTIONS Place all parts from the box in a cleared area and position them on the floor in front of you. Remove all packing materials from your area and place them back into the box. Do not dispose of the packing materials until assembly is completed. - Page 5 ASSEMBLY INSTRUCTIONS STEP 3 LOWER CONNECTION WIRE(31) UPPER CONNECTION WIRE(32). Connect the Insert UPRIGHT(4) MAIN FRAME(1) BUTTON HEAD BOLTS(M8 x onto the and secure with 20mm)(68), LOCK WASHERS(M8)(78), WASHERS(M8)(79). STEP 4 LEFT RIGHT PEDAL ARMS(10, 11) PEDAL ARM CONNECTORS(12) Connect the to the with BUTTON HEAD BOLTS(M10 x 55mm)(69), WASHERS(M10)(80),...
- Page 6 ASSEMBLY INSTRUCTIONS STEP 6 "C" COMPUTER(33), Install four size batteries into the four batteries included. Plug the UPPER CONNECTION WIRE(32) COMPUTER(33). COMPUTER(33) into the Then attach the onto the plate UPRIGHT(4) ROUND HEAD SCREWS(M5 x 10mm)(61). on the with Press the READING HOLDER(34) COMPUTER(33).
- Page 7 ASSEMBLY INSTRUCTIONS STEP 8 "L" LEFT HANDLEBAR(6), "R" RIGHT HANDLEBAR(7). There is a decal on the and a decal on the LEFT HANDLEBAR(6) LEFT PIVOTING ARM(8) ROUND HEAD Insert the onto the and secure with BOLTS(M6 x 35mm)(66) NYLOCK NUTS(M6)(73). Repeat on the right side.
-
Page 8: Exercise Workout
EXERCISE WORKOUT ELLIPTICAL, To start using the stand on the foot pedals, grasp the handlebars, move your highest foot forward and follow the natural path of the machine. Start at a load level that is comfortable to familiarize yourself with the machine. Once you are comfortable start adjusting the load level to achieve the workout desired. -
Page 9: Computer Instructions
COMPUTER INSTRUCTIONS ELLIPTICAL Your utilizes a magnetic braking system to create resistance for your workout. You control the amount and pattern of this resistance by means of the advanced computer console mounted at the center of the handlebar. We recommend that you use this computer console to vary your workout from session to session and note your progress toward your fitness goals. - Page 10 COMPUTER INSTRUCTIONS LCD DISPLAY INSTRUCTIONS Indicates the program selected has started. Indicates the program selected has stopped. You just can setup the programs under STOP this model. Displays programs for selection during setup, from P1 to P16. Displays the selected program during exercise. Displays resistance level of the current interval of program, from 1 to 16.
- Page 11 COMPUTER INSTRUCTIONS Displays flashing " 30" for presenting the AGE for programs during setup, from 10 to 99. Displays flashing " 90" for presenting the TARGET H.R. in the Target Heart Rate Program, P9, from 60 to 220. Displays the target heart rate of programs during exercise. Displays the BMI in Body Fat Program.
- Page 12 COMPUTER INSTRUCTIONS HEART RATE CONTROL PROGRAMS: P9 to P12 are preset automatic heart programs. You must input your age and always hold the pulse sensors on the Handlebar with both hands when using the heart programs. Program 9 allows you to input the TARGET H.R. you desire, from 60 to 220. Programs 10 to 12 offer three percentages of maximum heart rate based on your age.
- Page 13 COMPUTER INSTRUCTIONS OPERATION INSTRUCTIONS The advanced computer with diversified programs allows you to control the following features: Workout Time (Except in Program 8) Distance (Except in Program 8) Heart Rate Control (Program 9 to 12) Body Fat (Program 8) Select the program that you desire and set the function values to adjust your workout. The different categories of programs operate in different ways but, the computer will guide you step by step to setup the program easily.
- Page 14 COMPUTER INSTRUCTIONS B. PRESET PROGRAMS (P2 to P7) STEP 1: POWER ON Pedaling or press any button. STEP 2 : SELECT PROGRAM Press " / " buttons until the desired program is displayed. STEP 3: SET THE PROGRAM TIME OR DISTANCE, AND AGE Press the ENTER button, the TIME function mode will appear with the display flashing "0:00".
- Page 15 COMPUTER INSTRUCTIONS UNDERSTANDING THE READOUT INFORMATION 1. BODY FAT % Your body fat percentage is simply the percentage of fat your body contains. If you are 150 pounds and 10% fat, it means that your body consists of 15 pounds fat and 135 pounds lean body mass (bone, muscle, organ tissue, blood and everything else).
- Page 16 COMPUTER INSTRUCTIONS D. HEART RATE CONTROL PROGRAMS (P9 to P12) STEP 1: POWER ON Pedaling or press any button. STEP 2 : SELECT PROGRAM Press " / " buttons until the desired program is displayed. STEP 3: SET THE PROGRAM TIME OR DISTANCE, AND AGE Press the ENTER button, the TIME function mode will appear with the display flashing "0:00".
- Page 17 COMPUTER INSTRUCTIONS OPERATION DESCRIPTIONS 1. To stop a running program, press the START / PAUSE button. In this mode, you can press the START/PAUSE button again to continue to run the current program. Or, you can use " / -" buttons to select a new program.
-
Page 18: Conditioning Guidelines
CONDITIONING GUIDELINES How you begin your exercise program depends on your physical condition. If you have been inactive for ELLIPTICAL several years, or are severely overweight, you must start slowly and increase your time on the gradually: a few minutes per workout. Initially, you may be able to exercise only for a few minutes in your target zone, however, your aerobic fitness will improve over the next six to eight weeks. -
Page 19: Warm-Up And Cool-Down
WARM-UP and COOL-DOWN Warm-up The purpose of warming up is to prepare your body for exercise and to minimize injuries. Warm up for two to five minutes before strength-training or aerobic exercising. Perform activities that raise your heart rate and warm the working muscles. Activities may include brisk walking, jogging, jumping jacks, jump rope, and running in place Stretching Stretching while your muscles are warm after a proper warm-up and again after your strength... -
Page 21: Parts List
PARTS LIST DIAGRAM# PART NAME Main Frame Rear Stabilizer Front Stabilizer Upright Stationary Handlebar Left Handlebar Right Handlebar Left Pivoting Arm Right Pivoting Arm Left Pedal Arm Right Pedal Arm Pedal Arm Connector Crank Crank Cover Left Cover Right Cover Shaft Bearing (6004z) Washer (M20) - Page 22 PARTS LIST DIAGRAM# PART NAME Pedal Divider Connector Bushing E Ring (17mm) Moving Wheel Round Endcap (76mm) Leveling Cap (76mm) Rectangular Plug/w Curve (30mm x 60mm) Rectangular Plug (30mm x 60mm) Round Plug (22mm) Round Plug (32mm) Carriage Bolt (M8 x 1.25 x 75mm) Screw, Round Head (M4 x 20mm) Screw, Round Head (M4 x 25mm) Screw, Round Head (M5 x 12mm)
Need help?
Do you have a question about the Elliptical Trainer and is the answer not in the manual?
Questions and answers