
Subscribe to Our Youtube Channel
Related Manuals for Grundig Traveller II Digital


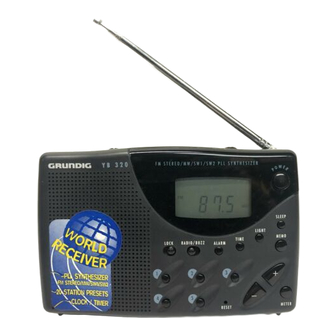
Summary of Contents for Grundig Traveller II Digital
- Page 1 WORLD RECEIVER TRAVELLER II DIGITAL UTHORIZED RUNDIG TORE agsradio.com Toll .ree US & Canada 1 866 282 4801...
- Page 2 As a proud representative of Grundig’s radio products, the Authorized Grundig Store is pleased to offer this support manual, as delivered OEM Grundig AG with Traveller II Digital radio. It is available on the world wide web through our website in Postscript Document .ormat (pdf) and may be downloaded free of charge, viewable with the recommended utility Adobe Acrobat Reader 4.0 or later.
- Page 3 THE UNITED KINGDOM If, after reading this owner’s manual, you need Mains Plug help learning to operate your TRAVELLER II DIGITAL, This apparatus is fitted with an approved 13 Amp plug. call GRUNDIG toll free, Monday through Friday, 8.30 am To change a fuse in this type of plug proceed as follows: to 4.30 pm, PST at:...
- Page 4 IMPORTANT NOTICE How to connect a plug The wires in the mains lead are coloured with the following code: blue=neutral (N), brown=live (L). As these colours may not correspond with the colour markings identifying the terminals in your plug, proceed as follows: •...
-
Page 5: Table Of Contents
TABLE OF CONTENTS SUBJECT PAGE CLOCK INTRODUCTION Setting the Current Time CONTROLS ALARM FUNCTION DISPLAY 6 - 7 Setting the Alarm Time POWER SUPPLY Switching the Alarm ON 9 / 10 Khz Switching the Alarm OFF SW TUNING SLEEP FUNCTION ANTENNAS Switching the Sleep Function ON RADIO RECEPTION... -
Page 6: Introduction
INTRODUCTION SHORT-WAVE (SW) TIME ZONES The Earth rotates around its axis in 24 hours and around the Your world receiver can receive an number of wavebands. sun in one year. These movements are responsible for the time Most of these are known and tuning to the required station will differences and the seasons on the Earth. -
Page 7: Controls
16 17 CONTROLS 1. ALARM - for switching the alarm On and Off 2. TIME - for setting the display mode and setting the time 3. LIGHT - for illuminating the display 4. FM MW SW1 SW2 switch - band selector switch 5. -
Page 8: Display
DISPLAY FEATURES The settings are easy to check: DISPLAY When the radio is Off: ALARM SLEEP - The display shows the current time mode. The display provides LOCK MEMO - If you wish to check the alarm time setting, 08:8.8 information about the press TIME briefly. - Page 9 POWER SUPPLY FEATURES Warning for weak batteries BATTERIES When the batteries run low, the sound volume declines gradu- ally. Continued operation with low batteries causes the radio - Open the battery compartment and insert 3 AA type to turn off automatically, other malfunctioning and losing alkaline batteries.
-
Page 10: Power Supply
POWER SUPPLY FEATURES 9 / 10 kHz SELECTOR The minimum ‘frequency distance’ (span division) between AC MAINS ADAPTOR (NOT INCLUDED) adjacent radio stations (measured in kHz) is standardized all over the world. However, North and South America use You can connect the set to the mains using a mains adaptor. another standard than the rest of the world. -
Page 11: Sw Tuning
SW TUNING MODE ANTENNA SW METER BAND / CONTINUOUS • For FM reception extend the telescopic antenna fully. To Your TRAV IID has a built-in Short-Wave Frequency Tuning improve the reception you can incline and rotate the Mode select switch inside the battery compartment. antenna. -
Page 12: Radio Reception
RADIO RECEPTION • Ensure that the LOCK switch is Off. SHORTWAVE BAND RANGES • Press POWER to switch the radio On. - The frequency in the wave-band will appear in the display. • Adjust the volume with the VOLUME control. You can SW1 (Mhz) 2.30 - 7.40 connect headphones to the HEADPHONES socket. -
Page 13: Tuning
TUNING TO A STATION PRESET RADIO STATIONS There are two possibilities for tuning into a station: You can program 20 stations into the memory, 5 on each wave-band. - Automatically - the stations are sought automatically. Programming - Manually - this is easy if the frequency of the station is •... -
Page 14: Calling Up Preset Stations
PRESET RADIO STATIONS CLOCK Calling up preset stations Setting the current time • Select the wave range with FM, MW, SW1, SW2 switch. • Press TIME to select the display in current time mode. • Press one of the PRESET 1... 5 buttons. •... -
Page 15: Alarm Function
ALARM You can use your Trav IID as an alarm clock. To use this SWITCHING THE ALARM ON function you first have to set the alarm time. You will be woken by a bleep or by the radio. • Press ALARM ON/OFF. - The alarm sign will appear on the display. -
Page 16: Sleep Function
SLEEP Your Trav IID is equipped with a sleep function. It enables SETTING THE SLEEP FUNCTION OFF you to continue listening to the radio while you fall asleep. After 90, 80, 70 ... 10 minutes the radio will be switched Off The sleep function can be switched Off before the set time automatically. -
Page 17: Lock
LOCK SWITCH By setting the LOCK switch to the ‘LOCK’ position, a • Set the LOCK switch in the ‘LOCK’ position. function is no longer interrupted when a button is accidentally - The ‘LOCK’ symbol will appear on the display: touched. -
Page 18: General Information
GENERAL INFORMATION TECHNICAL SPECIFICATIONS Power Supply - by 3x 1.5 V batteries (AA) WARNINGS External supply - by a commercial 4.5 V DC mains unit Output Power - 250 mW - Rain, damp and excessive heat are bad for the radio and the batteries. -
Page 19: Troubleshooting Guide
TROUBLESHOOTING GUIDE If a fault occurs first check the points listed below before Poor sound quality taking the set for repair. If you are unable to remedy the – Batteries are nearly exhausted problem by following these hints, consult a qualified dealer •... -
Page 20: Troubleshooting Guide
TROUBLESHOOTING GUIDE This unit complies with the radio interference requirements as Set does not react to operation of any button laid down in EC (European Community), USA’s FCC regula- – Electrostatic discharge tions and UDC/CSA standards. • Switch Off the set, disconnect the mains plug, The type plate is located on the back of the set.
Need help?
Do you have a question about the Traveller II Digital and is the answer not in the manual?
Questions and answers