Table of Contents
Advertisement
BOTTOM FREEZER REFRIGERATOR
Use & Care Guide o 2
CONGELADOR
INFERIOR REFRIGERADOR
Guia para el Uso y Cuidado ° 36
CONGCLATEUR
INFCRIEUR RCFRIGCRATEUR
Guide d'Utilisation
et d'Entretien o 70
Models / Modelos / Modeles 795.7850;!-_, 7851 ;!-_
;!-_= color number, n0mero de color, numero de couleur
==trio
MFL37933510
Sears, Roebuck and Co., Hoffman Estates, IL 60179 U.S.A.
www.sears.com
Printed in Korea
Sears Canada, Inc., Toronto, Ontario, Canada M5B 2B8
www.sears.ca
Advertisement
Table of Contents

Related Manuals for Kenmore TRIO 795.785


Summary of Contents for Kenmore TRIO 795.785
- Page 1 BOTTOM FREEZER REFRIGERATOR Use & Care Guide o 2 CONGELADOR INFERIOR REFRIGERADOR Guia para el Uso y Cuidado ° 36 CONGCLATEUR INFCRIEUR RCFRIGCRATEUR Guide d'Utilisation et d'Entretien o 70 Models / Modelos / Modeles 795.7850;!-_, 7851 ;!-_ ;!-_= color number, n0mero de color, numero de couleur MFL37933510 Sears, Roebuck and Co., Hoffman Estates, IL 60179 U.S.A.
-
Page 2: Table Of Contents
Your Refrigerator Installation Removing And Replacing Your Refrigerator Handles And Doors Leveling And Door Alignment Base Cover Using Your Refrigerator Setting The Controls Ensuring Proper Air Circulation Using A Ice Room Adjusting Control Settings Food Storage Guide Storing Frozen Food... -
Page 3: Warranty
Five Year Limited Warranty on Sealed For five years from the date of purchase, when this refrigerator is installed, operated, and maintained according to the instructions supplied with it, Sears will repair the sealed system (consisting of refrigerant, connecting tubing, and compressor), free of charge, if defective in material or workmanship. -
Page 4: Protection Agreements
In the space below, record the date of purchase, model and serial number of your product. You will find the model and serial number printed on an identification label located on the right-hand side of the refrigerator compartment. Have these items of information available whenever you contact Sears concerning your product. -
Page 5: Basic Safety
• Before replacing a burned-out light bulb, unplug the refrigerator or turn off power at the circuit breaker or fuse box in order to avoid contact with a live wire filament. (A burned-out light bulb may break when being replaced.) NOTE: Some models have LED interior lighting and service should be performed by a qualified technician. -
Page 6: Grounding Requirements
(Child entrapment and suffocation). Your old refrigerator may have a cooling system that used CFCs (chlorofluorocarbons). CFCs are believed to harm stratospheric ozone. -
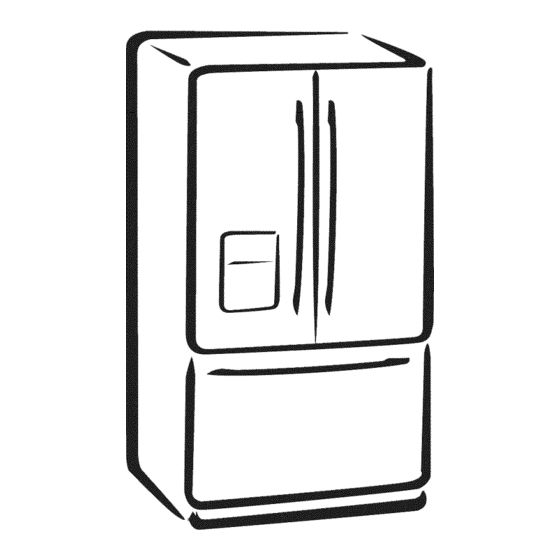
Page 7: Parts And Features
Use this page to become more familiar with the parts and features. Page references are included for your convenience. NOTE: This guide covers several different models. The refrigerator you have purchased may have some or all of the items listed below. The locations of the features shown below may not match your model. -
Page 8: Refrigerator Installation
They are packed together to prevent possible damage during shipment. 3. Let your refrigerator run for at least 2 or 3 hours before putting food in it. Check the flow of cold air in the freezer compartment to ensure proper cooling. -
Page 9: How To Remove
HOW TO REMOVE DOOR HANDLES NOTE: Handle appearance may vary from illustrations on this page. 1. Removing Refrigerator Handle • Grasp the handle tightly with both hands and slide the handle up (1)(this may require some force). • The keyhole slots (2) on the back of the handle allow the handle to separate from the mounting screws (3). -
Page 10: How To Replace
DOOR HANDLES NOTE: Handle appearance may vary from illustrations on this page. 1. Reinstalling the Refrigerator Door Handle • Align keyhole slots (1) on the top and bottom of the back of the handle with the screws (2) mounted on the front of the door. -
Page 11: Removing And Replacing
• Do not put hands or feet or other objects into the air vents, base grille, or bottom of the refrigerator. You may be injured or receive an electrical shock. • Be careful when you work with the hinge, base grille, and stopper. - Page 12 Reinstalling the Refrigerator Door I_ Right Door 1. Lower the door onto middle hinge pin (8). 2. Fit top hinge (5) over hinge lever latch (6) and into place. Insert hinge lever (4) under lever latch. Rotate lever counterclockwise to secure hinge.
- Page 13 HOW TO REMOVE AND INSTALL THE PULLOUT DRAWER IMPORTANT: To avoid possible injury or product or property damage, you will need two people to perform the following instructions. 1. Removing Pullout Drawer • Pull the drawer open to full extension. Remove the lower basket (1) by lifting basket from rail system.
- Page 14 HOW TO REMOVE AND INSTALL THE PULLOUT DRAWER IMPORTANT: To avoid possible injury or product or property damage, you will need two people to perform the following instructions. 2. Installing Pullout Drawer • With both hands, hold the center bar and pull it out to let both rails out to full extension simultaneously.
-
Page 15: Leveling And Door Alignment
NOTE: Having someone push backward against the top of the refrigerator takes some weight off the leveling legs. This makes it easier to adjust the legs. 3. Open both doors again and check to make sure that they close easily. -
Page 16: Using Your Refrigerator
SETTING THE CONTROLS Temperature • Your refrigerator has a control pad on the dispenser that lets you regulate the temperature in the freezer and refrigerator compartments. • Initially set the refrigerator control at 37°F (3°C) and the freezer control at 0°F (-18°C). Leave it at this setting for 24 hours (one day) to stabilize. -
Page 17: In=Door Ice Bank
Keep the ice bank door closed tightly. If the ice bank door is not closed tightly, the cold air in the ice bank will freeze food in the refrigerator compartment. This could also cause the icemaker to not produce ice. -
Page 18: Adjusting Control Settings
Freezer compartment to make it colder. If you need to adjust temperatures in the refrigerator or freezer, start by adjusting the refrigerator. Then wait 24 hours before checking the freezer temperature. If it is too warm or too cold, then adjust the freezer control. -
Page 19: Storing Frozen Food
Successful freezing depends on correct packaging. When you close and seal the package, it must not allow air or moisture in or out. If it does, you could have food odor and taste transfer throughout the refrigerator and also dry out frozen food. Packaging... -
Page 20: Refrigerator Shelves
Storing similar food items together in your refrigerator and adjusting the shelves to fit different heights of items will make finding the exact item you want easier; it will also reduce the amount of time the refrigerator door is open, saving energy. IMPORTANT: Do not clean glass shelves with warm water when they are cold. -
Page 21: Snack Pan
SNACK PAN While holding the chef fresh with one hand, pull it forward slightly. CRISPER HUMIDITY CONTROL The crispers provide fresher-tasting fruit and vegetables by letting you easily control humidity inside the drawer. The Crispers include a humidity control knob at the front of the crisper cover. -
Page 22: D,-Freezer Section
FREEZER SECTION TILTING DOOR The tilting door provides easy access for stored foods. How to use Tilt the door down and pull it out. A WARNING: Be careful when you open tilting door so that you do not injure your foot! TILT-OUT DOOR BASKET To remove basket... -
Page 23: Durabase
DURABASE 1. To remove the Durabase, push it back to the end as much as possible. Tilt up the front of the Durabase and pull straight out. 2. To install, insert the Durabase in rail assembly. DURABASE DIVIDER The Durabase divider allows you to organize the Durabase area into sections. -
Page 24: Filter
FILTER It is recommended that you replace the filter when the water filter indicator icon turns on or your water dispenser or ice maker performance decreases noticeably. After changing the water filter cartridge, reset the water filter status display and indicator icon by pressing and holding the Filter Reset button for 3 seconds. -
Page 25: Care And Cleaning
NOTE: Some models have LED interior lighting and service should be performed by a qualified technician. NOTE: Not all appliance bulbs will fit your refrigerator. Be sure to replace the bulb with one of the same size, shape and wattage. -
Page 26: Power Interruptions
A CAUTION: DO NOT place fingers inside of cover. Lamp may be hot. • When you are finished, reconnect the refrigerator to the electrical source and reset the controls. (Thermostat, Refrigerator Control, and or Freezer Control, depending on the model) to the desired setting. -
Page 27: Ice Maker
Personal Injury Hazard Avoid contact with the moving parts of the ejector mechanism, or with the heating element that releases the cubes. DO NOT place fingers or hands on the automatic icemaking mechanism while the refrigerator is plugged in. Icemaker Cube Size... -
Page 28: Normal Sounds You May Hear
2 minutes that are dispensed after refrigerator installation. • This is also necessary if the refrigerator has not been used for a long time. • Never store beverage cans or other foods in the ice bank for the purpose of rapid cooling. -
Page 29: Installation Instructions
To determine how much tubing you need: measure the distance from the water valve on the back of the refrigerator to the water supply pipe. Then add 8 feet (2.4 m). Be sure there is sufficient extra tubing (about 8 feet [2.4 m] coiled into 3 turns of about 10" [25 cm] diameter) to allow the refrigerator to move out from the wall after installation. - Page 30 NOTE: Be sure there is sufficient extra tubing (about 8 feet coiled into 3 turns of about 10" diameter) to allow the refrigerator to move out from the wall after installation. 7. CONNECT...
-
Page 31: Shutoff Valve
THE TUBING TO THE REFRIGERATOR NOTE: • Before making the connection to the refrigerator, be sure the refrigerator power cord is not plugged into the wall outlet. 1. Remove the plastic flexible cap from the water valve. 2. Place the compression nut and ferrule (sleeve) onto the end of the tubing as shown. -
Page 32: Understanding Sounds You May Hear
• Rattling noises may come from the flow of refrigerant, the water line, or items stored on top of the refrigerator. • Your refrigerator is designed to run more efficiently to keep your food items at the desired temperature. - Page 33 Adding food and opening the door warms the refrigerator. It is normal for the refrigerator to run longer in order to cool the refrigerator back down. Adding a large amount of food warms the refrigerator. See the Food Storage Guide section on page 18.
- Page 34 The refrigerator is defrosting. It is more humid than normal. REFRIGERATOR SEEMS Check if... The sounds may be normal for your refrigerator. THE ICEIMIAKER IS NOT PRODUCING Check if... The freezer temperature is cold enough to produce ice. Door left open.
- Page 35 The more the door is opened, the faster the humidity builds up, and the more warm air the refrigerator must cool. In order to keep the refrigerator cool, try to get everything you need out of the refrigerator at once, keep food organized so it is easy to find and close the door as soon as the food is removed.
-
Page 36: Spanish Version
For expert troubleshooting For repair- lawn and garden equipment, no matter who made it, no matter who sold it! For the replacement parts, accessories owner's manuals that you need to do-it-yourself. For Sears professional and items like garage door openers and water heaters. 1..800-4..MY..H0 M E®...
Need help?
Do you have a question about the TRIO 795.785 and is the answer not in the manual?
Questions and answers