Table of Contents
Advertisement
E2006 Lennox Industries Inc.
Dallas, Texas, USA
RETAIN THESE INSTRUCTIONS
FOR FUTURE REFERENCE
WARNING
Improper installation, adjustment, alteration, ser-
vice or maintenance can cause property damage,
personal injury or loss of life. Installation and ser-
vice must be performed by a qualified installer or
service agency.
IMPORTANT
This unit must be matched with an indoor coil as
specified in Lennox' Engineering Handbook.
Coils previously charged with R−22 must be flu-
shed.
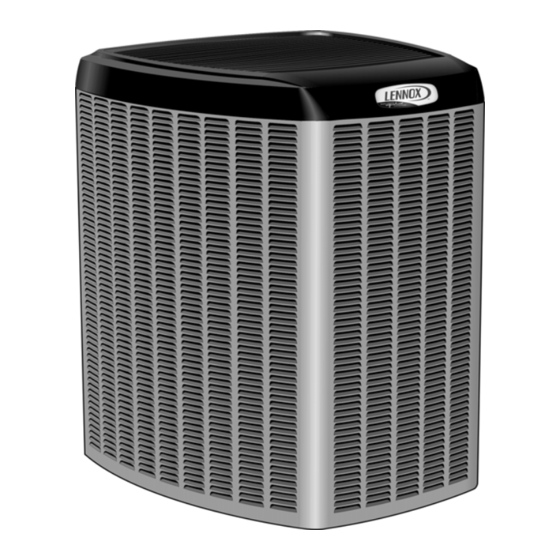
XC15 Outdoor Unit
XC15 outdoor units use R−410A refrigerant. This unit must
be installed with a matching indoor coil and line set as out-
lined in the Lennox Engineering Handbook. XC15 outdoor
units are designed for use in expansion valve (TXV) sys-
tems only. Refer to the Lennox Engineering Handbook for
expansion valve kits which must be ordered separately.
CAUTION
Physical contact with metal edges and corners
while applying excessive force or rapid motion can
result in personal injury. Be aware of, and use
caution when working near these areas during
installation or while servicing this equipment.
Shipping and Packing List
1 − Assembled XC15 outdoor unit
1 − Bushing (for low voltage wiring)
2 − Grommets (for liquid and vapor lines)
Check equipment for shipping damage. If you find any
damage, immediately contact the last carrier.
01/06
*2P0106*
INSTALLATION
INSTRUCTIONS
XC15 Series Units
CONDENSING UNITS
505,095M
01/06
Table of Contents
. . . . . . . . . . . . . . . . . . . . . . . . . . . . . . . . .
. . . . . . . . . . . . . . . . . . . . . . . . . . . . . . . . . . . . .
. . . . . . . . . . . . . . . . . . . . . . . . . . . . . . . . . . . . . . .
. . . . . . . . . . . . . . . . . . . . . . . . . . . . . . . . .
. . . . . . . . . . . . . . . . . . . . . . . . . . . . . . . . . . .
. . . . . . . . . . . . . . . . . . . . . . . . . . . . . . . . . . . .
. . . . . . . . . . . . . . . . . . . . . . . . . . . . . . . . . . . . . . .
. . . . . . . . . . . . . . . . . . . . . . . . . . . . . . . . . . .
General Information
When servicing or repairing HVAC components, ensure
the fasteners are appropriately tightened. Table 1 shows
torque values for fasteners, and for port and valve caps.
Torque Requirements
Part
Service valve cap
Sheet metal screws
Machine screws #8
Compressor bolts
Gauge port seal cap
These instructions are intended as a general guide and do
not supersede national or local codes in any way. Consult
authorities having jurisdiction before installation.
Page 1
. . . . . . . . . . . . . . . . . . . . . . . . . . . . . .
. . . . . . . . . . . . . . . . . . . . . . . .
. . . . . . . . . . . . . . . . . . . . . . . . . . . . .
. . . . . . . . . . . . . . . . . . . . . . . . . . . . . . .
. . . . . . . . . . . . . . . . . . . . . . . . . . . . . . .
. . . . . . . . . .
. . . . . . . . . . . . . . . . . . . . .
. . . . . . . . . . . . . . . . . . . . . . . . . . . .
. . . . . . . . . . . . . . . . . . . . . . . . . . . .
. . . . . . . . . . . . . . . . . . . . . . . . . . . . . .
. . . . . . . . . . . . . . . . . . . . . . . . . . .
. . . . . . . . . .
. . . . . . . . . . . . . . . . . . . . . . . . . . .
Table 1
Recommended Torque
8 ft.− lb.
11 NM
16 in.− lb.
2 NM
16 in.− lb.
2 NM
90 in.− lb.
10 NM
8 ft.− lb.
11 NM
505,095M
*P505095M*
Litho U.S.A.
1
1
2
1
2
3
4
6
9
10
11
11
12
12
13
13
16
18
18
. . . . . . . .
19
19
20
. . . .
20
Advertisement
Table of Contents

Subscribe to Our Youtube Channel
Related Manuals for Lennox XC15 Series


Summary of Contents for Lennox XC15 Series
-
Page 1: Table Of Contents
(TXV) sys- When servicing or repairing HVAC components, ensure tems only. Refer to the Lennox Engineering Handbook for the fasteners are appropriately tightened. Table 1 shows expansion valve kits which must be ordered separately. -
Page 2: Unit Dimensions
Unit Dimensions − inches (mm) and Parts Arrangement 9−1/4 (457) CONTACTOR (234) SYSTEM OPERA- OUTDOOR FAN TION MONITOR RUN CAPACITOR COMPRESSOR AND SOUND DISCHARGE LINE REDUCTION COVER (SEE PAGE 20 FOR VAPOR VALVE AND 13−1/2 COVER GAUGE PORT INFORMATION) (343) VAPOR LINE COMPRESSOR TERMINAL... -
Page 3: Removing Panels
48" (1219 mm) clearance required on top of unit. available from address shown below, or contact Maximum soffit overhang is 36" (914 mm). your supervisor. Figure 2 Lennox Industries Inc. P.O. Box 799900 Dallas, TX 75379−9900 CAUTION Slab Mounting... -
Page 4: Electrical
Remove and reinstall the access panel as described in fig- Removing/Installing Louvered Panels ure 4. IMPORTANT! Do not allow panels to hang on unit by top tab. Tab is for alignment and not designed to support weight of panel. Access Panel Panel shown slightly ro- tated to allow top tab to exit (or enter) top slot for... - Page 5 LED codes. Table 8 (see page 17) describes LED op- 3. Connect conduit to the unit via the bottom hole using eration when the module is incorrectly wired and the a proper conduit fitting. action required to correct the problem. Typical Wiring Diagram Figure 7 Page 5 XC15 SERIES...
-
Page 6: Refrigerant Piping
(sweat connections) to the indoor coil Outside Unit Placement and Installation (flare or sweat connections). Use Lennox L15 (sweat, non− flare) series line sets as shown in table 2 or use field−fabri- cated refrigerant lines. Valve sizes are also listed in table 2. - Page 7 8 feet Strap the vapor line to the joist or rafter at 8 ft. intervals then strap the liquid line to the vapor line. METAL SLEEVE FLOOR JOIST OR ROOF RAFTER TAPE OR WIRE TIE Figure 10 Page 7 XC15 SERIES...
- Page 8 Refrigerant Line Sets: Transition From Vertical To Horizontal ANCHORED AUTOMOTIVE HEAVY NYLON MUFFLER-TYPE WIRE TIE HANGER WALL WALL STUD STUD Strap Liquid Strap Liquid Line Line To Va- To Vapor Line por Line LIQUID LIQUID LINE LINE METAL VAPOR LINE − WRAPPED METAL VAPOR LINE −...
-
Page 9: Flushing Existing Line Set And Indoor Coil
Take care to empty all existing traps. Polyol and close the liquid line valve. ester (POE) oils are used in Lennox units charged Pump all of the existing R−22 refrigerant back into with R−410A refrigerant. Residual mineral oil can the outdoor unit. -
Page 10: Refrigerant Metering Device
See the indoor coil installation instructions 6. Set the recovery machine for liquid recovery and start and the Lennox Engineering Handbook for approved TXV the recovery machine. Open the gauge set valves to match−ups and application information. Table 2 (on... -
Page 11: Manifold Gauge Set
1. Remove service port cap with an adjustable wrench. 2. Connect gauge to the service port. To outdoor coil 3. When testing is completed, replace service port cap. Figure 15 Tighten finger tight, then tighten an additional 1/6 turn. Page 11 XC15 SERIES... -
Page 12: Leak Testing
Vapor Line (Ball Type) Service Valve Leak Test with Electronic Leak Detector 1. Connect an R−410A manifold gauge set high pressure Vapor line service valves function the same way as the oth- hose to the vapor valve service port. (Normally, the er valves;... -
Page 13: Start−Up
1. Rotate fan to check for frozen bearings or binding. 4. Evacuate the system again. Then, weigh the appropri- 2. Inspect all factory− and field−installed wiring for loose ate amount of R−410A refrigerant (listed on unit name- connections. plate) into the system. Page 13 XC15 SERIES... - Page 14 Charge Using the Approach Method Outdoor IMPORTANT Temp. >65ºF (18ºC) The following procedure is intended as a general guide and Charge adjustments may be required to allow for is for use on expansion valve systems only. For best re- longer line sets and coil volumes. Check for proper sults, outdoor temperature should be 70°F (21°C) to 80°F charge using charging information in this manual.
- Page 15 2. Use a temperature/pressure chart for R−410A (table 7) *Four−sided unit shown. to determine the saturation temperature for the liq- uid line pressure reading and record that in the space Figure 17 provided in table 6. Page 15 XC15 SERIES...
-
Page 16: System Operation
A drier is factory−installed in each XC15 unit. A replace- room thermostat and on select White-Rodgers room ther- ment drier is available from Lennox. Refer to Lennox Re- mostats, an icon on the display will flash. Either will flash at pair Part Program. - Page 17 High pressure switch is open and requires manual reset. Open circuit in compressor supply wiring or connections. Unusually long compressor protector reset time due to extreme ambi- ent temperature. Compressor windings are damaged. table continued on next page Page 17 XC15 SERIES...
-
Page 18: Maintenance
System Operation Monitor LED Troubleshooting Codes Status LED Condition Status LED Description Status LED Troubleshooting Information Yellow Alert" Flash Open Start Circuit − Current Run capacitor has failed. Code 6* only in run circuit Open circuit in compressor start wiring or connections. Compressor start winding is damaged. -
Page 19: Xc15 Start−Up And Performance Check List
If your system is so equipped, ask your 1. Air Filter Ask your Lennox dealer to show you where dealer for maintenance instructions. your indoor unit’s filter is located. It will be either at the 5. -
Page 20: Thermostat Operation
(preferably twice a year, but at Programmable Thermostats least once a year) to inspect and service your air con- Your Lennox system controlled ditioning or heat pump system. programmable thermostat. These thermostats provide the...
Need help?
Do you have a question about the XC15 Series and is the answer not in the manual?
Questions and answers