Table of Contents
Advertisement
Quick Links
Advertisement
Table of Contents

Related Manuals for ZMODO Funlux


Summary of Contents for ZMODO Funlux
-
Page 3: Table Of Contents
Before using this product..........1.1 1.1 Understanding the manual ....................1.1 How this manual is organized ....................1.1 Manual Conventions ........................ 1.2 1.2 Safety Precautions ....................... 1.3 1.3 Minimum Requirements ....................1.3 Product Introduction ........... - Page 4 From your Mobile Device (via Zsight) ................4.30 From your DVR (via USB) ...................... 4.30 Support ................ 5.31 5.1 Troubleshooting ......................... 5.31 5.2 Warranty & RMA ........................ 5.33 5.3 Funlux Support ........................5.37 ...
-
Page 5: Before Using This Product
For further instructions, please visit our knowledge base at http://kb.zmodo.com/ or our website at http://www.zmodo.com/support-software. • Chapter 1 Before using this product... -
Page 6: Manual Conventions
DVR. • Chapter 5 Support This chapter covers common troubleshooting issues that can be easily resolved, warranty information, and information for Funlux support and other resources. Please refer to this chapter before calling technical support. Manual Conventions This manual uses several symbols, typographies and abbreviations that carry specific definitions. -
Page 7: Safety Precautions
Safety Precautions Please read and follow these instructions for your safety while operating and setting up the equipment. • Use only the provided power adapter to power the DVR. • Make sure that the rear power switch is off before unplugging or plugging the DVR. -
Page 8: Product Introduction
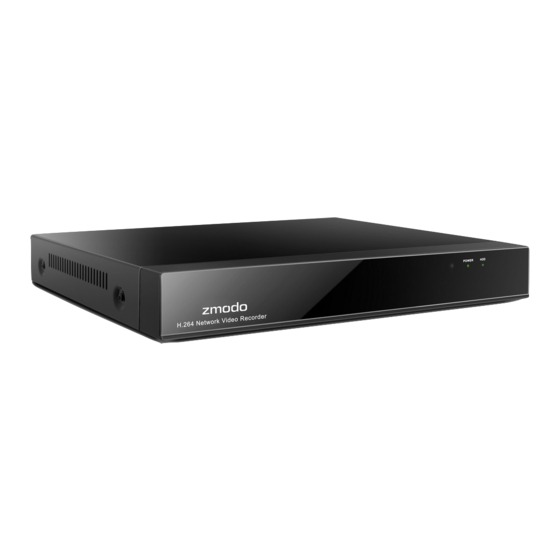
Product Introduction Product Overview This Funlux DVR system is specially designed to safeguard your home or business by providing cutting-edge video surveillance and monitoring. Instant email notifications and multiple live streaming and recording options make your DVR available and accessible anywhere at anytime. -
Page 9: Technical Specifications
Technical Specifications DVR (ZMD-DX-SAN8) Video Input (Analog) 8 channel BNC HDMI x1 (1920x1080@60Hz) Video Output VGA x1 (1920x1080@60Hz, 1280x1024@60Hz, 1024x768@60Hz) BNC x1 (PAL: 704x576, NTSC: 704x480) Compression H.264 Multiple Stream Yes 960H: 12 frames/sec (NTSC) / 12 frames/sec (PAL) D1: 20 frames/sec (NTSC) / 20 frames/sec (PAL) Recording Resolution HD1: 20 frames/sec (NTSC) / 20 frames/sec (PAL) CIF: 30 frames/sec (NTSC) / 25 frames/sec (PAL) -
Page 10: Compatibility
Weight 2.18lbs (without HDD) Language Support 11 languages Compatibility This DVR is compatible with all Funlux BNC surveillance cameras. Cameras can be purchased at: http://www.cctvhotdeals.com/. When purchasing cameras, we recommend that you check under the specifications to make sure that the video output type is "BNC". -
Page 11: Package Contents
Package Contents Before proceeding with any setup procedures, please make sure that your package includes the following contents: • 8-Channel Security DVR (ZMD-DX-SAN8) • USB Mouse • 12V 3A Power Adapter • Quick Installation Guide • Case Screws (not pictured) •... -
Page 12: Getting Familiar With Your Dvr
Getting Familiar with your DVR Main Functions & Features Live Remote Viewing Access your DVR remotely from anywhere in the world on your Android or iOS mobile device. Intelligent Recording Mode Intelligent recording identifies surveillance footage triggered by critical events such as motion detection and alarm triggering and optimizes storage by increasing recording quality when a critical event occurs. -
Page 13: Rear Panel
Rear Panel Product Introduction... -
Page 14: Mouse
Mouse Product Introduction 2.10... -
Page 15: First-Time Setup
First-time Setup DVR Installation HDD Installation IMPORTANT: Your system will not be preinstalled with a hard disk drive (HDD) unless the system was specifically purchased with an included HDD. You may install a SATA HDD between 250GB and 2TB of storage after receiving your system. - Page 16 1. Make sure your DVR is unplugged from its power source and slide the top panel off of the DVR. 2. Connect the SATA power and data cables from the DVR to the corresponding ports on your HDD (as shown): First-time Setup...
- Page 17 3. Once connected, place the HDD into the DVR with the cables placed as shown. IMPORTANT: Make sure that the cables do not come into contact with the cooling fan! 4. Holding the hard drive and the DVR, gently turn it over and line up the holes on the hard drive with the holes on the DVR.
- Page 18 5. Slide the DVR panel back on and locate the 7 black Phillips screws (found in kit). Apply the screws in the three holes on the back panel, and the two holes on the sides. 6. When you power on your system, you will see a popup asking you to format your HDD.
-
Page 19: Connecting Your Dvr
7. The system will begin formatting the HDD, and will automatically reboot once the formatting is complete. Connecting your DVR 1. Connect your analog cameras directly to the system with the correct cables as shown. For detailed instruction, please refer to 3.2 Camera Installation. 2. -
Page 20: Connecting The Display
Connecting the Display This DVR can support up to three different display options: HDMI, VGA and BNC. The following steps provide instructions that will ensure that you have a working HDMI or VGA connection: 1. Make sure that you have the proper equipment. You will need a display and a corresponding video cable. - Page 21 1. On the output BNC connectors on the rear panel of your DVR, you will see two protrusions (one on each side of the connector). On the male BNC end of your cable, you will see two slots. Line up the slots with the protrusions, as shown in the picture below: 2.
-
Page 22: Connecting An External Alarm
Because of this, the following instructions are not comprehensive, and will have to be supplemented by specific instructions for your desired external alarms/systems. Please refer to our knowledge base (http://kb.zmodo.com/) for more information. Prior to installation, please locate the alarm input and output ports on the back panel of your DVR. -
Page 23: Connecting The Cameras To The Dvr
Connecting the cameras to the DVR 1. Connect the power adapter to the outlets. Connect the camera power adapter to a power outlet near the DVR. In most cases, you will have a 4-port power splitter cable. If so, connect the female end of the 4-port splitter into the male end of the power adapter. -
Page 24: Connecting A Ptz Camera
Connecting a PTZ Camera 1. Locate the RS-485 connectors on the back panel of your DVR. 2. Locate the positive wire on your PTZ camera. Please refer to the manual provided with your camera to determine the wires. 3. Push the orange tab labeled 'A' on the PTZ port (with your finger nail or pen) in order to open the spring-loaded connection. -
Page 25: Dvr First-Time Startup
bottom of the camera. Rotate until the camera is securely attached to the mounting bracket. 6. Mount the camera to the wall. Align your mounting bracket with the anchors and slowly screw the bracket onto the wall with the 3 screws provided. 7. -
Page 26: Startup Guide Explained
Startup Guide Explained Network Time Protocol: When enabled, the DVR system will automatically set the date and time settings through the internet connection. If you do not enable this, you will need to manually input the date and time in the corresponding forms. -
Page 27: Home Screen Introduction
Home Screen Introduction The home screen is the main screen of your DVR, displaying the live-video stream from the connected cameras. There are several viewing options available locally on your DVR. By default it will be set to the 9-channel view with the live-video streams from all eight camera feeds. -
Page 28: Event Notification
Event Notification When your cameras have detected an event (see 4.1 Main Menu Detailed – Event Management) a notification will appear in your quick-menu. Clicking on the icon will bring you to clips recorded at the time of the events. Single View This option enables you to quickly view one camera feed in full-screen. -
Page 29: Using The Dvr
Using the DVR Main Menu Detailed Use the main menu to access all of the full features of the DVR. The following chapter will explain how to navigate and perform the features through the menu. General Settings Use the General Settings menu to manage accounts, change the date & time, view the system events log, view hard disk information, change PTZ settings, view and upgrade your firmware and restore your device to factory settings. - Page 30 The system can support up to 16 accounts, with two different account types: Administrator: Has full access to all features of the DVR and full permission to change all settings. Operator: Can only view the live-video stream. Managing your user accounts by simply highlighting a user account from the menu and selecting a function to perform.
- Page 31 System Log The DVR will provide notifications when certain events occur. Such events could be, but are not limited to: a missing hard drive or hard drive failure, activated motion sensors, activated alarms, etc. Use this menu to review the system log of all event notifications.
- Page 32 Disk Drive Info This menu allows you to review important HDD information, format HDD's and change it's settings. Hard Disk Drive Full Defines how the DVR will behave when the HDD is full. When the HDD has reached its storage capacity, the DVR will either stop recording or overwrite the older playback files.
- Page 33 PTZ Settings Channel Select the channel that your PTZ camera is connected to. Protocol Refers to the language of communication between your DVR and camera. Address This allows the DVR to identify the different PTZ cameras connected to the device. Refer to your camera's manual for specific instructions on changing the address.
- Page 34 System Settings Use this menu to view and change basic settings and information of the DVR. From this menu, you may enable the startup guide, change the display resolution and video standard, view system information, upgrade the DVR firmware and reset the system to factory default settings.
- Page 35 Help&FAQ Funlux offers comprehensive support for our users. This page provides links to some of our resources that will help guide you to a maximal experience of our products. Use a QR-code scanner on your mobile device and scan the QR-codes...
-
Page 36: Video Settings
Video Settings Display Settings The DVR offers several options to best customize the content displayed on the home-screen of your DVR. Channel Select a channel display to customize. Each channel can display a specific channel name and the current time. IMPORTANT: When changing the settings on a channel, press [Save] before editing another channel or exiting the page otherwise all changes will be lost. - Page 37 Video Stream Settings Adjusts the video quality, frame rate, resolution and streaming bit rate Channel Choose the channel that you would like to change the settings for. IMPORTANT: When changing the settings on a channel, press [Save] before editing another channel or exiting the page otherwise all changes will be lost. Local Video Stream Changes the video streaming settings for devices that are connected to the DVR locally (devices that are connected to the same internet connection as the DVR).
- Page 38 Video Mask The DVR allows you to mask / hide certain areas of your camera feed from recording and monitoring. To create an area to mask you must first select the channel to edit and select the draw tool. Select an area by clicking and dragging down and to the right with your cursor.
-
Page 39: Network Settings
Network Settings Basic Settings Selecting DHCP will allow the DVR to manually configure the IP address and network parameters. The settings on this page enable access to the DVR over the internet. Unless you are an advanced user, we do not recommend that you change these settings. These definitions are not sufficient for manual networking and configuration. - Page 40 DDNS NOTE: For advanced users only. Router port-forwarding is required. Use this page to set up a DDNS (Dynamic DNS Server) for remote surveillance, please refer to the knowledge base for full instructions. UPNP UPNP (Universal Plug and Play) is a protocol used to establish network connectivity and interaction between devices.
-
Page 41: Event Management
NOTE: The UPNP settings for the device are not the same as the UPNP settings on your router and do not pose the same security risks. NOTE*: For advanced users only. We do not recommend that you change any settings under this page without prior networking knowledge. Event Management This DVR system is specialized for continuous recording, and will automatically mark recordings that are triggered by "critical events"... - Page 42 The intelligent recording profile will automatically manage the recording to optimize storage capacity. During scenes of interest when "critical events" are triggered, the DVR will automatically record in full frames to ensure higher quality. During stationary scenes, the DVR will record at a lower framerate to optimize storage capacity.
- Page 43 IMPORTANT: When changing the settings on a channel, press [Save] before editing another channel or exiting the page otherwise all changes will be lost. 1. Choose a channel to edit. Select a channel under the dropdown menu next to [Channel]. 2.
- Page 44 f. "Send E-mail" The DVR will send an email notification. The DVR comes with predefined server settings for common service providers, however you may need to specify your own settings if your provider is not included. Choose an email address using the specified service provider to send the email and input the corresponding password to the existing email address.
- Page 45 1. Choose an alarm to edit. In the dropdown menu, choose an alarm and select [On] to enable the alarm input. Choose the type (normally open or normally closed) that describes your specific alarm. You may need to refer to the instruction manual provided with your device.
- Page 46 Video Loss The camera's video could be lost due to various reasons, and the potential consequences could be serious. Use this menu to customize system response when video is lost. Please follow the following instructions to configure your DVR's response to a lost video signal: 1.
-
Page 47: Camera Controls
c. "Alarm Output" The DVR will activate any external alarms that have been connected to the back panel (see: 3.1 DVR Installation – Connecting an External Alarm). d. "Alarm Duration" will adjust how long both the buzzer and the alarm output will sound after motion is detected. -
Page 48: Zoom
Image Change the image orientation. "Flip" will flip the image vertically, Orientation "Mirror" will flip the image horizontally, and "Flip and Mirror" will apply both functions. Adjust the brightness settings of the camera. Adjust the color saturation of the camera. Adjust the contrast settings of the camera. -
Page 49: Snapshot
Snapshot You can quickly capture a snapshot at any time; in order to do so, click once on the [Snapshot] button in the camera functions bar. A thumbnail will appear on the bottom left of your screen. Access the snapshots gallery in the quick menu (see 3.4 Home Screen Introduction). -
Page 50: Playback
Playback Access and review your surveillance footage from this menu. Video Playback 1. Select the channel of your recording on the right panel under "Channel". When you select a channel, it will be highlighted in blue. 2. Select the month and year on the calendar in the right panel. The days that are highlighted in blue will have recordings available. -
Page 51: Ptz Control
PTZ Control These control settings can only be used for cameras that have pan, tilt and/or zoom features (PTZ). Directional Arrows Move the camera in the direction of the arrow Start the PTZ patrolling function (the camera will automatically patrol a certain movement path). - Page 52 Select Patrol Line Choose the preset patrol path for the camera to follow. Select Preset Select a preset location, and press OK to move the camera to that location. Dwell Time Select the duration that the camera will remain in one preset location before it patrols to the next.
-
Page 53: Remote-Viewing Setup
Remote-viewing Setup Remote viewing allows you to access your DVR from any location in the world for unprecedented surveillance versatility using any Android or iOS mobile device with our 'Zsight' application installed. With our revolutionary user-friendly setup, we have eliminated the need for complex port-forwarding procedures and other networking hassles. - Page 54 1. Locate the DVR information on the outer casing of your system. 2. Connect your mobile device to the same local network as your DVR. Please make sure your mobile device is connected to the internet through the same wireless router as your DVR. 3.
- Page 55 4. Add a new device to your account. Once you have logged in, you will enter a 'Device List' page. Tap the [+] on the upper right hand corner to open the 'Add Device' menu. 5. Add your DVR by scanning the QR code found in step 1. Select the [Scan QR Code] option as shown in the image, and a QR code scanner will open.
- Page 56 6. Name your device. When the device has been successfully added, you will be automatically prompted to name your device. Choose any unique name for your device to distinguish it in your device list. 7. Select your system from the device list to view the live video stream. back to the 'Device List' section and select your device from the list.
- Page 57 Zsight app on the desired device and log in to your account from step 1. You can also share your device with anyone with a Zsight user account by accessing the settings menu for your device in the Zsight app. Congratulations, and thank you for choosing Funlux! 4.29...
-
Page 58: Updating Your Dvr
Updating your DVR From your Mobile Device (via Zsight) Please refer to the following instructions to upgrade the firmware of your DVR from your mobile device. 1. Make sure that both your mobile device and your DVR have a secure, consistent network connection. -
Page 59: Support
Support Troubleshooting Most problems encountered are common problems and are easily correctible. For your convenience, please refer to the following table before calling our Funlux Technical Support. Common Problem Possible Causes Solution The system won't The cables are not 1. Make sure that the power brick is properly turn on. - Page 60 Zsight account. It is possible that your device is account. currently linked to another account. Please email support@zmodo.com providing your Device ID and we will promptly resolve the issue. My camera can't The camera does not In many cases, cameras do not support a...
-
Page 61: Warranty & Rma
Non-qualified and non-conforming returns are not included in Funlux RMA policy and, if returned, will be rejected or subject to a restocking fee of up to 15% at Funlux's sole discretion. If the non-qualified or non- conforming package is rejected, the party who returned the item(s) will be billed for return shipping cost of the item(s). - Page 62 After the initial 48-hour hold expires, the customer should see no charge placed on the credit card unless the RMA items are not returned to Funlux within 25 calendar days. Should 25 days pass and the original product is not yet received by Funlux, we will charge the full amount that was authorized on the credit card.Subject to availability, Funlux will ship product on the same day the RMA is generated.
- Page 63 Funlux is unable to exchange any item for an item of a different type unless the following circumstance applies: 1.
- Page 64 Under no circumstances shall Funlux be liable in any way to the user for damages, including any lost profits, lost savings or other incidental or consequential damages arising out of the use of, or inability to use the Funlux products.
-
Page 65: Technical Support
Funlux Support Online Resources For full instructional manuals, software downloads, and more, please visit: http://www.zmodo.com/support-software For detailed and specific instruction, please our frequently updated knowledge- base: http://kb.zmodo.com Technical Support If you ever have any problems setting up or using this product, call our...
Need help?
Do you have a question about the Funlux and is the answer not in the manual?
Questions and answers