Parrot Asteroid Smart User Manual
Hide thumbs
Also See for Asteroid Smart:
- Quick start manual (152 pages) ,
- User manual (102 pages) ,
- Installation manual (13 pages)
Table of Contents
Advertisement
Quick Links
Advertisement
Table of Contents

Related Manuals for Parrot Asteroid Smart


Summary of Contents for Parrot Asteroid Smart
- Page 1 User guide...
-
Page 2: Table Of Contents
Installing the ISO cable ...........................................13 Installing the USB cables ...........................................13 Basic operations ...........................................13 Getting started ...............................15 Turning the Parrot ASTEROID Smart on / off ...........................................15 Home screen ...........................................15 Personalizing the home screen ...........................................15 Changing settings ...........................................16 Connecting a phone via Bluetooth ...........................................16... - Page 3 Using the Parrot ASTEROID whilst on a call ...........................................20 Music ...............................22 Using vocal music search ...........................................22 Screen commands ...........................................22 iPod ...........................................23 USB storage device ...........................................23 SD card ...........................................23 Audio player connected via Bluetooth ...........................................24 Analogue audio player ...........................................24 Radio ...........................................25 Internet ...............................27...
- Page 4 Pre-installed applications ...............................45 Calculator ...........................................45 Diary ...........................................45 General information ...............................48...
-
Page 6: Before You Begin
SD card An SD card is included with the Parrot ASTEROID Smart. It allows you to play music tracks and is mandatory in order to use applications. Note: The iGO application is provided for free with the Parrot ASTEROID Smart. The necessary navigation datas are stored on the provided SD card. -
Page 7: Steering Wheel Control Interface
A steering wheel control interface can be used to connect your vehicle’s steering wheel controls to your Parrot ASTEROID Smart. With this interface, you will be able to make phone calls via the steering wheel controls while keeping your hands on the wheel. Refer to our website www.parrot.com... -
Page 8: Installation
If you need to use screws, do not allow them to come into contact with any power cable. Install the Parrot ASTEROID Smart only on vehicles with a 12 V battery. If your vehicle (e.g. : truck) has a 24V battery, the use of a step-down converter is essential. -
Page 9: Installation Diagram
Example of antenna adaptor -DIN / Fakra (not provided) connector Installation diagram Installation using the holder 1. Loosen the 4 screws to remove the Parrot ASTEROID Smart holder. 2. Insert the holder into the dashboard. To do so, bend the tabs 90 degrees. Installation... -
Page 10: Installation Using The Side Screw Holes
1. Loosen the 4 screws to remove the Parrot ASTEROID Smart holder. 2. Remove the two side brackets. 3. Position the Parrot ASTEROID Smart so that its screw holes are aligned with the screw holes of the bracket. 4. Tighten as many screws as necessary depending on the model of your vehicle. Only use the provided screws. -
Page 11: Connecting The Parking Brake Lead
2 hours without handling it. Note: Once the GPS receiver is connected to the Parrot ASTEROID Smart, the GPS receiver light becomes white while searching for a GPS signal. The light blinks as soon as a signal is detected. -
Page 12: Installing A Rear View Camera
Installing a rear view camera If you are to use the Parrot ASTEROID Smart with a rear view camera (not provided), the orange cable on the Parrot ASTEROID Smart ISO cable will detect when the gearstick is moved to "reverse". Connect this cable to the one providing power to the reverse lamp of your vehicle in order to display the rear view camera image when backing your vehicle. -
Page 13: Installing The Iso Cable
Connect the USB cables to the Parrot ASTEROID Smart. We recommend you connect all audio cables to the Parrot ASTEROID Smart even if you do not plan on using them. Route the audio cables to a suitable location in your vehicle such as the glove box or arm rest compartment. - Page 14 To replace the faceplate, insert the lower part first and then press the top until you hear a click. Installation...
-
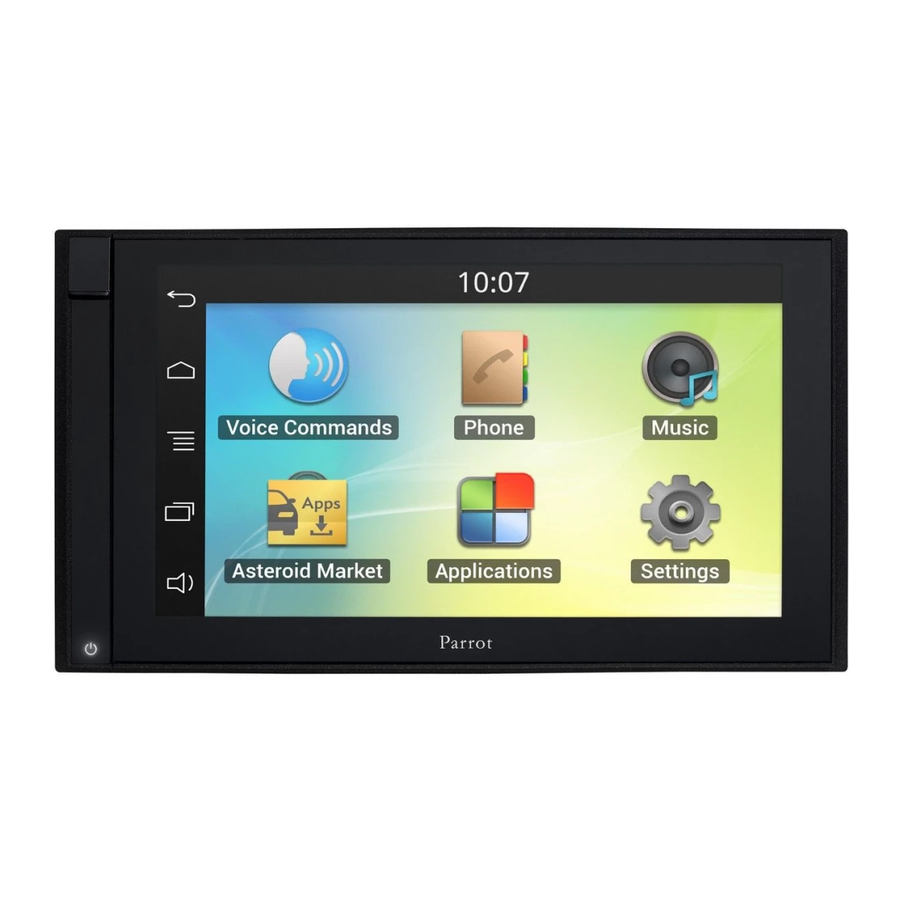
Page 15: Getting Started
Turning the Parrot ASTEROID Smart on / off Hold down the button for 2 seconds to turn the Parrot ASTEROID Smart on / off. Home screen Slide your finger horizontally to the left. You will discover more space for adding functions shortcuts. -
Page 16: Changing Settings
Parrot ASTEROID Smart and to consult the specific pairing procedures for the most common phones : www.parrot.com/uk/compatibility. If you are using the Parrot ASTEROID Smart with your phone for the very first time, you must initially pair both devices. Once your telephone is paired with the Parrot ASTEROID Smart, the 2 devices will automatically connect when they are turned on (as well as Bluetooth®... -
Page 17: Synchronising The Phonebook
You can receive calls to the main or secondary phones. Only the phonebook for your main phone may be accessed through the Parrot ASTEROID Smart. You can only make calls using the main phone. However, you can easily switch between the connected phones. To do so : 1. -
Page 18: Phone
Receiving a call An incoming call is indicated by a ringtone. If you want to answer this call, tap the green button on the Parrot ASTEROID Smart screen. Then tap the red button to end the call. If you want to refuse this call, tap the red button. -
Page 19: Consulting The Call History
If there are several phone numbers associated to the contact you want to call, you can specify the type of number: - Home - Work - Mobile - Other - At home - At work - Cellular - General - Office - Cell - Default - At office... -
Page 20: Manage Favourite Contacts
If you want to switch back to the kit, press the button again. When the ignition is turned off while on call, the window below is displayed. To confirm the shut down of the Parrot ASTEROID Smart and to transfer the communication on your phone, select Accept shutdown. - Page 21 Press the button to reactivate it. Managing voice mail The Parrot ASTEROID Smart allows you to send DTMF while on call. To do so, press on > The numeric keypad is displayed. Press on to exit the numeric keypad screen.
-
Page 22: Music
Note: Several minutes of loading may be necessary when connecting your audio peripheral (USB / SD / iPod) to the Parrot ASTEROID Smart for the first time, particularly if you are using audio peripheral with a large capacity or containing many audio files. This loading time will allow your audio files to be accessible via voice recognition. -
Page 23: Ipod
(Audio/Video Remote Control Profile). iPod Note : If you are using the Parrot ASTEROID with the iPod Mini, iPod Photo, iPod 3G and iPod Shuffle, then connect your iPod to the Parrot ASTEROID using the Jack / Jack cable. -
Page 24: Audio Player Connected Via Bluetooth
2 different phones without having to disconnect one of them. You can use the Parrot ASTEROID Smart to listen to songs stored on your mobile phone or Bluetooth audio device. To do so, your phone / audio device must support the Bluetooth A2DP profile (Advanced Audio Distribution Profile). -
Page 25: Radio
3. Start playing a song on your audio player. Note : Press the button to mute / unmute the Parrot ASTEROID Smart. Radio To open the radio, press Music > Radio. Note : The default frequency is the one you last listened to. - Page 26 Modifying the radio parameters Press the button and select Settings. AF : Alternative This option allows you to activate / deactivate the RDS scan. The RDS frequency scan allows to change automatically the frequency of the current radio station when the signal becomes too weak. TA : Traffic alert This option allows the Radio source to be automatically activated and selected when the current station starts broadcasting traffic information.
-
Page 27: Internet
Memorise option if you do not want to enter the PIN code each time you use the Parrot ASTEROID Smart with this USB Modem. Note: You will be able to change this setting by selecting Settings > Wireless & networks >... -
Page 28: Connection Via Usb
Connection via USB If you have a telephone that supports 3G connection sharing via USB, connecting your telephone to the Parrot ASTEROID Smart using a USB / micro-USB cable (not provided) will allow for sharing of the telephone's 3G connection. -
Page 29: Using The Asteroid Market
Before starting, you must create your account onASTEROID Market and link this account with your Parrot ASTEROID Smart (see previous sections). You can download an application from your Parrot ASTEROID Smart on the Asteroidmarket site. Note: To reduce data consumption, we recommend you download your applications from the site https://www.parrotasteroid.com/asteroidmarket. -
Page 30: Using The Browser
2. Select an application and then press Download. 3. Select the application and then press Install. Closing an application Exiting from an application on Parrot ASTEROID Smart without closing it does not necessarily stop your consumption of 3D data: Certain applications can operate in background mode. - Page 31 Browsing a Web page To access Web page: 1. Press on the address bar. > The touch keypad appears. 2. Enter the address of the Web page. Note: As you enter the address, the address of related Web pages appear on the screen. Press on an address to directly access this Web page or continue typing.
- Page 32 Press the left or right arrow to go to the previous or next item found. Managing favourites You can store as many bookmarks as you like on your Parrot ASTEROID Smart. To open a bookmark: 1. When a Web page is displayed, press on >...
- Page 33 To display pages widthwise: 1. Press on > More > Settings. 2. Enable Landscape mode. Note: By default the Parrot ASTEROID Smart automatically adjusts the pages to the screen. To disable this option, press > More > Settings > Auto-fit pages. Internet...
-
Page 34: Video
Consequently this function is only available when the vehicle is stationary. To watch a video on the Parrot ASTEROID Smart, park your vehicle in a safe place and set your parking brake or disable the application safety control. -
Page 35: Playback Of A Video Via A Sd Card
Playback of a video via a SD card The Parrot ASTEROID Smart allows you to watch videos stored on a SD card. Only the MP2, MP4, H263, H264, WMV and SPARK formats are supported. 1. Insert the SD card into the appropriate slot. -
Page 36: Settings
Settings > Date & time then check / uncheck the 24-hour format option. You can choose to automatically update the Parrot ASTEROID Smart via the GPS signal. To do so, select Settings > Date & Time and check the Automatic option. -
Page 37: Phone
Option Volume modified System Menus and messages read aloud by the Parrot ASTEROID Smart Multimedia Music Line in Music from an audio player connected via the Jack / Jack cable... - Page 38 Using the Sound stage function Sound stage function allows you to obtain a sound rendering in three dimensions. To use this function, select Settings > AudioFX > Sound stage. You can choose among 4 position settings : for the driver's seat, the passenger's seat, the front seats or all the seats in the car.
-
Page 39: Music
If there are no images included in the tags of your audio files, you can add an image in .jpg format to the corresponding folder. If there are several images in the folder, the Parrot ASTEROID Smart will display the image entitled cover.jpg by preference. -
Page 40: Display
Enable location services The option GPS location allows Parrot ASTEROID Smart to determine your exact position. This information is required when you use geolocation or driving assistance applications. You can enable/disable this option when your Parrot ASTEROID Smart connects to the Settings... -
Page 41: Other Settings
Parrot ASTEROID Smart to determine your exact position. This information is required when you use geolocation or driving assistance applications. You can enable/disable this option when your Parrot ASTEROID Smart connects to the Internet. You can also activate this option by selecting Settings >... - Page 42 > Privacy Settings > Advanced Remove your SD card safely settings > Storage Check the available space on your Parrot ASTEROID Smart and on your SD card Settings > Advanced Change the speech recognition settings (language, filters) settings > Voice Change the speech synthesis settings (engine, language, speech input &...
-
Page 43: Gallery
Gallery Using the gallery To open the gallery, press Applications > Gallery. You photos/videos are filed in albums. The files on your SD card containing photos and videos are also treated as albums and are listed underneath the predefined albums. Press on an album to look at the photos and/or videos in this album. -
Page 44: Defining An Image As Screen Background
1. Select the image. 2. Press on Menu > More > Crop. 3. Slide your finger towards the inside or the outside to resize the cropping tool. Slide the cropping tool to the location you want so you can move it over the part of the photo to be cropped. - Page 45 Pre-installed applications Calculator To carry out calculations: 1. Press on Applications > Calculator. 2. Use the calculator keys displayed on the screen to carry out basic mathematical operations. 3. Press the key > Advanced functions to access the advanced functions. Press on Basic panel to return to the keys.
- Page 46 View Features/use Markers show the days where there are events. Select a day to view the events for this day. Press and hold the day to open an option menu from which you Month view can display the day, the diary or create a new event. Slide your finger up or down the screen to view the previous/ following months.
- Page 47 Hide rejected events invitations. Configure event reminders to create an alert, receive a Alerts and notifications notification or disable event notifications on your Parrot ASTEROID Smart. Ring tone Select the ring tone for the event reminder. Select how long before the event you want to be Default reminder notified.
-
Page 48: General Information
After inspection of the product, Parrot will proceed, at its option, to the replacement or the issue a credit note to the exclusion of any other remedy. - Page 49 Parrot reserves the right to amend or improve the product design or user guide without any restrictions and without any obligation to notify users. As part of our ongoing concern to upgrade and improve our products, the product that you have purchased may differ slightly from the model described in this guide.
- Page 50 Parrot S.A. is under license. Bluetooth QDID : B013841, B013839, "Made for iPod / iPhone / iPad" means that an electronic accessory has been designed to connect specifically to iPod, iPhone or iPad, respectively, and has been certified by the developer to meet Apple performance standards.
Need help?
Do you have a question about the Asteroid Smart and is the answer not in the manual?
Questions and answers