Table of Contents
Advertisement
Advertisement
Table of Contents

Related Manuals for XVision X4


Summary of Contents for XVision X4
- Page 1 X4/X8/X16DVR USERS MANUAL...
- Page 2 User’’ s Manual...
- Page 3 User’’ s Manual Caution and Preventive Tips Take care not to drop the unit or subject the unit to major shocks or jolts. Do not place this unit on an unstable stand, bracket or mount. This unit is designed for indoor use only. Do not place the unit near water or in other extremely humid conditions.
- Page 4 User’’ s Manual Important Information Before proceeding, please read and observe all instructions and warnings in this manual. Retain this manual with the original bill of sale for future reference and, if necessary, warranty service. When unpacking your unit, check for missing or damaged items. If any item is missing, or if damage is evident, DO NOT INSTALL OR OPERATE THIS PRODUCT.
-
Page 5: Table Of Contents
User’’ s Manual Table of Content 1. Overview ........................7 Product Key Features ..................8 Product Application Diagram................9 2. System Setup........................9 Position the Unit....................9 Selecting Video Format..................10 Connecting Devices to the Unit................10 Rear Panel Connections ..................11 3. General System Setup ....................14 Front Panel Introduction ..................15 3.1.1 LED Definition ..................15... - Page 6 User’’ s Manual 4.4.2 To Export Normal Video................30 4.4.3 To Export Event Video ................31 Deleting Recorded Video ...................31 Dome Control.....................32 4.6.1 Dome Connection.................32 4.6.2 Dome Protocol Setup ................33 4.6.3 RS485 Setup ..................33 4.6.4 Dome Controlling Keys.................34 4.6.5 Setting Preset Points ................36 4.6.6 Calling Preset Points ................37 Appendix A: Technical Specifications ................38...
-
Page 7: Overview
X4/X8/X16 DVR includes DVRRemote Lite, the remote viewing software that is a Web-browser plug-in, allows user to view live or recorded video images. The remote software is stored in X4/X8/X16 DVR and deployed over a LAN, WAN or Internet connection to remote Windows-based computers. This simplifies the installation and maintenance of the software components so all remote users are kept up to date. -
Page 8: Product Key Features
X4/X8/X16 DVR –– 16ch Product Key Features The X4/X8/X16 DVR offers advanced features not typically found in standard multiplexers; it integrates the full features of a DVR, multiplexer and video server (by using the software DVRRemote Lite). The key features of X4/X8/X16 DVR are listed as follows. -
Page 9: Product Application Diagram
Position the Unit Position / mount the X4/X8/X16 DVR in a proper place and be sure to power off the unit before making any connections. The placed location should avoid hindering or blocking the unit from airflow. Enough airflow is needed to protect the unit from overheating. -
Page 10: Selecting Video Format
Connecting Short-term Device If you plan to install any short-term devices to the X4/X8/X16 DVR and use them as part of the unit system, such as USB CD-ROM, USB Hard Disk Drive, etc, make sure those devices are connected only after the unit is powered up. -
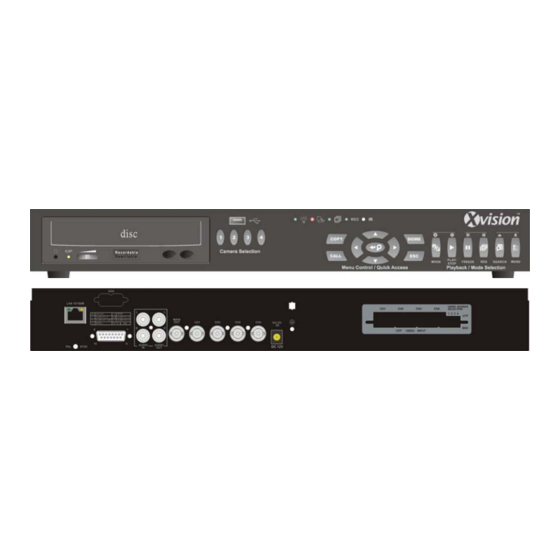
Page 11: Rear Panel Connections
The following figure shows the connectors by name; and followed by the detailed description of each connector. LAN Connector (RJ-45) The X4/X8/X16 DVR is capable of networking. The LAN port opens the door of X4/X8/X16 DVR to Ethernet. USB Connector There is a USB 2.0 port on the rear panel for users to connect external USB... - Page 12 User’’ s Manual Visdeo System Switch It is used for adjusting the video system of the unit. Video Input A group of BNC connectors are available for video input streams from installed cameras. Alarm I/O & RS485 The unit provides an alarm I/O and RS485 port that offers user the flexibility required to connect the unit to the other device.
- Page 13 ALARM In 16 (for 16ch only) 13 ALARM In 8 Power Jack The X4/X8/X16 DVR has a free voltage DC power connection jack. Please connect the power adapter that ships with the unit. NOTE: Use of other power adapter may cause overloading.
-
Page 14: General System Setup
There are plenty of UTP connectors positioned on the rear panel of each unit. Next to these connectors places a switch used to enable or disable this function. Each switch (4ch X4/X8/X16 DVR only has one switch and 4ch/ 8ch X4/X8/X16 DVR has two) has four DIP switches on it. These DIP switches are named by numbers;... -
Page 15: Front Panel Introduction
Power LED (Green) The LED lit during the period when the correct power is connected. Network LED (Green) The LED should be lit when X4/X8/X16 DVR is connected to a network and blink when the data is being transferred. Alarm LED (Red) The LED should be lit during an alarm is triggered. -
Page 16: Function Keys
User’’ s Manual 3.1.2 Function Keys The X4/X8/X16 DVR functional keys on the front panel for normal operation are described as follows. CHANNEL When in both Live and Playback modes, press the CHANNEL key to view the corresponding video in full screen. The number of the CHANNEL keys corresponds to the number of cameras supported by the unit. - Page 17 User’’ s Manual ZOOM/ENTER In OSD menu or selection interface, press the key to make the selection or save settings. In live full screen view mode, press to view a 2 zoom image; press it again to exit zoom mode. COPY In Playback mode, press COPY to select the start and end point of the video you want to export.
-
Page 18: Power Up / Down The Unit
User’’ s Manual Power Up / Down the Unit If you must shut down the X4/X8/X16 DVR for any reason, please use the proper shut down and power up procedures to avoid damaging your DVR unit. To Power Up the Unit... -
Page 19: Entering Osd Setup Menu
Entering OSD Setup Menu The OSD Main menu contains a list of items that are used to configure the X4/X8/X16 DVR. To enter the Main menu, press MENU and then enter Administrator or User password. The Password Verification screen displays as follows. -
Page 20: System Date / Time Setting
User’’ s Manual System Date / Time Setting User can set the current date, time and other OSD parameters in Date/Time menu. The administrator’’ s privileges are required for entering the submenu. In OSD Main menu, select <System Setup> and press ENTER, then select <Date/Time>... -
Page 21: Daylight Saving Time
User’’ s Manual Move to the item and press ENTER, the option starts blinking. Use UP / DOWN keys to change the setting. The default setting is <Y/M/D> in both NTSC / PAL formats. Time Display Mode User can choose to set the time format to <12 hour> or <24 hour>. Use the UP / DOWN keys to change the format. -
Page 22: Record Schedule / Quality Setting
User’’ s Manual Record Schedule / Quality Setting The Record Setup menu allows user to set recording quality, recording schedules, and other recording parameters. To setup the recording quality and schedules, you have to enter the OSD Setup Menu with correct Administrator's password. -
Page 23: Schedule Setup
User’’ s Manual 3.5.2 Schedule Setup The Schedule Setup is used to set the day and night time, or weekend recording schedule. Select <Schedule Setup> from the Record Setup menu and press ENTER; the following menu is displayed. Schedule Setup 1. -
Page 24: To Record Event Video Only
4.1.1 Viewing Modes The X4/X8/X16 DVR supplies user versatile ways of viewing both live and recorded video. Following presents these view formats. Viewing in Full Screen Press any CHANNEL key directly to view the corresponding camera image in... -
Page 25: Digital Zoom
User’’ s Manual Viewing in Multi-window Various multi-window view formats are offered for selecting. To switch between available viewing formats, press MODE repeatedly. 4.1.2 Digital Zoom Users are able to view a 2 full screen in live mode. To view the 2 full screen, follow the steps. -
Page 26: Key Usage In Playback
User’’ s Manual Key Usage in Playback The key usage is slightly changed in playback mode. Following is the key usage found in playback mode. LEFT (Reverse Playback) The key is used to reverse the recorded video while the unit is playing back. Press the key repeatedly to increase the speed of reverse playback by 1 , 2 , 4 , 8 , 16 , or 32 . -
Page 27: Sequence Setup
ESC to stop sequencing. Searching Recorded Video The X4/X8/X16 DVR is capable of searching and playing back recorded video by date and time or events. Entering the specific date and time of the wanted video, the unit will then search for the matched video and play it on the monitor. -
Page 28: Searching By Event
User’’ s Manual NOTE: If there is no available recorded video that matches your specified time and date, the unit starts playback from the next available video. NOTE: The date/time information will be shown on the screen with a DST icon if the Daylight Saving Time function is enabled. ““S”” indicates summer time and ““W””... -
Page 29: Video Export
User’’ s Manual Follow the steps to playback video from Event List. Press and hold UP / DOWN to scroll through the Event List. Press ENTER to play back the selected event record. Press PLAY/STOP to return to live mode. Video Export The unit allows you to export wanted video to an external device, such as a ®... -
Page 30: To Export Normal Video
User’’ s Manual The whole process is described step by step in the following sections. 4.4.2 To Export Normal Video To Export normal video to external device, follow these step: Press SEARCH and play wanted normal video by entering date and time. Note if you are viewing in multiple channel mode, please make sure there is no window displaying in Live mode. -
Page 31: To Export Event Video
User’’ s Manual 4.4.3 To Export Event Video To export event video, follow these steps: Press SEARCH and play wanted event video. To play event video, refer to Section 4.3 Searching Recorded Video. After entering the playback mode, press COPY. The ““ezBurn”” window displays as below figure. -
Page 32: Dome Control
The default of this item is <2000/01/01>. Dome Control X4/X8/X16 DVR allows user to control a dome camera by the front panel. In Live mode, user can press CHANNEL key to display the desired dome camera in full view. To enter Dome Control mode, press the DOME key and press channel key 2 to display the hint screen;... -
Page 33: Dome Protocol Setup
4.6.2 Dome Protocol Setup The Dome Protocol item lists the available dome protocols for communicating with dome cameras connected to the X4/X8/X16 DVR. From the Main menu, select <Camera Setup> and press ENTER. The following menu is displayed. Camera Setup 1. -
Page 34: Dome Controlling Keys
1 to 255. The default ID is 224. Note that no two devices on the same bus should be given the same ID address, or a conflict may occur. The default X4/X8/X16 DVR RS-485 settings are 9600 Baud, 8 Data Bits, 1 Stop Bit and No Parity. - Page 35 User’’ s Manual Zoom In Use to zoom the dome camera in. This function is for user to choose the viewing area, more or less of it. Use to leave dome control mode and return to live and full screen viewing mode.
-
Page 36: Setting Preset Points
User’’ s Manual 4.6.5 Setting Preset Points The X4/X8/X16 DVR allows user to set preset positions; the amount of preset points depends on the dome manufacturer. Follow the steps to set preset points. Press a Channel key to view the corresponding camera in full screen. -
Page 37: Calling Preset Points
User’’ s Manual 4.6.6 Calling Preset Points Follow the steps to call preset points. Press a Channel key to view the corresponding camera in full screen. Then press DOME to enter dome control mode. Press 2 to view the dome control Hint Screen; press 2 again to toggle the Hint Screen. -
Page 38: Appendix A: Technical Specifications
User’’ s Manual Appendix A: Technical Specifications All specifications are subject to change without notice. Specifications 4ch Model 8ch Model 16ch Model Video BNCx4, 1.0Vp-p, BNCx8, 1.0Vp-p, BNCx16, 1.0Vp-p, Input 75 ohm 75 ohm 75 ohm NTSC/PAL switch selectable Video Standard Video Operation Triplex (Live, Record, Playback, Remote, and Internet access) Main Monitor... - Page 39 User’’ s Manual Alarm X4, D-Sub 15 pin X8, D-Sub 25 pin X16, D-Sub 25 pin Alarm Input X1, D-Sub 15 pin X1, D-Sub 25 pin X1, D-Sub 25 pin Alarm Relay Output Alarm Detection N.C./N.O., Programmable Motion Detection 16x12...
-
Page 40: Appendix B: Record Duration
User’’ s Manual Appendix B: Record Duration The record duration relates to recording rate, image quality and HDD capacity. Refer to the following table. NOTE: Record duration times are based on actual tests and represent average file sizes. Performance may vary depending on specific installations and use. Audio recording requires 8 KB per second (or 0.7 GB per day) for data storage. - Page 41 User’’ s Manual 300 GB Internal Storage 28.9 38.6 57.9 18.8 6.25 3.75 28.9 38.6 57.9 37.5 12.5 54.3 72.3 108.5 600 GB Internal Storage 57.9 77.2 115.7 37.5 12.5 57.9 77.2 115.7 108.5 144.7 Number of Days of Recording 720 x 240 @ 50PPS (without Audio)--PAL Recording Recording Recording...
- Page 42 User’’ s Manual Number of Days of Recording 720 x 240 @ 60PPS (without Audio)--NTSC Recording Recording Recording Recording Rate Mode Rate Mode 512K 256K 128K Extended Best Standard Number of bpsDSL bpsDSL bpsDSL Record Quality Cameras Total Images Total Images NTSC NTSC NTSC...
- Page 43 User’’ s Manual 300 GB Internal Storage 13.6 18.1 27.1 27.1 36.1 54.1 17.3 54.3 72.3 108.5 34.5 17.3 108.5 144.7 12.5 69.0 34.5 19.7 289.4 6.25 138.0 69.0 39.4 600 GB Internal Storage 27.1 36.2 54.3 17.3 54.3 72.3 108.5 34.5 17.3...
Need help?
Do you have a question about the X4 and is the answer not in the manual?
Questions and answers