
Related Manuals for Dru Global 60 Triple BF G20


Summary of Contents for Dru Global 60 Triple BF G20
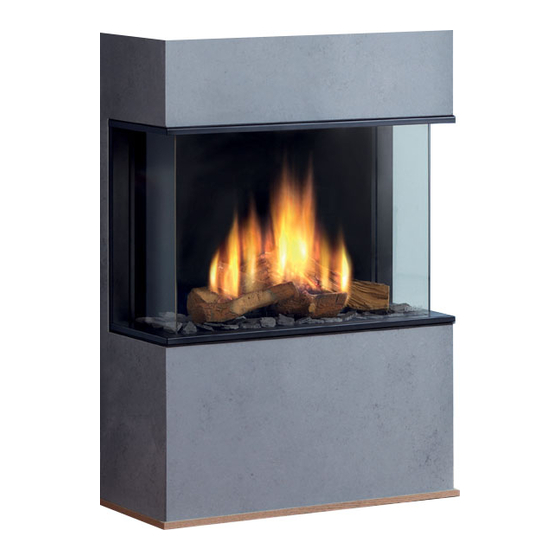
- Page 1 Global 60 Triple BF G20/G25(Natural gas) G31(Propane) Installation manual (UK/IE) Store this document in a safe place...
-
Page 2: Table Of Contents
I NS T AL L A TI O N MA N U A L Contents 1. Introduction 2. CE declaration 3. SAFETY 3.1 General 3.2 Regulations 3.3 Precautions/safety instructions during installation 3.4 Second thermocouple safety 3.5 Oxypilot safety 4. Removing the packaging 5. -
Page 3: Introduction
We hereby declare, that the design and construction method of the gas-fired heating appliance issued by Dru complies with the essential requirements of the gas appliance directive. Product: gas-fired heating appliance Type: Global 60 Triple BF EEC directives: 2009/142/EC Standards: NEN-EN-613... -
Page 4: Safety
I NS T AL L A TI O N MA N U A L 3. SAFETY 3.1 General !Caution Please observe the generally applicable regulations and precautions/safety instruction in this manual. First check the exact technical version of the appliance to be installed in Appendix 2, Table 2. 3.2 Regulations Please install the appliance in accordance with the applicable national, local and constructional (installation) regulations. -
Page 5: Oxypilot Safety
I NS T AL L AT I ON M A N U A L 3.5 Oxypilot safety (if applicable, see Appendix 2, Table 2) If the appliance is provided with an oxypilot safety, you need to know that it will intervene (the pilot flame and the gas supply to the main burner will be switched off) if insufficient combustion air (oxygen) is supplied and/or if the discharge system has insufficient thermal draught. -
Page 6: Placing The Appliance
I NS T AL L A TI O N MA N U A L 5.2.2 Electric connection In case of a 230 Volt electrical connection, provide proper grounding, if applicable. Place this electrical connection away from the appliance, as low as possible in the chmney breast. This has to do with the temperature development in the chimney breast. -
Page 7: Placing The Chimney Breast
I NS T AL L AT I ON M A N U A L Make sure the ignition cable cannot come into contact with other wires; !Caution The data plate should remain attached to the chain. Ø Set the height of the appliance using the adjustable feet (if applicable). Ø... -
Page 8: Placing The Control Hatch
I NS T AL L A TI O N MA N U A L 5.6 Placing the control hatch (if applicable) The control hatch (also see paragraphs 5.4 and 5.5) is placed as low as possible in the chimney breast. The bottom of the control hatch may not be placed higher in the appliance than the burner surface. -
Page 9: Connection Flue Gas Discharge System
I NS T AL L AT I ON M A N U A L 5.7.2 Connection of flue gas discharge system (if a class 1 chimney is not applicable) For connection to an existing chimney, a flexible stainless steel discharge pipe is required over the complete length for the discharge of the flue gases, unless indicated otherwise. -
Page 10: Placing The Concentric System
I NS T AL L A TI O N MA N U A L When using a roof terminal, the following applies: The construction of the chosen system, when using a roof terminal, must be permissible according to Appendix 2, Table 5. (See the method of working described below) The working method below indicates how the permissibility is determined of a concentric system when using a roof terminal. -
Page 11: Connection Existing Chimney
I NS T AL L AT I ON M A N U A L 5.8.4 Connection to an existing chimney It is possible to connect the appliance to an existing chimney. A flexible SS pipe is placed in the chimney with a fitting diameter at the flue gas discharge pipe, for the discharge of flue gas. -
Page 12: Additional Instructions
I NS T AL L A TI O N MA N U A L 5.9 Additional instructions The construction frame of this appliance cannot be adjusted. Ø Attach the appliance to the wall by means of wall brackets (B) (see appendix 3, fig. 1). !Tip Extension legs are available for this appliance. -
Page 13: Placing The Glass Pane
I NS T AL L AT I ON M A N U A L 5.10.3 Placing the glass pane Placing the glass pane will take place in reverse order of removing the glass pane, as described above. Avoid/remove fingerprints on the glass pane, as they will burn into the glass; !Caution The self-tapping screws should not be over-tightened, since otherwise they could break or strip the thread: tight = tight;... -
Page 14: Placing The Wood/Pebble Set
I NS T AL L A TI O N MA N U A L 5.12 Placing the wood or pebble set The appliance is supplied with a wood set or a pebble set. Strictly observe the following instructions to prevent unsafe situations: !Caution Ø... -
Page 15: Connecting The Receiver
I NS T AL L AT I ON M A N U A L Control The appliance is supplied with a wireless remote control. Controlling the flame height, igniting and switching off take place through a remote control controlling a receiver. Chapter 4, Wireless remote control, in the User Manual describes the operation of the appliance and how you should use the remote control. -
Page 16: Final Inspection
I NS T AL L A TI O N MA N U A L 6.3 Alternative operation Appliances made with an electronic ignition and radio remote control can be connected to an alternative external control system (e.g. Domotics). For this purpose, there are 4 connection points at the side of the receiver (see Appendix 3, fig. -
Page 17: Ignition Pilot And Main Burner
I NS T AL L AT I ON M A N U A L 7.3 Ignition pilot and main burner For igniting the pilot and main burner, see the User Manual, chapter 4, section 4.2, Remote control. 7.3.1 First ignition of the appliance after installation or adjustments !Caution After installation, or after work has been performed, you should ignite the appliance for the first time without the glass window. -
Page 18: Maintenance
I NS T AL L A TI O N MA N U A L 8. Maintenance The appliance must be inspected once per year by a skilled installer in the field of gas-fired heating, and repaired if necessary. Check at least whether the appliance is working properly and safely. !Caution Always close the gas tap during maintenance work;... -
Page 19: Delivery
I NS T AL L AT I ON M A N U A L Delivery You must explain to the user how to operate the appliance. You must give him/her instructions on putting it in operation, the safety measures, the operation of the remote control and annual maintenance (see the User Manual). -
Page 20: Appendix 1 Diagnosis Of Malfunctions
I NS T AL L A TI O N MA N U A L Appendix 1 diagnosis of malfunctions Fires with electronic ignition, fault finding: Ignition and burning Start 2.10 Do(es) main burner(s) 2.06 Pilot can be lit. 2.08 Does main burner ignite ignite smoothly and across 2.01 Can pilot be lit? Does it stay alight? - Page 21 I NS T AL L AT I ON M A N U A L 2.12 Does appliance switch off 2.20 Perfect! 2.14 Does main burner go out exactly 22 sec after 2.16 Is flame picture OK? 2.18 Can fire be switched off? You have a well functioning after 'some time'? servomotor starts running?
- Page 22 IN S TA L L A TI O N M A N U A L Malfunction search diagram atmospheric gas-fired heating appliance with electronic ignition: Starting up cycle. Start 1.05 1.01 Does receiver beep? 1.03 Short sound signals, 1 sec after One long 5 second beep, (possibly each other, followed by the preceded by 7 short beeps).
-
Page 23: Appendix 2 Various Tables
I NS T AL L AT I ON M A N U A L Appendix 2 Tables Table 1: Parts included with the delivery Part Number Wood set / pebble set Control hatch Available separately Control hatch manual Available separately Installation manual User manual Restrictor slide... - Page 24 IN S TA L L A TI O N M A N U A L Table 2: Technical data Global 60 Triple BF Product name Type of appliance Built-in Combustion Closed combustion Concentric 150/100 Supply and discharge system Flame protection version...
- Page 25 I NS T AL L AT I ON M A N U A L Table 3: Line-pressure when using G31 Country mbar NL / DK / FI / NO / SE / HU / BA / GR FR / BE / IT / PT / ES / GB / IE Permissibility and conditions concentric system with wall terminal Table 4: Conditions for setting the appliance G20/G25/G31...
- Page 26 IN S TA L L A TI O N M A N U A L Permissibility and conditions concentric system with roof terminal Table 5: Determining permissibility concentric system G20/G25/G31 Total number of meters Total no. of meters vertical and/or sloping pipe length horiz.
-
Page 27: Appendix 3 Figures
I NS T AL L AT I ON M A N U A L Appendix 3 Figures 38C-1838 38C-1839... - Page 28 I NS T AL L A TI O N MA N U A L Tot. min 200 cm2 38c-1840 1x90° 38c-744w 38c-1078 1x90° 1x90° 38c-744v 38c-744q 1 - 4m...
- Page 29 I NS T AL L AT I ON M A N U A L 38C-1820/0 38C-1843 /0 38C-1842 /0 38C-1844 /0 38C-1845 /0...
- Page 30 IN S TA L L A TI O N M A N U A L 38P-0301 38P-0302 38P-0303 38P-0304 38p-0023...
- Page 31 I NS T AL L AT I ON M A N U A L 38P-0300 38P-0309...
- Page 32 IN S TA L L A TI O N M A N U A L 38P-0306 38P-0307...
- Page 33 I NS T AL L AT I ON M A N U A L 38C-1836 38P-0308...
- Page 34 IN S TA L L A TI O N M A N U A L 38p-0180 38p-0181 38p-0179 38p-0182 38C-1837 /0...
- Page 35 I NS T AL L AT I ON M A N U A L...
- Page 36 DRU Verwarming B.V. The Netherlands Postbus 1021, NL-6920 BA Duiven Ratio 8, NL-6921 RW Duiven...
Need help?
Do you have a question about the Global 60 Triple BF G20 and is the answer not in the manual?
Questions and answers