
Subscribe to Our Youtube Channel
Related Manuals for Wyred 4 Sound mINT


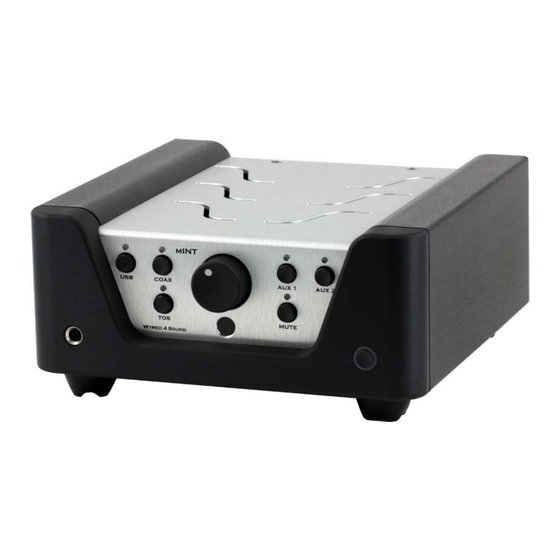
Summary of Contents for Wyred 4 Sound mINT
- Page 1 Mini-Integrated Owner’s Manual **IMPORTANT** Check position of voltage mains switch prior to connecting the unit to power...
-
Page 2: Table Of Contents
Table of Contents Register Your Product! READ FIRST Important Package Contents Introduction Design and Feature Overview AC Mains Voltage Switch Getting Connected Powering your Integrated Amplifier “Break-In” Period Front Panel Operation Aux 2 / Home Theater Bypass Fixed Out / Main In DC Trigger USB Configuration (MAC) USB Configuration (PC) -
Page 3: Register Your Product
Please read the entire manual before connecting this product to any existing components or power. This manual contains detailed information regarding the design, operation and features of the Wyred 4 Sound mINT. Damage due to misuse or improperly following instructions will not be covered under warranty. See “Warranty”... -
Page 4: Introduction
A soft ramp feature means that when powering the unit on/off or using the mute/un-mute it increases/decreases the volume at a pleasant rate. The mINT has a 12V DC trigger in and out as well as an external mains voltage switch. -
Page 5: Ac Mains Voltage Switch
HT mode. Aux Out (preamp output) will work very well to incorporate a powered subwoofer. In addition to the pre-out the mINT has a Fixed out that will typically be used to send a signal to a recording device or feed a signal to a second system. -
Page 6: Getting Connected
Powering your Integrated amplifier In order to turn the mINT on the switch located on the rear must be in the “on” position. After a couple of seconds the green light surrounding the power button on the front will illuminate. -
Page 7: Front Panel Operation
When the mINT is plugged in and the rear power switch is in the “on” position the ring light will be green. To turn the unit on press the power button on the front and the ring light will then change to blue. -
Page 8: Fixed Out/Main In
(Please note: This USB device currently does not support Mac OS 10.5 or earlier) pg. 6 1. Connect a USB cable from the mINT to the computer ( type: USB A to USB B ) with the mINT and computer powered on. -
Page 9: Usb Configuration (Pc)
2. The USB device should automatically start installing. 3. It is now necessary to select the mINT as the output device. Please locate the Audio Midi setup by following this directory: Go to Finder----> Applications---> Utilities----> Audio Midi setup. Once you have reached the Midi setup you will need to select the “24/96 Async USB Audio Sound”... -
Page 10: Back Panel Diagram
It will be necessary to restart the computer for proper operation. 11. Connect a USB cable from the mINT to the computer ( type: USB A to USB B ) with the mINT and computer powered on. -
Page 11: Troubleshooting
Damage to any equipment due to the volume being set to high is not covered under warranty. 1. Verify that the power cord is securely plugged into the wall and the mINT. 2. Check the switch on the rear to verify that it is in the on position. Make sure that the blue light is on around the power button and the proper input is selected. -
Page 12: Got Hum
7. Verify that the interconnects are working by replacing them with a different set from a connection that you know works. 8. Now that you have interconnects that you know work, try connecting the amplifier to another source that you know has worked in the past. If you are still experiencing problems and have exhausted your available resources and time please contact the dealer/distributor that you purchased the product from. -
Page 13: Warranty Coverage
If a hardware defect arises and a valid claim is received within the Warranty Period, at its option, Wyred 4 Sound will either (1) repair the hardware defect at no charge, using new or refurbished replacement parts, or (2) exchange the product with a product that is new or which has been manufactured from new or serviceable used parts and is at least functionally equivalent to the original product. - Page 14 Wyred 4 Sound Authorized Service Provider will help determine whether your product requires service and, if it does, will inform you how Wyred 4 Sound will provide it. Wyred 4 Sound or its Wyred 4 Sound Authorized Service Providers will provide warranty service on products that are tendered or presented for service during the Warranty Period, as permitted by law.
-
Page 15: Service
Use the original packaging to ensure the safe transit of the product to the factory, dealer, or distributor. Wyred 4 Sound may, at its discretion, return a product in new packaging and bill the owner for such packaging if the product received by Wyred 4 Sound was boxed in nonstandard packaging or if the original packaging was so damaged to the point it was unusable. -
Page 16: Specifications
pg. 14...
Need help?
Do you have a question about the mINT and is the answer not in the manual?
Questions and answers