Table of Contents
Advertisement
Quick Links
See also:
User Manual
Advertisement
Table of Contents
Troubleshooting

Subscribe to Our Youtube Channel
Related Manuals for Delta Tau Geo Brick


Summary of Contents for Delta Tau Geo Brick
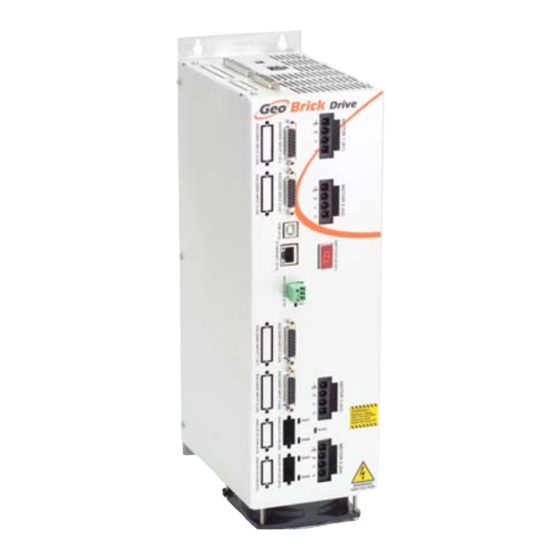
- Page 1 USER MANUAL Geo Brick Programmable Servo Amplifier 5xx-603800-xUxx March 19, 2007 Single Source Machine Control Power // Flexibility // Ease of Use 21314 Lassen Street Chatsworth, CA 91311 // Tel. (818) 998-2095 Fax. (818) 998-7807 // www.deltatau.com...
-
Page 2: Operating Conditions
© 2007 Delta Tau Data Systems, Inc. All rights reserved. This document is furnished for the customers of Delta Tau Data Systems, Inc. Other uses are unauthorized without written permission of Delta Tau Data Systems, Inc. Information contained in this manual may be updated from time-to-time due to product improvements, etc., and may not conform in... - Page 3 After removing the power source from the equipment, wait at least 10 minutes before touching or disconnecting sections of the equipment that normally carry electrical charges (e.g., capacitors, contacts, screw connections). To be safe, measure the electrical contact points with a meter before touching the equipment.
- Page 5 REVISION HISTORY REV. DESCRIPTION DATE APPVD UPDATED ANALOG INPUT SECTION 09/07/06 R. UNADKAT UPDATED 6-AXIS REGEN RESISTOR INFO, P. 8 03/19/07 D. GENTRY...
-
Page 7: Table Of Contents
Geo Brick User Manual Table of Contents Copyright Information.............................. ii Operating Conditions ............................... ii Safety Instructions..............................ii INTRODUCTION ...............................1 Geo Brick Features..............................1 Amplifier Standard Features ..........................2 Amplifier Ratings ..............................2 Feedback Devices..............................3 Compatible Motors..............................3 Maximum Speed..............................3 Torque...................................3 Motor Poles ................................4 Motor Inductance..............................4 Motor Resistance ..............................4... - Page 8 Geo Brick User Manual J3: External Shunt Connector Pinout ........................22 Shunt Regulation..............................22 Minimum Resistance Value..........................23 Maximum Resistance Value ..........................23 Energy Transfer Equations..........................23 Bonding ...................................26 Filtering ...................................26 CE Filtering................................26 Input Power Filtering ............................26 Motor Line Filtering ............................27 I/O Filtering................................27 Connectors................................28 X1-X8: Encoder Input (1 to 8) ..........................28 X9-10: Analog I/O Ch5 (X9) and Ch6 (X10), (Optional) ..................29...
- Page 9 PWM DRIVE COMMAND STRUCTURE......................71 Default Mode................................71 Enhanced Mode...............................71 TROUBLESHOOTING............................73 Error Codes ................................73 D1: Geo Brick Drive Status Display Codes......................73 Status LEDs ................................74 Actions on Watchdog Timer Trip........................75 Diagnosing Cause of Watchdog Timer Trip .......................75 APPENDIX A................................77 Mating Connector and Cable Kits ...........................77 CONKIT5A .................................78...
-
Page 11: Introduction
Modbus TCP slave or even a PC-based HMI package connected via USB 2.0 or Ethernet, the Geo Brick is again the answer. Geo Brick Features The Geo Brick is capable of controlling up to eight axes with direct-PWM commands. • Motorola DSP 56k digital signal processor •... -
Page 12: Amplifier Standard Features
Geo Brick User Manual • Eight thermal-fuse protected outputs (expandable to 16 with option) rated for 0.5A @ 24VDC each (Flexible outputs allow for sinking or sourcing of current depending on whether the common emitter or common collector is used.) •... -
Page 13: Feedback Devices
Compatible Motors The Geo Brick product line is capable of interfacing to a wide variety of motors. The Geo Brick can control almost any type of three-phase brushless motor, including DC brushless rotary, AC brushless rotary, induction, and brushless linear motors. -
Page 14: Motor Poles
Geo Brick User Manual must be able to achieve the desired speed with this voltage limitation. This can be determined by using the voltage constant of the motor (Kb), usually specified in volts-per-thousand rpm. The application speed is divided by 1000 and multiplied by the motor’s Kb. This is the required voltage to drive the motor to the desired velocity. -
Page 15: Motor Inertia
Geo Brick User Manual constant is known, the drive amplifier requirements can be calculated to effectively size a drive amplifier for a given motor. Some motor designs allow Kt to be non-linear, in which Kt will actually produce less torque per unit of current at higher output speeds. It is wise to de-rate the systems torque producing capability by 20% to allow headroom for servo control. - Page 16 Geo Brick User Manual Introduction...
-
Page 17: Specifications
Geo Brick User Manual SPECIFICATIONS Part Number Geo Brick Drive Part Number Definition G B L Number of Amplifier Axes Communication Options Four Axes (Default) : No options (Default) Six Axes : DPR option (required for NC) Eight Axes : ModBus option : ModBus &... -
Page 18: Environmental Specifications
Geo Brick User Manual Environmental Specifications Description Unit Specifications Operating Temperature °C +0 to 45°C. Above 45°C, derate the continuous peak output current by 2.5% per °C above 45°C. Maximum Ambient is 55°C Rated Storage Temperature °C -25 to +70... -
Page 19: 8-Axis Configuration
Geo Brick User Manual 8-axis Configuration GBL8-xx-552- GBL8-xx-882- GBL8-xx-582- GBL8-xx-852- Model axis axis axis axis axis axis axis axis Output Continuous Current rms/axis) Output Peak Current for 2 seconds (rms/axis) Rated Input Power (KVA) @ 26A (for all axes) 42A (for all axes) -
Page 20: Package Types
Geo Brick User Manual Package Types Geo package types provide various power levels (Low/Medium/High) and up to eight axes configurations mainly with three different package types. • 4-axes Low/Medium power Drive (5A/10A or 8A/16A): GBL4-xx-50x-xxx and GBL4-xx-80x-xxx 4.5" wide (114 mm), Maximum Power Handling ~8000 watts Package Dimensions: 4.5"... -
Page 21: Receiving And Unpacking
6. If the Geo Brick Drive is to be stored for several weeks before use, be sure that it is stored in a location that conforms to published storage humidity and temperature specifications stated in this manual. - Page 22 Geo Brick User Manual Note: If Ethernet communications are used, Delta Tau Systems strongly recommends the use of RJ45 CAT5e or better shielded cable. Newer network cards have the Auto-MDIX feature that eliminates the need for crossover cabling by performing an internal crossover when a straight cable is detected during the auto-negotiation process.
-
Page 23: Mounting
Geo Brick User Manual MOUNTING The location of the drive is important. Installation should be in an area that is protected from direct sunlight, corrosives, harmful gases or liquids, dust, metallic particles, and other contaminants. Exposure to these can reduce the operating life and degrade performance of the drive. -
Page 24: 4-Axis Low/Medium Power Drive
Geo Brick User Manual 4-axis Low/Medium Power Drive GBL4-xx-50x-xxx and GBL4-xx-80x-xxx (x stands for the different options that can be ordered) Width Depth Height Weight Mounting Dimensions 114mm / 4.50in. 178mm/ 7.00in. 391mm/ 15.40in. 4.4Kgs (9.6lbs) Geo Brick amplifier 4-axis... -
Page 25: 6-Axis: 4-Axis Low/Medium Power Plus 2-Axis High Power (15A/30A) Drive
Geo Brick User Manual 6-axis: 4-axis Low/Medium Power plus 2-axis High Power (15A/30A) Drive GBL6-xx-5Fx-xxx and GBL6-xx-8Fx-xxx (x stands for the different options that can be ordered) Width Depth Height Weight 203mm / 8.00in. 178mm /7.00in. 391mm / 15.40in. Call Factory... -
Page 26: 8-Axis Low/Medium Power Drive
Geo Brick User Manual 8-axis Low/Medium Power Drive GBL8-xx-552-xxx, GBL8-xx-582-xxx, GBL8-xx-852-xxx and GBL8-xx-882-xxx (x stands for the different options that can be ordered) Width Depth Height Weight 203mm/ 8.00in. 178mm./ 7.00in. 392mm./ 15.40in. 9.0 kgs (19.9lbs) Mounting Dimensions Geo Brick Amplifier 8-axis... -
Page 27: System Wiring
Geo Brick User Manual SYSTEM WIRING OPTIONAL FILTER GARxx EARTH SHUNT BLOCK RESISTOR Twisted Wires 24 V RET MAIN POWER POWER SUPPLY +24 V LOGIC Motor n SHUNT EARTH Motor FRAME A 1-8 (Max. 8) Encoder X 1-8 Brick xt t Encoder n (Max. -
Page 28: Use Of Gfi Breakers
Operating Temperature It is important that the ambient operating temperature of the Geo Brick Drive be kept within specifications. The Geo Drive should be installed in an enclosure such as a NEMA cabinet. The internal temperature of the cabinet must be kept under the Geo Drive Ambient Temperature specifications. It is sometimes desirable to roughly calculate the heat generated by the devices in the cabinet to determine if some type of ventilation or air conditioning is required. -
Page 29: Wiring Ac Input
Usually, the ground connection is a copper plate directly bonded to the back panel or a copper strip with multiple screw locations. The Geo Brick drive is brought to the earth- ground via the fourth pin on the J1 connector, located at the bottom of the unit through a heavy gauge, multi-strand conductor to the central earth-ground location. -
Page 30: Wiring 24 V Logic Control
Wiring 24 V Logic Control An external 24Vdc power supply is required to power the logic portion of the Geo Brick drive. This power can remain on, regardless of the main AC input power, allowing the signal electronics to be active while the main motor power control is inactive. -
Page 31: A1-8: Motor 1 To 8 Output Connector Pinout (Low/Medium Power Units)
Excessive energy can be dumped via an external load resistor. The Geo Brick product series is designed for operation with external shunt resistors of 78 Ω. The 6-axis unit needs 48Ω. Delta Tau has the GAR48 and GAR78 available for these applications. This resistor is provided with pre-terminated cables that plug into connector J3. -
Page 32: J3: External Shunt Connector Pinout
Connector is located at the top side of the unit DT Connector part number #014-000F02-HSG and pins part number #014-043375-001 Molex Crimper tool p/n#63811-0400 For the 6-axis Geo Brick, GBL6-xx-xxx-xxx and GBL6-xx-8Fx-xxx, this connector is a 3 pin Large Molex connector CAP-... -
Page 33: Minimum Resistance Value
Geo Brick User Manual The shunt regulator monitors the DC Bus voltage. If this voltage rises above a present threshold (Regen Turn On Voltage), the Geo Drive will turn on a power device intended to place the externally mounted regen resistor across the bus to dump the excessive energy. The power device keeps the regen resistor connected across the bus until the bus voltage is sensed to be below the Regen Turn Off voltage, at which time the power device removes the resistor connection. - Page 34 Geo Brick User Manual Here also, to get energy in Joules from English mechanical units, additional conversion factors are required. To calculate the kinetic energy of a mass having a weight of W pounds, the following equation can be used:...
- Page 35 Geo Brick User Manual where: is the lost energy in joules (J) is the current required for the deceleration in amperes (A), equal to the required deceleration torque divided by the motor’s (rms) torque constant K is the phase-to-phase resistance of the motor, in ohms (Ω)
-
Page 36: Bonding
Geo Brick User Manual Bonding The proper bonding of shielded cables is imperative for minimizing noise emissions and increasing immunity levels. The bonding effect is to reduce the impedance between the cable shield and the back panel. Power input wiring does not require shielding (screening) if the power is fed to the enclosure via metal conduit. -
Page 37: Motor Line Filtering
Geo Brick User Manual Motor Line Filtering Motor filtering may not be necessary for CE compliance of Geo Drives. However, this additional filtering increases the reliability of the system. Poor non-metallic enclosure surfaces and lengthy, unbonded (or unshielded) motor cables that couple noise line-to-line (differential) are some of the factors that may lead to the necessity of motor lead filtering. -
Page 38: Connectors
Because the same pinouts are used for all encoders, n stands for encoder number 1 to 8: n=1 / axis 1, n=2 / axis 2, etc. *The signals 2.5V / Stepper input enable/ ResOut were implemented to all the Geo Brick Drives that have the Reset button on the front plate. -
Page 39: X9-10: Analog I/O Ch5 (X9) And Ch6 (X10), (Optional)
Geo Brick User Manual X9-10: Analog I/O Ch5 (X9) and Ch6 (X10), (Optional) X9/10 (Female DB-9 Connector) Pin # Symbol Function Notes AGND Common ADC5/6+ Input 12-bit Analog Input, channel 5/6+ * DAC5/6+ Output 12-bit filtered PWM analog output, channel 5/6+... -
Page 40: X13: Usb 2.0 Connector
This connector is used for Ethernet communications from the Geo PMAC Drive to a PC. Note: Delta Tau Systems strongly recommends the use of RJ45 CAT5e or better shielded cable. Newer network cards have the Auto-MDIX feature that eliminates the need for crossover cabling by performing an internal crossover when a straight cable is detected during the auto-negotiation process. -
Page 41: X15: Watchdog & Abort
X15: Watchdog & ABORT The X15 connector allows the user to send Ohm output from the Geo Brick Drive to the machine if a watchdog condition has occurred at the Drive. This is an important safety feature because the Geo is totally disabled when it is in watchdog condition and this output will allow the other machine’s... -
Page 42: J4 Limit Inputs (1-4 Axis)
J4 Limit Inputs (1-4 Axis) The Geo Brick limit and flag circuits give the flexibility to wire in standard 12V to 24V limits and flags or wire in 5V level limits and flags on a channel basis. The default is set for the standard 12V to 24V inputs, but if the resistor pack is added to the circuit, the card can read 5V inputs. -
Page 43: J5 Limit Inputs (5-8 Axis)
J5 Limit Inputs (5-8 Axis) The Geo Brick limit and flag circuits give the flexibility to wire in standard 12V to 24V limits and flags or wire in 5V level limits and flags on a channel basis. The default is set for the standard 12V to 24V inputs, but if the resistor pack is added to the circuit, the card can read 5V inputs. - Page 44 Geo Brick User Manual A sample of the positive limit circuit is shown below. The 4.7K resistor packs used will allow 12-24V flag inputs. If 0-5V flags are used, then a 1KΩ resistor pack (RP) can be placed in: Flags 1-4: RP39 (channel 1), RP43 (channel 2), RP 47 (channel 3), RP51 (channel 4) Flags 5-8: RP89 (channel 5), RP93 (channel 6), RP 97 (channel 7), and RP 101 (channel 8).
-
Page 45: J6: General Purpose I/O
Geo Brick User Manual J6: General Purpose I/O General purpose I/O is available on the Geo Brick Drive. All I/O is electrically isolated from the drive. Inputs can be configured for sinking or sourcing applications. All Inputs are 12-24VDC. All Outputs are 24V nominal operation, 0.5A maximum current. -
Page 46: Suggested M-Variable Addressing For The General Purpose I/O (J6)
Geo Brick User Manual Suggested M-Variable Addressing for the General Purpose I/O (J6) Suggested M-var. # Address Notes M0-> Y:$78800,0,1 Input 1 Data Line, J6 Pin 1 M1-> Y:$78800,1,1 Input 2 Data Line, J6 Pin 20 M2-> Y:$78800,2,1 Input 3 Data Line, J6 Pin 2 M3->... -
Page 47: J7: Extra General Purpose I/O (Optional)
J7: Extra General Purpose I/O (Optional) General purpose I/O is available on the Geo Brick Drive. All I/O is electrically isolated from the drive. Inputs can be configured for sinking or sourcing applications. All Inputs are 12-24VDC. All Outputs are 24V nominal operation, 0.5A maximum current. -
Page 48: Suggested M-Variable Addressing For The Optional General Purpose I/O (J7)
Geo Brick User Manual Suggested M-Variable Addressing for the optional General Purpose I/O (J7) Suggested M-var. # Address Notes M16-> Y:$78803,0,1 Input 16 Data Line, J7 Pin 1 M17-> Y:$78803,1,1 Input 17 Data Line, J7 Pin 20 M18-> Y:$78803,2,1 Input 18 Data Line, J7 Pin 2 M19->... - Page 49 Geo Brick User Manual Sample J6/J7, I/O Wiring Diagrams Sourcing 01-16 Inputs Sinking 01-16 Inputs 24V Supply 24V Supply Sourcing 01-08 Outputs 0V 24V Sinking 01-08 Outputs 0V 24V GPIN01 GPIN01 GPIN02 GPIN02 GPIN03 GPIN03 Inputs Inputs GPIN04 GPIN04 GPIN05...
-
Page 50: Setting Up Quadrature Encoders
Geo Brick User Manual Setting up Quadrature Encoders Digital quadrature encoders are the most common position sensors used with Geo Drives. Interface circuitry for these encoders comes standard on board-level Turbo PMAC controllers, UMAC axis- interface boards, Geo drives, and QMAC control boxes. -
Page 51: Encoder Loss Setup
(XOR) gate. If the encoder is working properly and connected to the Geo Brick, the two inputs of the pair should be in opposite logical states – one high and one low – yielding a true output from the XOR gate. -
Page 52: Setting Up Digital Hall Sensors
If used for power-up commutation position feedback only, typically the hall sensors are wired into the U, V, and W supplemental flags of X1 –X8 connectors of the Geo Brick Drive. These are single-ended 5V digital inputs on all existing hardware implementations. They are not optically isolated inputs; if isolation is desired from the sensor, this must be done externally. -
Page 53: Using Hall Effect Sensors For Phase Reference
Geo Brick User Manual GBL_Hall effect wiring X1-X8 Function Pin # Shield ENCPWRn CHUn+ CHVn+ CHWn+ CHTn+ Note: In the case of magnetic hall sensors, the feedback signals often come back to the controller in the same cable as the motor power leads. In this case, the possibility of a short to motor power must be considered;... -
Page 54: Calculating The Hall Effect Zero Point (Hez)
Geo Brick User Manual boundary points if all commutation is done from the commutation sensors. If mounting the hall-effect sensors manually, take care to align the boundaries at these points. The simplest way is to force the motor to the zero degree point with a current offset (as described below) and adjust the sensor while watching its outputs to get a boundary as close as possible to this point. - Page 55 Geo Brick User Manual Hall Sensors at 0 , 120 , and 240 P179=I179 P129=I129 ; store previous offsets before test #1o0 ; Open loop command of zero magnitude Six Step Method U (Mx26) V(Mx25) W(Mx24) I179=3000 I129=0 elec. I179=0 I129=3000;...
-
Page 56: Determining The Polarity Of The Hall Effects - Standard Or Reversed
Geo Brick User Manual UVW Value: Cycle: -150 HEZ @ +60 degrees electrical The offset can be computed using the mapping test shown above. In the example, the Hall Effect Zero (HEZ) point was found to be between +30 e and +90 e, so it is called +60 e. -
Page 57: Software Settings For Hall Effect Phasing
Bits 16-21 HEZ in Hexadecimal format, see section 5 above. Bits 0-15 Reserved Example: For a Geo Brick on Axis 1 using Hall Effects with a HEZ of 60 e and reversed polarity the setting would ∗ ∗ ≈ Offset... -
Page 58: Optimizing The Hall Effect Phasing Routine For Maximum Performance
Geo Brick User Manual I191= $800000 + $400000 + $0B0000 = $CB0000 Optimizing the Hall Effect Phasing Routine for Maximum Performance Since typically there are only three Hall Sensors, the accuracy of phase referencing is good to +/-30 of the commutation cycle, which is enough to get reasonable torque and reasonable smoothness without any phasing search. -
Page 59: Using The Test Results
Mx71 for different machines. Typically, motor manufacturers will mount the index in a repeatable manner with respect to the electrical cycle, although this cannot be guaranteed by Delta Tau. If not homing using the index pulse, then the value for Mx71 must be measured on every machine since it is dependant on the mounting of the motor to a coupling or the location of a home/limit switch. - Page 60 Geo Brick User Manual This diagram shows the hall-effect waveforms with zero offset, defined such that the V-signal transition when the U-signal is low (defined as the zero point in the hall-effect cycle) represents the zero point in PMAC’s commutation cycle.
- Page 61 Hall Effect Offset ($0B) Standard Hall Sense (0), Reversed Hall Sense (1) Hall Effect Type Phase (1) Ixx91 mask = $80 + $40 + $0B = $CB For Turbo PMAC2 Geo Brick, axis #1, this would give us I191 = $CB0000 System Wiring...
-
Page 62: Setting Up The Analog Inputs (Optional)
Setting Up the Analog Inputs (optional) The Geo Brick Drive can be ordered with up to four analog to digital converters on a 4-Axis Geo Brick Drive and can be ordered with two analog to digital converters on a 6-Axis Geo Brick Drive. There are no analog input options available for an 8-Axis Geo Brick Drive. - Page 63 Geo Brick User Manual For a 6-Axis Geo Brick Drive On a 6-Axis unit, the analog inputs use channels 7 and 8 of the second gate-array and channels 5 and 6 are used for the current loop feedback. The strobe word for the current loop feedback is I7106=$3FFFFF, which will set the strobe word for all the channels on the second gate-array.
- Page 64 Geo Brick User Manual At the same time, the first bit of the 24-bits in P5000 is moved to the front and set as P5003. The results of P5001 and P5003 are added together and then copied into a temporary M-variable location, M5004.
-
Page 65: Filtered Dac Outputs Configuration
I7mn6 (m=1, n=1-4) needs to be set for PWM output. When the analog I/O option is ordered the Geo Brick comes with 2 or 4 analog (+/10VDC) output signals. These analog output signals are filtered PWM signals, 12-bit analog outputs. These outputs can be either single-ended or differential. -
Page 66: Setting Up For Pulse And Direction Output
Short pin 8 to pin 4 to enable Stepper Output (For Older version Geo Brick drives: Jumpers E21(E31) throughE24( E34) must be jumpered in the inside of the unit for PFM outputs and E25(35) through E28(38) must be jumpered for amplifier enable outputs. Pin 8 was not connected to anything) - Page 67 Single-Channel I-Variables Each Servo IC has four channels n, numbered 1 to 4. For the first (standard) Servo IC on the Geo Brick, the channel numbers 1 – 4 on the Servo IC are the same as the channel numbers 1 – 4 on the board. For the second (optional) Servo IC on the Geo Brick, the channel numbers 1 –...
- Page 68 Geo Brick User Manual Ixx30: Motor xx Proportional Gain To create a closed loop position response with a natural frequency of approximately 25 Hz and a damping ratio of 1, use the following calculation: PFMCLK Example: PFMCLK is set to default of 9.83 MHz, and Ixx08 is set to default of 96. Ixx30 = 660,000 / (96 * 9.83) = 700.
- Page 69 Geo Brick User Manual Example: User wants channels 5 to 8 to be used with stepper motors. First the user needs to wire the Stepper drive, and so as to enable the Stepper output pin 8 needs to be shorted to pin 4 (+5V) for X5 to X8.
-
Page 70: Direct Pwm Commutation Controller Setup
Turbo PMAC2 controllers that would have to be modified for use with the amplifier. The Delta Tau setup software such as Turbo Setup will help set these parameters for the system automatically. For details about direct commutation of brushless and induction motors, read the PMAC2 or Turbo PMAC2 User Manual. -
Page 71: Dc Brush Motor Drive Setup With Turbo Pmac
The direct-PWM algorithms in the Turbo PMAC are optimized for 3-phase motors and will cause significant torque ripple when used with 2- or 4-phase motors. Delta Tau has created user-written phase algorithms for these motors; contact the factory if interested in obtaining these. -
Page 72: Testing Pwm And Current Feedback Operation
Geo Brick User Manual • Ixx73 = 0, Ixx74 = 0: These default settings ensure that Turbo PMAC will not try to do a phasing search move for the motor. A failed search could keep Turbo PMAC from enabling this motor. -
Page 73: Purpose
Geo Brick User Manual Before testing any of Turbo PMAC’s software features for digital current loop and direct PWM interface, it is important to know whether the hardware interface is working properly. PMAC’s M-Variables are used to access the input and output registers directly. The examples shown here use the suggested M- Variable definitions for Motor 1. -
Page 74: Position Feedback And Polarity Test
Geo Brick User Manual Position Feedback and Polarity Test If the PWM command values observed in the Watch window are not zero, set them to zero with the command: M102=0 M104=0 M107=0 The motor can be turned (or pushed) freely by hand now. As the motor is turned, monitor the M101 value in the Watch window. -
Page 75: Pwm/Adc Phase Match
Geo Brick User Manual PWM/ADC Phase Match Command values from Turbo PMAC’s Phase A PWM outputs should cause a roughly proportionate response of one sign or the other on Turbo PMAC’s Phase A ADC input (whatever the phase is named in the motor and drive). -
Page 76: Setting I 2 T Protection
Geo Brick User Manual Setting I T Protection It is important to set the I T protection for the amplifier/motor system for Turbo PMAC2 direct PWM commutation. Normally, an amplifier has internal I T protection because it is closing the current loop. -
Page 77: Calculating Minimum Pwm Frequency
Geo Brick User Manual Calculating Minimum PWM Frequency The minimum PWM frequency requirement for a system is based on the time constant of the motor. Calculate the minimum PWM frequency to determine if the amplifier will properly close the current loop. -
Page 78: Amplifier Only Special Online Commands
Amplifier Only Special online commands With the Geo Brick Amplifiers a new version of firmware was created to help the user identify the unit easier. If the user uses the “TYPE” on-line command and PMAC responds and there is a word AMP, then your drive has the latest Amplifier firmware. - Page 79 Geo Brick User Manual AMPSID Function: Report serial electronic identification number Scope: Global Syntax: AMPSID This command causes Turbo PMAC to report the electronic identification number from the ID-number module. The identification number is reported as a hexadecimal 16-digit ASCII string, representing a 64- bit value.
- Page 80 Geo Brick User Manual DC Brush Motor Drive Setup with Turbo PMAC...
-
Page 81: Pwm Drive Command Structure
For Default mode to work correctly, make sure that the A/D strobe word for the axis is set to the correct value for the A/D on the amplifier. For instance, the current Delta Tau amplifiers use a 12- bit Burr Brown part requiring a strobe word of $3FFFFF;... - Page 82 Geo Brick User Manual PWM Drive Command Structure...
-
Page 83: Troubleshooting
Geo Brick User Manual TROUBLESHOOTING The Geo Brick utilizes a scrolling single-digit 7-segment display. When control power is applied to the drive, the 7-segment display will have a blinking “.” (period) indicating that the software and hardware are running normally. This blinking period is running all of the time except if the PMAC CPU has faulted, then it stays on. -
Page 84: Status Leds
Lit when ABORT is not True INACTIVE In older versions of the Geo Brick, the ABORT LEDs and the inputs at X15 were not available. Watchdog Timer Geo Brick has an on-board watchdog timer. This subsystem provides a fail-safe shutdown to guard against software and hardware malfunction. -
Page 85: Actions On Watchdog Timer Trip
Geo Brick User Manual will shut down, Geo Brick uses its own DC to DC converter to create 5V and +/-15V from the user supplied 24VDC. This prevents corruption of registers due to insufficient voltage. The second necessary condition is that the timer must see a square wave input (provided by the Turbo PMAC software) of a frequency greater than approximately 25 Hz. - Page 86 Geo Brick User Manual Troubleshooting...
-
Page 87: Appendix A
APPENDIX A Mating Connector and Cable Kits Cable sets can be purchased directly from Delta Tau to make the wiring of the system easier. Available cable kits (CABKITxx) are listed below. However, for those who wish to manufacture their own cable sets, the table below provides Connector Kits to use with each drive. -
Page 88: Conkit5A
Geo Brick Hardware Reference Manual CONKIT5A D/T part D/T part number Connector Molex part number number individuals Housing: #014-043645-200 43645-0200 24VDC 200-043645-200 Pins: #014-043030-008 43030-0007/-0008/-0009 Housing: #014-000F04-HSG 44441-2004 Motor (x4) 200-000F04-HSG Pins: #014-043375-001 43375-0001 Housing: 014-H00F04-049 42816-0412 AC Input 200-H00F04-049... -
Page 89: Pwm Cable Ordering Information
Geo Brick User Manual – Preliminary Documentation PWM Cable Ordering Information Length Part Numbers 600mm 900mm 1.5m 1.8m 2.1m 3.6m Cable (24") (36") (60") (72") (84") (144") √ CABPWM-1 200-602739-024X √ CABPWM-2 200-602739-036x √ 200-602739-060x CABPWM-3 √ CABPWM-4 200-602739-072x √... -
Page 90: Cable Drawings
Geo Brick Hardware Reference Manual Cable Drawings 5A/10A and 8A/16A Motor Cable Appendix A... -
Page 91: 15A/30A Motor Cable
Geo Brick User Manual – Preliminary Documentation 15A/30A Motor Cable Appendix A... -
Page 92: 24V Logic Power Cable
Geo Brick Hardware Reference Manual 24V Logic Power Cable Appendix A... -
Page 93: 3-Phase Power Cable
Geo Brick User Manual – Preliminary Documentation 3-Phase power cable Appendix A... -
Page 94: Regenerative Resistor: Gar48/78
Geo Brick Hardware Reference Manual Regenerative Resistor: GAR48/78 Model Description GAR48 300W, 48 OHM regenerative resistor with Thermostat protection. Includes 18-inch wire cable. Single or dual axis. GAR78 300W, 78 OHM regenerative resistor with Thermostat protection. Includes 18-inch wire cable. Single or dual axis. -
Page 95: Db- Connector Spacing Specifications
Geo Brick User Manual – Preliminary Documentation DB- Connector Spacing Specifications X1-8: DB-15 Connectors for encoder feedback 3.115±.05 1.541±.015 X9-12: DB-9 Connectors for Analog I/O 2.45±.05 1.213+.015 Screw Lock Size for all DB-connectors .235 .126 #4-40 FEMALE SCREWLOCK LOCKWASHER QTY 2 per connector... -
Page 96: Type Of Cable For Encoder Wiring
Therefore, the following recommendations are based upon some experiences that we at Delta Tau Data Systems have acquired. If possible, the best cabling to use is a double-shielded twisted pair cable. Typically, there are four pairs used in a differential encoder’s wiring. - Page 97 Geo Brick User Manual – Preliminary Documentation Cables for single-ended encoders should be shielded for the best noise immunity. Single-ended encoder types cannot take advantage of the differential noise immunity that comes with twisted pair cables. Note: If noise is a problem in the application, careful attention must be given to the method of grounding that is used in the system.
-
Page 98: Schematics
Geo Brick Hardware Reference Manual APPENDIX B Schematics X15: Watchdog (JWDO) DGND_PLANE N.C. N.O. NC7SZ08M5 BWDO (SOT23-5) TERMBLK 3 (.150 PITCH) MMBD301LT1 (SOT23) DGND_PLANE FBR12ND05 J6 and J7: General Purpose I/O Inputs Opto Gnd Plane RP152 RP153 GPIN01 ACI1A GPIN02... - Page 99 Geo Brick User Manual – Preliminary Documentation Outputs COM_COL Opto Gnd Plane MBRS140T3 MBRS140T3 MBRS140T3 MBRS140T3 MBRS140T3 MBRS140T3 MBRS140T3 MBRS140T3 GPO1+ GPO1+ GPO1+ RUE090 Raychem NZT560A 30R090 (SOT-223) Littelfuse 2.2K GPO1-- GPO1-- GPO2+ GPO2+ GPO2+ RUE090 ANO1 Raychem CAT1 NZT560A...
-
Page 100: J4: Limit Inputs For Axis 1-4
Geo Brick Hardware Reference Manual J4: Limit Inputs for Axis 1-4 RP37 USER1 PLIM1 MLIM1 HOME1 FL_RT1 4.7KSIP8I RP38 4.7KSIP8I RP39 PS2705-4 x1KSIP8I (IN SOCKET) C160 C162 RP40 C161 C163 1KSIP8I RP41 USER2 PLIM2 LIMITS 1,2,3,4 MLIM2 HOME2 FL_RT2 4.7KSIP8I... -
Page 101: J5: Limit Inputs For Axis 5-8
Geo Brick User Manual – Preliminary Documentation J5: Limit Inputs for Axis 5-8 RP87 USER5 PLIM5 MLIM5 HOME5 FL_RT5 4.7KSIP8I RP88 4.7KSIP8I RP89 PS2705-4 x1KSIP8I (IN SOCKET) C200 C202 RP90 C201 C203 1KSIP8I RP91 USER6 PLIM6 LIMITS 5,6,7,8 MLIM6 HOME6 FL_RT6 4.7KSIP8I... -
Page 102: Appendix C
Geo Brick Hardware Reference Manual APPENDIX C Board Jumpers E10 – E12: Power-Up/Reset Load Source E Point & Description Default Physical Layout E10: To load active memory from flash IC on power-up/reset/remove No E10 jumper jumper E10; installed Jump E11 pin 1 to 2 E11 and E12, jump Jump E12 pin 1 to 2. -
Page 103: E25-28: Select Encoder Index Input Or Aena Output (Channels 1-4)
No jumper installed E38: Jumper 1-2 to output AENA8 at Ch8 encoder connector On the revisions of the Geo Brick that the S1- Reset button was not on the face plate E3: Re-Initialization on Reset Control E Point and Description...
Need help?
Do you have a question about the Geo Brick and is the answer not in the manual?
Questions and answers