
Related Manuals for Takstar X6


Summary of Contents for Takstar X6
- Page 1 User Manual GUANGDONG TAKSTAR ELECTRONIC CO., LTD. Address: Longqiao Road Longxi Boluo Huizhou Guangdong China 516121 Tel: +86 752 6383644 Fax: + 86 752 6383952 E-mail: sales@takstar.com INTELLIGENT UHF WIRELESS MICROPHONE Website: www.takstar.com...
- Page 2 Table of Contents 1. Table of Contents…………………………………………………………........1 2. Safety Instruction/Features/How to Setup……………………………………….....2-3 3. Function and Operation………………………………………..........3-4 4. LCD Panel Instruction………………………………………..........4-6 5. Operating Instruction/Correct Usage………………………………………......7 6. Trouble Shooting/Maintenance……………………………………………......8 7. Specification/Product content……………………………………………......9 ※ Notice Please read this manual detailedly before using to make sure the correct operation of this product and exert the best performance;...
- Page 3 Specification Safety Instruction Use the supplied power adaptor only and make sure that the AC power voltage is same as the System Specification power adaptor's requirement. The unit may be damaged if other power adaptor is used. Frequency Range: 740~790MHz Modulation Mode: FM Power supply of this system is AC 220V, fire or malfunction maybe occurred if other voltage is Adjustable Range: 50MHz...
- Page 4 If the frequency is set appropriately, up to 12 transmitters can be used in the same frequency Trouble Shooting band; if the frequency is set inappropriately, mutual interference will be caused. Troubles Possible reasons When several systems are used at one venue, please avoid overlapping the receivers. No indication on transmitter and Running out of batteries or bad connection between Receiver Function and Operation...
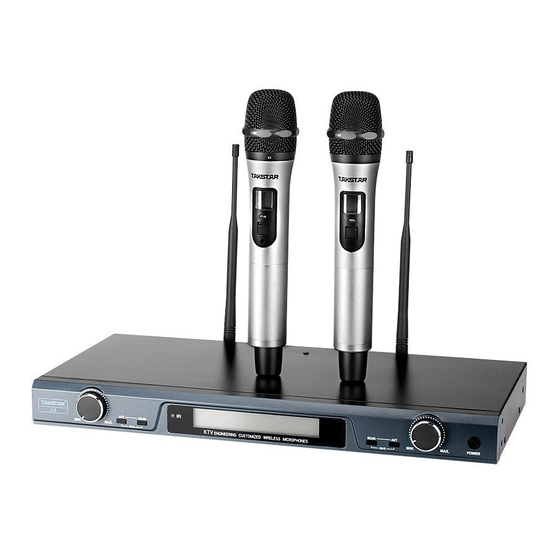
- Page 5 Operating Instruction/Correct Usage Handheld Microphone Function and Operation A. Do not turn on the transmitter before receiver is powered on. First of all turn the receiver volume to the minimum. Then press power button for turning on the receiver. After that, background light of LCD indicator lights and all data as well as receiver channel, frequency and automatic frequency matching status will display.
- Page 6 2. Button function and operation Picture 2 Picture 3 C. System locking 1. Under the initial interface as picture 1, long press “ACT” for function key locking. When locking 1) Short press “SCAN” button for automatic frequency scan and “ACT” for automatic frequency is finished, it will show the LED indication as picture 4 and all function key will be locked (except matching.
Need help?
Do you have a question about the X6 and is the answer not in the manual?
Questions and answers