JVC TH-A5 Instructions Manual
Dvd digital cinema system
Hide thumbs
Also See for TH-A5:
- Service manual (76 pages) ,
- Instructions manual (117 pages) ,
- Service manual (68 pages)
Table of Contents
Advertisement
DVD DIGITAL CINEMA SYSTEM
TH-A5
STANDBY/ON
AUDIO
VCR
CONTROL
TV
VCR
OFF
ON
TV CHANNEL
TOP MENU
MENU
AUDIO/
FM MODE SUBTITLE
TV VOLUME
DISPLAY
RETURN
STEP
TV/VIDEO
TUNER PRESET
DOWN
UP
REW
FF
VCR CHANNEL
TUNING
B.SEARCH
F.SEARCH
ENTER
VOLUME
DVD
FM/AM
AUX
MUTING
COMPACT
DIGITAL VIDEO
STANDBY
STANDBY/ON
RM-STHA5U
DVD CINEMA SYSTEM
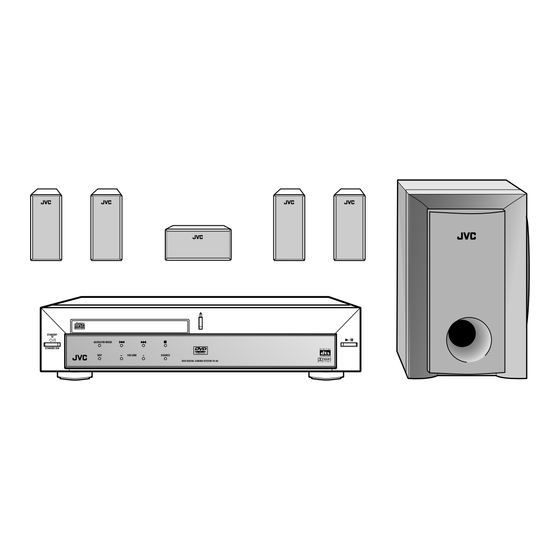
Consists of XV-THA5 and SP-THA5
AUDIO/FM MODE
DSP
VOLUME
SOURCE
DVD DIGITAL CINEMA SYSTEM TH-A5
INSTRUCTIONS
D I G I T A L
S U R R O U N D
D I G I T A L
For Customer Use:
Enter below the Model No. and Serial
No. which are located either on the rear,
bottom or side of the cabinet. Retain this
information for future reference.
Model No.
Serial No.
LVT0837-013A
[US, UB]
Advertisement
Chapters
Table of Contents
Troubleshooting

Related Manuals for JVC TH-A5


Summary of Contents for JVC TH-A5
- Page 1 AUDIO/FM MODE STANDBY/ON D I G I T A L VOLUME SOURCE S U R R O U N D DVD DIGITAL CINEMA SYSTEM TH-A5 D I G I T A L RM-STHA5U DVD CINEMA SYSTEM INSTRUCTIONS For Customer Use: Enter below the Model No.
- Page 2 Warnings, Cautions and Others / Caution –– STANDBY/ON switch! STANDBY/ON Disconnect the mains plug to shut the power off completely. The STANDBY/ON STANDBY/ON switch in any position does not disconnect the mains line. The power can be remote controlled. CAUTION To reduce the risk of electrical shocks, fire, etc.: 1.
- Page 3 Caution: Proper Ventilation To avoid risk of electric shock and fire and to protect from damage. Locate the apparatus as follows: Front: No obstructions open spacing. Sides: No obstructions in 10 cm from the sides. Top: No obstructions in 10 cm from the top. Back: No obstructions in 15 cm from the back Bottom:...
- Page 4 IMPORTANT FOR LASER PRODUCTS / REPRODUCTION OF LABELS / 1 CLASSIFICATION LABEL, PLACED ON EXTERIOR 2 WARNING LABEL, PLACED INSIDE THE UNIT SURFACE CLASS 1 LASER PRODUCT KLASSE 1 LASER PRODUKT LUOKAN 1 LASER LAITE KLASS 1 LASER APPARAT PRODUCTO LASER CLASE 1 1.
-
Page 5: Table Of Contents
Adjusting Stereo Sound ............20 Setting the Parental (Rating) Level .......... 49 Adjusting Dolby Digital and DTS Digital Surround ....21 Operating JVC’s Components ...... 50 Activating Dynamic Range Compression ........ 21 Adjusting Dolby Surround ............22 Operating Other Manufacturers’ TV .... 51 Adjusting DSP Modes .............. -
Page 6: Parts Identification
D I G I T A L VOLUME SOURCE S U R R O U N D DVD DIGITAL CINEMA SYSTEM TH-A5 D I G I T A L See pages in the parentheses for details. Front Panel 1 STANDBY/ON 7 Remote sensor button and STANDBY lamp (10 –... -
Page 7: Remote Control
MUTING IMPORTANT: If you press VCR CONTROL ON, this remote control will work ONLY for the JVC’s VCR. When you want to operate the system again, press VCR CONTROL OFF. y TV CHANNEL + and – buttons (50, 51) u TV VOLUME + and – buttons (50, 51) -
Page 8: Getting Started
Getting Started Before Installation Putting Batteries in the Remote Control General Precautions Before using the remote control, put two supplied batteries first. • When using the remote control, aim the remote control directly at • DO NOT insert any metal object into the center unit. the remote sensor on the center unit. -
Page 9: Connecting The Fm And Am Antennas
Connecting the FM and AM Antennas If AM reception is poor, connect single vinyl-covered wire (not supplied). AM Loop Antenna (supplied) If FM reception is poor, connect outdoor FM antenna (not supplied). Snap the tabs on the loop into FM Antenna (supplied) the slots of the base to assemble the AM loop antenna. -
Page 10: Speaker Layout Diagram
AUDIO/FM MODE speaker STANDBY/ON D I G I T A L VOLUME SOURCE S U R R O U N D DVD DIGITAL THEATER SYSTEM TH-A5 D I G I T A L Subwoofer Left front speaker Center speaker Left rear... -
Page 11: Connecting The Speakers
When setting the speakers Connecting the Speakers To obtain the best possible sound from this system, you need to place all the speakers except the subwoofer at the same distance Connect the satellite speakers, center speaker, and subwoofer to the from the listening position with each front faced toward the listener. -
Page 12: Connecting Audio/Video Component
Getting Started Connecting Audio/Video Component Turn the power off to all components before connections. Audio component connection Illustrations of the input/output terminals below are typical Connect the other component to the center unit with the examples. audio cord. When you connect the other component, refer also to its Use the cord supplied with the other component or manuals since the terminal name actually printed on the rear purchase it at an electric appliance store. - Page 13 TV connection The S-video cord and the component video cord are not supplied with this system. Use the cords supplied with the other component or purchase them at an electric appliance store. Video cord (supplied) Component video cord (not supplied) S-video cord (not supplied) Illustrations below are typical examples.
-
Page 14: Basic Dvd Operations
FM/AM MUTING Press MUTING. • When you use a JVC’s TV, you can turn on your TV by pressing on the remote control, and select the video input by To restore the sound, press pressing TV/VIDEO. (If your TV is not a JVC’s, see “Operating MUTING again. -
Page 15: Activate Realistic Sound Field
Stop Playback ctivate Realistic Sound Field Press 7 twice. TUNER PRESET You can enjoy two kinds of surround—Digital Multichannel Surround (Dolby Digital and DTS Digital Surround) and DSP Playback stops completely and “DVD” appears modes. on the display. (The DVD player goes on working for 3 minutes after playback stops.) •... -
Page 16: Basic Vcd/Cd Operations
• When you use a JVC’s TV, you can turn on your TV by pressing on the remote control, and select the video input by pressing TV/VIDEO. -
Page 17: Activate Realistic Sound Field
Stop Playback ctivate Realistic Sound Field Press 7 twice. You can enjoy DSP modes. TUNER PRESET Playback stops completely and “VCD” or “CD” DSP modes—HALL, THEATER, PAVILION, appears on the display. (The DVD player goes DANCE CLUB, LIVE CLUB on working for 3 minutes after playback stops.) •... -
Page 18: Basic Tuner Operations
Basic Tuner Operations djust the Volume STANDBY/ON AUDIO STANDBY/ON To increase the volume, press and hold VOLUME +. AUDIO To decrease the volume, press and hold VOLUME –. CONTROL VOLUME TV CHANNEL TOP MENU MENU AUDIO/ SUBTITLE TV VOLUME FM MODE CAUTION: DISPLAY RETURN... -
Page 19: Other Basic Operations
Other Basic Operations Turning Off the Power with the Timer ENTER You can fall asleep while listening to music—Sleep Timer. VOLUME From the remote control ONLY: FM/AM MUTING SLEEP Press SLEEP. • Each time you press the button, the shut-off time changes SOUND as follows: SETTING... -
Page 20: Speaker Settings
Speaker Settings Setting the Speaker Information To obtain best possible surround, register the center speaker (C–SP) STANDBY/ON AUDIO and rear speakers (R–SP) settings after completing all the connections. CONTROL TV CHANNEL TOP MENU MENU Before you start, remember... AUDIO/ There is a time limit in doing the following steps. If the setting is SUBTITLE TV VOLUME FM MODE... -
Page 21: Setting The Delay Time
Press 3 or 2 to adjust delay Setting the Delay Time time. • 3 : Increases delay time. Adjust the delay time of the sounds from the center speaker and the • 2 : Decreases delay time. rear speakers, comparing to that of the sounds from the front ENTER speakers. -
Page 22: Creating Realistic Sound Fields
Creating Realistic Sound Fields You can use the following surround to reproduce a realistic sound Dolby Pro Logic and Dolby 3 Stereo field. Dolby Surround encoding format records the left front channel, • Digital Multichannel Surround—Dolby Digital and DTS Digital right front channel, center channel, and rear channel signals (total 4 Surround channels) into 2 channels. - Page 23 I DSP (Digital Signal Processor) Modes To check the speaker connections and settings using the test DSP modes have been designed to create important acoustic tone surround elements. 1. Select and play a DVD encoded with Dolby Digital or DTS Digital Surround.
-
Page 24: Adjusting Stereo Sound
Creating Realistic Sound Fields To adjust the output balance for the front speakers 1) Press SOUND repeatedly until the VCR CHANNEL SOUND TUNING adjustment indication for the front B.SEARCH F.SEARCH speakers appears on the display. • Each time you press the button, the adjustment indication ENTER on the display changes as follows: 00 F 00... -
Page 25: Adjusting Dolby Digital And Dts Digital Surround
2) Press 3 or 2 to adjust the Adjusting Dolby Digital and output balance. DTS Digital Surround 3 : Decreases the left speaker ENTER output, or restores the right You can adjust the following settings while activating Dolby Digital speaker output. or DTS Digital Surround. -
Page 26: Adjusting Dolby Surround
Creating Realistic Sound Fields Press PRO LOGIC repeatedly on the PRO LOGIC remote control to select Dolby Pro Logic VCR CHANNEL or Dolby 3 Stereo. TUNING The PRO LOGIC indicator lights up on the display. B.SEARCH F.SEARCH • Each time you press the button, the indication changes as follows: ENTER PRO LOGIC... -
Page 27: Adjusting Dsp Modes
To adjust the output level for the center speaker, Select and play any source except Dolby Digital the rear speakers, and the subwoofer or DTS Digital Surround. 1) Press SOUND repeatedly to select the SOUND Press DSP MODE (or DSP on the front “CEN,”... -
Page 28: Adjusting Dsp Sound Parameters
Creating Realistic Sound Fields Adjusting DSP Sound Parameters VCR CHANNEL You can fine-adjust DSP modes more minutely by changing three TUNING parameters—room, liveness, and reverberation. B.SEARCH F.SEARCH Before you start, remember... • There is a time limit in doing the following steps. If the setting is ENTER canceled before you finish, start from step 2 again. -
Page 29: Disc Introduction-Dvd/Vcd/Cd
Disc Introduction—DVD/VCD/CD This system has been designed to play back the following discs: Disc structure—DVD, Video CD (VCD) and Audio CD (CD) DVD, Video CD, Audio CD, CD-R, and CD-RW. A DVD disc consists of Titles, and each title may be divided into some Chapters. -
Page 30: Basic Disc Operations
Basic Disc Operations To stop playback for a moment TUNER PRESET Press 3/8. While pausing, “PAUSE” appears on the STANDBY/ON AUDIO display. • To resume play, press 3/8. CONTROL To go to another chapter or track (except MP3) TV CHANNEL TOP MENU MENU Press ¢... -
Page 31: Dvd Playback
DVD Playback Some DVDs contain several audio languages, subtitles, and multi- Showing the On-Screen Bar angle views. When you find the following marks on the DVD or its package, you You can show the following information on the TV screen while a can select these elements recorded on the DVD. -
Page 32: Selecting The Subtitles
DVD Playback Selecting the Audio Languages While playing back a DVD containing audio languages (sound STANDBY/ON AUDIO track), you can select the language (sound track) to listen to. • You can set your favorite audio language as the initial audio CONTROL language. -
Page 33: Checking The Remaining Time
Checking the Remaining Time Moving to a Particular Portion Directly While playing back a DVD, you can check the remaining time to be You can move to another title, chapter, or particular scene in the played back. chapter directly. From the remote control ONLY: From the remote control ONLY: REMAIN Press REMAIN. -
Page 34: Searching For A Particular Point
DVD Playback To reverse the chapter—Variable Speed Reverse Search From the remote control ONLY: STANDBY/ON AUDIO Press 1 during playback or pause. CONTROL • Each time you press the button, the search speed B.SEARCH changes as follows: TV CHANNEL TOP MENU MENU AUDIO/ SUBTITLE... -
Page 35: Programming The Playing Order Of The Chapters-Program Play
From the remote control ONLY: Press ENTER. Press A–B REPEAT to select the start A-B REPEAT SELECT: ENTER PROGRAM MENU point. T I T L E CHAPT T I T L E CHAPT ENTER “REPEAT A” appears on the display. –... - Page 36 DVD Playback To erase the stored program Press 0 to eject the disc. • If you turn off the system or change the source, the STANDBY/ON AUDIO program is also erased. CONTROL To check the program contents TV CHANNEL TOP MENU MENU You can check the program contents by pressing PROGRAM.
-
Page 37: Dvd Special Effect Playback
7 Zoom DVD Special Effect Playback You can zoom in on the picture while playing back a DVD. 7 Still Picture/Frame-by-Frame Playback From the remote control ONLY: You can advance the still picture frame by frame while playing a Press ZOOM to zoom in. DVD. -
Page 38: Vcd/Cd Playback
VCD/CD Playback STANDBY/ON 1/35 00:12 AUDIO CONTROL MENU TV CHANNEL TOP MENU MENU On-screen bar goes off. RETURN AUDIO/ SUBTITLE TV VOLUME FM MODE DISPLAY * Appears only when a VCD is loaded. DISPLAY RETURN STEP TV/VIDEO 1 : Disc type ¢... -
Page 39: Disc Menu-Driven Playback (Only For Vcd)
Disc Menu–Driven Playback (Only for VCD) TIME – – : – – : Select this to move to a particular portion on the current disc. The Play Back Control function (PBC) allows you to operate the TRACK TIME – – : – – VCD using menus. -
Page 40: Repeating Playback
VCD/CD Playback Note: When the on-screen bar is shown on the screen, Repeat mode indication also changes as follows: STANDBY/ON AUDIO CONTROL REPEAT:ONE REPEAT:DISC TV CHANNEL TOP MENU MENU AUDIO/ SUBTITLE TV VOLUME FM MODE REPEAT OFF DISPLAY RETURN STEP TV/VIDEO 7 A–B Repeat TUNER PRESET... -
Page 41: Programming The Playing Order Of The Tracks-Program Play
Programming the Playing Order of the Repeat steps 3 and 4 to program other tracks Tracks—Program Play you want. • After 10 steps are programed, “NEXT «” is selected (highlighted). If you want to program more steps, press You can arrange the track playback order before you start playing. You can program up to 20 steps. -
Page 42: Selecting Playback Channel
VCD/CD Playback Selecting Playback Channel When you play back a karaoke VCD or CD, you can only select STANDBY/ON AUDIO either the left channel or right channel to listen to. CONTROL Press AUDIO/FM MODE repeatedly. AUDIO/ FM MODE TV CHANNEL AUDIO/ TOP MENU MENU... -
Page 43: Vcd Special Effect Playback
7 Zoom VCD Special Effect Playback You can zoom in on the picture while playing a VCD. 7 Still Picture/Frame-by-Frame Playback From the remote control ONLY: You can advance the still picture frame by frame while playing a Press ZOOM to zoom in. VCD. -
Page 44: Mp3 Introduction
MP3 Introduction This system is incorporated with an MP3 decoder. You can play back MP3 tracks (files) recorded on CD-Rs, CD-RWs, and CD- ROMs. STANDBY/ON • Notice that “files” and “tracks” are used interchangeably. AUDIO CONTROL What is MP3? MP3 is an abbreviation of Motion Picture Experts Group (or MPEG) TV CHANNEL TOP MENU MENU... -
Page 45: Mp3 Playback
MP3 Playback To go off the on-screen bar Starting Playback From the remote control ONLY: DISPLAY Press DISPLAY. It is recommended to turn on your TV when playing back an MP3 • Each time you press the button, the on-screen bar disc. -
Page 46: Operations Using The On-Screen Display
MP3 Playback Operations Using the On-Screen Display It is recommended to turn on your TV when playing back an MP3 STANDBY/ON AUDIO disc. CONTROL When the loaded MP3 disc is recognized, the following on-screen TV CHANNEL TOP MENU MENU display appears on the TV screen. (The contents of this on-screen display varies according to the disc—the way MP3 tracks were AUDIO/ SUBTITLE... -
Page 47: Moving To A Particular Track Directly
Moving to a Particular Track Directly Repeating Playback You can move to a particular track on the disc directly. On an MP3 disc, A–B repeat cannot be used. You can enjoy only repeat play. From the remote control ONLY: SEARCH To repeat playback—Repeat Play Press SEARCH during playback or pause. -
Page 48: Tuner Operations
Tuner Operations Tuning in Stations From the remote control: STANDBY/ON AUDIO Press FM/AM repeatedly FM/AM MUTE CONTROL to select the band. The last received station of the TV CHANNEL TOP MENU MENU AUDIO/ selected band is tuned in. FM MODE AUDIO/ SUBTITLE TV VOLUME... -
Page 49: Using Preset Tuning
To tune in a preset station Using Preset Tuning From the remote control: Once a station is assigned to a channel number, the station can be Press FM/AM repeatedly FM/AM MUTE quickly tuned. You can preset up to 20 FM and 10 AM stations. to select the band. -
Page 50: Setting Up The Dvd Preferences
Setting up the DVD Preferences Setting the Initial Languages You can select your favorite language you listen to or read on the TV STANDBY/ON AUDIO screen. When you operate this system or watch a DVD, you will be able to CONTROL operate the system or to enjoy a DVD in the language you have TV CHANNEL... -
Page 51: Introducing The Dvd Preference (System)
I Basic language selecting procedure Introducing the DVD Preference (System) Ex. : To select the desired language as the initial language for “AUDIO.” You can set the DVD preference to match it to your usage and operating circumstances. From the remote control ONLY: SETUP Press SETUP. -
Page 52: Setting Up The Dvd Operations
Setting up the DVD Operations Press ∞ (or 5) to select (highlight) one of the system STANDBY/ON setting items listed on the AUDIO menu. ENTER CONTROL LANGUAGES SYSTEM TV CHANNEL TOP MENU MENU TV SCREEN 4 : 3 LB AUDIO/ SUBTITLE TV VOLUME FM MODE... -
Page 53: Setting The Parental (Rating) Level
Press ∞ (or 5) to select Setting the Parental (Rating) Level (highlight) the level you want, Using this function, you can restrict playback of DVD containing then press ENTER. violent scenes and those not suitable for your family members. ENTER Nobody can play such a disc unless this function is canceled. -
Page 54: Operating Jvc's Components
Operating JVC’s Components You can use the remote control to operate not only this unit but also other JVC products. • Refer also to the manuals supplied for the other products. – This remote control can operate a VCR whose remote control code is set to A code. -
Page 55: Operating Other Manufacturers' Tv
Operating Other Manufacturers’ TV ❏ To change the transmittable signals for operating a You can use the remote control to operate other manufactures’ TV. 1. Press and hold TV • Refer also to the manuals supplied for the other products. 2. -
Page 56: Maintenance
Maintenance To get the best performance of the unit, keep your discs and mechanism clean. General Notes Cleaning the unit In general, you will have the best performance by keeping your • Stains on the unit discs, and the mechanism clean. Should be wiped off with a soft cloth. -
Page 57: Troubleshooting
Troubleshooting Use this chart to help you solve daily operational problems. If there is any problem you cannot solve, contact your JVC service center. PROBLEM POSSIBLE CAUSE SOLUTION Power does not come on. The power cord. Insert the plug into the socket. -
Page 58: Specifications
Specifications Center unit (XV-THA5) Subwoofer (SP-WA5) Amplifier section Speaker: 20 cm Bass-reflex, Magnetically Shielded Front/Center/Rear: 35 watts per channel, min. RMS at 6 ohms as 1 kHz, Power Handling Capacity: 60 W with no more than 10 % total harmonic distortion. 3 Ω... - Page 59 Mains (AC) Line Instruction (not applicable for Europe, U.S.A., Canada, Australia and U.K.) CONPONENT OUT CAUTION for mains (AC) line BEFORE PLUGGING IN, do check that your mains (AC) line voltage corresponds with the position of the voltage selector switch provided on the outside of this equipment and, if different, reset the voltage selector switch, to prevent from a damage or risk of fire/electric shock.
- Page 60 AUDIO/FM MODE STANDBY/ON D I G I T A L VOLUME SOURCE S U R R O U N D DVD DIGITAL CINEMA SYSTEM TH-A5 D I G I T A L RM-STHA5U DVD CINEMA SYSTEM INSTRUCTIONS MANUAL DE INSTRUCCIONES For Customer Use: Enter below the Model No.
- Page 61 Warnings, Cautions and Others / Avisos, precauciones y otras notas / Advertêcias, precauções e outras notas Caution –– STANDBY/ON switch! Precaução –– Interruptor STANDBY/ON Disconnect the mains plug to shut the power off completely. The Desconectar o cabo de alimentação para desligar a alimentação por STANDBY/ON switch in any position does not disconnect the completo.
- Page 62 Caution: Proper Ventilation Precaução: ventilação apropriada To avoid risk of electric shock and fire and to protect from damage. Para prevenir o risco de choque elétrico ou incêndio e para proteger o Locate the apparatus as follows: aparelho contra danos. Front: No obstructions open spacing.
- Page 63 IMPORTANT FOR LASER PRODUCTS IMPORTANTE PARA PRODUCTOS LÁSER IMPOTANTE PARA PRODUTOS LASER REPRODUCTION OF LABELS / REPRODUCCIÓN DE ETIQUETAS / REPRODUÇÃO DE ETIQUETAS 1 CLASSIFICATION LABEL, PLACED ON EXTERIOR 2 WARNING LABEL, PLACED INSIDE THE UNIT SURFACE 2 ETIQUETA DE ADVERTENCIA, PEGADA EN EL IN- 1 ETIQUETA DE CLASIFICACIÓN, COLOCADA EN LA TERIOR DE LA UNIDAD SUPERFICIE EXTERIOR...
- Page 64 Adjusting Stereo Sound ............20 Setting the Parental (Rating) Level .......... 49 Adjusting Dolby Digital and DTS Digital Surround ....21 Operating JVC’s Components ...... 50 Activating Dynamic Range Compression ........ 21 Adjusting Dolby Surround ............22 Operating Other Manufacturers’ TV .... 51 Adjusting DSP Modes ..............
-
Page 65: Parts Identification
D I G I T A L VOLUME SOURCE S U R R O U N D DVD DIGITAL CINEMA SYSTEM TH-A5 D I G I T A L See pages in the parentheses for details. Front Panel 1 STANDBY/ON 7 Remote sensor button and STANDBY lamp (10 –... -
Page 66: Remote Control
MUTING IMPORTANT: If you press VCR CONTROL ON, this remote control will work ONLY for the JVC’s VCR. When you want to operate the system again, press VCR CONTROL OFF. y TV CHANNEL + and – buttons (50, 51) u TV VOLUME + and – buttons (50, 51) -
Page 67: Getting Started
Getting Started Before Installation Putting Batteries in the Remote Control General Precautions Before using the remote control, put two supplied batteries first. • When using the remote control, aim the remote control directly at • DO NOT insert any metal object into the center unit. the remote sensor on the center unit. -
Page 68: Connecting The Fm And Am Antennas
Connecting the FM and AM Antennas If AM reception is poor, connect single vinyl-covered wire (not supplied). AM Loop Antenna (supplied) If FM reception is poor, connect outdoor FM antenna (not supplied). Snap the tabs on the loop into FM Antenna (supplied) the slots of the base to assemble the AM loop antenna. -
Page 69: Speaker Layout Diagram
AUDIO/FM MODE speaker STANDBY/ON D I G I T A L VOLUME SOURCE S U R R O U N D DVD DIGITAL THEATER SYSTEM TH-A5 D I G I T A L Subwoofer Left front speaker Center speaker Left rear... -
Page 70: Connecting The Speakers
When setting the speakers Connecting the Speakers To obtain the best possible sound from this system, you need to place all the speakers except the subwoofer at the same distance Connect the satellite speakers, center speaker, and subwoofer to the from the listening position with each front faced toward the listener. -
Page 71: Connecting Audio/Video Component
Getting Started Connecting Audio/Video Component Turn the power off to all components before connections. Audio component connection Illustrations of the input/output terminals below are typical Connect the other component to the center unit with the examples. audio cord. When you connect the other component, refer also to its Use the cord supplied with the other component or manuals since the terminal name actually printed on the rear purchase it at an electric appliance store. - Page 72 TV connection The S-video cord and the component video cord are not supplied with this system. Use the cords supplied with the other component or purchase them at an electric appliance store. Video cord (supplied) Component video cord (not supplied) S-video cord (not supplied) Illustrations below are typical examples.
-
Page 73: Basic Dvd Operations
FM/AM MUTING Press MUTING. • When you use a JVC’s TV, you can turn on your TV by pressing on the remote control, and select the video input by To restore the sound, press pressing TV/VIDEO. (If your TV is not a JVC’s, see “Operating MUTING again. -
Page 74: Activate Realistic Sound Field
Stop Playback ctivate Realistic Sound Field Press 7 twice. TUNER PRESET You can enjoy two kinds of surround—Digital Multichannel Surround (Dolby Digital and DTS Digital Surround) and DSP Playback stops completely and “DVD” appears modes. on the display. (The DVD player goes on working for 3 minutes after playback stops.) •... -
Page 75: Basic Vcd/Cd Operations
• When you use a JVC’s TV, you can turn on your TV by pressing on the remote control, and select the video input by pressing TV/VIDEO. -
Page 76: Activate Realistic Sound Field
Stop Playback ctivate Realistic Sound Field Press 7 twice. You can enjoy DSP modes. TUNER PRESET Playback stops completely and “VCD” or “CD” DSP modes—HALL, THEATER, PAVILION, appears on the display. (The DVD player goes DANCE CLUB, LIVE CLUB on working for 3 minutes after playback stops.) •... -
Page 77: Basic Tuner Operations
Basic Tuner Operations djust the Volume STANDBY/ON AUDIO STANDBY/ON To increase the volume, press and hold VOLUME +. AUDIO To decrease the volume, press and hold VOLUME –. CONTROL VOLUME TV CHANNEL TOP MENU MENU AUDIO/ SUBTITLE TV VOLUME FM MODE CAUTION: DISPLAY RETURN... -
Page 78: Other Basic Operations
Other Basic Operations Turning Off the Power with the Timer ENTER You can fall asleep while listening to music—Sleep Timer. VOLUME From the remote control ONLY: FM/AM MUTING SLEEP Press SLEEP. • Each time you press the button, the shut-off time changes SOUND as follows: SETTING... -
Page 79: Speaker Settings
Speaker Settings Setting the Speaker Information To obtain best possible surround, register the center speaker (C–SP) STANDBY/ON AUDIO and rear speakers (R–SP) settings after completing all the connections. CONTROL TV CHANNEL TOP MENU MENU Before you start, remember... AUDIO/ There is a time limit in doing the following steps. If the setting is SUBTITLE TV VOLUME FM MODE... -
Page 80: Setting The Delay Time
Press 3 or 2 to adjust delay Setting the Delay Time time. • 3 : Increases delay time. Adjust the delay time of the sounds from the center speaker and the • 2 : Decreases delay time. rear speakers, comparing to that of the sounds from the front ENTER speakers. -
Page 81: Creating Realistic Sound Fields
Creating Realistic Sound Fields Dolby Pro Logic and Dolby 3 Stereo You can use the following surround to reproduce a realistic sound field. Dolby Surround encoding format records the left front channel, • Digital Multichannel Surround—Dolby Digital and DTS Digital right front channel, center channel, and rear channel signals (total 4 Surround channels) into 2 channels. - Page 82 I DSP (Digital Signal Processor) Modes To check the speaker connections and settings using the test DSP modes have been designed to create important acoustic tone surround elements. 1. Select and play a DVD encoded with Dolby Digital or DTS Digital Surround.
-
Page 83: Adjusting Stereo Sound
Creating Realistic Sound Fields To adjust the output balance for the front speakers 1) Press SOUND repeatedly until the VCR CHANNEL SOUND TUNING adjustment indication for the front B.SEARCH F.SEARCH speakers appears on the display. • Each time you press the button, the adjustment indication ENTER on the display changes as follows: 00 F 00... -
Page 84: Adjusting Dolby Digital And Dts Digital Surround
2) Press 3 or 2 to adjust the Adjusting Dolby Digital and output balance. DTS Digital Surround 3 : Decreases the left speaker ENTER output, or restores the right You can adjust the following settings while activating Dolby Digital speaker output. or DTS Digital Surround. -
Page 85: Adjusting Dolby Surround
Creating Realistic Sound Fields Press PRO LOGIC repeatedly on the PRO LOGIC remote control to select Dolby Pro Logic VCR CHANNEL or Dolby 3 Stereo. TUNING The PRO LOGIC indicator lights up on the display. B.SEARCH F.SEARCH • Each time you press the button, the indication changes as follows: ENTER PRO LOGIC... -
Page 86: Adjusting Dsp Modes
To adjust the output level for the center speaker, Select and play any source except Dolby Digital the rear speakers, and the subwoofer or DTS Digital Surround. 1) Press SOUND repeatedly to select the SOUND Press DSP MODE (or DSP on the front “CEN,”... -
Page 87: Adjusting Dsp Sound Parameters
Creating Realistic Sound Fields Adjusting DSP Sound Parameters VCR CHANNEL You can fine-adjust DSP modes more minutely by changing three TUNING parameters—room, liveness, and reverberation. B.SEARCH F.SEARCH Before you start, remember... • There is a time limit in doing the following steps. If the setting is ENTER canceled before you finish, start from step 2 again. -
Page 88: Disc Introduction-Dvd/Vcd/Cd
Disc Introduction—DVD/VCD/CD This system has been designed to play back the following discs: Disc structure—DVD, Video CD (VCD) and Audio CD (CD) A DVD disc consists of Titles, and each title may be divided into DVD, Video CD, Audio CD, CD-R, and CD-RW. •... -
Page 89: Basic Disc Operations
Basic Disc Operations To stop playback for a moment TUNER PRESET Press 3/8. While pausing, “PAUSE” appears on the STANDBY/ON AUDIO display. • To resume play, press 3/8. CONTROL To go to another chapter or track (except MP3) TV CHANNEL TOP MENU MENU Press ¢... -
Page 90: Dvd Playback
DVD Playback Some DVDs contain several audio languages, subtitles, and multi- Showing the On-Screen Bar angle views. When you find the following marks on the DVD or its package, you You can show the following information on the TV screen while a can select these elements recorded on the DVD. -
Page 91: Selecting The Subtitles
DVD Playback Selecting the Audio Languages While playing back a DVD containing audio languages (sound STANDBY/ON AUDIO track), you can select the language (sound track) to listen to. • You can set your favorite audio language as the initial audio CONTROL language. -
Page 92: Checking The Remaining Time
Checking the Remaining Time Moving to a Particular Portion Directly While playing back a DVD, you can check the remaining time to be You can move to another title, chapter, or particular scene in the played back. chapter directly. From the remote control ONLY: From the remote control ONLY: REMAIN Press REMAIN. -
Page 93: Searching For A Particular Point
DVD Playback To reverse the chapter—Variable Speed Reverse Search From the remote control ONLY: STANDBY/ON AUDIO Press 1 during playback or pause. CONTROL • Each time you press the button, the search speed B.SEARCH changes as follows: TV CHANNEL TOP MENU MENU AUDIO/ SUBTITLE... -
Page 94: Programming The Playing Order Of The Chapters-Program Play
From the remote control ONLY: Press ENTER. Press A–B REPEAT to select the start A-B REPEAT PROGRAM MENU SELECT: ENTER point. T I T L E CHAPT T I T L E CHAPT ENTER “REPEAT A” appears on the display. –... - Page 95 DVD Playback To erase the stored program Press 0 to eject the disc. • If you turn off the system or change the source, the STANDBY/ON AUDIO program is also erased. CONTROL To check the program contents TV CHANNEL TOP MENU MENU You can check the program contents by pressing PROGRAM.
-
Page 96: Dvd Special Effect Playback
7 Zoom DVD Special Effect Playback You can zoom in on the picture while playing back a DVD. 7 Still Picture/Frame-by-Frame Playback From the remote control ONLY: You can advance the still picture frame by frame while playing a Press ZOOM to zoom in. DVD. -
Page 97: Vcd/Cd Playback
VCD/CD Playback STANDBY/ON 1/35 00:12 AUDIO CONTROL MENU TV CHANNEL TOP MENU MENU On-screen bar goes off. RETURN AUDIO/ SUBTITLE TV VOLUME FM MODE DISPLAY * Appears only when a VCD is loaded. DISPLAY RETURN STEP TV/VIDEO 1 : Disc type ¢... -
Page 98: Disc Menu-Driven Playback (Only For Vcd)
Disc Menu–Driven Playback (Only for VCD) TIME – – : – – : Select this to move to a particular portion on the current disc. The Play Back Control function (PBC) allows you to operate the TRACK TIME – – : – – VCD using menus. -
Page 99: Repeating Playback
VCD/CD Playback Note: When the on-screen bar is shown on the screen, Repeat mode indication also changes as follows: STANDBY/ON AUDIO CONTROL REPEAT:ONE REPEAT:DISC TV CHANNEL TOP MENU MENU AUDIO/ SUBTITLE TV VOLUME FM MODE REPEAT OFF DISPLAY RETURN STEP TV/VIDEO 7 A–B Repeat TUNER PRESET... -
Page 100: Programming The Playing Order Of The Tracks-Program Play
Programming the Playing Order of the Repeat steps 3 and 4 to program other tracks Tracks—Program Play you want. • After 10 steps are programed, “NEXT «” is selected You can arrange the track playback order before you start playing. (highlighted). -
Page 101: Selecting Playback Channel
VCD/CD Playback Selecting Playback Channel When you play back a karaoke VCD or CD, you can only select STANDBY/ON AUDIO either the left channel or right channel to listen to. CONTROL Press AUDIO/FM MODE repeatedly. AUDIO/ FM MODE AUDIO/ TV CHANNEL TOP MENU MENU The on-screen bar appears on the screen for a while. -
Page 102: Vcd Special Effect Playback
7 Zoom VCD Special Effect Playback You can zoom in on the picture while playing a VCD. 7 Still Picture/Frame-by-Frame Playback From the remote control ONLY: You can advance the still picture frame by frame while playing a Press ZOOM to zoom in. VCD. -
Page 103: Mp3 Introduction
MP3 Introduction This system is incorporated with an MP3 decoder. You can play back MP3 tracks (files) recorded on CD-Rs, CD-RWs, and CD- ROMs. STANDBY/ON • Notice that “files” and “tracks” are used interchangeably. AUDIO CONTROL What is MP3? MP3 is an abbreviation of Motion Picture Experts Group (or MPEG) TV CHANNEL TOP MENU MENU... -
Page 104: Mp3 Playback
MP3 Playback To go off the on-screen bar Starting Playback From the remote control ONLY: DISPLAY Press DISPLAY. It is recommended to turn on your TV when playing back an MP3 • Each time you press the button, the on-screen bar disc. -
Page 105: Operations Using The On-Screen Display
MP3 Playback Operations Using the On-Screen Display It is recommended to turn on your TV when playing back an MP3 STANDBY/ON AUDIO disc. CONTROL When the loaded MP3 disc is recognized, the following on-screen TV CHANNEL TOP MENU MENU display appears on the TV screen. (The contents of this on-screen display varies according to the disc—the way MP3 tracks were AUDIO/ SUBTITLE... -
Page 106: Moving To A Particular Track Directly
Moving to a Particular Track Directly Repeating Playback You can move to a particular track on the disc directly. On an MP3 disc, A–B repeat cannot be used. You can enjoy only repeat play. From the remote control ONLY: To repeat playback—Repeat Play SEARCH Press SEARCH during playback or pause. -
Page 107: Tuner Operations
Tuner Operations Tuning in Stations From the remote control: STANDBY/ON AUDIO Press FM/AM repeatedly FM/AM MUTE CONTROL to select the band. The last received station of the TV CHANNEL TOP MENU MENU AUDIO/ selected band is tuned in. FM MODE AUDIO/ SUBTITLE TV VOLUME... -
Page 108: Using Preset Tuning
To tune in a preset station Using Preset Tuning From the remote control: Once a station is assigned to a channel number, the station can be Press FM/AM repeatedly FM/AM MUTE quickly tuned. You can preset up to 20 FM and 10 AM stations. to select the band. -
Page 109: Setting Up The Dvd Preferences
Setting up the DVD Preferences Setting the Initial Languages You can select your favorite language you listen to or read on the TV STANDBY/ON AUDIO screen. When you operate this system or watch a DVD, you will be able to CONTROL operate the system or to enjoy a DVD in the language you have TV CHANNEL... -
Page 110: Introducing The Dvd Preference (System)
I Basic language selecting procedure Introducing the DVD Preference (System) Ex. : To select the desired language as the initial language for “AUDIO.” You can set the DVD preference to match it to your usage and operating circumstances. From the remote control ONLY: SETUP Press SETUP. - Page 111 Setting up the DVD Preferences Press ∞ (or 5) to select (highlight) one of the system STANDBY/ON setting items listed on the AUDIO ENTER menu. CONTROL LANGUAGES SYSTEM TV CHANNEL TOP MENU MENU TV SCREEN 4 : 3 LB AUDIO/ SUBTITLE TV VOLUME FM MODE...
-
Page 112: Setting The Parental (Rating) Level
Press ∞ (or 5) to select Setting the Parental (Rating) Level (highlight) the level you want, Using this function, you can restrict playback of DVD containing then press ENTER. violent scenes and those not suitable for your family members. ENTER Nobody can play such a disc unless this function is canceled. -
Page 113: Operating Jvc's Components
Operating JVC’s Components You can use the remote control to operate not only this unit but also other JVC products. • Refer also to the manuals supplied for the other products. – This remote control can operate a VCR whose remote control code is set to A code. -
Page 114: Operating Other Manufacturers' Tv
Operating Other Manufacturers’ TV ❏ To change the transmittable signals for operating a You can use the remote control to operate other manufactures’ TV. 1. Press and hold TV • Refer also to the manuals supplied for the other products. 2. -
Page 115: Maintenance
Maintenance To get the best performance of the unit, keep your discs and mechanism clean. General Notes Cleaning the unit In general, you will have the best performance by keeping your • Stains on the unit discs, and the mechanism clean. Should be wiped off with a soft cloth. -
Page 116: Troubleshooting
Troubleshooting Use this chart to help you solve daily operational problems. If there is any problem you cannot solve, contact your JVC service center. PROBLEM POSSIBLE CAUSE SOLUTION Power does not come on. The power cord. Insert the plug into the socket. -
Page 117: Specifications
Specifications Center unit (XV-THA5) Subwoofer (SP-WA5) Amplifier section Speaker: 20 cm Bass-reflex, Magnetically Shielded Front/Center/Rear: 35 watts per channel, min. RMS at 6 ohms as 1 kHz, Power Handling Capacity: 60 W with no more than 10 % total harmonic distortion. 3 Ω... - Page 118 Mains (AC) Line Instruction (not applicable for Europe, U.S.A., Canada, Australia and U.K.) Instrucción sobre la línea de la red (CA) (no aplicable para Europa, EE.UU., Canadá, Australia, ni el Reino Unido) Instrução sobre a tensão da rede eléctrica (CA) (não aplicável para a Europa, os E.U.A., o Canadá, a Austrália e o Reino Unido) COMPONENT OUT CAUTION for mains (AC) line...
- Page 119 AUDIO/FM MODE STANDBY/ON D I G I T A L VOLUME SOURCE S U R R O U N D DVD DIGITAL CINEMA SYSTEM TH-A5 D I G I T A L RM-STHA5U DVD CINEMA SYSTEM INSTRUCTIONS For Customer Use: Enter below the Model No.
- Page 120 Warnings, Cautions and Others Caution –– STANDBY/ON switch! Disconnect the mains plug to shut the power off completely. The STANDBY/ON switch in any position does not disconnect the mains line. The power can be remote controlled. CAUTION To reduce the risk of electrical shocks, fire, etc.: 1.
- Page 121 IMPORTANT FOR LASER PRODUCTS REPRODUCTION OF LABELS 1 CLASSIFICATION LABEL, PLACED ON EXTERIOR 2 WARNING LABEL, PLACED INSIDE THE UNIT SURFACE CLASS 1 LASER PRODUCT KLASSE 1 LASER PRODUKT LUOKAN 1 LASER LAITE KLASS 1 LASER APPARAT PRODUCTO LASER CLASE 1 1.
- Page 122 Introducing the DVD Preference (System) ......47 Adjusting DSP Sound Parameters ..........24 Setting the Parental (Rating) Level .......... 49 Disc Introduction—DVD/VCD/CD ....25 Operating JVC’s Components ...... 50 Basic Disc Operations ........ 26 Operating Other Manufacturers’ TV .... 51 Maintenance ..........52 Troubleshooting .........
-
Page 123: Parts Identification
D I G I T A L VOLUME SOURCE S U R R O U N D DVD DIGITAL THEATER SYSTEM TH-A5 D I G I T A L See pages in the parentheses for details. Front Panel 1 STANDBY/ON 7 Remote sensor button and STANDBY lamp (10 –... -
Page 124: Remote Control
MUTING IMPORTANT: If you press VCR CONTROL ON, this remote control will work ONLY for the JVC’s VCR. When you want to operate the system again, press VCR CONTROL OFF. y TV CHANNEL + and – buttons (50, 51) u TV VOLUME + and – buttons (50, 51) -
Page 125: Getting Started
Getting Started Before Installation Putting Batteries in the Remote Control General Precautions Before using the remote control, put two supplied batteries first. • When using the remote control, aim the remote control directly at • DO NOT insert any metal object into the center unit. the remote sensor on the center unit. -
Page 126: Connecting The Fm And Am Antennas
Connecting the FM and AM Antennas If AM reception is poor, connect single vinyl-covered wire (not supplied). AM Loop Antenna (supplied) If FM reception is poor, connect outdoor FM antenna (not supplied). Snap the tabs on the loop into FM Antenna (supplied) the slots of the base to assemble the AM loop antenna. -
Page 127: Speaker Layout Diagram
AUDIO/FM MODE speaker STANDBY/ON D I G I T A L VOLUME SOURCE S U R R O U N D DVD DIGITAL THEATER SYSTEM TH-A5 D I G I T A L Subwoofer Left front speaker Center speaker Left rear... -
Page 128: Connecting The Speakers
When setting the speakers Connecting the Speakers To obtain the best possible sound from this system, you need to place all the speakers except the subwoofer at the same distance Connect the satellite speakers, center speaker, and subwoofer to the from the listening position with each front faced toward the listener. -
Page 129: Connecting Audio/Video Component
Getting Started Connecting Audio/Video Component Turn the power off to all components before connections. Audio component connection Illustrations of the input/output terminals below are typical Connect the other component to the center unit with the examples. audio cord. When you connect the other component, refer also to its Use the cord supplied with the other component or manuals since the terminal name actually printed on the rear purchase it at an electric appliance store. - Page 130 TV connection The S-video cord and the component video cord are not supplied with this system. Use the cords supplied with the other component or purchase them at an electric appliance store. Video cord (supplied) Component video cord (not supplied) S-video cord (not supplied) Illustrations below are typical examples.
-
Page 131: Basic Dvd Operations
FM/AM MUTING Press MUTING. • When you use a JVC’s TV, you can turn on your TV by pressing on the remote control, and select the video input by To restore the sound, press pressing TV/VIDEO. (If your TV is not a JVC’s, see “Operating MUTING again. -
Page 132: Activate Realistic Sound Field
Stop Playback ctivate Realistic Sound Field Press 7 twice. TUNER PRESET You can enjoy two kinds of surround—Digital Multichannel Surround (Dolby Digital and DTS Digital Surround) and DSP Playback stops completely and “DVD” appears modes. on the display. (The DVD player goes on working for 3 minutes after playback stops.) •... -
Page 133: Basic Vcd/Cd Operations
• When you use a JVC’s TV, you can turn on your TV by pressing on the remote control, and select the video input by pressing TV/VIDEO. -
Page 134: Activate Realistic Sound Field
Stop Playback ctivate Realistic Sound Field Press 7 twice. You can enjoy DSP modes. TUNER PRESET Playback stops completely and “VCD” or “CD” DSP modes—HALL, THEATER, PAVILION, appears on the display. (The DVD player goes on working for 3 minutes after playback stops.) DANCE CLUB, LIVE CLUB •... -
Page 135: Basic Tuner Operations
Basic Tuner Operations djust the Volume STANDBY/ON AUDIO STANDBY/ON To increase the volume, press and hold VOLUME +. AUDIO To decrease the volume, press and hold VOLUME –. CONTROL VOLUME TV CHANNEL TOP MENU MENU AUDIO/ SUBTITLE TV VOLUME FM MODE CAUTION: DISPLAY RETURN... -
Page 136: Other Basic Operations
Other Basic Operations Turning Off the Power with the Timer ENTER You can fall asleep while listening to music—Sleep Timer. VOLUME From the remote control ONLY: FM/AM MUTING SLEEP Press SLEEP. • Each time you press the button, the shut-off time changes SOUND as follows: SETTING... -
Page 137: Speaker Settings
Speaker Settings Setting the Speaker Information To obtain best possible surround, register the center speaker (C–SP) STANDBY/ON and rear speakers (R–SP) settings after completing all the AUDIO connections. CONTROL TV CHANNEL TOP MENU MENU Before you start, remember... AUDIO/ There is a time limit in doing the following steps. If the setting is SUBTITLE TV VOLUME FM MODE... -
Page 138: Setting The Delay Time
Press 3 or 2 to adjust delay Setting the Delay Time time. • 3 : Increases delay time. Adjust the delay time of the sounds from the center speaker and the • 2 : Decreases delay time. rear speakers, comparing to that of the sounds from the front ENTER speakers. -
Page 139: Creating Realistic Sound Fields
Creating Realistic Sound Fields You can use the following surround to reproduce a realistic sound Dolby Pro Logic and Dolby 3 Stereo field. Dolby Surround encoding format records the left front channel, • Digital Multichannel Surround—Dolby Digital and DTS Digital right front channel, center channel, and rear channel signals (total 4 Surround channels) into 2 channels. - Page 140 I DSP (Digital Signal Processor) Modes To check the speaker connections and settings using the test DSP modes have been designed to create important acoustic tone surround elements. 1. Select and play a DVD encoded with Dolby Digital or DTS Digital Surround.
-
Page 141: Adjusting Stereo Sound
Creating Realistic Sound Fields To adjust the output balance for the front speakers 1) Press SOUND repeatedly until the VCR CHANNEL SOUND TUNING adjustment indication for the front B.SEARCH F.SEARCH speakers appears on the display. • Each time you press the button, the adjustment indication ENTER on the display changes as follows: 00 F 00... -
Page 142: Adjusting Dolby Digital And Dts Digital Surround
2) Press 3 or 2 to adjust the Adjusting Dolby Digital and output balance. DTS Digital Surround 3 : Decreases the left speaker ENTER output, or restores the right You can adjust the following settings while activating Dolby Digital speaker output. or DTS Digital Surround. -
Page 143: Adjusting Dolby Surround
Creating Realistic Sound Fields Press PRO LOGIC repeatedly on the PRO LOGIC remote control to select Dolby Pro Logic VCR CHANNEL or Dolby 3 Stereo. TUNING The PRO LOGIC indicator lights up on the display. B.SEARCH F.SEARCH • Each time you press the button, the indication changes as follows: ENTER 3 STEREO... -
Page 144: Adjusting Dsp Modes
To adjust the output level for the center speaker, Select and play any source except Dolby Digital the rear speakers, and the subwoofer or DTS Digital Surround. 1) Press SOUND repeatedly to select the SOUND Press DSP MODE (or DSP on the front “CEN,”... -
Page 145: Adjusting Dsp Sound Parameters
Creating Realistic Sound Fields Adjusting DSP Sound Parameters VCR CHANNEL You can fine-adjust DSP modes more minutely by changing three TUNING parameters—room, liveness, and reverberation. B.SEARCH F.SEARCH Before you start, remember... • There is a time limit in doing the following steps. If the setting is ENTER canceled before you finish, start from step 2 again. -
Page 146: Disc Introduction-Dvd/Vcd/Cd
Disc Introduction—DVD/VCD/CD This system has been designed to play back the following discs: Disc structure—DVD, Video CD (VCD) and Audio CD (CD) DVD, Video CD, Audio CD, CD-R, and CD-RW. A DVD disc consists of Titles, and each title may be divided into •... -
Page 147: Basic Disc Operations
Basic Disc Operations To stop playback for a moment TUNER PRESET Press 3/8. While pausing, “PAUSE” appears on the STANDBY/ON AUDIO display. • To resume play, press 3/8. CONTROL To go to another chapter or track (except MP3) TV CHANNEL TOP MENU MENU Press ¢... -
Page 148: Dvd Playback
DVD Playback Some DVDs contain several audio languages, subtitles, and multi- Showing the On-Screen Bar angle views. When you find the following marks on the DVD or its package, you You can show the following information on the TV screen while a can select these elements recorded on the DVD. -
Page 149: Selecting The Subtitles
DVD Playback Selecting the Audio Languages While playing back a DVD containing audio languages (sound STANDBY/ON AUDIO track), you can select the language (sound track) to listen to. • You can set your favorite audio language as the initial audio CONTROL language. -
Page 150: Checking The Remaining Time
Checking the Remaining Time Moving to a Particular Portion Directly While playing back a DVD, you can check the remaining time to be You can move to another title, chapter, or particular scene in the played back. chapter directly. From the remote control ONLY: From the remote control ONLY: REMAIN Press REMAIN. -
Page 151: Searching For A Particular Point
DVD Playback To reverse the chapter—Variable Speed Reverse Search From the remote control ONLY: STANDBY/ON AUDIO Press 1 during playback or pause. CONTROL • Each time you press the button, the search speed B.SEARCH changes as follows: TV CHANNEL TOP MENU MENU AUDIO/ SUBTITLE... -
Page 152: Programming The Playing Order Of The Chapters-Program Play
From the remote control ONLY: Press ENTER. Press A–B REPEAT to select the start A-B REPEAT SELECT: ENTER PROGRAM MENU point. T I T L E CHAPT T I T L E CHAPT ENTER “REPEAT A” appears on the display. –... - Page 153 DVD Playback To erase the stored program Press 0 to eject the disc. • If you turn off the system or change the source, the STANDBY/ON AUDIO program is also erased. CONTROL To check the program contents TV CHANNEL TOP MENU MENU You can check the program contents by pressing PROGRAM.
-
Page 154: Dvd Special Effect Playback
7 Zoom DVD Special Effect Playback You can zoom in on the picture while playing back a DVD. 7 Still Picture/Frame-by-Frame Playback From the remote control ONLY: You can advance the still picture frame by frame while playing a Press ZOOM to zoom in. DVD. -
Page 155: Vcd/Cd Playback
VCD/CD Playback STANDBY/ON 1/35 00:12 AUDIO CONTROL MENU TV CHANNEL TOP MENU MENU On-screen bar goes off. RETURN AUDIO/ SUBTITLE TV VOLUME FM MODE DISPLAY * Appears only when a VCD is loaded. DISPLAY RETURN STEP TV/VIDEO 1 : Disc type ¢... -
Page 156: Disc Menu-Driven Playback (Only For Vcd)
Disc Menu–Driven Playback (Only for VCD) TIME – – : – – : Select this to move to a particular portion on the current disc. The Play Back Control function (PBC) allows you to operate the TRACK TIME – – : – – VCD using menus. -
Page 157: Repeating Playback
VCD/CD Playback Note: When the on-screen bar is shown on the screen, Repeat mode indication also changes as follows: STANDBY/ON AUDIO CONTROL REPEAT:ONE REPEAT:DISC TV CHANNEL TOP MENU MENU AUDIO/ SUBTITLE TV VOLUME FM MODE REPEAT OFF DISPLAY RETURN STEP TV/VIDEO 7 A–B Repeat TUNER PRESET... -
Page 158: Programming The Playing Order Of The Tracks-Program Play
Programming the Playing Order of the Repeat steps 3 and 4 to program other tracks Tracks—Program Play you want. • After 10 steps are programed, “NEXT «” is selected (highlighted). If you want to program more steps, press You can arrange the track playback order before you start playing. ENTER. -
Page 159: Selecting Playback Channel
VCD/CD Playback Selecting Playback Channel When you play back a karaoke VCD or CD, you can only select STANDBY/ON AUDIO either the left channel or right channel to listen to. CONTROL Press AUDIO/FM MODE repeatedly. AUDIO/ FM MODE TV CHANNEL AUDIO/ TOP MENU MENU... -
Page 160: Vcd Special Effect Playback
7 Zoom VCD Special Effect Playback You can zoom in on the picture while playing a VCD. 7 Still Picture/Frame-by-Frame Playback From the remote control ONLY: You can advance the still picture frame by frame while playing a Press ZOOM to zoom in. VCD. -
Page 161: Mp3 Introduction
MP3 Introduction This system is incorporated with an MP3 decoder. You can play back MP3 tracks (files) recorded on CD-Rs, CD-RWs, and CD- ROMs. STANDBY/ON • Notice that “files” and “tracks” are used interchangeably. AUDIO CONTROL What is MP3? MP3 is an abbreviation of Motion Picture Experts Group (or MPEG) TV CHANNEL TOP MENU MENU... -
Page 162: Mp3 Playback
MP3 Playback To go off the on-screen bar Starting Playback From the remote control ONLY: DISPLAY Press DISPLAY. It is recommended to turn on your TV when playing back an MP3 • Each time you press the button, the on-screen bar disc. -
Page 163: Operations Using The On-Screen Display
MP3 Playback Operations Using the On-Screen Display It is recommended to turn on your TV when playing back an MP3 STANDBY/ON AUDIO disc. CONTROL When the loaded MP3 disc is recognized, the following on-screen TV CHANNEL TOP MENU MENU display appears on the TV screen. (The contents of this on-screen display varies according to the disc—the way MP3 tracks were AUDIO/ SUBTITLE... -
Page 164: Moving To A Particular Track Directly
Moving to a Particular Track Directly Repeating Playback You can move to a particular track on the disc directly. On an MP3 disc, A–B repeat cannot be used. You can enjoy only repeat play. From the remote control ONLY: SEARCH To repeat playback—Repeat Play Press SEARCH during playback or pause. -
Page 165: Tuner Operations
Tuner Operations Tuning in Stations From the remote control: STANDBY/ON AUDIO Press FM/AM repeatedly FM/AM MUTE CONTROL to select the band. The last received station of the TV CHANNEL TOP MENU MENU AUDIO/ selected band is tuned in. FM MODE AUDIO/ SUBTITLE TV VOLUME... -
Page 166: Using Preset Tuning
To tune in a preset station Using Preset Tuning From the remote control: Once a station is assigned to a channel number, the station can be Press FM/AM repeatedly FM/AM MUTE quickly tuned. You can preset up to 20 FM and 10 AM stations. to select the band. -
Page 167: Setting Up The Dvd Preferences
Setting up the DVD Preferences Setting the Initial Languages You can select your favorite language you listen to or read on the TV STANDBY/ON AUDIO screen. When you operate this system or watch a DVD, you will be able to CONTROL operate the system or to enjoy a DVD in the language you have TV CHANNEL... -
Page 168: Introducing The Dvd Preference (System)
I Basic language selecting procedure Introducing the DVD Preference (System) Ex. : To select the desired language as the initial language for “AUDIO.” You can set the DVD preference to match it to your usage and operating circumstances. From the remote control ONLY: SETUP Press SETUP. - Page 169 Setting up the DVD Preferences Press ∞ (or 5) to select (highlight) one of the system STANDBY/ON setting items listed on the AUDIO ENTER menu. CONTROL LANGUAGES SYSTEM TV CHANNEL TOP MENU MENU TV SCREEN 4 : 3 LB AUDIO/ SUBTITLE TV VOLUME FM MODE...
-
Page 170: Setting The Parental (Rating) Level
Press ∞ (or 5) to select Setting the Parental (Rating) Level (highlight) the level you want, Using this function, you can restrict playback of DVD containing then press ENTER. violent scenes and those not suitable for your family members. ENTER Nobody can play such a disc unless this function is canceled. -
Page 171: Operating Jvc's Components
Operating JVC’s Components You can use the remote control to operate not only this unit but also other JVC products. • Refer also to the manuals supplied for the other products. – This remote control can operate a VCR whose remote control code is set to A code. -
Page 172: Operating Other Manufacturers' Tv
Operating Other Manufacturers’ TV ❏ To change the transmittable signals for operating a You can use the remote control to operate other manufactures’ TV. 1. Press and hold TV • Refer also to the manuals supplied for the other products. 2. -
Page 173: Maintenance
Maintenance To get the best performance of the unit, keep your discs and mechanism clean. General Notes Cleaning the unit In general, you will have the best performance by keeping your • Stains on the unit discs, and the mechanism clean. Should be wiped off with a soft cloth. -
Page 174: Troubleshooting
Troubleshooting Use this chart to help you solve daily operational problems. If there is any problem you cannot solve, contact your JVC service center. PROBLEM POSSIBLE CAUSE SOLUTION Power does not come on. The power cord. Insert the plug into the socket. -
Page 175: Specifications
Specifications Center unit (XV-THA5) Subwoofer (SP-WA5) Amplifier section Speaker: 20 cm Bass-reflex, Magnetically Shielded Front/Center/Rear: 35 watts per channel, min. RMS at 6 ohms as 1 kHz, Power Handling Capacity: 60 W with no more than 10 % total harmonic distortion. 3 Ω... - Page 176 Mains (AC) Line Instruction (not applicable for Europe, U.S.A., Canada, Australia and U.K.) COMPONENT OUT CAUTION for mains (AC) line BEFORE PLUGGING IN, do check that your mains (AC) line voltage corresponds with the position of the voltage selector switch provided on the outside of this equipment and, if different, reset the voltage selector switch, to prevent from a damage or risk of fire/electric shock.
Need help?
Do you have a question about the TH-A5 and is the answer not in the manual?
Questions and answers
Dvd/cd player will not open
The JVC TH-A5 DVD/CD player may not open because the disc tray automatically closes 35 seconds after being opened if no action is taken. Additionally, if there is a disc playback issue, such as a "REGION ERR" message, the player may not function properly. Ensure that the player is connected correctly to the TV and that the setup menu settings are configured properly. If the problem persists, try pressing the eject button (0) again on the front panel.
This answer is automatically generated