Table of Contents
Advertisement
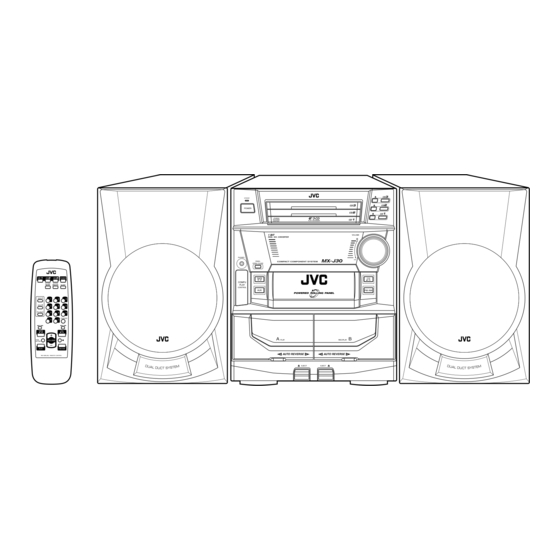
COMPACT COMPONENT SYSTEM
SYSTEME DE COMPOSANTS COMPACT
MX-J30
Consists of CA-MXJ30 and SP-MXJ30.
Composé du CA-MXJ30 et SP-MXJ30.
SOUND
ACTIVE
MODE
BASS EX.
SLEEP
TAPE-
A
TAPE-
B
REC PAUSE
FM MODE
+
FADE
MUTING
–
RM–SMXJ30J REMOTE CONTROL
MX-J30[J].COVER/5
SP-MXJ30
INSTRUCTIONS
MANUEL D'INSTRUCTIONS
1
CA-MXJ30
STANDBY
3
CD
POWER
2
CD
COMPACT
CD
1
PLAY & EXCHANGER
DIGITAL AUDIO
1 BIT
VOLUME
DUAL D/A CONVERTER
+
PHONES
–
PANEL
OPEN / CLOSE
TAPE
COMPU
PLAY
CONTROL
AUX
PLAY
REC/PLAY
AUTO REVERSE
AUTO REVERSE
EJECT
EJECT
99.1.27, 6:16 PM
SP-MXJ30
CD
3
2
CD
1
CD
C D
/
FM AM
COMPACT
DIGITAL AUDIO
For Customer Use:
Enter below the Model No. and Serial
No. which are located either on the rear,
bottom or side of the cabinet. Retain this
information for future reference.
Model No.
Serial No.
GVT0011-001A
[J]
Advertisement
Table of Contents

Subscribe to Our Youtube Channel
Related Manuals for JVC MX-J30


Summary of Contents for JVC MX-J30
- Page 1 COMPACT COMPONENT SYSTEM SYSTEME DE COMPOSANTS COMPACT MX-J30 Consists of CA-MXJ30 and SP-MXJ30. Composé du CA-MXJ30 et SP-MXJ30. SOUND ACTIVE MODE BASS EX. SLEEP TAPE- TAPE- REC PAUSE FM MODE FADE MUTING – RM–SMXJ30J REMOTE CONTROL MANUEL D'INSTRUCTIONS MX-J30[J].COVER/5 SP-MXJ30...
- Page 2 Consult the dealer or an experienced radio/TV technician for help. WARNING: TO REDUCE THE RISK OF FIRE OR ELECTRIC SHOCK, DO NOT EXPOSE THIS APPLIANCE TO RAIN OR MOISTURE. MX-J30[J].Safety/5 CAUTION To reduce the risk of electrical shocks, fire, etc.: 1. Do not remove screws, covers or cabinet.
- Page 3 15 cm in.) 1 cm in.) 15 cm MX-J30[J].Safety/5 For Canada/pour le Canada THIS DIGITAL APPARATUS DOES NOT EXCEED THE CLASS B LIMITS FOR RADIO NOISE EMISSIONS FROM DIGITAL APPARATUS AS SET OUT IN THE INTERFERENCE-CAUSING EQUIPMENT STANDARD ENTITLED “DIGITAL APPARATUS,”...
- Page 4 Introduction We would like to thank you for purchasing one of our JVC products. Before operating this unit, read this manual carefully and thoroughly to obtain the best possible performance from your unit, and retain this manual About This Manual This manual is organized as follows: •...
-
Page 5: Table Of Contents
Recording ... 16 Using the Timers ... 18 Maintenance ... 21 Troubleshooting ... 22 Specifications ... 22 EN01-11.MX-J30[J]/5 Front Panel ... 4 Remote Control ... 5 Unpacking ... 6 Putting the Batteries into the Remote Control ... 6 Connecting Antennas ... 6 Connecting Speakers ... -
Page 6: Location Of The Buttons And Controls
CLOSE to open the panel. To close the panel, press the button again. STANDBY POWER PHONES PANEL OPEN / CLOSE TAPE COMPU PLAY CONTROL EN01-11.MX-J30[J]/5 PRESET START/STOP REVERSE DEMO DUBBING MODE TIMER CANCEL /CLOCK CD REC START DECK A/B COMPACT PLAY &... -
Page 7: Front Panel
Powered Rolling Panel i PRESET – / + buttons (11) 4 / ¢ (reverse search/forward search) buttons (9, 13, 18) o REVERSE MODE button (15, 17) EN01-11.MX-J30[J]/5 S.MODE REPEAT ALL 1 CD RANDOM PRGM ; REC START/STOP button (16) a DUBBING button (17) -
Page 8: Remote Control
EJECT When using the remote control, point it at the remote sensor on the front panel. EN01-11.MX-J30[J]/5 Remote Control 1 Disc number buttons (CD 1, CD 2, and CD 3) (12) Pressing one of these buttons also turns on the unit. -
Page 9: Getting Started
• DO NOT leave the batteries in the battery compartment when you are not going to use the remote control for an extended period of time. Otherwise, it will be damaged from battery leakage. EN01-11.MX-J30[J]/5 Connecting Antennas FM antenna ANTENNA 13/16 in. -
Page 10: Connecting Speakers
• Make sure the antenna conductors do not touch any other terminals and connecting cords. • Keep the antennas away from metallic parts of the unit, connecting cords, and the AC power cord. EN01-11.MX-J30[J]/5 Connecting Speakers You can connect a pair of the front speakers. Vinyl-covered wire... -
Page 11: Connecting Other Equipment
Audio equipment To audio output Connect the audio output jacks on the other equipment and the AUX jacks on the rear, using an audio cord (not supplied). EN01-11.MX-J30[J]/5 NOW, you can plug in the unit and other connected equipment FINALLY! ANTENNA... -
Page 12: Common Operations
If there is a power failure The clock loses the setting and is reset to “AM 12:00.” You need to set the clock again. EN01-11.MX-J30[J]/5 Turning On the Power and Selecting the Sources When you press the play button for a particular source (FM/... -
Page 13: Adjusting The Volume
To turn down the volume level temporarily Press FADE MUTING on the remote control. To restore the sound, press the button again. EN01-11.MX-J30[J]/5 Reinforcing the Bass Sound The richness and fullness of the bass sound is maintained regardless of how low you set the volume. -
Page 14: Listening To Fm And Am Broadcasts
1 again. Tune in the station you want to preset. • See “Tuning in a Station” above. EN01-11.MX-J30[J]/5 Press SET. A.BASS EX FM AM Press PRESET – / + to select a preset number A.BASS EX... -
Page 15: Playing Back Cds
• The disc indicator flashes while the corresponding CD is being played. • The disc indicator goes off when the unit has detected that there is no CD on the corresponding disc tray. EN12-15.MX-J30[J]/5 Playing Back the Entire Discs — Continuous Play You can play CDs continuously. -
Page 16: Programming The Playing Order Of The Tracks - Program Play
• To use Repeat play for Program play, press REPEAT after starting Program play. Load discs. • If the current playing source is not the CD player, press CD 6, then 7 before going to the next step. EN12-15.MX-J30[J]/5 TUNING Press PROGRAM. A.BASS EX S.MODE PRGM •... -
Page 17: Playing At Random - Random Play
To stop during play, press 7. • Random play also stops when one of the disc trays is opened. EN12-15.MX-J30[J]/5 To exit from Random play mode, press RANDOM again before or after play so that the unit enters Continuous play mode. -
Page 18: Playing Back Tapes
To remove the cassette, press 0 EJECT for deck A or EJECT 0 for deck B. EN12-15.MX-J30[J]/5 To play both sides repeatedly — Reverse Mode Reverse Mode works for both decks at the same time. When it is in use, the tape automatically reverses at the end of a side and the unit starts playing the other side of the tape, and repeats the same process. -
Page 19: Recording
When using type II tape, be careful not to cover the holes used to detect the tape type. EN16-22.MX-J30[J]/5 Recording Tapes on Deck B Press EJECT 0 for the deck B. Put in a recordable cassette, with the exposed part of the tape down. -
Page 20: Dubbing Tapes
— To cancel Reverse Mode, press the button again so that the Reverse Mode indicator lights up as — EN16-22.MX-J30[J]/5 CD Direct Recording REC PAUSE Everything on the CD goes onto the tape in the order it is on the CD, or according to the order you have made for Program play. -
Page 21: Using The Timers
S.MODE DAILY S.MODE DAILY EN16-22.MX-J30[J]/5 Set the on-time you want the unit to turn on. 1) Press 4 or ¢ to set the hour, then press SET. 2) Press 4 or ¢ to set the minute, then press SET. -
Page 22: Using Recording Timer
The settings you have done are shown on the display in sequence for your confirmation. If the unit is turned on when the timer-on time comes Daily Timer does not work. EN16-22.MX-J30[J]/5 Using Recording Timer PRESET With Recording Timer, you can make a tape of a radio broadcast automatically. -
Page 23: Using Sleep Timer
To turn on the Recording Timer, press SET. The REC indicator lights up on the display. ºThe settings you have done are shown on the display in sequence for your confirmation. EN16-22.MX-J30[J]/5 Using Sleep Timer PRESET With Sleep Timer, you can fall asleep to music. -
Page 24: Maintenance
DO NOT use any solvent — such as conventional record cleaner, spray, thinner, or benzine — to clean the disc. EN16-22.MX-J30[J]/5 Handling cassette tapes • If the tape is loose in its cassette, take up the slack by inserting a pencil in one of the reels and rotating. -
Page 25: Troubleshooting
50 — 14,000 Hz Metal (type IV): 50 — 14,000 Hz (only for playback) Wow and flutter 0.15% (WRMS) EN16-22.MX-J30[J]/5 Cause Connections are incorrect or loose. • Antennas are disconnected. • The AM loop antenna is too close to the unit. -
Page 26: How To Locate Your Jvc Service Center
Sophisticated electronic products may require occasional service. Just as quality is a keyword in the engineering and production of the wide array of JVC products, service is the key to maintaining the high level of performance for which JVC is world famous. The JVC service and engineering organization stands behind our products. -
Page 27: Limited Warranty
WHAT WE WILL DO: If this product is found to be defective, JVC will repair or replace defective parts at no charge to the original owner. Such repair and replacement services shall be rendered by JVC during normal business hours at JVC authorized service centers. - Page 28 VICTOR COMPANY OF JAPAN, LIMITED 0299MWMMDWJEM MX-J30[J].COVER/5 99.1.27, 6:16 PM...
Need help?
Do you have a question about the MX-J30 and is the answer not in the manual?
Questions and answers