
Related Manuals for Rich electric INVERTEK


Summary of Contents for Rich electric INVERTEK
-
Page 1: User Manual
§ Q ¨ Î ¿ ³ · ~ ª Ñ ¥ ÷ ¦ ³ ¤ ½ ¥ q RICH ELECTRIC CO.,LTD. INVERTEK ® SWITCH-MODE BATTERY CHARGER (MICROPROCESSOR SYSTEM) USER MANUAL FOR ALL PATTERNS 1 AND 3 OUTPUTS... -
Page 2: Table Of Contents
CONTENTS Introduction......................2 Technical Features ....................2 Advanced Charging Technique ................3 Safety Devices......................3 Options........................4 Safety Instruction....................4 Installation......................5 Front Panel ......................7 LED Indicators....................... 7 Instruction of Charging Curve Selection ............7 DC Power Supply....................9 BTS/Remote Control ................... -
Page 3: Introduction
FLOATING Charge/TOP-UP Charge : Compensates for constant battery drain, while keeping the battery fully charged. Invertek Battery Charger is the only charger on the market to allow the battery to be connected and used constantly, while still offering a real BOOST (high voltage) charge over short period. -
Page 4: Advanced Charging Technique
It means that the on-board circuit can be used while keeping the battery charge level constant. WITHOUT BATTERY AND IN SPECIAL CIRCUMSTANCES, THE INVERTEK CHARGER SUPPLIES STABLE VOLTAGE. General form of the charging curve (five possible levels according to battery type) -
Page 5: Options
CAUTION: In case of fault, charger switches off automatically. Disconnect charger from mains then wait for approximately 10 minutes before starting it again. 2. Remote Control: It can be connected to the Invertek charger. All operating controls and displays are available on the remote control unit. -
Page 6: Installation
Protection from unauthorized handling. Dry dust free room, no condensation, no rodents. Keep ventilation holes free. The ventilation of the Invertek is designed in such a way that it will work most efficiently when mounted horizontally. Before any connection, put the switch on the right charging curve. - Page 7 2 x 30A WARNING: Check carefully the tightness of the battery connections to the charger (risk if not properly tightened). Rich Electric will not take charge of damage caused by a bad tightness of connections. Don’t connect a charge distributor on an Invertek charger, 1 or 3 outputs.
-
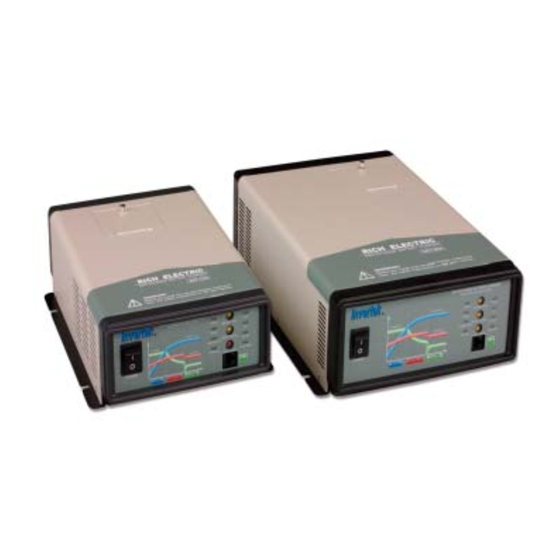
Page 8: Front Panel
Every battery is designed according to particular technology and therefore calls for a particular charging curve. With Invertek battery charger, you can achieve this perfect match between battery and charger using a switch, which is simply positioned according to the required, charging... - Page 9 Note: Do indicate the type of your battery when buying the charger, and position the switch correctly before use. The user can very easily adapt the Invertek charger to the type of battery by rotate switch used. To modify configuration, carryout the following steps: STEP 1: Disconnect charger from the mains.
-
Page 10: Dc Power Supply
STEP 3: Connect charger to the mains. Example: To use the Invertek charger of 12V/60A to charge a battery of Sealed lead acid at desired charging current 42A, users should choose rotate switch of battery type to be “5”. DC Power Supply Invertek charger can not only charge the battery but also supply DC power directly. -
Page 11: Bts/Remote Control
BTS/Remote Control It is a port for phone jack of the battery temperature sensor and upcoming remote control to be connected. Troubleshooting Guide Problem and Symptoms Possible Cause Solution No alternative current or main Check the fuse and replace it No output voltage and/or fuse is melted down intensity... -
Page 12: Specification
Problem and Symptoms Possible Cause Solution Default of the battery which is Check the connection of the Fuse open LED ON in deep discharged or polarity battery, the polarity and inversion of the battery the output fuse No LED is lighting when Check the main input, the the charger is connected to DEFAULT... - Page 13 Output: 24V Model No. ADC-15U-242A ADC-30U-243A ADC-50U-243A Input voltage Universal input: 230V ~ Input Voltage 90V to 250V +10%/-15% Output Voltage Charging Capacity 50Hz/60Hz Frequency 1 or 3 Output Patterns +/-2% Input Voltage U bat +/-10% Output Current I bat 3 states IUU type Charging Curve Type (Boost Charge, Absorption Charge, Floating Charge)
Need help?
Do you have a question about the INVERTEK and is the answer not in the manual?
Questions and answers