
Related Manuals for EverRide 915400 – YJ1840


Summary of Contents for EverRide 915400 – YJ1840
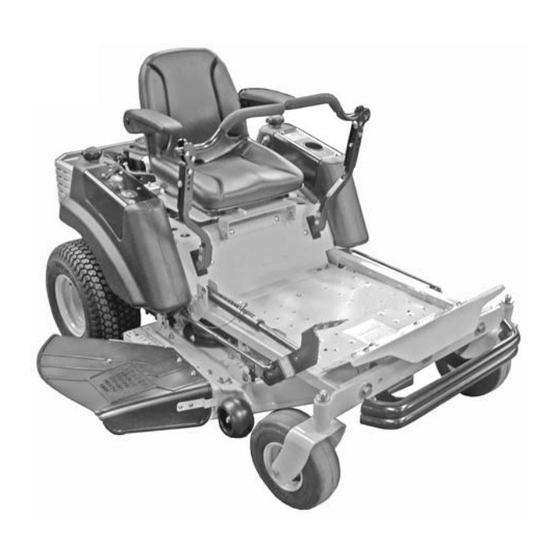
- Page 1 Owner/Operator Manual Models 915400 – YJ1840 915401 – YJ2044 915402 – YJ2348 03285100A 1/08 ENGLISH Printed in USA...
-
Page 2: Table Of Contents
TABLE OF CONTENTS SAFETY ......4 STORAGE ..... . 22 ASSEMBLY. -
Page 3: Unauthorized Replacement Parts
PRODUCT REGISTRATION 4. Review recommended lubrication, maintenance and adjustments. The EverRide dealer must register the 5. Review Limited Warranty Policy. product at the time of purchase. Registering 6. Fill out a product registration card and the product will help the company process... -
Page 4: Safety
SAFETY WARNING: This cutting machine CAUTION: POTENTIALLY is capable of amputating hands HAZARDOUS SITUATION! If not and feet and throwing objects. avoided, MAY RESULT in minor or Failure to observe the safety moderate injury. It may also be instructions in the manuals and used to alert against unsafe on decals could result in serious practices. - Page 5 077541 Figure 1 2. Danger! NO STEP! Always keep feet away from rotating parts. Avoid injury - Stay clear of rotating parts. OL1813 OL1816 4. Warning! 3. Danger! Always stand clear of discharge area. Always keep feet and hands away from rotating parts. OL1814 Do not operate mower unless OL1809...
-
Page 6: Safety Rules
Never direct discharge toward Fill fuel tanks to 2-1/2 in. other people. Thrown objects (6.35 cm) below bottom of filler can cause injury. neck. OL1803 Look down and behind before and while backing. • Never fill fuel tank when engine is running, hot or unit is indoors. - Page 7 NEVER operate unit after or during the use of DO NOT operate in reverse unless absolutely medication, drugs or alcohol. necessary. ALWAYS look down and behind before and while backing; especially for NEVER allow anyone to operate this unit children. when their alertness or coordination is impaired.
- Page 8 Fuel is highly flammable and its vapors are ALWAYS keep protective structures, guards, explosive. Handle with care. Use an approved and panels in good repair, in place and fuel container. securely fastened. NEVER modify or remove safety devices. NO smoking, NO sparks, NO flames. ALWAYS allow engine to cool before DO NOT change engine governor settings or servicing.
-
Page 9: Assembly
ASSEMBLY WARNING: AVOID INJURY. Read and understand the entire Safety section before proceeding. Tools Required • Adjustable wrench • Petroleum jelly or dielectric grease. Unpack Unit Remove unit and all other components from the shipping container. Engage transmission bypass lever (see on page 14). Push unit from container onto a level surface. -
Page 10: Controls And Features
Check function of all controls Check Safety Interlock System See OPERATION on page 11. WARNING: Safety interlock failure and improper operation of unit can result in death or serious injury. Check system before each use to make sure it is functioning properly. See Safety Interlock System on page 11. -
Page 11: Operation
Perform the following tests to ensure the Throttle Lever (915401, 402) safety interlock system is working properly. If Fast (1) – the unit does not perform as stated contact Increases engine your EverRide dealer for repairs. speed. Test Steering PTO Parking Engine Lever... - Page 12 Power Take-Off (PTO) Switch NOTE: To stop, return both steering levers to neutral. Engages NOTE: The steering levers must be in the (2) and neutral position to start the engine. disengag NOTE: The parking brake must be es (1) disengaged prior to moving the steering mower levers from the neutral position.
-
Page 13: Moving Unit Manually
Axle Locks (Figure 5) IMPORTANT: See Engine Manual for correct type and grade of fuel. 3. Fill fuel tanks to 2-1/2 in. (6.35 cm) below bottom of filler neck. See SPECIFICATIONS on page 26 for capacity of fuel tanks. 4. Replace fuel caps. STOPPING IN AN EMERGENCY Bring steering levers back to neutral, set parking brake, and turn off engine. -
Page 14: Transporting Unit
1. Set throttle lever to choke (915400) or 4. Release parking brake. engage choke control (915401, 402) for 5. Use steering levers to move the unit. a cold engine. Set throttle lever at 1/3 6. Disengage PTO to stop mower blades. throttle for a warm engine. - Page 15 Safety Interlock System on page 11). Check Parking Engage parking brake and engage transmission bypass lever Brake (see on page 14). Push unit. If unit rolls, contact your EverRide Dealer. Clean Unit Clean engine, battery, seat, mower deck, etc. of all dirt and debris.
-
Page 16: Service And Adjustments
SERVICE AND ADJUSTMENTS WARNING: AVOID INJURY. Read and understand the entire Safety section before proceeding. TIPPING SEAT FORWARD Remove clamping knob and tip seat forward to access the battery and engine. 1. Adjustment Pin 2. Mower Lift Tip seat back and secure to unit with Pedal clamping knob (figure 8). -
Page 17: Removing Mower Deck
a. Rotate right and left mower blades 2. Measure from front edge of right and left mower blades to the ground. to face side-to-side. 3. Subtract front blade cutting height b. Measure outer edge of mower measurement from rear blade cutting blades to ground. -
Page 18: Sharpening Mower Blade
1. Remove mower blade from unit (see REPLACING MOWER BLADE on page 18). 1. Adjustment Pin 2. Deck Access Plate EverRide recommends having mower blades 3. Knob sharpened by a professional. Contact your EverRide dealer. Figure 12 Discard mower blade if (figure 13): REPLACING MOWER BLADE •... -
Page 19: Servicing Battery
Models 915401, 402 DO NOT Sharpen to this Pattern Sharpen to this Pattern DISCARD if more than 1/2 in. (1.27 cm) 1. Air Lift Erosion 2. Cutting Edge Area Figure 13 ADJUSTING ANTI-SCALP ROLLER 1. Anti-scalp 3. Highest NOTE: The anti-scalp rollers are intended to Roller Position prevent lawn scalping, not to control cutting... -
Page 20: Adjusting Steering Levers
5. Install battery on unit (see Battery Removal and Installation on page 19). Jump-Starting EverRide does not recommend jump-starting your unit. Jump-starting can damage engine and electrical system components. See your engine manual for more detailed information. ADJUSTING STEERING LEVERS... -
Page 21: Replacing Pto Belt
NOTE: The forward travel adjustment bolt adjusts the forward travel of the steering lever. The rear travel adjustment bolt adjusts the rearward travel of the steering lever. 3. Adjust speed by: • Turning adjustment bolt clockwise to decrease steering lever travel. •... -
Page 22: Storage
3. Hook a puller into idler hole and pull idler 2. Disconnect electric clutch connector. arm towards outside of unit until tension 3. Remove clutch stop. is removed from PTO belt. CAUTION: Use care when releasing idler spring tension. Keep body parts well away from idler when performing this operation. -
Page 23: Troubleshooting
6. Connect spark plug wire(s) or spark plug(s) faulty. replace spark plug(s). Refer to Engine Manual for detailed instructions. 7. Faulty electrical system. 7. Contact your EverRide Dealer. 8. Faulty engine. 8. Contact your EverRide Dealer. Engine 1. Choke engaged. 1. Disengage choke. - Page 24 1. Depress operator presence depressed. switch by sitting on seat. blades do not engage or shuts 2. Faulty operator presence 2. Contact your EverRide Dealer. off. switch. 3. Electric clutch connector is 3. Connect the electric clutch loose or disconnected.
-
Page 25: Service Parts
SERVICE PARTS ACCESSORIES Be sure to always use genuine EverRide See your authorized EverRide dealer to add parts to keep your unit running like new. these optional accessories to your unit. Part No. Description Part no. Description 03498400 1 40-Inch Mower Blade... -
Page 26: Specifications
SPECIFICATIONS Model Number 915400 915401 915402 Model YJ1840 YJ2044 YJ2348 Engine Type Single Cylinder Twin Cylinder Kohler Kohler Engine Power – HP (kW) at 18 (13.4) 20 (14.9) 23 (17.2) Governed RPM Max Governed RPM 3375 3250 Speed Forward Max. – m.p.h (km/h) 6.5 (10.5) Reverse Max. -
Page 27: Warranty
Ariens after December 31, 2007 will be free from defects in material and workmanship for a period of two years after the date of purchase. An authorized EverRide dealer will repair any defect in material or workmanship, and repair or replace any defective part, subject to the conditions, limitations and exclusions set forth herein. - Page 28 Engines and engine accessories are covered only by the engine manufacturer’s warranty and are not covered by this warranty. • Parts that are not genuine EverRide service parts are not covered by this warranty. • The following maintenance, service and replacement items are not covered by this warranty unless...
- Page 30 Ariens Company - Auburn Operations 655 West Ryan Street Brillion, WI 54110-1072 920-756-2141 Fax 920-756-2407 www.ariens.com...
Need help?
Do you have a question about the 915400 – YJ1840 and is the answer not in the manual?
Questions and answers