Table of Contents
Advertisement
N I
S
T
S
E
R
N I
For service or repairs to boiler, call hour heating contractor. When seeking information on boiler, provide
Boiler Model Number and Serial Number as shown on Rating Label.
Boiler Model Number
IN_PVSNI_
Heating Contractor
Address
103560-03 - 10/12
A
L
L
A
I T
O
V
C I
E
N I
D
E
P
E
G
A
S
-
I F
Boiler Serial Number
N
,
O
P
E
R
S
T
R
U
C
I T
N
D
E
N
R
E
D
B
O
A
T
N I
G
A
O
N
S
F
O
C
E
P
V
®
L I
E
R
Installation Date
Phone Number
N
D
R
9700609
Price - $5.00
Advertisement
Table of Contents

Related Manuals for U.S. Boiler Company INDEPENDENCE IN3PV


Summary of Contents for U.S. Boiler Company INDEPENDENCE IN3PV
- Page 1 ® 9700609 For service or repairs to boiler, call hour heating contractor. When seeking information on boiler, provide Boiler Model Number and Serial Number as shown on Rating Label. Boiler Model Number Boiler Serial Number Installation Date IN_PVSNI_ Heating Contractor Phone Number Address Price - $5.00...
- Page 2 (B) Flue Left Right Weight Lbs. (A) Width Front Rear Vent Connector Side Side IN3PV 14-1/2 IN4PV 17-3/4 8-1/4 Alcove IN5PV 9-1/4 IN6PV 24-1/4 9-1/4 * Vent pipe minimum clearance to combustible material is five (5) inches when vent is installed in a fully enclosed (chase) application or four (4) inches when vent is installed with at least one side open, similar to a joist bay application.
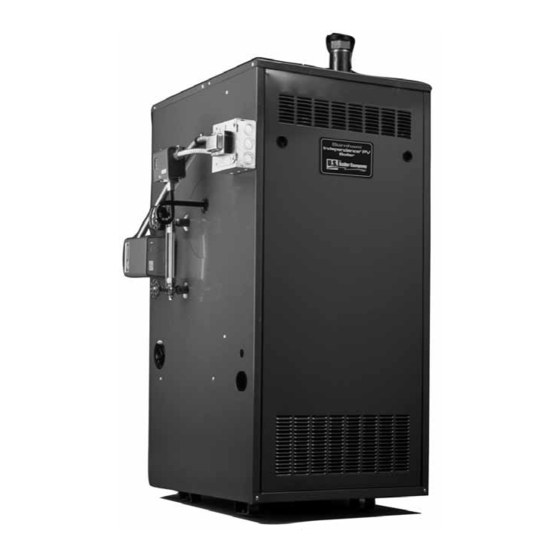
- Page 3 Figure 1: Elevation Views WARNING This boiler requires regular maintenance and service to operate safely. Follow the instructions contained in this manual. Improper installation, adjustment, alteration, service or maintenance can cause property damage, personal injury or loss of life. Read and understand the entire manual before attempting installation, start-up, operation, or service.
-
Page 4: Table Of Contents
Table of Contents I. Pre-Installation ........4 VII. System Start-up ....... 17 II. Unpack Boiler ........5 VIII. Service Instructions ......25 III. Steam Piping and Trim ...... 6 IX. Repair Parts ........32 IV. Gas Piping ......... 8 Appendix A - Figures ....... 40 V. -
Page 5: Unpack Boiler
I. Pre-Installation (continued) rating of 1 perm or less with openings gasketed Alternate method for boiler located within confined and sealed, and; space. Use indoor air if two permanent openings communicate directly with additional space(s) of b. Weather-stripping has been added on openable sufficient volume such that combined volume of all windows and doors, and; spaces meet criteria for unconfined space. Size each c. -
Page 6: Steam Piping And Trim
Oxygen contamination of boiler water will cause corrosion of iron and steel boiler components, and can lead to boiler failure. U.S. Boiler Company’s Standard Warranty does not cover problems caused by oxygen contamination of boiler water or scale (lime) build-up caused by frequent addition of water. - Page 7 III. Steam Piping and Trim (continued) Figure 3: Trim Installation Figure 4: Steam Piping, IN3PV...
-
Page 8: Gas Piping
54/ANSI Z223.1, or size system using standard Connection Number engineering methods acceptable to authority having Size Natural Gas jurisdiction. IN3PV ½ Connect boiler gas valve to gas supply system. IN4PV ½ 1. Use methods and materials in accordance with local IN5PV ½... - Page 9 IV. Gas Piping (continued) 2. Use thread (joint) compounds (pipe dope) resistant 4. All above ground gas piping upstream from manual to action of liquefied petroleum gas. shut-off valve must be electrically continuous and bonded to a grounding electrode. Do not use gas 3. Install sediment trap, ground-joint union and manual piping as grounding electrode.
-
Page 10: Venting
Each gasket-less vent component is supplied with a clamp band and sealant. A Vent Transition Kit, part number 6116302, is available that contains one clamp band and one 3 ounce tube of sealant. Figure A: U.S. Boiler Company Vent length of vent pipe (total length of straight pipe plus General Guidelines equivalent length of fittings). Maximum vent length... - Page 11 V. Venting (continued) Table 8: Vent System Components Install Vent Connector. 1. Remove vent connector from vent accessory carton. Vent System Part Equivalent Component Number Feet of Pipe 2. Remove gaskets, orifice plate and hardware from blower outlet flange. 3" Dia. Pipe x 1 Ft 8116296U 3. Assemble orifice plate gaskets, orifice plate, and 3"...
- Page 12 Seal joint with RTV specified in this manual. 6. Seal all U.S. Boiler Company Gasket-Less vent, U. S. Boiler Company mixed vent (Gasket-Less and Figure 8B: U.S. Boiler Company Gasket-Less Male and...
- Page 13 2. Procedure for joining the female end of U.S. Boiler Company Gasket-Less Vent with the male end of Moisture and ice may form on surfaces around U.S. Boiler Company Gasketed Vent. See Figure vent terminal. To prevent deterioration, surfaces should be in good repair (sealed, painted etc.) a. Clean joints of pipe or fittings using an alcohol...
- Page 14 V. Venting (continued) Figure 10: Horizontal Vent Terminal Vertical (Through Roof) Vent Installation Note: For one- or two-family dwellings fire resistance rating requirement may not need to be 1. Install vertical vent drain tee. See Figures 11 and 12. met, but is recommended. Attach tee directly to elbow or horizontal pipe from 5.
- Page 15 V. Venting (continued) d. Install storm collar on vent pipe immediately Table 9: Minimum Vent Height Above Roof above flashing. Apply sealant between vent pipe and storm collar. Roof Pitch Minimum Height [H] e. Attach Vent Terminal. Flat to 6/12 1 ft. Over 6/12 to 7/12 1 ft.
-
Page 16: Electrical
VI. Electrical Alliance SL™ Indirect Water Heater (if used) See General Install wiring and ground boiler in accordance Figure 15, Ladder Diagram. with requirements of authority having jurisdiction, or in absence of such requirements the National Electrical 1. Attach extension junction box to junction box. Code, ANSI/NFPA 70. -
Page 17: System Start-Up
VII. System Start-up Safe operation and other performance criteria were Fill boiler with water to normal water line. met with gas manifold and control assembly provided on boiler when boiler underwent tests specified in Prepare to check operation. American National Standard for Gas-Fired Low- 1. Obtain gas heating value (in Btu per cubic foot) Pressure Steam and Hot Water Boilers, ANSI Z21.13. - Page 18 VII. System Start-up (continued) Table 10: Ignition Module Terminal Cross-Reference Ignition Module Wiring Ladder Diagram Terminal Number Terminal Designation MV/PV 24V (GND) SPARK Table 11: Green LED Status Codes Green LED Flash Indicates Next System Action Recommended Service Action Code No “Call for Heat”...
- Page 19 VII. System Start-up (continued) a. Pilot flame current in micro amps can be v. Check the pilot flame. It must be blue, measured using any standard micro-ammeter by steady and envelop the flame sensing rod inserting the meter probes into the module holes 3/8” to ½”. labeled FLAME CURRENT as shown in Figure vi. If needed, adjust pilot flame by turning the 17B. gas valve pilot adjustment screw clockwise to decrease or counterclockwise to increase b.
- Page 20 VII. System Start-up (continued) Honeywell Electronic Ignition Troubleshooting Guide "CALL FOR HEAT." POWER TO CHECK LINE VOLTAGE POWER, LOW VOLTAGE TRANSFORMER, LIMIT CONTROLLER, THERMOSTAT (CONTROLLER), AND WIRING. ALSO, MODULE? (24 V CHECK AIR PROVING SWITCH ON COMBUSTION AIR BLOWER SYSTEM (IF USED) AND THAT THE VENT DAMPER END SWITCH (IF USED) NOMINAL) IS MADE.
- Page 21 VII. System Start-up (continued) Check low water cutoff. Check pilot burner flame. See Figure 19. Flame should be steady, medium hard blue enveloping 3/8 to 1. Adjust thermostat to highest setting. ½ inch of sensing probe. 2. With boiler operating, open drain valve and slowly drain boiler.
- Page 22 VII. System Start-up (continued) Figure 21: Operating Instructions 6. Recheck Main Burner Flame. Remove Main Burners per procedure in Section VIII: Service. 7. Return other gas-fired appliances to previous ii. Remove gas orifices. Drill one (1) drill size conditions of use. larger (drill size is stamped on orifice, or see Clean Heating System. Oil from new piping Key No. 4D). connections and sediment in existing piping must be iii. Reinstall gas orifices and main burners.
- Page 23 VII. System Start-up (continued) Table 13: Gas Flow Rate in Cubic Feet per Hour 6. Follow Operating instructions to place boiler in operation. See Figure 21. Check controls operation Size of Gas Meter Dial Seconds per Paragraphs F to K. Boil water for at least 5 for One hours.
- Page 24 VII. System Start-up (continued) 15. Fill boiler to normal water line. Follow Operating 25. Drain second quart sample from lower Gauge Glass Instructions to place boiler in operation. See Figure fitting. If sample is not clear, repeat cycle of draining boiler and return main and refilling boiler until sample is clear. 16. Operate boiler for at least 30 minutes after condensate begins to run hot.
-
Page 25: Service Instructions
VIII. Service Instructions 3. Vent pipe must be full round shape, and show no General damage from impact or excessive temperature. Inspection and service should be conducted annually. Turn off electrical power and gas supply while 4. Vent pipe must be supported at minimum 5 foot conducting service or maintenance. - Page 26 NOTE: If switch drops-out before boiler reaches 3. Vacuum tip of pilot burner. temperature or if pressure readings are below minimums shown in Table 15, check for cracks in 4. Check gas orifices for lint and dirt. Clean as hose or contact your nearest U.S. Boiler Company necessary. representative.
- Page 27 VIII. Service Instructions (continued) 4. Stop boiler, remove manometer and reconnect hose to pressure switch. See Figure 24. Table 15: Minimum Vacuum Boiler Minimum Vacuum Model IN3PV -0.40 inches w.c. IN4PV -0.40 inches w.c. IN5PV -0.70 inches w.c. IN6PV -0.70 inches w.c.
- Page 28 Important Product Safety Information Refractory Ceramic Fiber Product Warning: The Repair Parts list designates parts that contain refractory ceramic fibers (RCF). RCF has been classified as a possible human carcinogen. When exposed to temperatures about 1805°F, such as during direct flame contact, RCF changes into crystalline silica, a known carcinogen.
-
Page 29: Service Record
SERVICE RECORD DATE SERVICE PERFORMED... - Page 30 TURN OFF GAS SUPPLY. ADJUST THERMOSTAT TO CALL FOR HEAT. GO TO PAGE 31 DOES BLOWER ENERGIZE? SPARK PRESENT 24 VOLTS AT SUCTION NO HOSE SECURELY CONNECT HOSE CONNECT MANOMETER TO AT PILOT IGNITER/ PRESSURE SWITCH CONNECTED TO TO CANOPY SUCTION PRESSURE SWITCH SENSOR? TERMINAL 'NO'?
- Page 31 Troubleshooting Tree for Section VII, Step E WATERLINE ABOVE LOWEST PERMISSIBLE LEVEL? FILL BOILER TO NORMAL WATERLINE ALLOW SYSTEM PRESSURE TO FALL BELOW LIMIT CUT-IN GAUGE PRESSURE LESS THAN LIMIT CUT-IN SETTING? PRESSURE, OR INCREASE LIMIT CUT-IN SETTING. CAUTION REPLACE FLAME ROLLOUT SWITCH. DETERMINE CAUSE OF EXCESSIVE CONTINUITY ACROSS FLAME ROLLOUT SWITCH (FRS)? TEMPERATURE (BLOCKED FLUE, EXCESSIVE RATE CAUSED BY HIGH...
-
Page 32: Repair Parts
Should you require assistance in locating a Burnham product distributor in your area, or have questions regarding the availability of Burnham brand products or repair parts, please contact U.S. Boiler Company Customer Service at (717) 481-8400 or Fax (717) 481-8408. - Page 33 IX. Repair Parts (continued) [Quantity] Part Number Description IN3PV IN4PV IN5PV IN6PV 3. Base Assembly Group Base Tray [1] 71860391 [1] 71860491 [1] 71860591 [1] 71860691 Base Wrapper [1] 718600311 [1] 718600411 [1] 718600511 [1] 718600611 3B1 Base End Insulation...
- Page 34 IX. Repair Parts (continued) (Quantity) Part Number Description IN3PV IN4PV IN5PV IN6PV 4. Manifold and Main Burners Main Burner [2] 8236099 [4] 8236099 [6] 8236099 [8] 8236099 Main burner with 60° Pilot Bracket [1] 8236098 Manifold [1] 82260033 [1] 82260043...
- Page 35 IX. Repair Parts (continued) (Quantity) Part Number Description IN3PV IN4PV IN5PV IN6PV 5. Gas Train Group Pilot Assembly, Natural Gas, Honeywell Q3481B1206 [1] 103704-01 Pilot Orifice, Natural Gas Honeywell 388146NE Included with Key No. 5A Compression Nut/Fitting, 1/8" OD x 1/4 NPT Included with Key No.
- Page 36 IX. Repair Parts (continued) (Quantity) Part Number Description IN3PV IN4PV IN5PV IN6PV 6. Jacket Left Side Panel [1] 60410023 Right Side Panel [1] 60410022 Front Removable Door [1] 604100330 [1] 604100430 [1] 604100530 [1] 604100630 Vestibule Panel [1] 604100340 [1] 604100440...
- Page 37 IX. Repair Parts (continued) (Quantity) Part Number Description IN3PV IN4PV IN5PV IN6PV McDonnell & Miller PS-802 [1] 80160720 Hydrolevel CG400-2090 [1] 80160725 Probe, [Included with 7A] ---- Safety Valve, 3/4, 15 psi, Conbraco 13-511-08 [1] 81660530 Steam Gauge, 0-30 psi, 2-1/2" Dia.
- Page 38 IX. Repair Parts (continued) (Quantity) Part Number Description IN3PV IN4PV IN5PV IN6PV 10. Controls Ignition Module with Prepurge, Honeywell S8670E3003 [1] 100959-01 Ignition Module Support Bracket [1] 7016001 Flame Roll-out Switch [1] 80160044 10C1 Screw, Sheet Metal, #8 x 3/4"...
- Page 39 IX. Repair Parts (continued) (Quantity) Part Number Description IN3PV IN4PV IN5PV IN6PV 11. Gasketed Vent Accessory Carton 61110128 61110129 (Includes 11A & 11B) Vent Connector [1] 8116306 [1] 8116307 Vent Terminal [1] 8116310...
-
Page 40: Appendix A - Figures
Vent Connector Installation Figure 8A U.S. Boiler Company Gasketed Vent Joint Detail Figure 8B U.S. Boiler Company Gasket-Less Male and Gasketed Female Vent Joint Detail Figure 8C U.S. Boiler Company Gasket-Less Female and Gasketed Male Vent Joint Detail Figure 9... -
Page 41: Appendix B - Tables
Appendix B - Tables Table Page Description Number Number Table 1 Dimensions and Clearances Table 2 Purpose of Tappings Section III - Steam Piping and Trim Table 3 Rated Input Maximum Capacity of Schedule 40 Pipe in CFH of Natural Gas For Gas Pressures of 0.5 psig or Table 4 Less Table 5... - Page 42 SERVICE RECORD DATE SERVICE PERFORMED...
- Page 43 SERVICE RECORD DATE SERVICE PERFORMED...
- Page 44 U.S. Boiler Company, Inc. P.O. Box 3020 Lancaster, PA 17604 1-888-432-8887 www.usboiler.net...
Need help?
Do you have a question about the INDEPENDENCE IN3PV and is the answer not in the manual?
Questions and answers