Table of Contents
Advertisement
Quick Links
MICRO COMPONENT SYSTEM
√–∫∫‰¡‚§√§Õ¡‚æ‡ππ∑Ï
UX-P38V
Consists of CA-UXP38V and SP-UXP38V
ª√–°Õ∫¥È « ¬ CA - UXP38V ·≈– SP-UXP38V
SP-UXP38V
CA-UXP38V
COMPACT
DIGITAL VIDEO
INSTRUCTIONS
§"·π–π"
SP-UXP38V
COMPACT
DIGITAL AUDIO
For Customer Use:
Enter below the Model No. and Serial No.
which are located either on the rear, bot-
tom or side of the cabinet. Retain this
information for future reference.
Model No.
Serial No.
GVT0068-003A
[US, UN, UB]
Advertisement
Table of Contents

Related Manuals for JVC A-UXP38V


Summary of Contents for JVC A-UXP38V
-
Page 1: Micro Component System
MICRO COMPONENT SYSTEM √–∫∫‰¡‚§√§Õ¡‚æ‡ππ∑Ï UX-P38V SP-UXP38V Consists of CA-UXP38V and SP-UXP38V ª√–°Õ∫¥È « ¬ CA - UXP38V ·≈– SP-UXP38V CA-UXP38V COMPACT DIGITAL VIDEO INSTRUCTIONS §”·π–π” SP-UXP38V COMPACT DIGITAL AUDIO For Customer Use: Enter below the Model No. and Serial No. which are located either on the rear, bot- tom or side of the cabinet. - Page 2 Caution –– Disconnect the mains plug to shut the power off completely. The position does not disconnect the mains line. The power can be remote controlled. ¢È Õ §«√√–«— ß –– ¥÷ ß ª≈— Í ° À≈— ° ÕÕ°‡æ◊ Ë Õ ª‘ ¥ ‡§√◊ Ë Õ ßÕ¬Ë “ ß∂Ÿ ° µÈ Õ ß ‰¡Ë...
-
Page 3: Important For Laser Products
REPRODUCTION OF LABELS / 1 CLASSIFICATION LABEL, PLACED ON REAR ENCLOSURE ªÈ “ ¬·∫Ë ß ª√–‡¿∑µ‘ ¥ ‰«È ∑ “ß¥È “ πÀ≈— ß CLASS LASER PRODUCT 1. CLASS 1 LASER PRODUCT 2. CAUTION: Invisible laser radiation when open and interlock failed or defeated. Avoid direct exposure to beam. 3. -
Page 4: About This Manual
Introduction We would like to thank you for purchasing one of our JVC products. Before operating this unit, read this manual carefully and thoroughly to obtain the best possible performance from your unit, and retain this manual About This Manual This manual is organized as follows: •... -
Page 5: Table Of Contents
Contents Location of the Buttons and Controls ... 3 Front Panel ... 3 Remote Control ... 5 Getting Started ... 6 Supplied Accessories ... 6 Putting the Batteries into the Remote Control ... 6 Connecting Antennas ... 6 Connecting Speakers ... 7 Connecting Other Equipment ... -
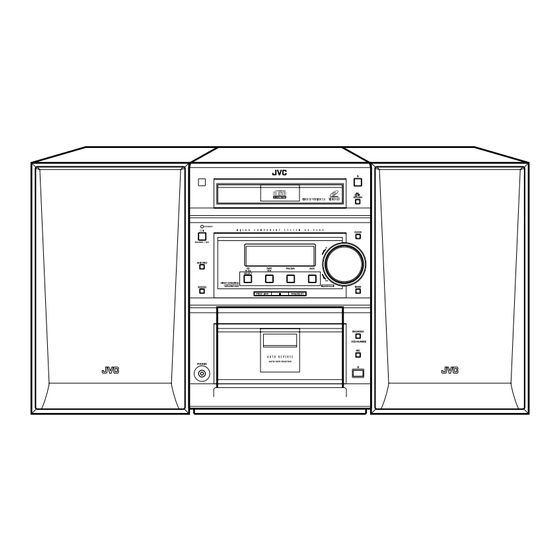
Page 6: Location Of The Buttons And Controls
Location of the Buttons and Controls Become familiar with the buttons and controls on your unit. Front Panel Front Panel – 3 –... - Page 7 Display Window See pages in the parentheses for details. Front Panel 1 Remote sensor 2 STANDBY lamp (9) STANDBY/ON button (9, 14, 24) 4 TAPE 2 3 button (19 – 20) Pressing this button also turns on the unit. 5 CD 3/8 SELECT (play/pause) button (9, 15 – 16, 18) Pressing this button also turns on the unit.
-
Page 8: Remote Control
Remote Control When using the remote control, point it at the remote sensor on the front panel. Remote Control 1 REPEAT button (14 – 15) 2 DISPLAY button (9) 3 PROG (program) button (13) 4 RANDOM button (13 – 15) 5 SOUND MODE button (10) 6 AUTO PRESET button (11) 7 CD 0 (disc tray open/close) button (12) -
Page 9: Getting Started
Getting Started Supplied Accessories Make sure that you have all the following items. The number in the parentheses indicates the quantity of the pieces supplied. • AM loop antenna (1) • FM antenna (1) • Remote control (1) • Batteries (2) •... -
Page 10: Connecting Speakers
AM antenna Vinyl-covered wire (not supplied) AM loop antenna (supplied) Connect the AM loop antenna to the AM LOOP terminals as illustrated. • If the AM loop antenna wire is covered with vinyl, remove the vinyl by twisting it as shown in the diagram. -
Page 11: Adjusting The Voltage Selector
To connect audio equipment Be sure that the plugs of the audio cords are colored: White plugs and jacks are for left audio signals, and red ones for right audio signals. To audio output Audio equipment For playing the other equipment through this unit, connect between the audio output jacks on the other equipment and AUX jacks by using audio cords (not supplied). -
Page 12: Common Operations
Common Operations Turning On the Power When you press the play button — CD 3/8 SELECT, TAPE 2 3, or the source selecting button — FM/AM and AUX, the unit automatically turns on and starts playback if the source is ready. -
Page 13: Selecting The Sources And Starting Play
Selecting the Sources and Starting Play To playback CDs, press SELECT CD 3/8. (See pages 12 – 14.) To playback tapes, press TAPE 2 3. (See page 19.) To listen to the FM/AM broadcasts, press FM/AM. (See page 11.) To select the external equipment as the source, press AUX. -
Page 14: Listening To Fm And Am Broadcasts
Listening to FM and AM Broadcasts Tuning in a Station Press FM/AM. The unit automatically turns on and tunes in the previously tuned station (either FM or AM). • Each time you press the button, the band alternates between FM and AM. Press and hold NEXT ¢... -
Page 15: Playing Back Cds (Cd/Cd-R/Cd-Rw)
Playing Back CDs (CD/CD-R/CD-RW) This unit has been designed to playback the following CDs: • CD • CD-R • CD-RW Continued use of irregular shape CDs (heart-shape, octagonal, etc.) can damage the unit. General Notes In general, you will have the best performance by keeping your CDs and the mechanism clean. -
Page 16: Programming The Playing Order Of The Tracks - Program Play
Programming the Playing Order of the Tracks — Program Play You can arrange the order in which tracks play before you start playing. You can program up to 50 tracks. On the remote control ONLY: Load a CD. • If the current playing source is not the CD player, press SELECT CD 3/8, then 7 button before going to the next step. -
Page 17: Repeating Tracks - Repeat Play
Repeating Tracks — Repeat Play You can have all the tracks, the program or individual track currently playing to repeat as many times as you like. On the remote control ONLY: To repeat playing, press REPEAT before or during playing. •... -
Page 18: Using The Video Cd Player (Video Cds)
You can play video CDs (with or without the Playback Control (PBC) function) to watch the picture on your TV while listening to the sound through your JVC Micro Component System. Before playing video CDs Make sure that the connection between the System and your TV is correct. -
Page 19: Playing Video Cds With The Pbc Function Using The Menu Screen (Menu-Driven Play)
Playing Video CDs with the PBC Function Using the Menu Screen (Menu-Driven Play) Before playing, make sure that Repeat indicator “ “ ” is not lit. If lit, press the REPEAT button on the Remote Control until “PBC” appears on the display. Load a video CD with PBC. -
Page 20: Playing Video Cds Without The Pbc Function
Example of playback using Playback Control (PBC) Moving Moving Moving Picture Picture Picture A selection menu is displayed when you start playing a video CD with PBC. The selection menu shows a list of numbers for selection. Some video CDs may show moving pictures or a divided screen. - Page 21 Display of Operating Status You can view the current operating status on the TV screen. Press the ON SCREEN button. Pressing the above button alternates between on-screen display ON and OFF. • Once you have turned on the on-screen display, the track number and playing time are always displayed on the TV screen.
-
Page 22: Playing Back Tapes
Playing Back Tapes You can playback type I, type II, and type IV tapes without changing any settings. Playing Back a Tape Press 0 button for cassette deck. Put a cassette in with the exposed part of the tape down. Close the cassette holder gently. -
Page 23: Recording
Recording IMPORTANT: • It may be unlawful to record or playback copyrighted material without the consent of the copyright owner. • The recording level is automatically set correctly, so it is not affected by the VOLUME, AHB (Active Hyper Bass) PRO, and SOUND MODE settings. -
Page 24: Cd Direct Recording
CD Direct Recording Everything on the CD goes onto the tape in the order it is on the CD, or according to the order you have made for Program play. On the unit ONLY: Put a recordable cassette in with the exposed part of the tape down. -
Page 25: Using The Multiplex Cds
Using the Multiplex CDs If the source you are going to play is a multiplex CD, you can use the Multiplex Sound function. What is Multiplex Sound? In a multiplex CD or VCD, two separate languages are recorded on the left and right channel. With this system, you can select your choice of language you wish to listen to. -
Page 26: Using The Timers
Using the Timers There are three timers available — Daily Timer, Recording Timer, and Sleep Timer. Before using the timers, you need to set the clock built in the unit (see page 9). When you press TIMER on the unit for more than 3 seconds, the display alternates between “ADJUST”... -
Page 27: Using Sleep Timer
Press TIMER to complete the timer setting. Press STANDBY/ON to turn off the unit (on standby) if you have set the timer with the unit turned on. • When the timer turns on the unit, the timer ) indicator and the selected timer mode indicator (DAILY or REC) start flashing. -
Page 28: Maintenance
Maintenance To get the best performance of the unit, keep your discs, tapes, and mechanism clean. Handling discs • Remove the disc from its case by holding it at the edge while pressing the center hole lightly. • Do not touch the shiny surface of the disc, or bend the disc. -
Page 29: Troubleshooting
Troubleshooting If you are having a problem with your unit, check this list for a possible solution before calling for service. If you cannot solve the problem from the hints given here, or the unit has been physically damaged, call a qualified person, such as your dealer, for service. - Page 30 Mains (AC) Line Instruction (not applicable for Europe, U.S.A., Canada, Australia, and U.K.) §”·π–𔇰’ Ë ¬ «°— ∫ “¬‰øÀ≈— ° (AC) (¬°‡«È π ª√–‡∑»„π¬ÿ ‚ √ª À√— ∞ Õ‡¡√‘ ° “ ·§π“¥“ ÕÕ ‡µ√‡≈’ ¬ ·≈– À√“™Õ“≥“ — ° √) IMPORTANT for mains (AC) line BEFORE PLUGGING IN, do check that your mains (AC) line voltage corresponds with the position of the voltage selector switch provided on the outside of this equipment...
Need help?
Do you have a question about the A-UXP38V and is the answer not in the manual?
Questions and answers