dji Ronin-S User Manual
Hide thumbs
Also See for Ronin-S:
- Quick start manual ,
- User manual (61 pages) ,
- Disclaimer and safety manuallines (10 pages)
Table of Contents
Advertisement
Advertisement
Table of Contents

Related Manuals for dji Ronin-S


Summary of Contents for dji Ronin-S
- Page 1 User Manual RONIN-S V1.0 2018.06...
- Page 2 Navigating to a Topic View a complete list of topics in the table of contents. Click on a topic to navigate to that section. Printing this Document This document supports high resolution printing. © 2018 DJI OSMO All Rights Reserved.
-
Page 3: Using This Manual
(http://www.dji.com/ronin-s). Read the Disclaimers and Safety Guidelines to understand your legal rights and responsibilities. If you have any questions or problems during the installation, maintenance or use of this product, please contact DJI or a DJI authorized dealer. -
Page 4: Table Of Contents
Contents Using this Manual Legend Before You Begin Download the Ronin App Download DJI Pro Assistant for Ronin Contents Introduction Ronin-S Diagram Getting Started Mounting the Grip Attaching the Extended Grip Mounting the Camera Balancing Before Balancing Balancing the Vertical Tilt... -
Page 5: Introduction
DSLR and mirrorless cameras. It is compatible with almost any DSLR or mirrorless camera setup on the market. The Ronin-S also can be mounted to a tripod or a car for shooting, with operating speeds of 75 kph*. There are many modes of operation such as SmoothTrack and Lock mode, and the newly added Sport Mode allows you to capture fast- moving scenes effortlessly. -
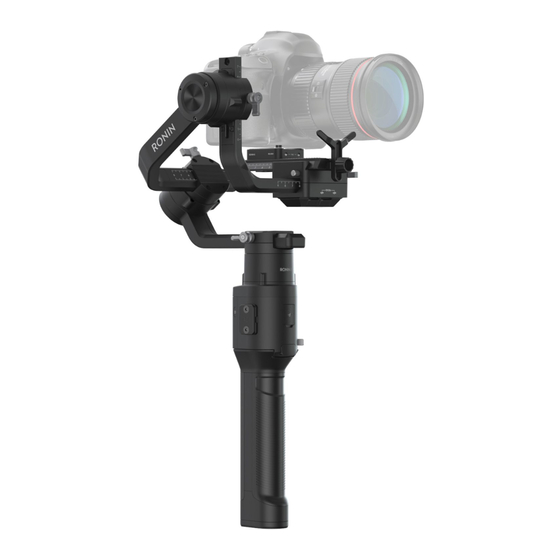
Page 6: Ronin-S Diagram
14. Battery Level Indicators 6. M Button 15. Grip Power Button 7. Camera Control Button 16. Focus Wheel 8. Grip 17. Camera Control Port (RSS Port) 9. Extended Grip/Tripod 18. Camera Mounting Plate © 2018 DJI OSMO All Rights Reserved. -
Page 7: Getting Started
Attach the gimbal to the grip by sliding it into the dovetail mount. Toggle the lever to the locked position. The Ronin-S’ power/data ports and connectors are not waterproof. Ensure to protect them from harmful dust and water during use to avoid damage. -
Page 8: Mounting The Camera
According to our tests, the listed camera and lens combinations can be physically balanced and stabilized on the Ronin-S. The Support Feature column indicates camera features that can be accessed by the gimbal and app. Please refer to Ronin-S product page for most updated compatibility list. - Page 9 Sonnar® T* E 24 mm F1.8 ZA XCD 4/21MM Start/stop recording XCD 3.5/120MM MCC-C Hassleblad XCD 3.2/90MM video* cable XCD 3.5/45MM Capture photo* XCD 3.5/30MM * Feature will be implemented through a future firmware update. © 2018 DJI OSMO All Rights Reserved.
- Page 10 DSLR cameras; press once to start/stop recording; press and hold to take a photo. *This is only supported by some cameras. Be sure the Ronin-S is not powered on when plugging/unplugging the RSS cable. Failure to do so may burn out the cable.
- Page 11 The Top Hotshoe Bracket is sold separately. The installation is shown below. * Mount the riser plate if needed. © 2018 DJI OSMO All Rights Reserved.
-
Page 12: Balancing
To obtain the best performance from the Ronin-S, proper balancing is essential. Accurate balance is critical for shots where the Ronin-S will be subjected to fast motion or acceleration. Proper balance will also offer longer battery runtimes. There are three axes that need to be accurately balanced prior to turning on the Ronin-S and setting up the software. -
Page 13: Balancing The Roll Axis
3. Tighten the knob. Balancing the Pan Axis 1. Grab the grip and tilt Ronin-S sideways to check for movement along the pan axis. 2. Loosen the knob on the pan motor. Adjust the camera balance until the camera stays still when rotating the pan axis 45°... -
Page 14: Grip And Built-In Battery
The Grip is for handheld use. The built-in battery within the Grip has a capacity of 2400 mAh and able to power the Ronin-S for up to 12 hours (when the Ronin-S is properly balanced and used under normal conditions). -
Page 15: Safety Guidelines
3. Put out any grip fire using water, sand, fire blanket or a dry powder fire extinguisher. 4. Never use non-DJI batteries. Go to www.dji.com to purchase new batteries. DJI takes no responsibility for any damage caused by non-DJI batteries. 5. Never use or charge swollen, leaky, or damaged grip. If the grip is abnormal, contact DJI or a DJI authorized dealer for further assistance. 6. Never install or remove the grip from the gimbal when it is turned on. - Page 16 Grip Charging 1. Always use a DJI approved charger. DJI takes no responsibility if the grip is charged using a non-DJI charger. 2. Never leave the grip unattended during charging. DO NOT charge the grip near flammable materials or on flammable surfaces such as carpet or wood.
- Page 17 1. The grip is disabled and the battery cannot be fully discharged, please contact a professional battery disposal/recycling agent for further assistance. 2. Dispose of the grip immediately if it cannot be powered on after over-discharging. © 2018 DJI OSMO All Rights Reserved.
-
Page 18: Activating Ronin-S
Activating Ronin-S Make sure the camera is balanced before powering on Ronin-S. Do not turn on Ronin-S without a balanced load, as doing so may damage the gimbal motors. 1. Press the power button once to turn on the grip, and then press and hold the gimbal power button to turn on the gimbal. - Page 19 After selecting the tuning profile, simply tap ‘Auto Tune’. The Ronin-S will automatically work out the optimal result based on the weight of the setup. Alternatively, you can press and hold Ronin-S’ M button and front trigger simultaneously for four seconds to start Auto Tune without using the App.
- Page 20 In such instances, it is recommended to lower the Filter settings. Control: It is recommended to leave this setting as default. Control can guide the Ronin-S to better handle low-frequency vibrations. If your Ronin-S vibrates at a visible range, you can suppress it by increasing Control.
- Page 21 Endpoint: Limits the gimbal’s rotation range by setting the control endpoints. The Pan axis of Ronin-S utilizes a slip-ring therefore it could rotate continuously when the endpoints on left and right are both set to 180°. On Tilt axis, you can setup the endpoints on the up and down direction according to your setup.
- Page 22 Medium Medium Medium Motor Pause can temporarily disengage motors of the Ronin-S so that you can swap your lenses, change the cameras battery or just take a break after shooting. The Ronin-S will recenter after unpausing the motors automatically. Tapping the Recenter button will get the gimbal back to its center position on all three axes.
- Page 23 Ronin-S User Manual Create Features Ronin-S features a set of Create features that can bring automation to a creator’s projects, including Capture, Panorama, Timeapse, Motionlapse and Track. It's recommended to set your camera to electronic shutter or silent shutter to reduce interference by the mirror slap from a DSLR when using the create features.
- Page 24 The Track feature is designed to capture video with up to 10 waypoints. The travel speed in between 2 waypoints can be set as desired allowing you to couple Ronin-S with other platforms such as a motorized slider or an RC buggy to automate gimbal movement.
-
Page 25: Button Functions
The calibration has failed if the LEDs blink red. If they do try to go through the calibration process again. 5. Press and hold Ronin-S’ M button and trigger simultaneously for four seconds to start Auto Tune. The default Auto Tune grade is Medium. - Page 26 There will be more cameras supported in the future. The supported cameras list will be updated on the DJI website. Set the USB mode to PC (Tether) on the Panasonic GH5/GH5s camera and set the focus mode toggle to MF on the camera.
-
Page 27: Operation Modes
Channels) and re-map CH3 to the Roll axis (originally mapped as Pan axis) and also set the CH1 as N/A to avoid any input on the Tilt axis. Then hold the Ronin-S in the Flashlight mode and double tap the front trigger to re-center the gimbal orientation. Simply push the joystick left or right to get the gimbal rolling continuously. -
Page 28: Updating Firmware
Updating Firmware Download the DJI Pro Assistant for Ronin and update the firmware if there is new firmware released for Ronin-S. Follow the steps below to update the firmware: 1. Connect the Ronin-S to your computer via the USB-C Cable. -
Page 29: Specifications
Underslung Mode, Upright Mode, Flashlight Mode Mounting Modes Handheld, Car Mount Mode Built-in, independent IMU modules Advanced 32-Bit ARM Processor DJI Specialized Gimbal Drive Motors with Encoders Bluetooth Module S-Bus Receiver Supported DJI Pro Wireless Receiver Supported Extended GPS Supported USB–C Port... - Page 30 Roll axis: 360 ° continuous rotation Controlled Rotation Pan axis: 360 ° continuous rotation Range Tilt axis: +180° to -90° (Upright Mode), +90° to -135° (Underslung and Flashlight Mode) Roll axis: ±30°, 360° continuous rotation (Roll 360 mode) © 2018 DJI OSMO All Rights Reserved.
- Page 31 Contents are subject to change. Download the latest version from http://www.dji.com/product/ronin-s If you have any questions about this document, please contact DJI by sending a message to DocSupport@dji.com. © RONIN is a trademark of DJI OSMO. Copyright 2018 DJI OSMO All Rights Reserved.
Need help?
Do you have a question about the Ronin-S and is the answer not in the manual?
Questions and answers