JVC UX-P400 Instructions Manual
Jvc micro component system instructions
Hide thumbs
Also See for UX-P400:
- Instructions manual (32 pages) ,
- Service manual (87 pages) ,
- Instructions manual (31 pages)
Table of Contents
Advertisement
Advertisement
Table of Contents

Related Manuals for JVC UX-P400


Summary of Contents for JVC UX-P400
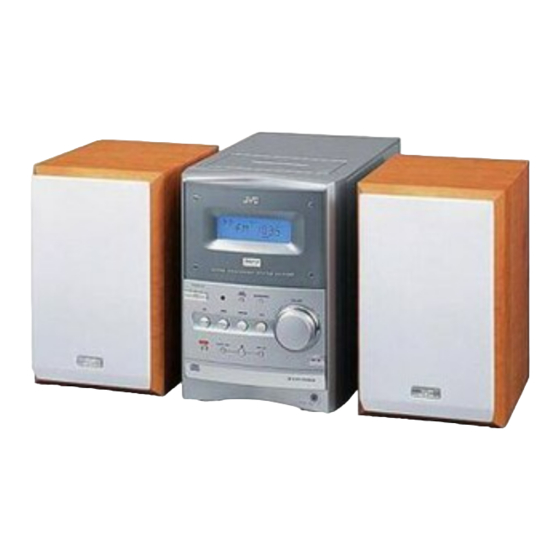
- Page 1 MICRO COMPONENT SYSTEM SISTEMAS DE MICROCOMPONENTES SISTEMA DE MICRO COMPONENTES UX-P400 INSTRUCTIONS MANUAL DE INSTRUCCIONES INSTRUÇÕES — Consists of CA-UXP400 and SP-UXP400 — Se compone de CA-UXP400 y SP-UXP400 — Composto por CA-UXP400 e SP-UXP400 GVT0128-002A [UW]...
- Page 2 Warnings, Cautions and Others Avisos, precauciones y otras notas Advertências, precauções e outras notas CAUTION—STANDBY/ON button! Disconnect the mains plug to shut the power off completely (all lamps and indications go off). The STANDBY/ON button in any position does not disconnect the mains line. •...
- Page 3 CAUTION To reduce the risk of electrical shocks, fire, etc.: 1. Do not remove screws, covers or cabinet. 2. Do not expose this appliance to rain or moisture. PRECAUCIÓN Para reducir riesgos de choques eléctricos, incendio, etc.: 1. No extraiga los tornillos, los cubiertas ni la caja. 2.
-
Page 4: Important For Laser Products
IMPORTANT FOR LASER PRODUCTS 1. CLASS 1 LASER PRODUCT 2. CAUTION: Do not open the top cover. There are no user serviceable parts inside the unit; leave all servicing to qualified service personnel. 3. CAUTION: Visible and invisible laser radiation when open and interlock failed or defeated. Avoid direct exposure to beam. 4. -
Page 5: Table Of Contents
Contents Introduction... 2 Precautions...2 How to Read This Manual ...2 Getting Started ... 3 Step 1: Unpack...3 Step 2: Prepare the Remote Control ...3 Step 3: Hook Up ... 4 Before Operating the System ... 7 Daily Operations—Playback... 8 Listening to the Radio...9 Playing Back a Disc...10 Playing Back a Tape ...11 Daily Operations—Sound &Other... -
Page 6: Introduction
Precautions Installation • Install in a place which is level, dry and neither too hot nor too cold—between 5°C and 35°C. • Install the System in a location with adequate ventilation to prevent internal heat buildup inside the System. DO NOT install the System in a location near heat sources, or in a place subject to direct sunlight, excessive dust or vibration. -
Page 7: Getting Started
Step 1 :Unpack the package and check the accessories. Step 2 : Prepare the remote control. Step 3 : Hook up the components such as AM/FM antennas, speakers, etc. (see pages 4 to 6). Finally plug the AC power cord. •... -
Page 8: Step 3: Hook Up
Step : Hook Up If you need more detailed information, see page 6. Illustrations of the input/output terminals below are typical examples. When you connect other components, refer also to their manuals since the terminal names actually printed on the rear may vary. - Page 9 FM antenna (supplied) Extend it so that you can obtain the best reception. White Before plugging in the System Set the correct voltage for your area with the voltage selector on the rear. Use a screwdriver to rotate the voltage selector so that the voltage marker is pointing at the same voltage as where you are plugging in the unit.
- Page 10 To assemble and connect the AM loop antenna To assemble the AM loop antenna To connect the AM loop antenna 1 Hold 2 Insert • If the AM loop antenna wire or speaker cords are covered with vinyl, remove the vinyl to expose the tip of the antenna by twisting the vinyl.
-
Page 11: Before Operating The System
Before Operating the System The indications on the display teach you a lot of things while you are operating the System. Before operating the System, be familiar with when and how the indicator illuminates on the display. SLEEP MONO ST MP3 123 REC RANDOM PRGM... -
Page 12: Daily Operations-Playback
Daily Operations 10 keys 4,7,¢ GROUP UP GROUP DOWN REV. MODE FM MODE STANDBY/ON VOLUME —Playback Turn on the power. The STANDBY/ON lamp on the main unit lights in green. • Without pressing STANDBY/ON turns on by pressing one of the source selecting buttons in the next step. -
Page 13: Listening To The Radio
Listening to the Radio To set the AM tuner interval spacing Before operating the tuner, it is required to select the appropriate AM space interval used for your area. Select the AM band. Turn off the power. STANDBY/ON Select the appropriate AM space interval for your area. -
Page 14: Playing Back A Disc
Select a preset number for the station you store. Examples: To select preset number 5, press To select preset number 15, press +10, then 5. To select preset number 30, press +10, +10, then 10. • You can also use the PRESET UP/PRESET DOWN buttons. -
Page 15: Playing Back A Tape
To select a track Increases the track numbers. Decreases the track numbers. To select a group (MP3 only) Before starting playback... GROUP UP Increases the group numbers. GROUP DOWN Decreases the group numbers. Group number and group name appear. To locate a particular portion While playing a disc, press and hold until the portion you want is reached. -
Page 16: Adjustments
Daily Operations Remote control CLOCK/ TIMER 4/¢ BASS/ TREBLE DIMMER FADE MUTING Main unit BASS /TREBLE 4/¢ —Sound&Other Adjustments Adjusting the Volume You can adjust the volume level from level 0 (VOL MIN) to level 40 (VOL MAX). Remote control: SLEEP VOLUME DISPLAY... -
Page 17: Changing The Display Brightness
Changing the Display Brightness You can dim the display window. DIMMER DIM 1 DIM OFF (Canceled) DIM 1 Dims the display. DIM 2 Erases the display illumination. Remote Setting the Clock ONLY Without setting the built-in clock, you cannot use Daily/ Recording Timers (see page 19) and Sleep Timer. -
Page 18: Advanced Disc Operations
Advanced Disc Operations Remote control 10 keys CD 6 REPEAT PLAY MODE Main unit CD 6 4,7,¢ Programming the Playing Order— Program Play You can arrange the playing order of the tracks (up to 50) before you start playback. Before starting playback, activate Program Play. PLAY MODE 4,7,¢... -
Page 19: Playing At Random-Random Play
To check the programmed contents Before or after playback... In the programmed order. In the reverse order. To modify the program Before or after playback... To erase the last step: To erase the entire program: CANCEL To add steps in the program: Repeat step 2. -
Page 20: Playing Repeatedly-Repeat Play
Playing Repeatedly—Repeat Play You can repeat playback. Before starting playback... REPEAT Canceled (No indication) While playing... REPEAT Canceled (No indication) Repeats the current (or specified) track—One Track Repeat. Repeats all tracks—All Track Repeat. A-B Repeat See below for details. “A” starts flashing in the main display. To repeat a particular portion—A-B Repeat You can repeat a particular portion while playing back a CD. -
Page 21: Advanced Tape Operations
Advanced Tape Operations Remote control TAPE 2 3 CD 6 REV. MODE Main unit PUSH OPEN 0 TAPE 2 3 CD 6 IMPORTANT It may be unlawful to record or play back copyrighted material without the consent of the copyright owner. Recording on a Tape You can use type I tapes for recording. -
Page 22: Synchronized Disc Recording
Select and start playing the source—“FM,” “AM,” “CD,” or “AUX.” • When recording a disc, you can also use “Synchronized Disc Recording” (see below). Start recording. On the main unit To stop recording: Synchronized Disc Recording You can start and stop both disc play and tape recording at the same time. -
Page 23: Timer Operations
Timer Operations Remote control PRESET UP/DOWN * Daily Timer initial settings when shipped from the factory •Daily 1: ON Time (6:00)/Source (TUNER)/ Volume level (8) •Daily 2: ON Time (7:00)/Source (TUNER)/ Volume level (8) •Daily 3: ON Time (10:00)/Source (TUNER)/ Volume level (8) Setting the Timer Using Daily Timer, you can wake up with your favorite... - Page 24 3 Select the volume level. • You can select the volume level (“VOLUME 0” to “VOLUME 40” and “VOLUME – –”). If you select “VOLUME – –,” the volume is set to the last level when the unit has been turned off. For Recording Timer: 1 Set the hour then the minute for on-time.
- Page 25 How Daily Timer actually works Once the Daily Timer has been set, the timer ( indicator and timer number indicator (1/2/3) are lit on the display. Daily Timer is activated at the same time everyday until the timer is turned off manually (see the next column) or another Daily Timer is activated.
-
Page 26: Additional Information
Additional Information Learning More about This System Daily Operations—Playback (see pages 8 to 11) Listening to the Radio: • If you store a new station into an occupied preset number, the previously stored station in that number will be erased. •... -
Page 27: Troubleshooting
Troubleshooting If you are having a problem with your System, check this list for a possible solution before calling for service. General: Adjustments or settings are suddenly canceled before you finish. There is a time limit. Repeat the procedure again. Operations are disabled. -
Page 28: Specifications
Specifications Amplifier section Output Power: 40 W (20 W + 20 W) at 4 Ω (10% THD) Speakers/Impedance: 4 Ω – 16 Ω Audio Input AUX: 400 mV/50 kΩ Tuner section FM tuning range: 87.50 MHz – 108.00 MHz AM (MW) tuning range: 531 kHz –... - Page 29 MEMO...
- Page 30 Mains (AC) Line Instruction (not applicable for Europe, U.S.A., Canada, Australia, and U.K.) Instrucción sobre la línea de la red (CA) (no aplicable para Europa, EE.UU., Canadá, Australia, ni el Grã-Bretanha) Instrução sobre a tensão da rede eléctrica (CA) (não aplicável para a Europa, os E.U.A., o Canadá, a Austrália e o Reino Unido) CAUTION for mains (AC) line BEFORE PLUGGING IN, do check...
Need help?
Do you have a question about the UX-P400 and is the answer not in the manual?
Questions and answers