JVC CA-UXP400 Instructions Manual
Jvc micro component system instructions
Hide thumbs
Also See for CA-UXP400:
- Instructions manual (30 pages) ,
- Service manual (87 pages) ,
- Instructions manual (31 pages)

Related Manuals for JVC CA-UXP400


Summary of Contents for JVC CA-UXP400
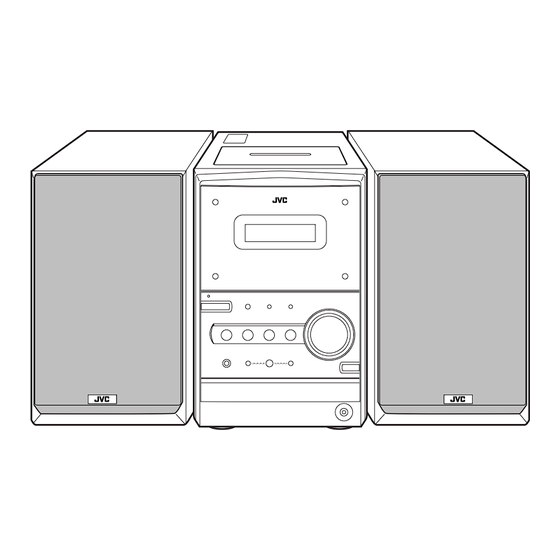
- Page 1 MICRO COMPONENT SYSTEM UX-P400 —Consists of CA-UXP400 and SP-UXP400 INSTRUCTIONS GVT0128-003A...
- Page 2 3. Bottom: Place on the level surface. Maintain an adequate air path for ventilation by placing on a stand with a height of 10 cm or more. Front view 1 cm 15 cm CA-UXP400 SP-UXP400 IMPORTANT FOR LASER PRODUCTS 1. CLASS 1 LASER PRODUCT 2. CAUTION: Do not open the top cover. There are no user serviceable parts inside the unit;...
-
Page 3: Table Of Contents
Contents Introduction... 2 Precautions...2 How to Read This Manual ...2 Getting Started ... 3 Step 1: Unpack...3 Step 2: Prepare the Remote Control ...3 Step 3: Hook Up ...4 Before Operating the System ... 7 Daily Operations—Playback... 8 Listening to the Radio...8 Playing Back a Disc...9 Playing Back a Tape ...10 Daily Operations—Sound&Other Adjustments ... -
Page 4: Introduction
Precautions Installation • Install in a place which is level, dry and neither too hot nor too cold—between 5°C and 35°C. • Install the System in a location with adequate ventilation to prevent internal heat buildup inside the System. DO NOT install the System in a location near heat sources, or in a place subject to direct sunlight, excessive dust or vibration. -
Page 5: Getting Started
Step 1 :Unpack the package and check the accessories. Step 2 : Prepare the remote control. Step 3 : Hook up the components such as AM/FM antennas, speakers, etc. (see pages 4 to 6). Finally plug the AC power cord. Now you can operate the System. -
Page 6: Step 3: Hook Up
Step : Hook Up If you need more detailed information, see page 6. Illustrations of the input/output terminals below are typical examples. When you connect other components, refer also to their manuals since the terminal names actually printed on the rear may vary. - Page 7 FM antenna (supplied) Extend it so that you can obtain the best reception. White AM loop antenna (supplied) Turn it until the best reception is obtained.
- Page 8 To assemble and connect the AM loop antenna To assemble the AM loop antenna To connect the AM loop antenna 1 Hold 2 Insert • If the AM loop antenna wire or speaker cords are covered with vinyl, remove the vinyl to expose the tip of the antenna by twisting the vinyl.
-
Page 9: Before Operating The System
Before Operating the System The indications on the display teach you a lot of things while you are operating the System. Before operating the System, be familiar with when and how the indicator illuminates on the display. SLEEP MONO ST MP3 123 REC RANDOM PRGM... -
Page 10: Daily Operations-Playback
Daily Operations 10 keys 4,7,¢ GROUP UP GROUP DOWN REV. MODE FM MODE STANDBY/ON VOLUME —Playback Turn on the power. The STANDBY/ON lamp on the main unit lights in green. • Without pressing STANDBY/ON turns on by pressing one of the source selecting buttons in the next step. -
Page 11: Playing Back A Disc
To tune in to a station While FM or AM is selected... Remote control: Main unit: sec. DOWN Frequency starts changing on the display. When a station (frequency) with sufficient signal strength is tuned in, the frequency stops changing. • When you repeatedly press the button, the frequency changes step by step. -
Page 12: Playing Back A Tape
To start: To pause: To release, press again. To select a track Increases the track numbers. Decreases the track numbers. To select a group (MP3 only) Before starting playback... GROUP UP Increases the group numbers. GROUP DOWN Decreases the group numbers. Group number and group name appear. -
Page 13: Daily Operations-Sound&Other Adjustments
Daily Operations Remote control CLOCK/ TIMER 4/¢ BASS/ TREBLE DIMMER FADE MUTING Main unit BASS /TREBLE 4/¢ —Sound&Other Adjustments Adjusting the Volume You can adjust the volume level from level 0 (VOL MIN) to level 40 (VOL MAX). Remote control: SLEEP VOLUME DISPLAY... -
Page 14: Changing The Display Brightness
Changing the Display Brightness You can dim the display window. DIMMER DIM 1 DIM OFF (Canceled) DIM 1 Dims the display. DIM 2 Erases the display illumination. Remote Setting the Clock ONLY Without setting the built-in clock, you cannot use Daily/ Recording Timers (see page 21) and Sleep Timer. -
Page 15: Advanced Radio Operations
Advanced Radio Operations Remote control RDS DISPLAY SELECT – / + Receiving FM Stations with RDS Radio Data System (RDS) allows FM stations to send an additional signal along with their regular program signals. • When tuned to an FM station which provides the RDS service, the RDS indicator lights on the display. -
Page 16: Switching Temporarily To A Program Of Your Choice Automatically
Start searching. SEARCH Ex. When “NEWS” is selected The receiver searches 30 preset FM stations, stops when it finds the one you have selected, and tunes in to that station. • If no program is found, “NOTFOUND” appears on the display. - Page 17 Description of the PTY codes NEWS News. AFFAIRS Topical program expanding or enlarging upon the news—debate, or analysis. INFO Programs the purpose of which is to impart advice in the widest sense. SPORT Programs concerned with any aspect of sports. EDUCATE Educational programs.
-
Page 18: Advanced Disc Operations
Advanced Disc Operations Remote control CD 6 REPEAT PLAY MODE Main unit CD 6 4,7,¢ Programming the Playing Order— Program Play You can arrange the playing order of the tracks (up to 50) before you start playback. Before starting playback, activate Program Play. PLAY MODE 4,7,¢... -
Page 19: Playing At Random-Random Play
To check the programmed contents Before or after playback... In the programmed order. In the reverse order. To modify the program Before or after playback... To erase the last step: To erase the entire program: CANCEL To add steps in the program: Repeat step 2. -
Page 20: Playing Repeatedly-Repeat Play
Playing Repeatedly—Repeat Play You can repeat playback. Before starting playback... REPEAT Canceled (No indication) While playing... REPEAT Canceled (No indication) Repeats the current (or specified) track—One Track Repeat. Repeats all tracks—All Track Repeat. A-B Repeat See below for details. “A” starts flashing in the main display. To repeat a particular portion—A-B Repeat You can repeat a particular portion while playing back a CD. -
Page 21: Advanced Tape Operations
Advanced Tape Operations Remote control TAPE 2 3 CD 6 REV. MODE Main unit PUSH OPEN 0 TAPE 2 3 CD 6 IMPORTANT It should be noted that it may be unlawful to re-record pre-recorded tapes, records, or discs without the consent of the owner of copyright in the sound or video recording, broadcast or cable programme and in any literary, dramatic, musical, or artistic embodied therein. -
Page 22: Synchronized Disc Recording
Select and start playing the source—“FM,” “AM,” “CD,” or “AUX.” • When recording a disc, you can also use “Synchronized Disc Recording” (see below). Start recording. On the main unit To stop recording: Synchronized Disc Recording You can start and stop both disc play and tape recording at the same time. -
Page 23: Timer Operations
Remote control 4/¢ * Daily Timer initial settings when shipped from the factory •Daily 1: ON Time (6:00)/Source (TUNER)/ Volume level (8) •Daily 2: ON Time (7:00)/Source (TUNER)/ Volume level (8) •Daily 3: ON Time (10:00)/Source (TUNER)/ Volume level (8) Timer Operations Setting the Timer Using Daily Timer, you can wake up with your favorite... - Page 24 3 Select the volume level. • You can select the volume level (“VOLUME 0” to “VOLUME 40” and “VOLUME – –”). If you select “VOLUME – –,” the volume is set to the last level when the unit has been turned off. For Recording Timer: 1 Set the hour then the minute for on-time.
- Page 25 How Daily Timer actually works Once the Daily Timer has been set, the timer ( indicator and timer number indicator (1/2/3) are lit on the display. Daily Timer is activated at the same time everyday until the timer is turned off manually (see the next column) or another Daily Timer is activated.
-
Page 26: Additional Information
Additional Information Learning More about This System Daily Operations—Playback (see pages 8 to 10) Listening to the Radio: • If you store a new station into an occupied preset number, the previously stored station in that number will be erased. •... -
Page 27: Troubleshooting
Troubleshooting If you are having a problem with your System, check this list for a possible solution before calling for service. General: Adjustments or settings are suddenly canceled before you finish. There is a time limit. Repeat the procedure again. Operations are disabled. -
Page 28: Specifications
Specifications Amplifier section Output Power: 40 W (20 W + 20 W) at 4 Ω (10% THD) Speakers/Impedance: 4 Ω – 16 Ω Audio Input AUX: 400 mV/50 kΩ Tuner section FM tuning range: 87.50 MHz – 108.00 MHz AM (MW) tuning range: 522 kHz – 1 629 kHz CD player section Dynamic range: 88 dB Signal-to-noise ratio: 93 dB... -
Page 29: Safety Instructions
“SOME DOS AND DON’TS ON THE SAFE USE OF EQUIPMENT” This equipment has been designed and manufactured to meet international safety standards but, like any electrical equipment, care must be taken if you are to obtain the best results and safety is to be assured. ✮✮✮✮✮✮✮✮✮✮✮✮✮✮✮✮✮✮✮✮✮✮✮✮✮✮✮✮✮✮✮✮✮✮✮✮✮✮✮✮✮✮✮✮✮✮✮... - Page 30 MEMO...
- Page 31 MEMO...
- Page 32 VICTOR COMPANY OF JAPAN, LIMITED © 2004 VICTOR COMPANY OF JAPAN, LIMITED 0104AIMMDWJEM...
Need help?
Do you have a question about the CA-UXP400 and is the answer not in the manual?
Questions and answers