Table of Contents
Advertisement
Advertisement
Table of Contents

Related Manuals for Rextron AcroGear DAG12


Summary of Contents for Rextron AcroGear DAG12
- Page 2 Package Contents: DAG12 2-Port AcroGear (DAG12) User’s manual Rubber foot pad x 1 set DAG14 4-Port AcroGear (DAG14) User’s manual Rubber foot pad x 1 set Copyright Rextron Technology, Inc. PP5-T7300-000 Printed in Taiwan...
-
Page 3: Table Of Contents
Table of Content Introduction Overview............1 Features ............2 System Requirements Console side............ 3 Computer side ..........3 Installations PC BIOS Notice..........4 Console Connection ........5 Computers Connection........6 Operations Front Panel operation........7 Rack Mount Kit ..........9 Appendices Specifications.......... -
Page 4: Introduction Overview
(keyboard/Video/mouse) switch and USB peripherals sharing device. With the DAG12 or DAG14, you can easily operate up to 2 or 4 PCs, G3/G4 Macs, or iMacs respectively from 1 USB keyboard, 1 USB mouse, and 1 monitor saving you space, time, equipment and money. -
Page 5: Features
USB keyboard, mouse and monitor with DAG12 and DAG14 respectively. 2 or 4 computers share up to 3 or 4 different USB peripherals with DAG12 and DAG14 respectively. Front panel push buttons for easy computer selection. No drivers needed for keyboard and mouse operation. -
Page 6: System Requirements Console Side
----------------- System Requirements Console side One DVI monitor One USB keyboard One USB mouse Computer side Each USB-enabled computer must be connected to the DAG switch by One DVI-I cable for monitor, as shown in figure 1. Figure 1. DVI-I cable One USB A-B cable with Type-A and Type-B plug for USB devices, as shown in figure 2. -
Page 7: Installations
----------------- Installation PC BIOS Notice The following BIOS setup changes are necessary for PC users and not necessary for Mac users: 1. In STANDARD CMOS, set HALT ON ERROR to ALL BUT KEYBOARD. 2. In PNP AND PCI SETUP, set PNP OS INSTALLED to YES and set USB IRQ to ENABLED. -
Page 8: Console Connection
Console Connection Before installation, make sure all devices and computers to be connected to the DAG switch have been turned off. Plug a monitor to the Console's DVI-I port; plug a USB keyboard and a USB mouse to any two of the Console's USB ports as shown in figure 3. -
Page 9: Computers Connection
Computers Connection Use a male-to-male cable to connect from a computer's DVI-I port to DAG's DVI-I port of PC side, as shown in figure 4. Use a USB A-B Cable to connect from the DAG's USB port (B connector, square connector) to the USB port on the corresponding computer (A connector, flat connector), as shown in figure 4. -
Page 10: Operations
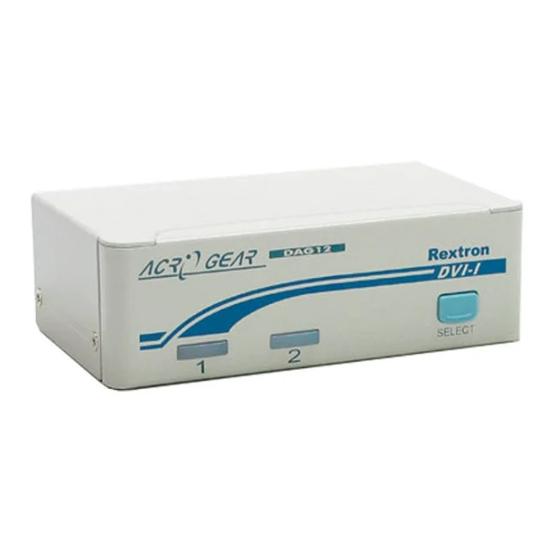
----------------- Operations Front Panel 1. On-line LED & Selected LED When the LED turns green, the connected computer is powered-on. When a computer is selected, its corresponding red LED illuminates. 2. Pushbuttons Each computer has a button associated with it on the front panel for selection. - Page 11 Then by tapping the pushbutton each time, the DAG12 responds with 1, 2, 3 or 4 beeps corresponding to 3, 8, 15 or 30 seconds respectively. Once set, leave the DAG12 as it is and it will automatically return for normal operation. For DAG14 To activate Auto Scan, press down front panel push buttons "3"...
-
Page 12: Rack Mount Kit
----- Rack Mount Kit for DAG14 (optional) The figure below shows how to attach optional mounting brackets and cable support (RMK04) to the DAG14 for standard 19-inch rack cabinet. -
Page 13: Specifications
----------------- Appendices Specifications Specification DAG12 DAG14 No. of computers supported Front panel push button Hot plug-and-play Automatic scan interval 3, 8, 15, 30 seconds Cable Length (Max) 5M(15ft) for USB Computer ON-LINE LED Computer selected LED Monitor Type Computer peripheral connector... -
Page 14: Troubleshooting
----------------- Troubleshooting Ensure that all cables are well seated. Label the cable for each computer to avoid confusion when connected to the DAG switch. The DAG switch has built-in power protection that works automatically when needed. When it works, USB communication halts and the only way to restart the DAG switch properly is to remove all power sources (USB patch cables and power adapter), wait a few seconds, apply power sources and start again. - Page 15 Improper device 1A current rating to the initialization. DAG switch. When DAG Be sure the USB cable switch works is well seated to under ensure communication. self-power, i.e., Remove all power no power supply sources to the DAG by added, it unplugging all USB supports max of A-B cables and the...
-
Page 16: Limited Warranty
Limited Warranty IN NO EVENT SHALL THE DIRECT VENDOR'S LIABILITY FOR DIRECT OR INDIRECT, SPECIAL, INCIDENTIAL OR CONSEQUENTIAL DAMAGES, LOSS OF PROFIT, LOSS OF BUSINESS, OR FINANCIAL LOSS WHICH MAY BE CAUSED BY THE USE OF THE PRODUCT EXCEEDS THE PRICE PAID FOR THE PDOCUDT.
Need help?
Do you have a question about the AcroGear DAG12 and is the answer not in the manual?
Questions and answers