
Related Manuals for McQuay IM 777-3


Summary of Contents for McQuay IM 777-3
-
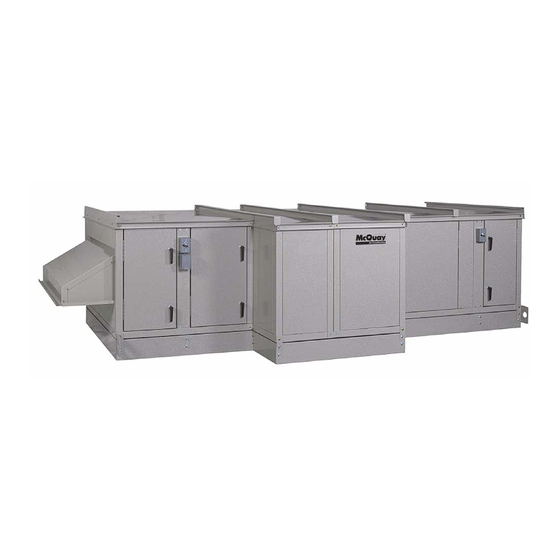
Page 1: Air Handler
Installation and Maintenance Manual IM 777-3 ™ Skyline Air Handler Group: Applied Air Sizes 003–090 Part Number: IM 777 Date: October 2008 © 2008 McQuay International... -
Page 2: Table Of Contents
Contents General Information ..........3 Electrical Installation ........15 Receiving and Handling........3 Operation Guidelines..........16 Unit Storage............3 Startup Checks..........16 Nomenclature ............. 3 Fan Wheel Alignment........17 Installation Guidelines ..........4 Operating Limits ..........19 Service Clearances..........4 Fan Vibration Levels ........ -
Page 3: General Information
030, 035, 045, 055, 065, 080, 085, 090 T = Motor behind twin housed fans Vintage of McQuay Air Handling Unit Unit Type/Coil Position B = Blow-thru cooling coil location D = Draw-thru cooling coil location H = Heating only V = Vent only McQuay IM 777-3... -
Page 4: Installation Guidelines
Before hoisting into position, test lift for stability and balance. Avoid twisting or uneven lifting of unit. Figure 3: Unit and Section Rigging H e i g h t McQuay IM 777-3... -
Page 5: Curb Mounting And Unit Leveling
Caulk all assembly joints of the unit—Before joining the sections, apply at least 1/4 inch diameter bead of sealant to the mating faces of the cabinet. Use the splice joint as a guide for applying the sealant. See Figure 5. McQuay IM 777-3... - Page 6 The gasket is to be installed in an arc shape with the ends S p l i c e P l a t e lower than the center, so that any moisture that may reach the gasket will be drained to the outside of the unit. McQuay IM 777-3...
-
Page 7: Panels, Frame Channels, And Doors
Fan Section Doors Opening fan section doors requires using a 1/2" socket Note: View from inside door wrench, which satisfies ANSI standards and other codes OPEN that require the “use of tools” to access compartments McQuay IM 777-3... -
Page 8: Field Mounting Junction Boxes And Other Components
D i s c h a r g e Ne pas se servir d’un chalumeau coupeur P l e n u m ni exposer les pannequx à une flamme nue pour ne pas risquer de les endommager. McQuay IM 777-3... -
Page 9: Dampers And Hoods
A typical rotary electric actuator can handle up to 40 sq. ft. of damper. For pneumatic actuators, allow 5 in-lb per square foot of damper area. Hood McQuay IM 777-3... -
Page 10: Face And Bypass Section Mounting
• Use care when piping the system, making sure all joints are tight and all lines are dry and free of foreign material. For typical refrigerant piping, see condensing unit product manual. McQuay IM 777-3... - Page 11 On startup, admit steam to coil ten minutes before admitting • Use bucket traps for on/off control only. outdoor air. Close fresh air dampers if steam supply pressure falls below • Locate traps at least 12 inches below the coil return connection. the minimum specified. McQuay IM 777-3...
- Page 12 5RA, 8RA, or 5SA coils. Banked two high, individual trapping of each coil as shown is preferred. 12" min. Return main Full size of return conn. 5RA, 8RA, or 5SA coils. Installed McQuay IM 777-3...
-
Page 13: Drain Pan Traps
D r a i n pan outlet must be twice the static pressure in the drain pan section under normal operation so the trap remains sealed. See Figure 20. McQuay IM 777-3... -
Page 14: Internal Isolation Assembly Adjustment
D e t a i l A screw on top of the isolator assembly. Turn the adjustment nut below the fan frame to lower or raise the fan motor and frame assembly. Retighten the cap screw on top of the isolator assembly. McQuay IM 777-3... -
Page 15: Electrical Installation
Do not drill through drip or drain pans. Refer to the VFD installation manual provided with the unit for detailed control wiring instructions. McQuay IM 777-3... -
Page 16: Operation Guidelines
Fan Startup: Start and run fan. Observe the rotation. If the fan operates backward, reverse two legs of the three-phase motor connections. Variable pitch fan drives usually are provided for Note: operation in the mid-speed adjustment range. However, McQuay IM 777-3... -
Page 17: Fan Wheel Alignment
Curved Type Fan Wheels W h e e l 36.5 40.25 1.00 44.5 1.12 I n l e t I n l e t F u n n e l F u n n e l 1.25 54.25 1.38 1.50 McQuay IM 777-3... - Page 18 Diameter (in) ft/lbs kg/m. 1/16 10.5 1.45 19.0 2.63 7/16 29.0 4.01 42.0 5.81 92.0 12.72 Table 5: Wheel-to-Inlet Funnel Relationship—Inline Fans Wheel—funnel overlap Size Overlap .375 .438 .562 .625 .688 .750 .812 .875 1.000 1.125 1.250 1.375 McQuay IM 777-3...
-
Page 19: Operating Limits
Maximum rpm Class I 1010 Maximum rpm Class Il 1281 1178 1011 Airfoil—housed Diameter 22.25 24.5 36.5 Maximum rpm Class I 2077 1875 1691 1479 1328 1209 1073 Maximum rpm Class Il 2703 2413 2199 1928 1730 1579 1401 McQuay IM 777-3... - Page 20 1208 1072 Maximum rpm Class II 3409 3111 2796 2551 2294 2082 1846 1662 1510 1340 1216 1100 Twin fans Diameter 9 x 9 10.62 12.62 18.12 Maximum rpm 2575 2400 2000 1700 1400 1200 Maximum HP McQuay IM 777-3...
-
Page 21: Fan Vibration Levels
Also similar faults in driven sheave. Bad V-belts; lumpy, or mismatched; belt tension too tight or too loose. Bad bearings, loose bearing hold-down bolts Fan Speed (rpm) Motor imbalance Fan section not supported evenly on foundation McQuay IM 777-3... -
Page 22: Service And Maintenance
Run the motor for five minutes before replacing the plugs. Above 250°F Contact Browning Specific greasing instructions are located on a tag Note: (120°C) attached to the motor. If special lubrication instructions are on the motor, they supersede all other instructions. McQuay IM 777-3... -
Page 23: Fan Drive Adjustments
V-belt outer surface where it passes around the sheave (pitch diameter). Calculate fan speed from the motor nameplate rpm. Measured diameter at motor sheave Fan rpm = motor rpm × Measured diameter at fan sheave McQuay IM 777-3... - Page 24 Readjust belt tension before starting drive. To provide the same pitch diameter, adjust both halves of the two-groove sheaves by the same number of turns from closed position. McQuay IM 777-3...
- Page 25 Tighten setscrews and capscrews 24 hours of operation. Put on belts and adjust belt tension. Do not force belts over grooves. See “Fan Drive Belt Adjustment” on page Figure 34: LVP Type Sheave Adjustment Section A-A Section A-A McQuay IM 777-3...
- Page 26 12.5 3/16 5/16–11NC 25.4 13.8 3/8–16NC 45.4 24.2 1/4, 5/16 150, 250 1/2–13NC 1300 108.3 51.7 5/8–11NC 1225 102.1 Figure 35: Sheave Adjustment Must be parallel Bearing Center lines must coincide Motor Adjustable Sheave Must be parallel McQuay IM 777-3...
-
Page 27: Fan Drive Belt Adjustment
• La surface des planchers doit être sec et libre de toute trace d'huile et où de graisse. McQuay IM 777-3... -
Page 28: Front Load Filter Option
F i l t e r F i l t e r F r a m e P r e f i l t e r R o t a t e W i r e C l i p s McQuay IM 777-3... -
Page 29: Maintaining The Coil
Note: Initial pressure drop solution used. Some products have a higher freezing Final pressure drop point in their natural state when mixed with water. McQuay International is not responsible for the Pleated panel filters freezing of coils. Type Perfect pleat AMAir 300 4"... - Page 30 Carefully drill holes in the end panels of the unit. Remove the brass plugs for the vents and drains on the connections. Slip the panel over the connections. Replace the brass plugs and panel fasteners. Coil Rests McQuay IM 777-3...
- Page 31 Once the coil is in place, bolt the coil to the section. pull out the coil from either side of the unit. Caulk the mounting surface of the steel plate and install the Install the coils in reverse order of removal. plate on the coils. McQuay IM 777-3...
-
Page 32: Warranty
Warranty Return Material Procedure Replacement Parts Defective material may not be returned without permission of authorized factory service personnel of McQuay International When writing to McQuay for service or replacement parts, in Minneapolis, Minnesota, (763) 553-5330. A “Return refer to the model number and serial number of the unit Goods”... -
Page 33: Skyline Equipment Warranty Registration Form
Stage 4 Stage 5 Stage 6 Phase L1: ___________ ____________ ____________ ___________ ___________ ____________ Phase L2: ___________ ____________ ____________ ____________ ___________ ____________ Phase L3 ___________ ____________ ____________ ___________ ___________ ____________ G. FLA: L1 ___________ L2____________ L3 ___________ McQuay IM 777-3... - Page 34 RETURN COMPLETED FORM WITHIN 10 DAYS OF START-UP TO: McQuay International Warranty Department, 13600 Industrial Park Boulevard, Minneapolis, MN 55441 Please list any additional comments that could affect the operation of this unit; e.g., shipping damage, failed components, adverse installation applications, etc., on a separate sheet and attach to this form.
-
Page 35: Quality Assurance Survey Report
If additional comment space is needed, write the comment(s) on a separate sheet, attach the sheet to this completed Quality Assurance Survey Report, and return it to the Warranty Department with the completed preceding “Equipment Warranty Registration Form”. McQuay IM 777-3... - Page 36 Warranty. Consult your local McQuay Representative for warranty details. Refer to Form 933-43285Y. To find your local McQuay Representative, go to www.mcquay.com. This document contains the most current product information as of this printing. For the most up-to-date product information, please go to www.mcquay.com. © 2008 McQuay International • www.mcquay.com • 800-432-1342...
Need help?
Do you have a question about the IM 777-3 and is the answer not in the manual?
Questions and answers