Motorola GP388 User Manual
Professional radio
Hide thumbs
Also See for GP388:
- Manual (58 pages) ,
- Detailed service manual (416 pages) ,
- Basic service manual (60 pages)
Table of Contents
Advertisement
Advertisement
Table of Contents

Related Manuals for Motorola GP388


Summary of Contents for Motorola GP388
- Page 1 Professional Radio GP388 User Guide 68P64110B99 Issue: Nov 2001...
-
Page 3: Table Of Contents
CONTENTS Radio Overview ....3 Radio Operation....17 Operation and Control Functions . - Page 4 The products described in this manual may include copyrighted computer programmes stored in semiconductor memories or other media. Laws in the United States of America and other countries preserve for Motorola Europe and Motorola Inc. certain exclusive rights for copyrighted computer programmes, including the right to copy or reproduce in any form the copyrighted computer programme.
-
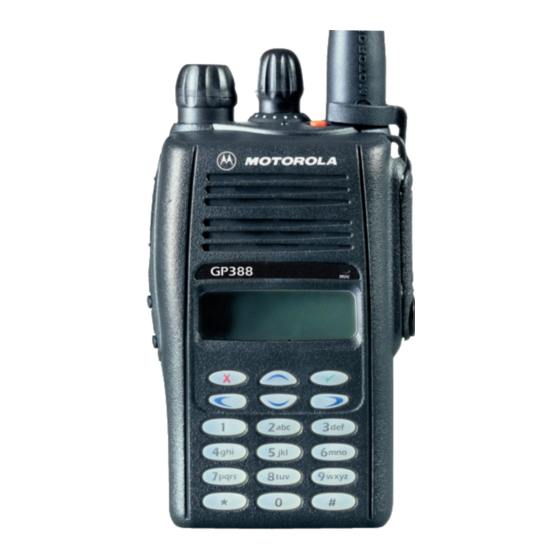
Page 5: Radio Overview
Recommended as Emergency button. This user guide covers the operation of the LED Indicator Green: Successful power up. GP388 Professional Portable Radio. Green Flashing: Radio scanning. Before using this radio, refer to Important Red: Radio transmitting. Safety and General Information contained in Red Flashing: Channel busy - when receiving. - Page 6 Feature Description Monitor allows user to select between signalling squelch, carrier squelch and unsquelch, and to suspend scan when landed on a channel in scan Monitor/Cancel mode. Cancel allows user to cancel current incoming or outgoing call. Radio Call To make an individual or group selective call. Allows user direct access into the Missed Call List Missed Call List menu feature.
- Page 7 Feature Description To delete a nuisance (unwanted) channel when Nuisance Delete scanning, with exception of priority channel, last channel in scan list and home channel. To toggle the radio’s transmit power level between Power Level High and Low. To talk directly with another radio without going Talkaround On/Off through a system or despatcher.
- Page 8 Feature Description Keypad Lock Allows user to lock/unlock menu keys and keypad On/Off keys. To place the keypad into permanent DTMF live dial DTMF mode. Backlight To toggle the display/keypad backlight on and off. English...
-
Page 9: Keypad Keys
Keypad Keys Keypad Lock/Unlock On your radio there is a keypad lock feature which 1 2 3 allows you to lock the keypad keys and menu keys 4 5 6 to eliminate accidental key presses. Press the keypad lock button to lock the keys, the 7 8 9 display icon L will be lit and the display will show: * 0 #... -
Page 10: Menu Keys
Menu Keys Menu/ Exit Select Left Right Down Menu/Select Key c Used to enter the Menu Mode. When you are in the Menu Mode, this key is also used to make menu selections. Note: When the radio is in the IDLE STATE, press- ing any of the six menu keys causes the radio to enter the Menu mode. -
Page 11: Menu Navigation Chart
Menu Navigation Chart (Refer to Menu Navigation guidelines— lower, left-hand corner of this page) Missed Utilities Status Radio Contact Channel Calls Information List select/ select/ select/ select/ enter ID enter ID enterID on/off Channel No. status/ voice/ Scan SW Version DTMF CP Version Call Forward... -
Page 12: Lcd Display And Icons
LCD Display and Icons Symbol Name and Description Keypad Lock Indicator On indicates that the keypad and menu keys are locked. Off indicates unlocked. Battery Level Indicator Shows the remaining charge in your battery, Displays channel, menu, and radio status based on how many bars are displayed. -
Page 13: Audio Signal Tones
Audio Signal Tones Tone Signal Description High pitched tone Low pitched tone Radio receives an Individual Call Individual Call. Tone Signal Description Call Reminder of Reminder unanswered call. Power up OK Radio self-test OK. Warns of expiry of Power up Fail Radio self-test fail. - Page 14 Tone Signal Description Channel Free Indicates current Beep channel is free. Incoming Indicates an Emergency emergency situation. Alert Confidence tone Keypad when any key Acknowledge pressed. Incoming calls (high English/French/ Ringtones tones), outgoing calls General (low tones). English...
-
Page 15: Getting Started
For optimum battery life and operation use only • The battery should be at about 25°C (room Motorola brand chargers. They were designed to temperature) whenever possible. Charging a operate as an integrated energy system. cold battery (below 10°C) may result in leakage of electrolyte and ultimately, in failure of the battery. -
Page 16: Recycling Or Disposal Of Batteries
Place the radio with the battery attached, or the and the hardware error tone will sound. This icon battery alone, in the charger. will only appear when a genuine Motorola battery The charger’s LED indicates the charging is used. progress. -
Page 17: Accessory Information
ACCESSORY INFORMATION Attaching the Battery Removing the Battery Battery Latches Slots Turn off the radio, if it is turned on. Fit the extensions at the bottom of the battery into the slots at the bottom of the radio’s body. Slide the battery latches, on both sides of the battery, downwards. -
Page 18: Attaching The Antenna
Attaching the Antenna Removing the Antenna Align the threaded end of the antenna with the Turn the antenna counterclockwise until you radio’s antenna connector. can remove it. Turn the antenna clockwise to fasten it. English... -
Page 19: Radio Operation
RADIO OPERATION Radio On Message Turning the Radio On or Off At power up the radio will display a message customised by your dealer, e.g.: Radio On After this text has been displayed, the radio perform a self test routine. On completion of a successful self test the radio will display: Channel This may be a number or an alias and will be the... -
Page 20: Selecting A Radio Channel
Selecting a Radio Channel Once in channel mode, there are three ways to select a channel: Your radio offers up to 255 channels, however some may not be programmed. Check with your dealer for Method 1 more information. Turn the rotary knob (1) clockwise or counterclock- wise until you reach the desired channel indicated Before selecting a channel ensure your radio is in on the display. -
Page 21: Sending A Call
Sending a Call Receiving a Call Turn your radio on and adjust the volume level. Select the desired radio channel. Switch to the desired radio channel. Press the PTT button and speak clearly into the microphone.Your mouth should be 2.5 to 5 cm If, at any time, a call is received you will hear away from the microphone. -
Page 22: Cancelling A Call
Cancelling a Call Ending a Call A call should always be ended by pressing the Monitor/ At any time while setting up a call it may be cancelled Call Cancel button. by pressing the Monitor/Call Cancel button. The call timer can also cancel a call. English... -
Page 23: Radio Calls
RADIO CALLS To answer the call: Press the PTT button or Call button. SELECTIVE CALLS The call will terminate automatically when Making a Selective Call the conversation has ended or press the You can make a selective call to a particular radio, Monitor button. -
Page 24: Contact List
CONTACT LIST Once in the Contact List, there are three ways to choose the desired address: When the radio is in the IDLE state or during a call, the contact list may be used to give access to up to Method 1 255 preprogrammed numbers accessed via the Turn the rotary knob (1) clockwise or counterclock-... -
Page 25: Keypad Edit
Once the desired address is displayed, there are Keypad Edit two methods to select the address: If the radio is displaying a Contact List number, a Method 1 Keypad Dialled number or a Status number, the last digit may be deleted by: c to confirm your selection. -
Page 26: Missed Calls
To view the calls in the list via the menu MISSED CALLS If a call remains unanswered, the call will be to enter Menu Mode. stored by the radio, provided that Missed Calls has been programmed into your radio. Display shows: Missed Calls Up to ten calls can be stored. - Page 27 Example: You can call back to any number in the Missed Call list by: Display shows Reception until If the displays shows S there is a status message desired number is associated with the call. Addr: Alias displayed: Displays message e.g. PTT button or to make the call.
- Page 28 On a successful call set- up, the entry is On deletion of the last message in the Missed automatically deleted from the stack together Calls list, the radio will exit the menu and return with any associated status message. to the IDLE STATE. Unanswered calls may be deleted from the To exit the Missed Call List: Missed Call list at any time by :...
-
Page 29: Status Calls
STATUS CALLS to select A status is a code for transmitting prearranged messages, e.g. status “05” may indicate Once in the Status List, there are three ways to “Return to Base”. The prearranged messages choose the desired status: and associated code digits are contained in a Method 1 Status List which contains up to 255 entries. -
Page 30: Receiving A Status Call
Once the desired status is displayed, there are two Receiving a Status Call methods to select the status: Your radio receives a Status Call when: Method 1 Individual Call alert c to confirm your selection. sounds Display shows: Selected Display shows: Stat: On Break (for 2 seconds) Stat: 04... -
Page 31: Emergency Calls
EMERGENCY CALL Should you receive an Emergency call the incoming emergency alert tone Your radio can be programmed to give you a will sound. one-button quick access to call a particular radio or centre (predefined by your dealer) in emergency situations. This is the Emergency Call. -
Page 32: Dtmf
DTMF To initiate a DTMF call with Automatic Telephone Interconnect Call DTMF means Dual Tone Multi Frequency and is used when the radio is required to operate in Press dedicated Call Button (Call 1-4 or PTT), a radio system with an interface to telephone you will hear a tone sequence. - Page 33 To initiate a DTMF call with Manually To end the call press the Monitor Button or Dialled Telephone Interconnect Call change channel when the clear down call is sent automatically from your radio to shutdown Enter the interconnect call from the keypad, the phone line.
- Page 34 Once the radio has connected to the called number, you can begin the conversation. Even though this is a phone call, your conversation mimics a radio call, that means that both parties speak in turn, i.e. press the PTT to talk, release to listen.
- Page 35 Permanent DTMF Mode Using the Menu Press the pre-programmed DTMF button once, to Ensure radio is in IDLE STATE. put the keypad into permanent DTMF live dial mode. Press the DTMF button again to disable the DTMF to enter Menu Mode. live dial.
- Page 36 To initiate a DTMF call in permanent live To end the call press the Monitor Button or dial change channel when the clear down call is sent automatically from your radio to shutdown Enter the interconnect call from the keypad, the phone line.
-
Page 37: Utilities
UTILITIES The utilities described below are programmed into your radio by your dealer and are accessible either via a programmable button or via the menu. English... -
Page 38: Dtmf
DTMF DTMF means Dual Tone Multi Frequency and is used when the radio is required to operate in a radio system with an interface to telephone systems. You can switch On or Off Permanent DTMF Mode by using a pre-programmed DTMF button or via the menu, please refer to page English... -
Page 39: Scan
SCAN Using the Scan Button You can monitor several channels in order to Press the Scan button to start scanning. The scan start alert tone will sound receive any call that is transmitted on any of and the display icon lit . - Page 40 Using the Menu The scan start alert tone will sound, the display icon G will be lit and the LED indicator will Ensure radio is in IDLE STATE, or in a call. blink green during a scan operation. When a call on a channel is detected the LED will stop to enter Menu Mode.
- Page 41 DELETING A NUISANCE CHANNEL ADDING A DELETED NUISANCE CHANNEL BACK INTO THE SCAN LIST If a channel continually generates unwanted calls/ noise (a “nuisance” channel), you can temporarily Using the Scan Button remove it from the scan list by performing a Press the Scan button to stop scanning.
-
Page 42: Call Forward
CALL FORWARD Using the Menu You can call forward calls to your radio to Ensure radio is in IDLE STATE. another radio if you are unable to take calls or are away from your radio. to enter Menu Mode. You can switch On or Off Call Forward by Utilities until: using a pre-programmed Call Forward button... -
Page 43: Talkaround
TALKAROUND Using the Menu In your communications network, you may be using Ensure radio is in IDLE STATE. a system to cover a larger area than is possible with your radio. However, you can communicate with to enter Menu Mode. another radio within your radio’s range without until: going through the system by using the Talkaround... -
Page 44: Whisper
WHISPER Using the Menu Whisper allows you to talk quietly into the radio Ensure radio is in IDLE STATE. microphone when making a call, by increasing the gain of the radio microphone. to enter Menu Mode. You can switch On or Off Whisper by using a until: Utilities pre-programmed Whisper button or via the... -
Page 45: Lone Worker
LONE WORKER Using the Menu The Lone Worker feature enables you to work Ensure radio is in IDLE STATE. alone with added safety. to enter Menu Mode. You can switch On or Off Lone Worker by using a pre-programmed Lone Worker button until: Utilities or via the menu. -
Page 46: Power Level
POWER LEVEL Using the Menu You can transmit your calls at different transmit Ensure radio is in IDLE STATE. power levels. A higher level means you can reach a radio that is farther away. A lower power to enter Menu Mode. level conserves battery power. -
Page 47: Companding
COMPANDING Using the Menu Companding is a collective term to define Ensure radio is in IDLE STATE. compressing the audio signal on transmission and expanding the audio signal on reception. to enter Menu Mode. The overall effect is to reduce noise in the until: received signal, giving you crisper, clearer Utilities... -
Page 48: Backlight
BACKLIGHT Using the Menu Backlight illuminates the radio display, keypad Ensure radio is in IDLE STATE. and menu navigation keys. to enter Menu Mode. Your radio can be programmed to have the backlight permanently on, permanently off or a until: Utilities timed period, when any new information being displayed, causes the backlight to remain on... -
Page 49: Voice Operated Transmit (Vox)
VOICE OPERATED TRANSMIT (VOX) When the VOX headset/microphone is connected, your radio may be used with hands-free operation. The VOX feature intelligently senses background noise, so that it adapts automatically to the noise level in the environment in which you are working. To start the VOX feature: Connect the VOX headset onto the accessory connector of the radio. -
Page 50: Stun/Unstun
STUN/UNSTUN For added security and to avoid abuse of the radio system in which you operate, a feature known as Stun/Unstun is included in your radio. This feature can only be activated by your system manager or administrator. For example, if your radio is stolen and is being used illegally, your system administrator can send a signal which will stun the radio making it incapable of being used. -
Page 51: Radio Information
RADIO INFORMATION To access Radio Information Ensure radio is in IDLE STATE. To enable you and your dealer/system administrator to establish, quickly, the software to enter Menu Mode. and radio parameters programmed into your until: radio, a feature known as Radio Information Radio Info can be accessed via the menu. - Page 52 SW Version further selections following steps CP Version 6 and 7: SW Part No CP Part No to exit menu mode , display shows e.g.: Chan: 05 English...
-
Page 53: Safety Information
SAFETY INFORMATION Before using this radio, refer to Important Safety and General Information contained in the separate booklet 68P64117B25_ enclosed with your radio. English... - Page 54 NOTES English...
Need help?
Do you have a question about the GP388 and is the answer not in the manual?
Questions and answers