
Related Manuals for Motorola GP600 Series


Summary of Contents for Motorola GP600 Series
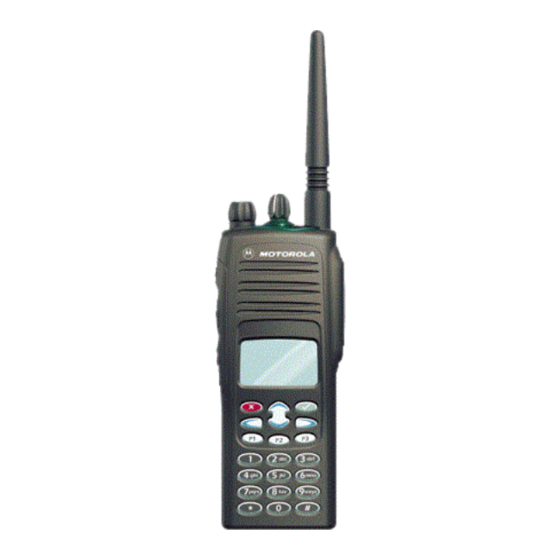
- Page 1 Professional Radio GP600 Series Basic Service Manual 68P64115B23A Issue: June 2000...
-
Page 2: Computer Software Copyrights
Accordingly, any copyrighted Motorola computer programs contained in the Motorola products described in this manual may not be copied or reproduced in any manner without the express written permission of Motorola. Furthermore, the purchase of Motorola prod-... -
Page 3: Safety Information
Read this information before using your radio. SAFE AND EFFICIENT OPERATION OF MOTOROLA TWO-WAY RADIOS This document provides information and instructions for the safe and efficient operation of Motorola Portable and Mobile Two-Way Radios. The information provided in this document supersedes the general safety information contained in user guides published prior to 1 January 1998. -
Page 4: Operational Warnings
SAFETY INFORMATION OPERATIONAL WARNINGS Vehicles with an air bag WARNING: Do not place a portable radio in the area over an air bag or in the air bag deploy- ment area. Air bags inflate with great force. If a portable radio is placed in the air bag deploy- ment area and the air bag inflates, the radio may be propelled with great force and cause serious injury to occupants of vehicle. -
Page 5: Table Of Contents
Table of Contents Chapter 1 INTRODUCTION 1.0 Scope of Manual ....................1-1 2.0 Warranty and Service Support................1-1 2.1 Warranty Period and Return Instructions ............1-1 2.2 After Warranty Period ..................1-1 2.3 European Radio Support Centre (ERSC)............1-2 2.4 Piece Parts .....................1-2 2.5 Technical Support...................1-3 3.0 Radio Model Information..................1-4 Chapter 2 INTRINSICALLY SAFE RADIO INFORMATION... - Page 6 1.0 Model Chart (VHF)....................6-1 2.0 Model Chart (UHF) ....................6-1 3.0 Model Chart (UHF2) .................... 6-2 4.0 Model Chart (300R1) ................... 6-2 5.0 Specifications - Professional GP600 Series Radios ..........6-3 Chapter 7 POWER UP SELF-TEST 1.0 Error Codes ......................7-1...
-
Page 7: Chapter 1 Introduction
In instances where the product is covered under a "return for replacement" or "return for repair" warranty, a check of the product should be performed prior to shipping the unit back to Motorola. This is to ensure that the product has been correctly programmed or has not been subjected to damage outside the terms of the warranty. -
Page 8: European Radio Support Centre (Ersc)
Aftermarket and Accessory Division (AAD). If no part number is assigned, the part is not normally available from Motorola. If the part number is appended with an asterisk, the part is serviceable by Motorola Depot only. If a parts list is not included, this generally means that no user-serviceable parts are available for that kit or assembly. -
Page 9: Technical Support
Warranty and Service Support Technical Support Motorola Product Services is available to assist the dealer/distributors in resolving any malfunctions which may be encountered. UK/Ireland - Richard Russell Telephone: +44 (0) 1256 488 082 Fax: +44 01256 488 080 Email: BRR001@email.mot.com... -
Page 10: Radio Model Information
INTRODUCTION Radio Model Information The model number and serial number are located on a label attached to the back of your radio. You can determine the RF output power, frequency band, protocols, and physical packages. The example below shows one portable radio model number and its specific characteristics. Table 1-1 Radio Model Number (Example: MDH25KDC9AA3AE) Type of Model... -
Page 11: Intrinsically Safe Radio Information
WARNING: Do not disassemble the FMRC Approved Product unit in any way that exposes the internal electrical circuits of the unit. Radios must ship from the Motorola manufacturing facility with the hazardous atmosphere capability and FM Approval labeling. Radios will not be “upgraded” to this capability and labeled in the field. -
Page 12: Repair Of Fmrc Approved Products
REPAIRS FOR MOTOROLA FMRC APPROVED PRODUCTS ARE THE RESPONSIBILITY OF THE USER You should not repair or relabel any Motorola manufactured communication equipment bearing the FMRC Approval label (“FMRC Approved Product”) unless you are familiar with the current FMRC Approval standard for repairs and service (“Class Number 3605). -
Page 13: Do Not Substitute Options Or Accessories
Repair of FMRC Approved Products Do Not Substitute Options or Accessories The Motorola communications equipment certified by Factory Mutual is tested as a system and consists of the FM Approved portable, FM Approved battery, and FM Approved accessories or options, or both. This Approved portable and battery combination must be strictly observed. There must be no substitution of items, even if the substitute has been previously Approved with a different Motorola communications equipment unit. - Page 14 INTRINSICALLY SAFE RADIO INFORMATION...
-
Page 15: Chapter 3 Maintenance
Chapter 3 MAINTENANCE Introduction This chapter provides details about the following: Preventive maintenance (inspection and cleaning) Safe handling of CMOS and LDMOS devices Disassembly and reassembly of the radio Repair procedures and techniques Installation of Option Boards Preventive Maintenance The radios do not require a scheduled preventive maintenance program; however, periodic visual inspection and cleaning is recommended. -
Page 16: Safe Handling Of Cmos And Ldmos Devices
Wear a conductive wrist strap in series with a 100k resistor to ground. (Replacement wrist straps that connect to the bench top covering are Motorola part number RSX- 4015.) Do not wear nylon clothing while handling CMOS devices. -
Page 17: Repair Procedures And Techniques - General
When damaged parts are replaced, identical parts should be used. If the identical replacement part is not locally available, check the parts list for the proper Motorola part number and order the part from the nearest Motorola Communications parts center listed in the “Piece Parts” section of this manual. -
Page 18: Radio Disassembly - Detailed
MAINTENANCE If a unit requires more complete testing or service than is customarily performed at the basic level, send this unit to a Motorola Authorized Service Center. (See Chapter 1 for a list of authorized service centers.) The following disassembly procedures should be performed only if necessary: Chassis Assembly Disassembly (Paragraph 6.2) - Page 19 Radio Disassembly — Detailed Pull the volume and channel selector knobs off of their shafts. Knobs Figure 3-2 Knob Removal NOTE Both knobs slide on and off. However, they are supposed to fit very tightly on their shafts. Separate the chassis from the internal electronics front cover assembly as follows: Insert a small, flat-blade screwdriver, or similar instrument, in between the thin retaining wall and the chassis at the bottom of the radio.
-
Page 20: Chassis Assembly Disassembly
MAINTENANCE Lay the chassis down. Rotate the front cover backward and slightly away from the chassis. Lift the latches on the main circuit board to release the flexes from their connectors. Latches Flex Connectors Figure 3-4 Unlatch Flex Connectors Chassis Assembly Disassembly Use a TORX™... -
Page 21: Keypad, Display, And Keypad/Option Board Disassembly
Radio Disassembly — Detailed Remove the O-ring. Slide off the ground contact from the top corner boss of the radio chassis. Keypad, Display, and Keypad/Option Board Disassembly If the disassembly of the keypad, the keypad printed circuit board, or the display is required, lift the microphone flex circuit up, and carefully remove the microphone and its boot from the front cover pocket. -
Page 22: Speaker, Microphone, And Universal Connector Flex Disassembly
MAINTENANCE The keypad/option board, and the keypad, can be removed without the use of tools. Retainer Display Module Keypad/Option Board Keypad Radio Body Figure 3-7 Removing the Keypad Retainer and Other Boards from the Radio Body At this point, the Option Board Installation Procedure should be performed, if necessary. NOTE Speaker, Microphone, and Universal Connector Flex Disassembly Turn the screw at the bottom of the dustcover counterclockwise with your fingers. -
Page 23: Ptt Disassembly
Radio Disassembly — Detailed Notch In Speaker @ 12:00 Speaker Orientation Tab @ 12:00 Speaker Universal Connector Tail Microphone Boot Microphone Speaker Microphone Flex Circuit Assembly Figure 3-8 Removal Speaker-Microphone Assembly After the universal connector tail of the speaker-microphone assembly is removed, the assembly can be completely removed. -
Page 24: Control Top Disassembly
3-10 MAINTENANCE Control Top Disassembly To remove the control top assembly, place a screwdriver next to the antenna boss, and pry it against the control top escutcheon. This will lift the control top escutcheon away from its double-sided adhesive. Grab the double-sided adhesive near the volume potentiometer, and lift it away. -
Page 25: Chassis Assembly Reassembly
Radio Reassembly — Detailed 3-11 NOTE Pull the speaker-microphone flex circuit out of harm’s way during reassembly. Re-insert the microphone and boot into the pocket in the front cover. Lay the speaker-microphone flex on top of keypad/option board retainer. Catches Retainer Figure 3-10 Lock retainer catches to the radio’s body Chassis Assembly Reassembly... -
Page 26: Option Board Installation
3-12 MAINTENANCE Push the chassis assembly completely into the top of the front cover until it settles in place. Be sure the O-ring is properly seated. Snap the bottom of the chassis into the front cover. Reassemble the knobs, dust cover, antenna, and battery. Radio Chassis Figure 3-11 Fastening the Chassis Option Board Installation... - Page 27 Option Board Installation 3-13 Retainer Jumper Flex Keypad/Option Board Display Flex Figure 3-12 Changing the Keypad/Option Board Reassemble the option board to the front cover assembly. Insert the display flex circuit into the connector on the option board. Insert the jumper flex circuit into the connector on the option board. Notice the orientation of the flex circuit.
-
Page 28: Mechanical View And Parts List
3-14 MAINTENANCE Mechanical View and Parts List GP640 Exploded View and Parts List Figure 3-13 GP640 Radio Exploded Mechanical View... - Page 29 Mechanical View and Parts List 3-15 Motorola Motorola Item Part Description Item Part Description Number Number See Chapter 6 Antenna 3280534Z01 Seal, Contact 3680529Z01 Knob, Volume 3280536Z01 Gasket, o-Ring 3680530Z01 Knob, Frequency 3980698Z01 Contact, Ground, Compliant, 1380525Z01 Escutcheon, Top 2780518Z01...
-
Page 30: Gp680 Exploded View And Parts List
3-16 MAINTENANCE GP680 Exploded View and Parts List Figure 3-14 GP680 Radio Exploded View... - Page 31 Mechanical View and Parts List 3-17 Motorola Motorola Item Part Description Item Part Description Number Number See Chapter 6 Antenna 0304726J04 Screw 3680529Z01 Knob, Volume 3980667Z01 Contact, finger 3680530Z01 Knob, Frequency See Chapter 6 Back Cover Kit incl. chassis main board...
-
Page 32: Service Aids
Table 3-1 lists service aids recommended for working on the GP640/GP680 Radios. While all of these items are available from Motorola, most are standard shop equipment items, and any equivalent item capable of the same performance may be substituted for the item listed. -
Page 33: 11.0 Test Equipment
Test Equipment 3-19 11.0 Test Equipment Table 3-2 lists test equipment required to service the GP640/GP680 Radios and other two-way radios. Table 3-2 Recommended Test Equipment Motorola Part Description Characteristics Application R2600_NT Comms System This monitor will Frequency/deviation meter Analyzer... -
Page 34: 12.0 Programming/Test Cable
3-20 MAINTENANCE 12.0 Programming/Test Cable 1metre 1metre Cable Cable Side Connector Figure 3-15 Programming/Test Cable Internal Pin Outs Connections External Speaker + Brown External Speaker - Dark Blue Option B + External Mic Grey Option Select 2 Light Blue Option Select 1 Ground Black Receive Data... - Page 35 Programming/Test Cable 3-21 25 Pos Male D Connector Side Connector 25 Pos Female D Connector Figure 3-17 Wiring of the Connectors...
- Page 36 3-22 MAINTENANCE...
-
Page 37: Performance Testing
Chapter 4 PERFORMANCE TESTING Introduction The receiver and transmitter performance tests are contained in Tables 4-1 and 4-2 respectively. Refer to Chapter 5 for the test equipment set up. Note that all test measurements are taken at 25°C. Receiver Performance Tests The receiver performance tests are described in Table 4-1 below. -
Page 38: Transmitter Performance Tests
PERFORMANCE TESTING Transmitter Performance Tests The transmitter performance tests are described in Table 4-2 below. Table 4-2 Transmitter Performance Checks Communications Test Name Radio Test Set Comments Analyzer Reference Mode: PWR MON TEST MODE, PTT to continu- Frequency error to be ±... -
Page 39: Radio Tuning And Programming
Chapter 5 RADIO TUNING AND PROGRAMMING Introduction This chapter provides an overview of the Customer Programming Software (CPS) and tuner program which are designed for use in a Windows 95/98 environment. These programs are available in separate kits as listed in the Table 5-1. An Installation instruction manual is also included with each kit. NOTE Refer to the appropriate program on-line help files for the programming procedures. -
Page 40: Initial Test Equipment Setup
RADIO TUNING AND PROGRAMMING Initial Test Equipment Setup The supply voltage is connected to the radio using a Motorola battery eliminator, P/N 0180305G54. The initial test equipment (Figure 5-1) control settings are listed in Table 5-2. NOTE Refer to appropriate program on-line help files for the tuning procedures. -
Page 41: Model Chart And Test Specification
Chapter 6 MODEL CHART AND TEST SPECIFICATION Model Chart (VHF) Professional GP600 Series (VHF) Model Description MDH25KDC9CK3_E GP640 VHF 136-174 MHz 5W MDH25KDC9CK6_E GP680 VHF 136-174 MHz 5W Item Description PMLD4113_ GP640 VHF Back Cover Kit PMLN4216_ GP640 VHF Front Cover Kit... -
Page 42: Model Chart (Uhf2)
MODEL CHART AND TEST SPECIFICATION Model Chart (UHF2) Professional GP600 Series (UHF2) Model Description MDH25SDC9CK3_E GP640 UHF2 450-527 MHz 4W MDH25SDH9CK6_E GP680 UHF2 450-527 MHz 4W Item Description PMLE4122_ GP640 UHF2 Back Cover Kit PMLN4216_ GP640 UHF2 Front Cover Kit... -
Page 43: Specifications - Professional Gp600 Series Radios
Specifications - Professional GP600 Series Radios Specifications - Professional GP600 Series Radios Data is specified for +25°C unless otherwise stated. General Specifications Channel Capacity 16 (Conventional) Power Supply Rechargeable battery 7.5v Dimensions: H x W x D (mm) Height excluding knobs With standard high capacity NiMH battery 137 x 57.5 x 37.5... - Page 44 MODEL CHART AND TEST SPECIFICATION Transmitter *Frequencies - Full Bandsplit VHF: 136-174 MHz UHF: 403-470 MHz UHF2: 450-527 MHz 300R1: 300-350 MHz Channel Spacing 12.5/20/25 kHz Frequency Stability ±2.5 ppm (-25°C to +55°C, +25° Ref.) ±5.0 ppm (UHF2, 300R1) Power 136 - 174: 1-5W 403 - 470: 1-4W 450 - 527: 1-4W...
-
Page 45: Power Up Self-Test
Codeplug structure mismatch or Reprogram codeplug with correct version non-existence of codeplug. and retest radio. If message reoccurs, replace main board or return it to the nearest Motorola depot. “Synth Lock” Channel frequency invalid for radio Reprogram codeplug with correct model. - Page 46 POWER UP SELF-TEST...
Need help?
Do you have a question about the GP600 Series and is the answer not in the manual?
Questions and answers