Thermador MES301HS Instruction Manual
For built-in steam and convection ovens
Hide thumbs
Also See for MES301HS:
- Use and care manual (44 pages) ,
- Installation manual (41 pages) ,
- Installation instructions manual (36 pages)

Related Manuals for Thermador MES301HS


Summary of Contents for Thermador MES301HS
- Page 1 INSTRUCTION MANUAL For Built in Steam and Convection Ovens Models MES301HS MES301HP...
-
Page 2: Table Of Contents
About This Manual ......Safety ........Getting Started . - Page 3 Getting the Most Out of Your Appliance ..Cooking Tables and Tips ......... . Steaming .
-
Page 4: About This Manual
About This Manual How This Manual is Organized You can get the most out of your new oven by reading this manual from beginning to end. This way you will systematically get to know your appliance and become familiar with its operation and features. The manual consists of the following sections: The Safety"... -
Page 5: Safety
Safety Important Safety Instructions READ AND SAVE THESE INSTRUCTIONS WARNING: When properly cared for, your new oven has been designed to be safe and reliable. Read all instructions carefully before use. These precautions will reduce the risk of burns, electric shock, fire and injury to persons. When using kitchen appliances, basic safety precautions must be followed, including those on the following pages. - Page 6 Always have a working smoke detector near the kitchen. In the event that personal clothing or hair catches fire, drop and roll immediately to extinguish flames. Smother flames from food fires other than grease fires with baking soda. Never use water on cooking fires.
- Page 7 Baking and Steaming Safety CAUTION - Hot steam can escape during use. Do not touch the ventilation openings. CAUTION - Hot steam can escape when opening the oven door. Hot water may drip from the door. Keep children away. CAUTION - Use pot holders to remove inserted cooking accessories from the hot oven.
-
Page 8: Getting Started
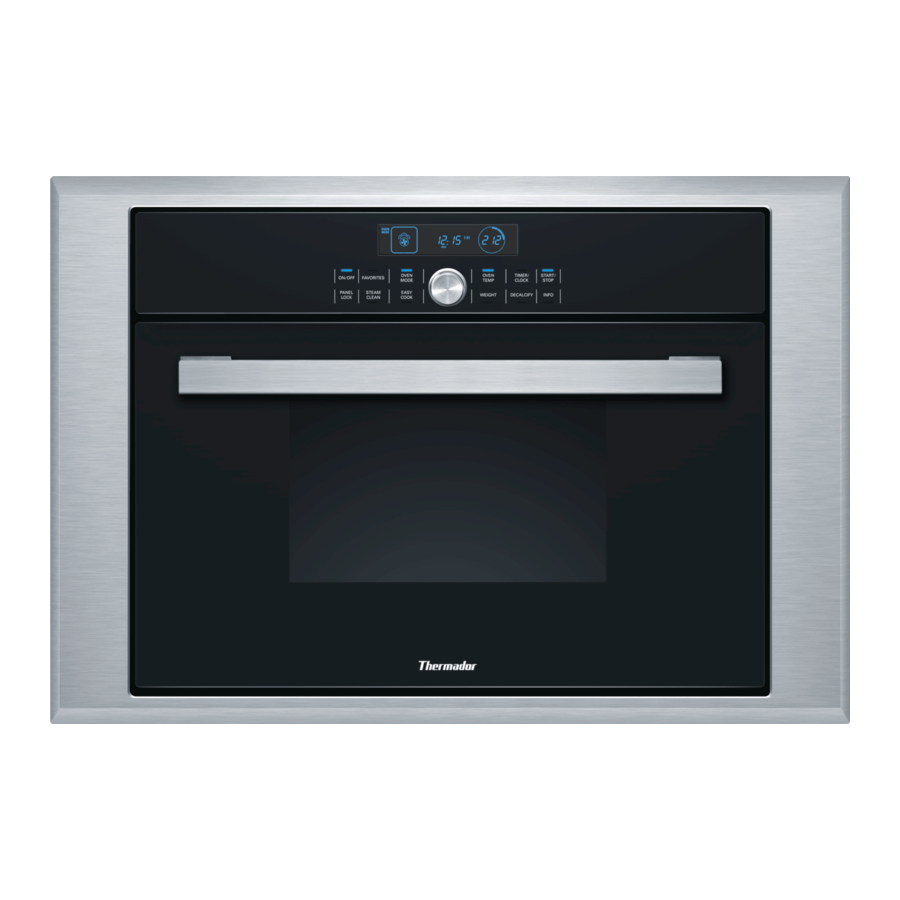
Getting Started Your New Appliance This section covers information on the following: Control panel Oven modes Oven and accessories Control Panel Settings Dial Touchpads Touchpads... -
Page 9: Touchpads
Touchpads Sensors are located under the touchpads. The sensors respond to the light touch of your finger on the pad. Touchpad Pad function ON/OFF Turns appliance on and off FAVORITES Press briefly to select memory Press and hold longer to store in memory OVEN MODE Sets the oven mode PANEL LOCK... -
Page 10: Oven Modes
Oven Modes Use the OVEN MODE touchpad to access the various oven modes of the appliance. Oven mode Temperature Display symbol range è True Convection 85 450 °F For moist cakes, sponge cakes, braised meat. (30 230 °C) A fan on the back wall distributes the heat evenly throughout the oven. -
Page 11: Oven And Accessories
Oven and Accessories The oven has four rack levels. The rack levels are numbered from bottom to top. WARNING: Do not use aluminum foil or protective liners to line any part of the appliance, especially the cavity bottom. Installing these liners may result in risk of electric shock or fire. - Page 12 Baking pan full size (CS2LH) 1 !/8" deep Ideal for baking cakes and catching dripping liquids when steaming. Wire rack (CSRACKH) Ideal for baking, cake pans and casseroles. Also ideal for roasts when used with the full size baking pan. The following additional accessories can be purchased in retail stores: Accessory Order no.
-
Page 13: Water Tank
Water Tank The water tank is located on the right when you open the appliance door. Use only fresh tap water or purchased non carbonated water to fill the water tank. If your water is very hard, we recommend using softened water. If the tap water is highly chlorinated (>... -
Page 14: Automatic Calibration
Flashes display flashes when the water tank is empty. A beep sounds and operation is stopped. 1. Carefully open the oven door. Steam will escape from inside. 2. Remove the water tank, fill it and slide it back in. 3. Press START/STOP. Automatic Calibration The temperature at which the water will boil depends on the air pressure. -
Page 15: Cleaning
Softened Water Descaling is not required if you only use softened water. In this case, change the water hardness level to softened "-". Changing the Water Hardness Level 1. Press and hold ON/OFF until the appliance turns on. 2. Press and hold INFO for approximately 4 seconds. The initial basic setting ’‹‚... -
Page 16: Operation
Operation Operating the Appliance This section covers the following: Turning the appliance on and off Important instructions to follow after each use Turning On the Example shown in the illustration: Appliance Set the oven mode to Steam at 175 °F (80 °C). 1. -
Page 17: Turning Off The Appliance
Turning Off the Appliance WARNING: Risk of severe burns! Hot steam may escape when opening the appliance door. Carefully open the door only after cooking is finished. If you set a cook time, the appliance will turn off automatically. A beep sounds. At the End of Cook Time Press TIMER/CLOCK to stop the signal. -
Page 18: Clock And Timer Settings
Clock and Timer Settings Use TIMER/CLOCK to access the clock and timer settings. The following options are available: If the appliance is off Q = sets the timer 0 = sets the clock If the appliance is on Q = sets the timer x = sets the Cook Time, if applicable y = changes the End Time, if applicable 0 = displays the time... -
Page 19: Setting The Cook Time
Setting the Cook Time If you set Cook Time for your dish, operation automatically stops at the end of the programmed time. The appliance stops heating. Cook Time must always be set when using oven modes with steam. Example shown in the illustration: Set Cook Time to 35 minutes. -
Page 20: Changing The End Time
Changing the End Time You can change the time when the food will be done. The appliance starts automatically and turns off at the preferred End Time. If the appliance is set to 12 hour mode, the End Time can only be delayed for up to 12 hours (see Basic Settings). -
Page 21: Setting The Clock
At the End of Cook Time A beep sounds. The appliance stops heating. Press TIMER/CLOCK to cancel the signal early. Setting the Clock The appliance must be off in order to set or change the clock. After a Power Outage After a power outage, four zeros flash in the display. -
Page 22: Automatic Programming Easycook
Automatic Programming EasyCook This section covers the following: Setting a program from automatic programming EasyCook Information and tips on the programs Available programs Automatic programming makes it easy to prepare food. There are 16 program groups with a total of 40 programs. Setting a Program Select the appropriate program from the program chart. -
Page 23: Program Information
5. Press START/STOP to start the appliance. The running cook time of the program x O appears in the display. 11:30 WARNING: Risk of severe burns! Hot steam may escape when opening the oven door. Carefully open the door only after cooking is finished. Changing the End Time Some programs allow you to delay the end time. -
Page 24: Easycook Program Charts
EasyCook This section covers all of the programs available for automatic programming. Program Charts Read the instructions before using a program to prepare the food. Vegetables Wait until after cooking to season vegetables. Program Notes Ovenware/accessories Level Steam cauliflower florets Florets of equal size Perforated cooking pan + baking pan... - Page 25 Program Notes Ovenware/accessories Level Basmati rice max. 1.7 lbs. (0.75 kg) Cooking pan Brown rice max. 1.7 lbs. (0.75 kg) Cooking pan Long grain rice max. 1.7 lbs. (0.75 kg) Cooking pan Couscous max. 1.7 lbs. (0.75 kg) Cooking pan Risotto, Arborio rice max.
- Page 26 Fish Grease the perforated cooking pan to prepare for the fish. Do not place whole fish, fish fillets or fish sticks on top of each other. Enter the weight of the heaviest piece of fish and select pieces that are approximately the same size.
- Page 27 Program Notes Ovenware/accessories Level Multigrain bread, proof and bake Note the message Baking pan P30* Rye bread, bake 1.25 4.5 lbs. (0.6 2 kg) Baking pan Rye bread, proof and bake Note the message Baking pan P32* Fresh bread rolls, bake Weight per piece 0.1 0.3 lbs.
-
Page 28: Favorites
Program Notes Ovenware/accessories Level Chicken pieces, bone in max. 4.5 lbs. (1.8 kg) Perforated cooking pan + baking pan Meat max. weight 3.5 lbs. (1.5 kg) Perforated cooking pan per piece + baking pan Berries Perforated cooking pan + baking pan Special items Cooking eggs Pierce holes in eggs before cooking. -
Page 29: Starting A Favorites Setting
Storing a Different Setting Enter a new setting and store it. This will override the old setting. Canceling a FAVORITES Setting Press and hold START/STOP. Starting a Favorites You can start stored settings at any time. Setting 1. Briefly press FAVORITES and use the settings dial to select the memory setting. The stored settings are displayed. -
Page 30: Basic Settings
Basic Settings The appliance features various basic settings preset in the factory. These basic settings can, however, be changed as necessary. You can restore the factory settings to reverse any changes. The example is shown in the illustration: To change the basic setting for the Cook Time signal from short to long. 1. - Page 31 The following basic settings can be changed: Basic setting Function Options ’‹‚* Preselection of units and clock ‹ = none National code display mode: ‚ = USA USA °F, 12 hour mode, lbs. ƒ = Canada Canada °C, 24 hour mode, kg ’‹ƒ...
-
Page 32: Getting The Most Out Of Your Appliance
Getting the Most Out of Your Appliance Cooking Tables and Tips These tables contain a selection of dishes that can be easily prepared in the steamer oven. You can find out which oven mode, accessories and cooking time are best suited for your dish. If not specified otherwise, this information applies to dishes placed in a cold appliance. -
Page 33: True Convection
Cooking an Entire Meal You can cook entire meals at the same time in Steam mode without mixing the flavors of the different food. Place the food with the longest cooking time in the appliance first and then add the remaining dishes at the appropriate time. This will ensure that all dishes are ready at the same time. -
Page 34: Side Dishes And Legumes
Food Size Accessories Oven mode Temperature Cooking time Green asparagus* Whole Perforated + Steam 210 °F (100 °C) 7 12 min. baking pan White asparagus* Whole Perforated + Steam 210 °F (100 °C) 10 15 min. baking pan Spinach* Perforated + Steam 210 °F (100 °C) 2 3 min. -
Page 35: Meat, Poultry, Fish
Food Ratio/ Accessories Oven mode Temperature Cooking time information Couscous 1 : 1 Cooking pan Steam 210 °F (100 °C) 6 10 min. Dumplings Perforated (level 3) + Steam 205 °F (95 °C) 20 25 min. baking pan (level 1) Meat, poultry, fish Insert rack and baking pan together at the same rack level. - Page 36 Beef Food Amount/ Accessories Level Oven mode Temperature Cooking time weight Pot roasted beef* 3.5 lbs (1.5 kg) Wire rack + Reheat 285 300 °F 100 140 min. baking pan (140 150 °C) Fillet of beef, 2 lbs (1 kg) Wire rack + Reheat 340 360 °F...
- Page 37 Food Amount/ Accessories Level Oven mode Temperature Cooking time weight Fillet in puff pastry 2 lbs (1 kg) Baking pan Combination 360 390 °F 40 60 min. (180 200 °C) Smoked pork on 2 lbs (1 kg) Wire rack + Combination 250 285 °F 60 70 min.
-
Page 38: Slow Cooking Meat
Food Amount/ Accessories Level Oven mode Temperature Cooking time weight Salmon fillet per 0.33 lbs Perforated + Steam 210 °F (100 °C) 8 10 min. (0.15 kg) baking pan Clams, oysters 0.33 lbs (0.15 kg) Baking pan Steam 210 °F (100 °C) 10 15 min. -
Page 39: Soufflés, Casseroles, Additions To Soups, Etc
Food Amount Accessories Level Temperature Cooking time Pork fillets Baking pan 175 195 °F 50 70 min. (80 90 °C) Pork medallions Baking pan 175 °F (80 °C) 60 60 min. Beef steaks approx. 1.2 in. Baking pan 175 °F (80 °C) 40 80 min. -
Page 40: Cakes And Baked Goods
Food Accessories Oven mode Temperature Cooking time Sweet baked items Ovenproof dish Combination 320 340 °F 50 60 min. (such as rice pudding) + wire rack (160 170 °C) Rice pudding* Baking pan Steam 210 °F (100 °C) 25 35 min. Yogurt Portion sized jars Steam... - Page 41 Food Accessories Level Oven mode Temperature Cooking time Savory cakes Quiche dish True Convection 360 375 °F 35 60 min. (such as quiche) (180 190 °C) Apple tart Flan base cake pan True Convection 340 375 °F 35 50 min. (170 190 °C) Sheet Cakes Food...
- Page 42 Food Accessories Level Oven mode Temperature Cooking time Multigrain bread Baking pan + Combination 390 430 °F 15 20 min. (200 220 °C) 1.7 lbs. (0.75 kg) parchment paper flour True Convection 320 340 °F 25 40 min. (160 170 °C) Combination 390 430 °F 20 30 min.
-
Page 43: Reheating Food
Baking Tips If using your own recipe. Look at cakes or baked goods in the table that are similar to your recipe. This will help to determine if the cake About 10 minutes before the end of baking time according to your recipe, stick a is cooked through. -
Page 44: Defrosting
Defrosting Freeze the food as flat as possible and in appropriate portions at 0 °F ( 18 °C). Do not freeze oversized portions. Defrosted food does not keep as long and spoils more quickly than fresh food. Defrost the food in the freezer bag on a plate or in the perforated cooking pan. Always slide the baking pan under the perforated cooking pan. -
Page 45: Juice Extraction
Food Amount Ovenware Temperature Cooking time Yeast dough 2 lbs. (1 kg) Bowl + wire rack 105 °F (40 °C) 20 30 min. Sourdough 2 lbs. (1 kg) Bowl + wire rack 105 °F (40 °C) 20 30 min. Juice Extraction Before extracting juice from berries, place the berries in a bowl and add sugar. - Page 46 Food Accessories Level Oven mode Temperature Cooking time Pizza, Baking pan + True Convection 360 390 °F 18 22 min. French bread wire rack (180 200 °C) Chilled pizza Baking pan + True Convection 340 360 °F 12 17 min. parchment paper (170 180 °C) Herb butter...
-
Page 47: Cleaning And Maintenance
Cleaning and Maintenance Cleaning This section covers information on the following: Care and cleaning of the appliance Cleaning agents and aids Steam Clean mode Decalcify mode WARNING: Risk of burns! Wait until the appliance has cooled down before cleaning. WARNING: Risk of short circuiting! Never use pressure washers or steam jet blowers to clean the appliance. -
Page 48: Cleaners
Cleaners Appliance exterior Soapy water. Use a soft cloth to dry. aluminum front panel/handle Mild window cleaner. Wipe using a soft window cloth or a lint free microfiber cloth at a horizontal angle without placing pressure on the surfaces. stainless steel front panel, trim, Soapy water. -
Page 49: Steam Clean
Steam Clean Steam Clean uses steam to help dissolve food residue and spills in the oven. Residue and spills can be easily removed afterward. Steam Clean takes approximately 30 minutes. Note: Operation of the appliance will be blocked if Steam Clean is canceled. The appliance cannot be operated again until after the first and second cleaning cycle to ensure that no dishwashing liquid remains inside. -
Page 50: Decalcify
Descaling Agent Use only the powder descaler recommended by customer service to descale the appliance. USA: item no. 310 967 at www.thermador eshop.com Canada: For Atlantic provinces, Ontario or Québec, contact A.P. Wagner, 1 800 287 1627, www.apwagner.ca For any of the Territories, Manitoba, Saskatchewan, Alberta or British Columbia, contact Reliable Parts, 1 800 941 9217, www.reliableparts.ca... -
Page 51: Removing And Installing The Appliance Door
3. Press START/STOP. The appliance starts the cleaning process. After Decalcify mode is complete, < appears. 4. Press and hold ON/OFF. Removing Residual Water Use the cleaning sponge to remove any water remaining in the evaporator dish. Wipe down the oven using the cleaning sponge and dry afterwards using a soft cloth. - Page 52 1. Open the door all the way. 2. Lay the two stop levers on the right and left down flat. 3. Position the door at an angle. Use both hands to grasp the left and right sides of the door. Close the door a little more and then remove it.
-
Page 53: Cleaning The Rack Rail Frames
Cleaning the Rack Rail The rack rail frames can be removed for cleaning. Frames Pull the rack rail frame toward you and remove. Use dishwashing soap and a kitchen sponge or brush to clean the rack rail frames. The rack rail frames can also be washed in the dishwasher. Installing the Rack Rail Frames Hang the back and front parts of the frame and then push it back until it locks into place. -
Page 54: Maintenance
Installing the Door Glass 1. Reinsert the door glass. Make sure that the flat surface faces outward and the printed surface is on the inside. 2. Put the cover in place and screw it back on. 3. Reinstall the door. Maintenance Replacing the Oven Bulb Heat resistant 230V / 25 Watt halogen bulbs with seals can be purchased through... -
Page 55: Replacing The Door Gasket
5. Screw the glass cover with seals back on. 6. Reconnect the appliance to power and reset the clock. Never operate the appliance without the glass cover or seals. Replacing the Glass Cover or Seals Damaged glass covers or seals must be replaced. Provide customer service with the appliance model and serial numbers. -
Page 56: Service
Service Before Calling Service If a problem occurs, it is usually just minor. Read the following information before calling customer service. Repairs must be made by trained customer service technicians only. Improper repairs made to the appliance can place you at extreme risk. Problem Possible cause Tip / Solution... - Page 57 Problem Possible cause Tip / Solution indicator appears, but the water Water tank is dirty. The moving water level Shake and clean the water tank. If the tank is not empty yet, or the water tank is detectors are stuck components are still stuck, obtain a new empty, but the indicator does not...
-
Page 58: Customer Service
Customer Service If the appliance needs to be repaired, customer service can assist you. To reach a service representative, contact 1 800 735 4328 or www.thermador.com. Model and Serial Always provide customer service with the model number (E no.) and serial number Numbers (FD no.) of your appliance. -
Page 59: Energy Saving Tips
Energy Saving Tips Only preheat the appliance if specified in the recipe or in the tables and charts in this manual. Keep the appliance door closed as much as possible during the cooking process. Baking Use dark, black coated or enamel baking dishes. They absorb heat well. It is best to bake several cakes one after the other. -
Page 60: Statement Of Limited Product Warranty
Please make sure to return your registration card; while not necessary to effectuate warranty coverage, it is the best way for Thermador to notify you in the unlikely event of a safety notice or product recall. How Long the Warranty Thermador warrants that the Product is free from defects in materials and workmanship for a period of twelve (12) months from the date of purchase. -
Page 61: Out Of Warranty Product
Out of Warranty Product Thermador is under no obligation, at law or otherwise, to provide you with any concessions, including repairs, pro rates, or Product replacement, once this warranty has expired. - Page 62 RESTAURANT MEALS, REMODELLING EXPENSES IN EXCESS OF DIRECT DAMAGES WHICH ARE DEFINITIVELY CAUSED EXCLUSIVELY BY THERMADOR, OR OTHERWISE. SOME STATES DO NOT ALLOW THE EXCLUSION OR LIMITATION OF INCIDENTAL OR CONSEQUENTIAL DAMAGES, AND SOME STATES DO NOT ALLOW LIMITATIONS ON HOW LONG AN IMPLIED WARRANTY LASTS, SO THE ABOVE LIMITATIONS MAY NOT APPLY TO YOU.
- Page 64 5551 McFadden Avenue, Huntington Beach, CA 92649 S 1 800 735 4328 Swww.thermador.com 9000 448 174 S 900810 E BSH Home Appliances Corporation 2010...
Need help?
Do you have a question about the MES301HS and is the answer not in the manual?
Questions and answers